Salesforce Integration
Integrate Salesforce with the Admin Portal to unify CRM and communication. The integration syncs Salesforce data with call activity, enables ClickToCall for leads and contacts, and keeps records aligned. It helps teams respond faster, reduce manual work, and improve collaboration. This guide shows how to create, view, edit, and delete Salesforce integrations.
Credentials Required for Integration
To set up the integration, you will need the following credentials:
- Salesforce instance URL (e.g.,
https://your-instance.salesforce.com) - OAuth Consumer Key
- OAuth Consumer Secret
- Salesforce Username
- Salesforce Password
Let's walk through the setup process step by step.
Step 1: Prepare Salesforce for Integration
-
Log in to your Salesforce account with an administrator role.
-
Copy your Salesforce instance URL from the browser's address bar and save it securely for later use.

Figure 1. Locate your Salesforce instance URL in the browser address bar and copy it.importantThis URL is required when configuring the integration in the Admin Portal (see Step 2: Create a New Salesforce Integration). Ensure you copy it exactly as shown in Figure 1.
-
Click the gear icon in the top-right corner and select Setup:

Figure 2. Accessing the Salesforce Setup menu. -
You will be redirected to the main Salesforce configuration page:

Figure 3. Salesforce main configuration page. -
In the Quick Find box on the left, type External and select Apps > External Client App Manager.
-
Click New External Client App to create a new Salesforce Connected App:

Figure 4. Creating a new Salesforce Connected App.This page lists all apps created for communication with external services.
-
Complete the form with the required information. The following fields are mandatory:
- External Client App Name: a name for your app (e.g.:
MegaphoneApp) - API Name: a name for the API (e.g.:
MegaphoneApp) - Contact Email: your email address
- Distribution State:
Local

Figure 5. Salesforce Connected App creation - ensure "Distribution State" is set to "Local".infoThe Distribution State must be set to Local. This limits the Connected App to your Salesforce organization only, preventing public distribution and ensuring secure communication with the WiLine Admin Portal.
- External Client App Name: a name for your app (e.g.:
-
Scroll down on the same page to enable the following settings:

Figure 6. Enabling OAuth settings and selecting OAuth scopes.-
Set the Callback URL to:
https://prod-mega-goapiv1.wiline.com/api/v1/salesforce/oauth/callback. -
Select the following OAuth scopes:
Full access (full)Manage user data via APIs (api)Perform requests on your behalf at any time (refresh_token, offline_access)
-
-
Scroll down further and enable these settings:
- Flow Enablement:
- Enable Authorization and Credential Flow
- Security:
- Require secret for Web Server Flow
- Require secret for Refresh Token Flow

Figure 7. Enabling flow and security settings. - Flow Enablement:
-
Click the Create button to save your Salesforce Connected App.
You will see the following confirmation screen:

Figure 8. Salesforce Connected App successfully created and enabled. -
Your Connected App is now active. Next, you need to retrieve the Consumer Key and Consumer Secret. Scroll down to the Settings section and select OAuth Settings:

Figure 9. Accessing Consumer Key and Consumer Secret. -
Click the Consumer Key and Secret button under App Settings. For security, these credentials are hidden until you verify your identity.

Figure 10. Salesforce identity verification prompt. -
Complete the authentication to verify your identity. This is a security measure by Salesforce. After authentication, the keys will be displayed.

Figure 11. Verification code sent via email. -
Check your email for the Verification Code. Enter this code on the previous page and click Verify.
-
Upon successful verification, the Consumer Key and Consumer Secret will be revealed:

Figure 12. Validated Consumer Key and Consumer Secret. -
Save the Connected App and allow up to 10 minutes for changes to propagate. You may receive a verification email to confirm your contact email address.
-
After the Connected App is created, click View to see and copy the Consumer Key and Consumer Secret. You will need these credentials for the Admin Portal.
Step 2: Configure WiLine Integration
After gathering your Salesforce credentials, configure the integration in the Admin Portal.
-
Log in to the Admin Portal.
-
Go to Features > Integrations > Salesforce Integration.

Figure 13. Access Salesforce Integration in the Admin Portal.
Create a New Salesforce Integration
-
Click the New button in the Salesforce Integration window:

Figure 14. Salesforce Integration window. -
Fill out the integration form with the following information:
Field Action NAME Enter a descriptive name for this integration. URL Enter the full URL of your Salesforce instance. USERNAME Enter your Salesforce username. CONSUMER KEY Paste the OAuth Consumer Key from your Salesforce Connected App. CONSUMER SECRET Paste the OAuth Consumer Secret from your Salesforce Connected App. Note: Ensure OAuth credentials are correct to maintain a successful connection. Visit Step 1: Prepare Salesforce for Integration if necessary.
-
Click Next to continue to the next steps. A Salesforce authorization popup will appear. Authenticate and authorize WiLine to access Salesforce:

Figure 15. Salesforce authorization popup. -
After authorization, an API token will be generated:

Figure 16. API token confirmation. -
Synchronize users between Salesforce and WiLine:

Figure 17. User synchronization options.Click Sync User and then select the Salesforce User from the dropdown.
Once synchronized, you can use the ClickToCall feature. When viewing a lead or contact in Salesforce, pressing ClickToCall will initiate a call to the customer, ringing the extension configured in your WiLine account.
-
To finalize your integration, complete additional settings:
- Call Type: Select
InboundorOutbound. - Select TNs: Choose the telephone numbers that trigger this integration.
- Package Installation: Follow prompts to install required packages.
-
-
Review all fields. Click Finish to save the integration.
Step 3: Enable Click2Call in Salesforce UI
-
Log in to Salesforce with an administrator role.
-
Click the gear icon > Setup:
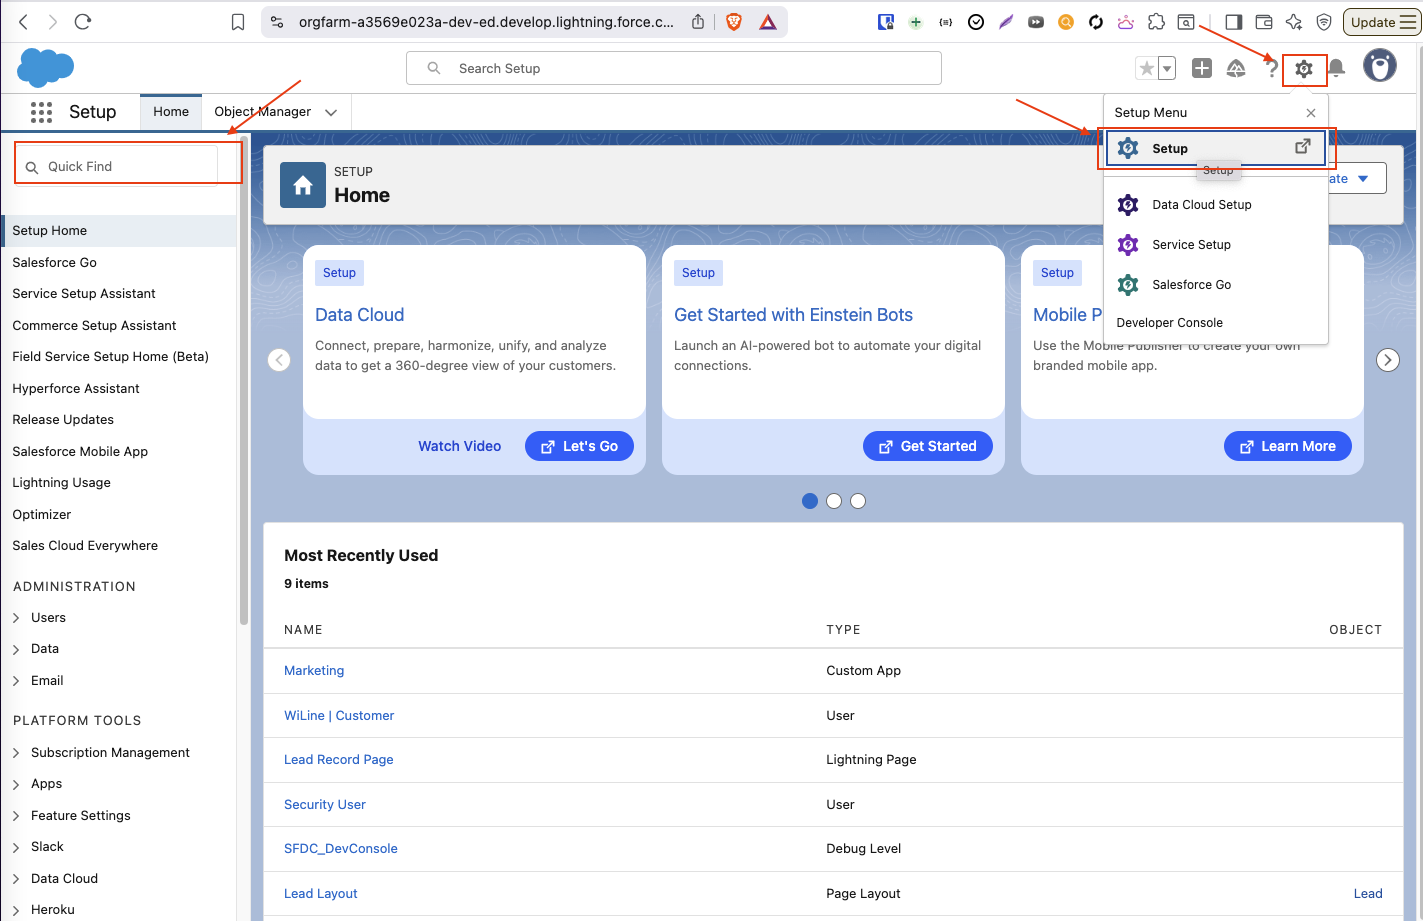
Figure 18. Access Setup via Quick Find. -
In Quick Find, search for Object Manager:
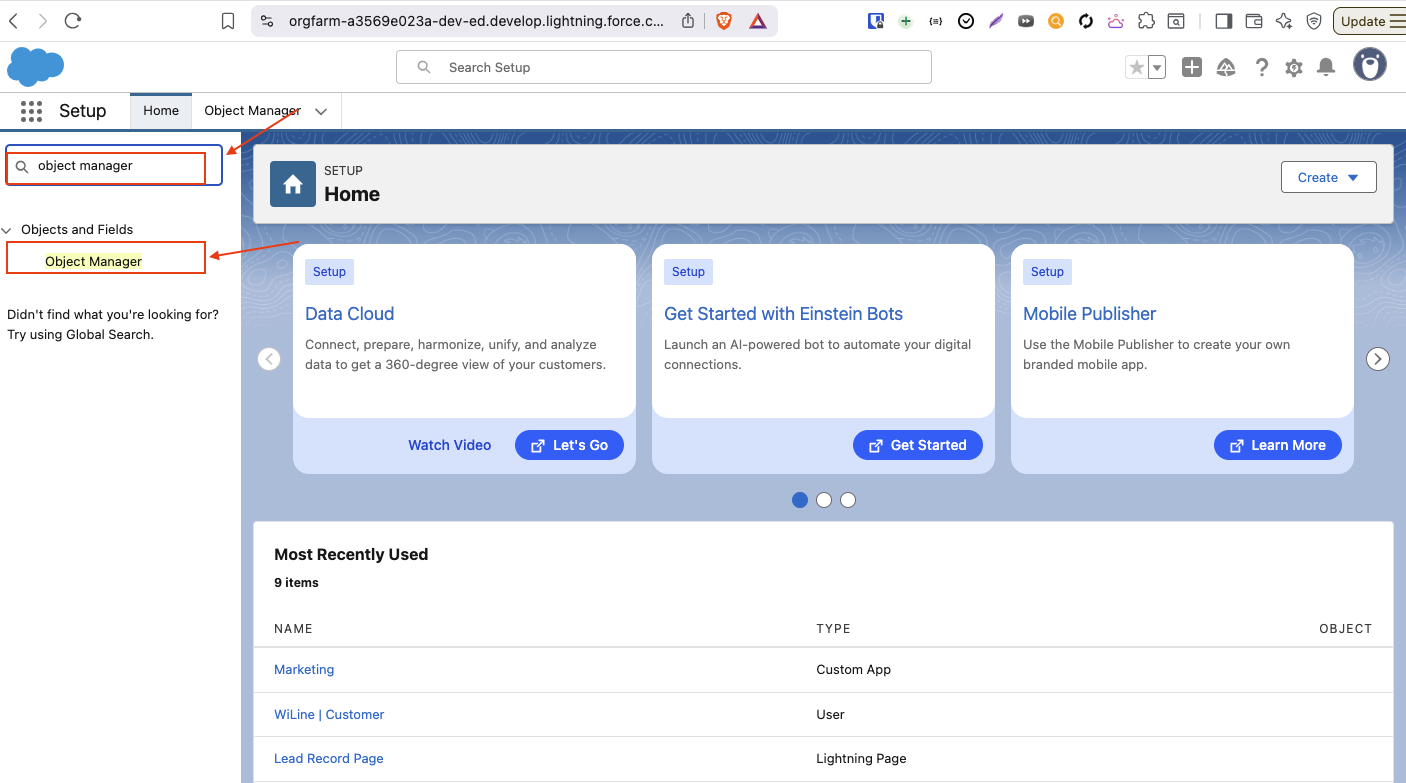
Figure 19. Navigate to Object Manager. -
Select Lead:
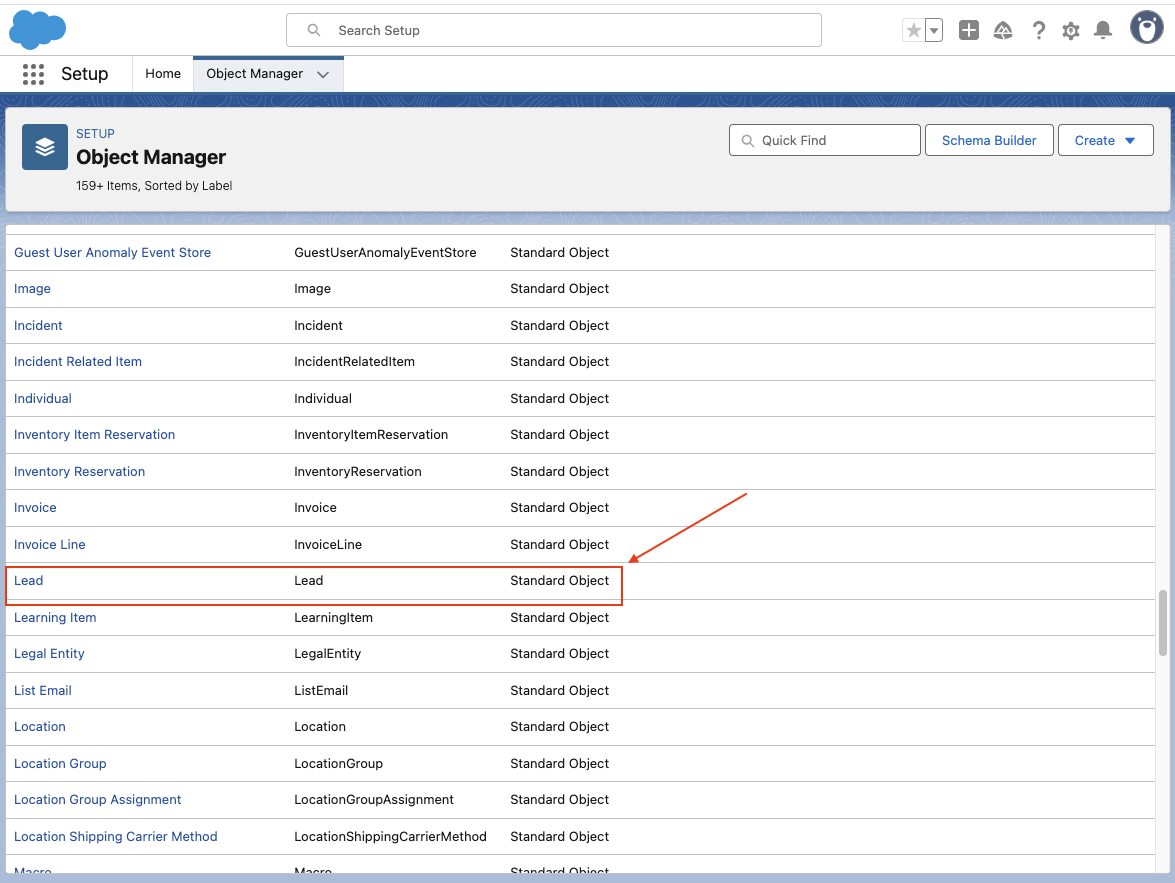
Figure 20. Select the Lead object. -
Open Lightning Record Pages > Lead Record Page:
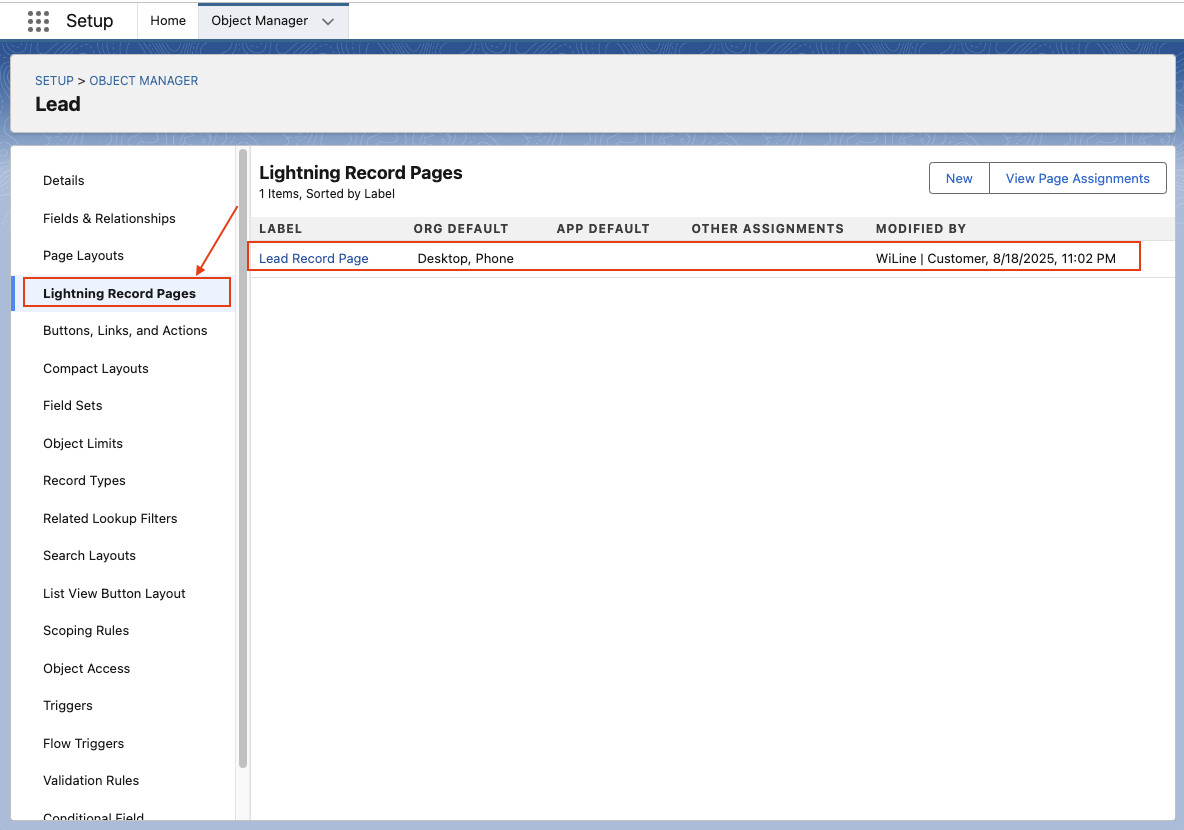
Figure 21. Open the Lead Record Page. -
In Custom, drag the Click2Call button to the desired location:
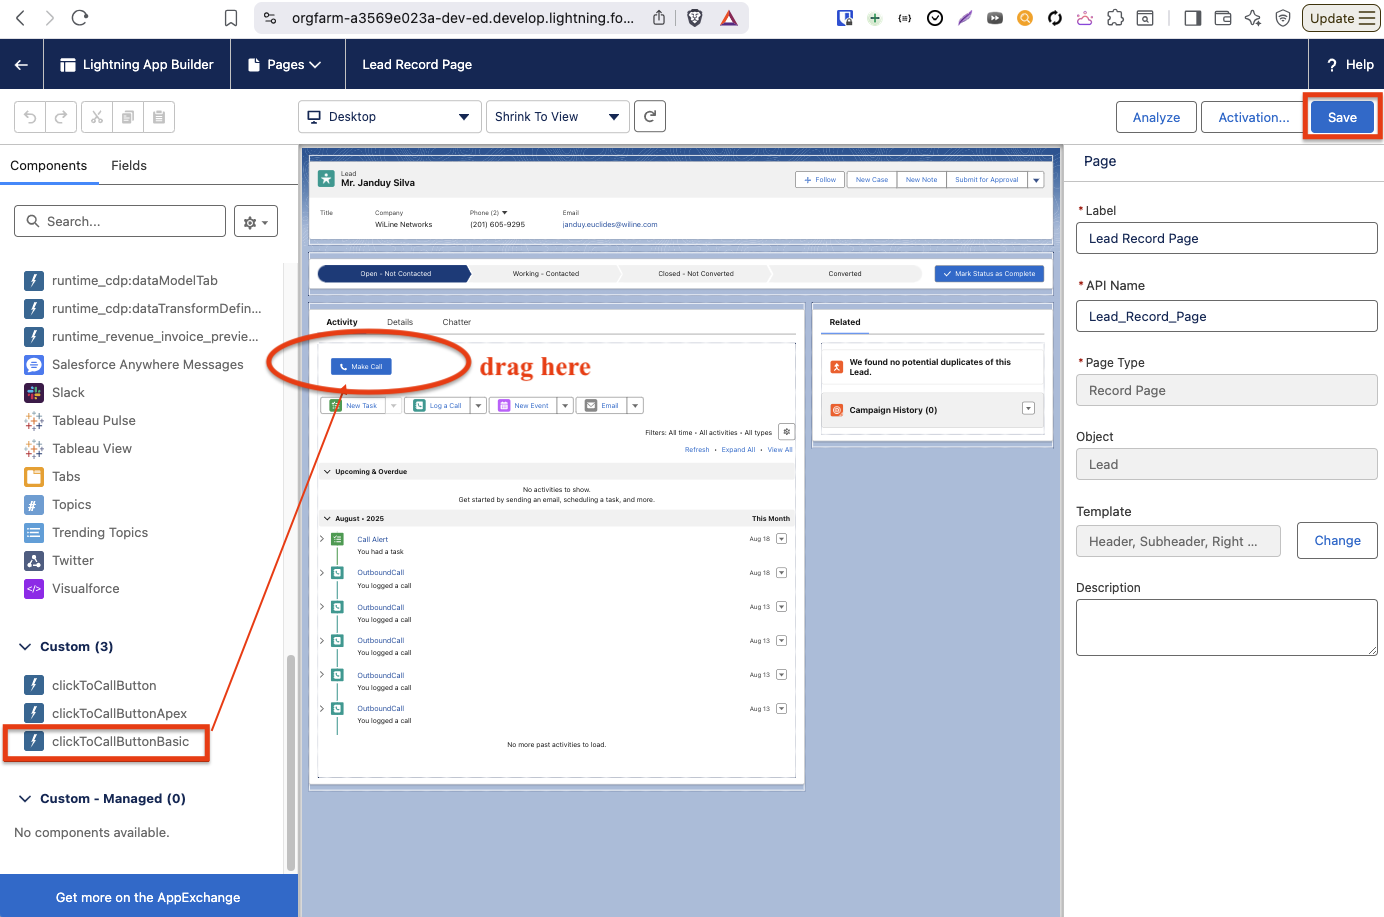
Figure 22. Drag the Click2Call button.warningModifying other components may affect your page layout and integration.
-
Click the blue Save button.
-
Test the Click2Call button on a Lead: it should ring your extension and connect to the customer, logging call details.
Use the Click2Call button in Salesforce
-
On a Lead or Contact, click ClickToCall to initiate a call through your assigned extension:

Figure 23. ClickToCall button on Salesforce record. -
Verify your extension in Profile > Settings. WiLine auto-assigns this value (e.g., “175-3091”):

Figure 24. Extension field assigned by WiLine.warningDo not change this field manually; it may disrupt your integration.
-
Calls initiated via ClickToCall will automatically log details in the Lead record:

Figure 25. Call data recorded in Lead.ClickToCall rings your extension, connects to the customer, and logs call data in the Lead record.
Edit an Existing Salesforce Integration
View Salesforce Integrations List
-
On the Integrations page, locate the Salesforce integration you want to modify.
-
Click the View/Edit button next to the integration or double-click the integration row.
-
Update the fields as required, such as Name, URL, or other configuration settings:
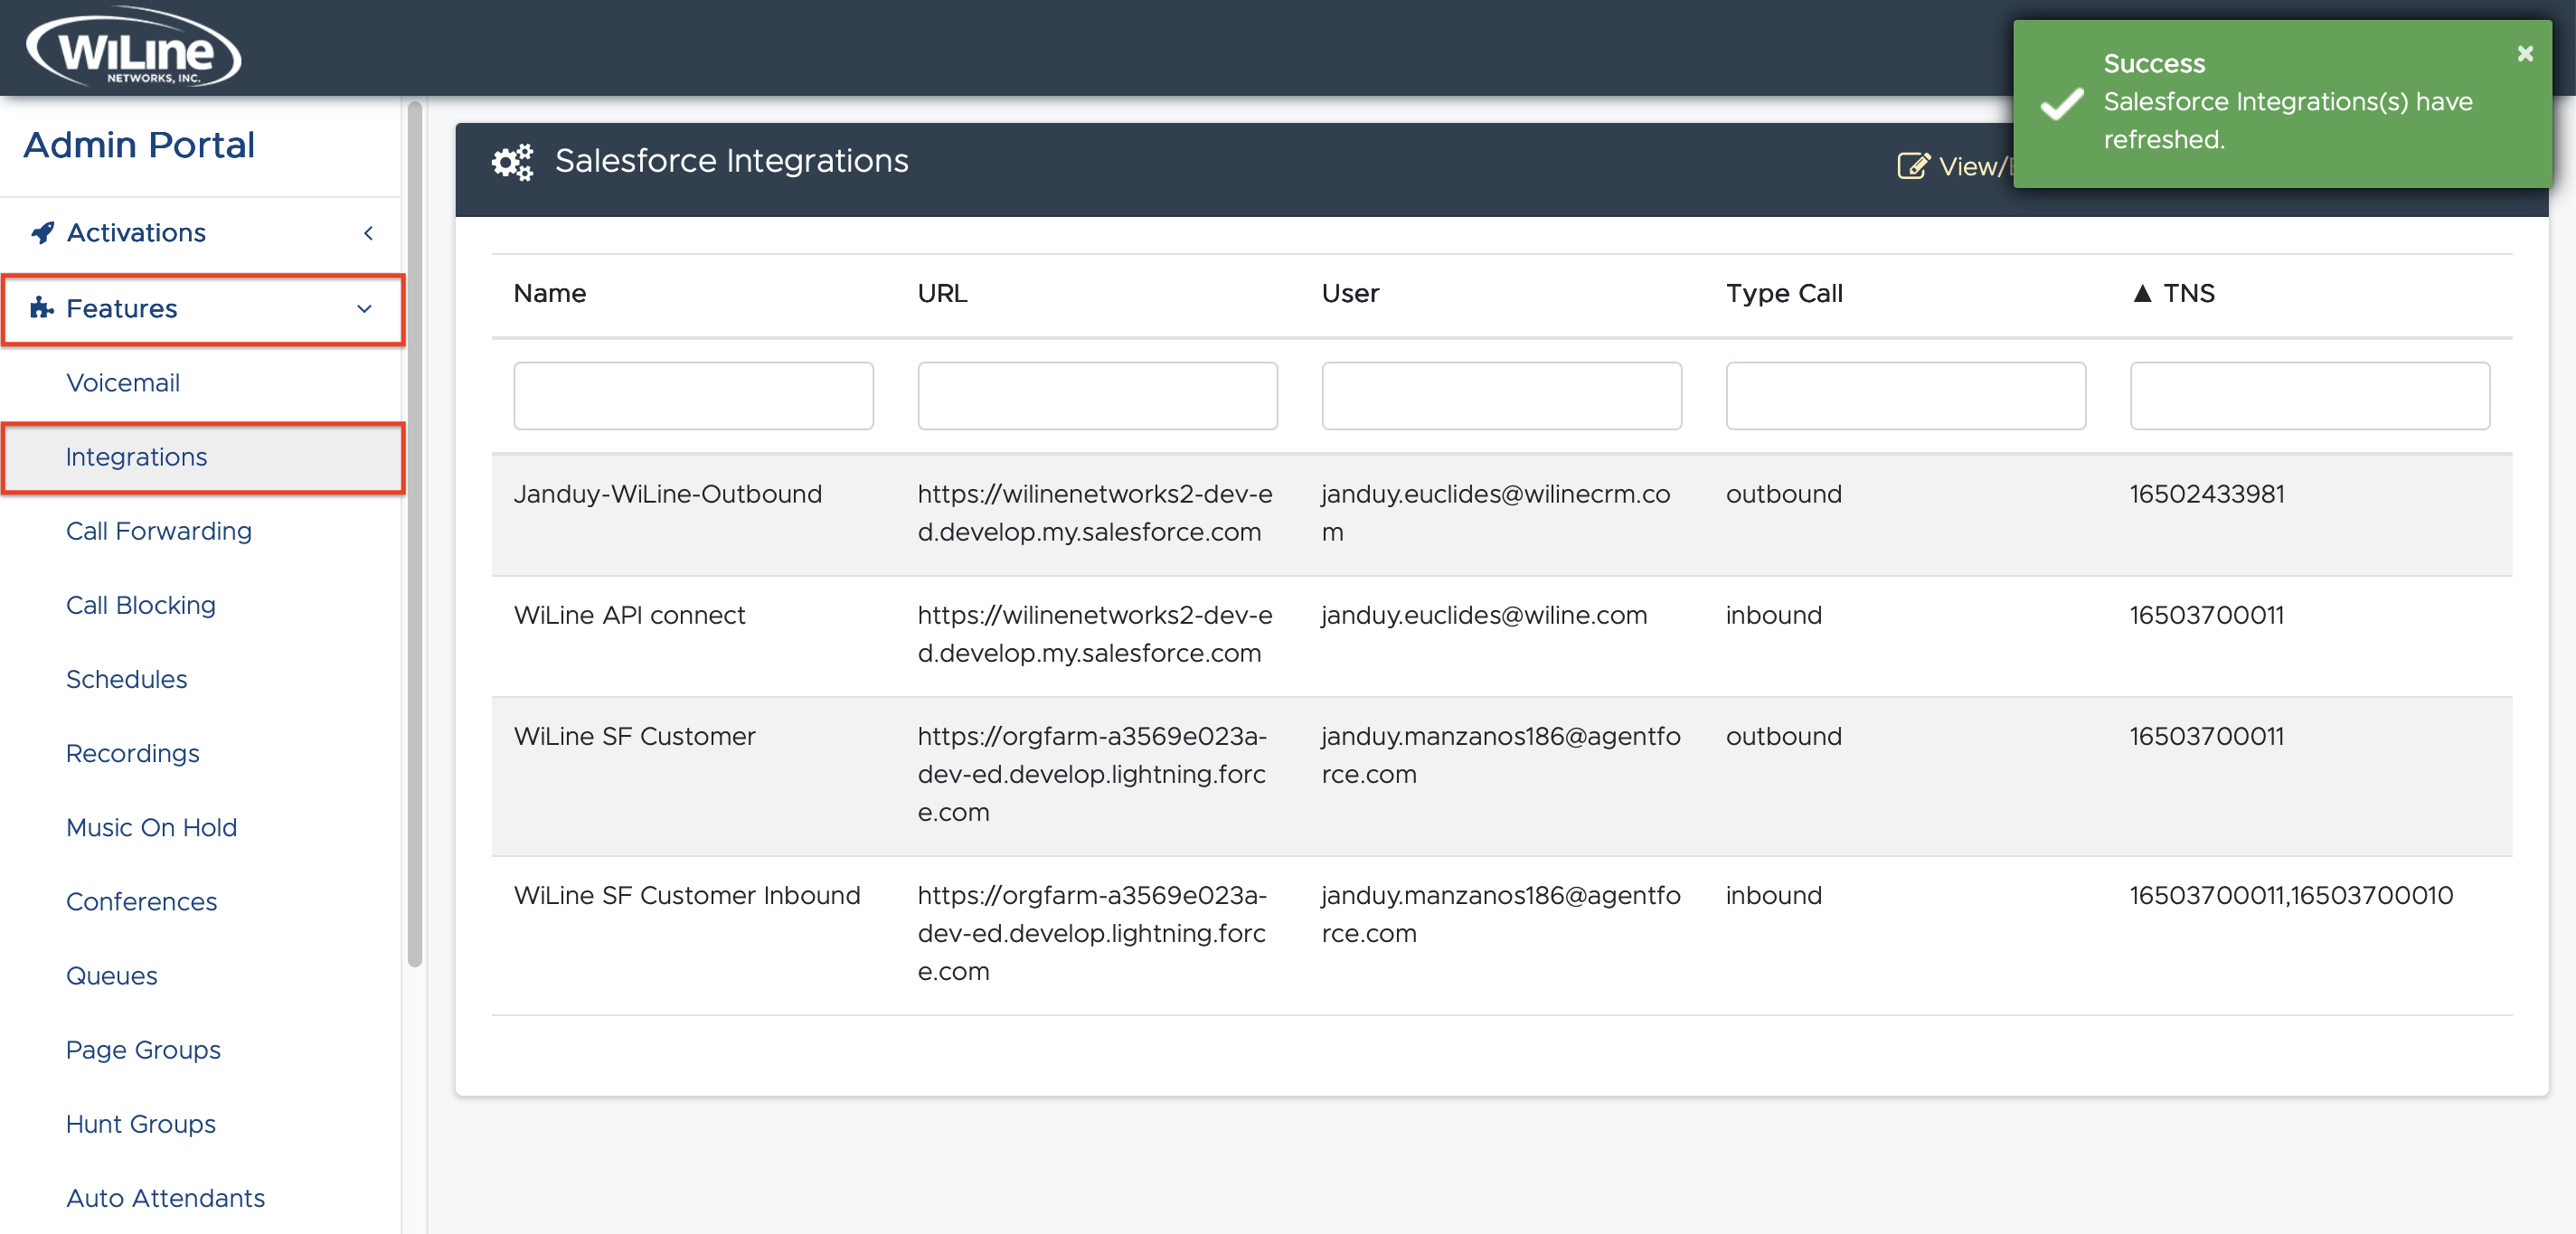
Figure 26. View all existing Salesforce integrations. -
Use the Refresh button to update the list if a newly created integration does not appear immediately.
Edit a Salesforce Integration
To edit an existing Salesforce integration:
-
On the Integrations page, locate the Salesforce integration you want to modify.
-
Click the View/Edit button next to the integration or double-click the integration row.
-
Update the fields as needed, such as Name, URL, Consumer Key, Consumer Secret, or other configuration settings.
importantWhen editing an integration, you can update fields as needed. Note that changes to the Consumer Key or Consumer Secret may require re-authentication with Salesforce to generate a new token. The system will prompt you with the authorization popup if required.
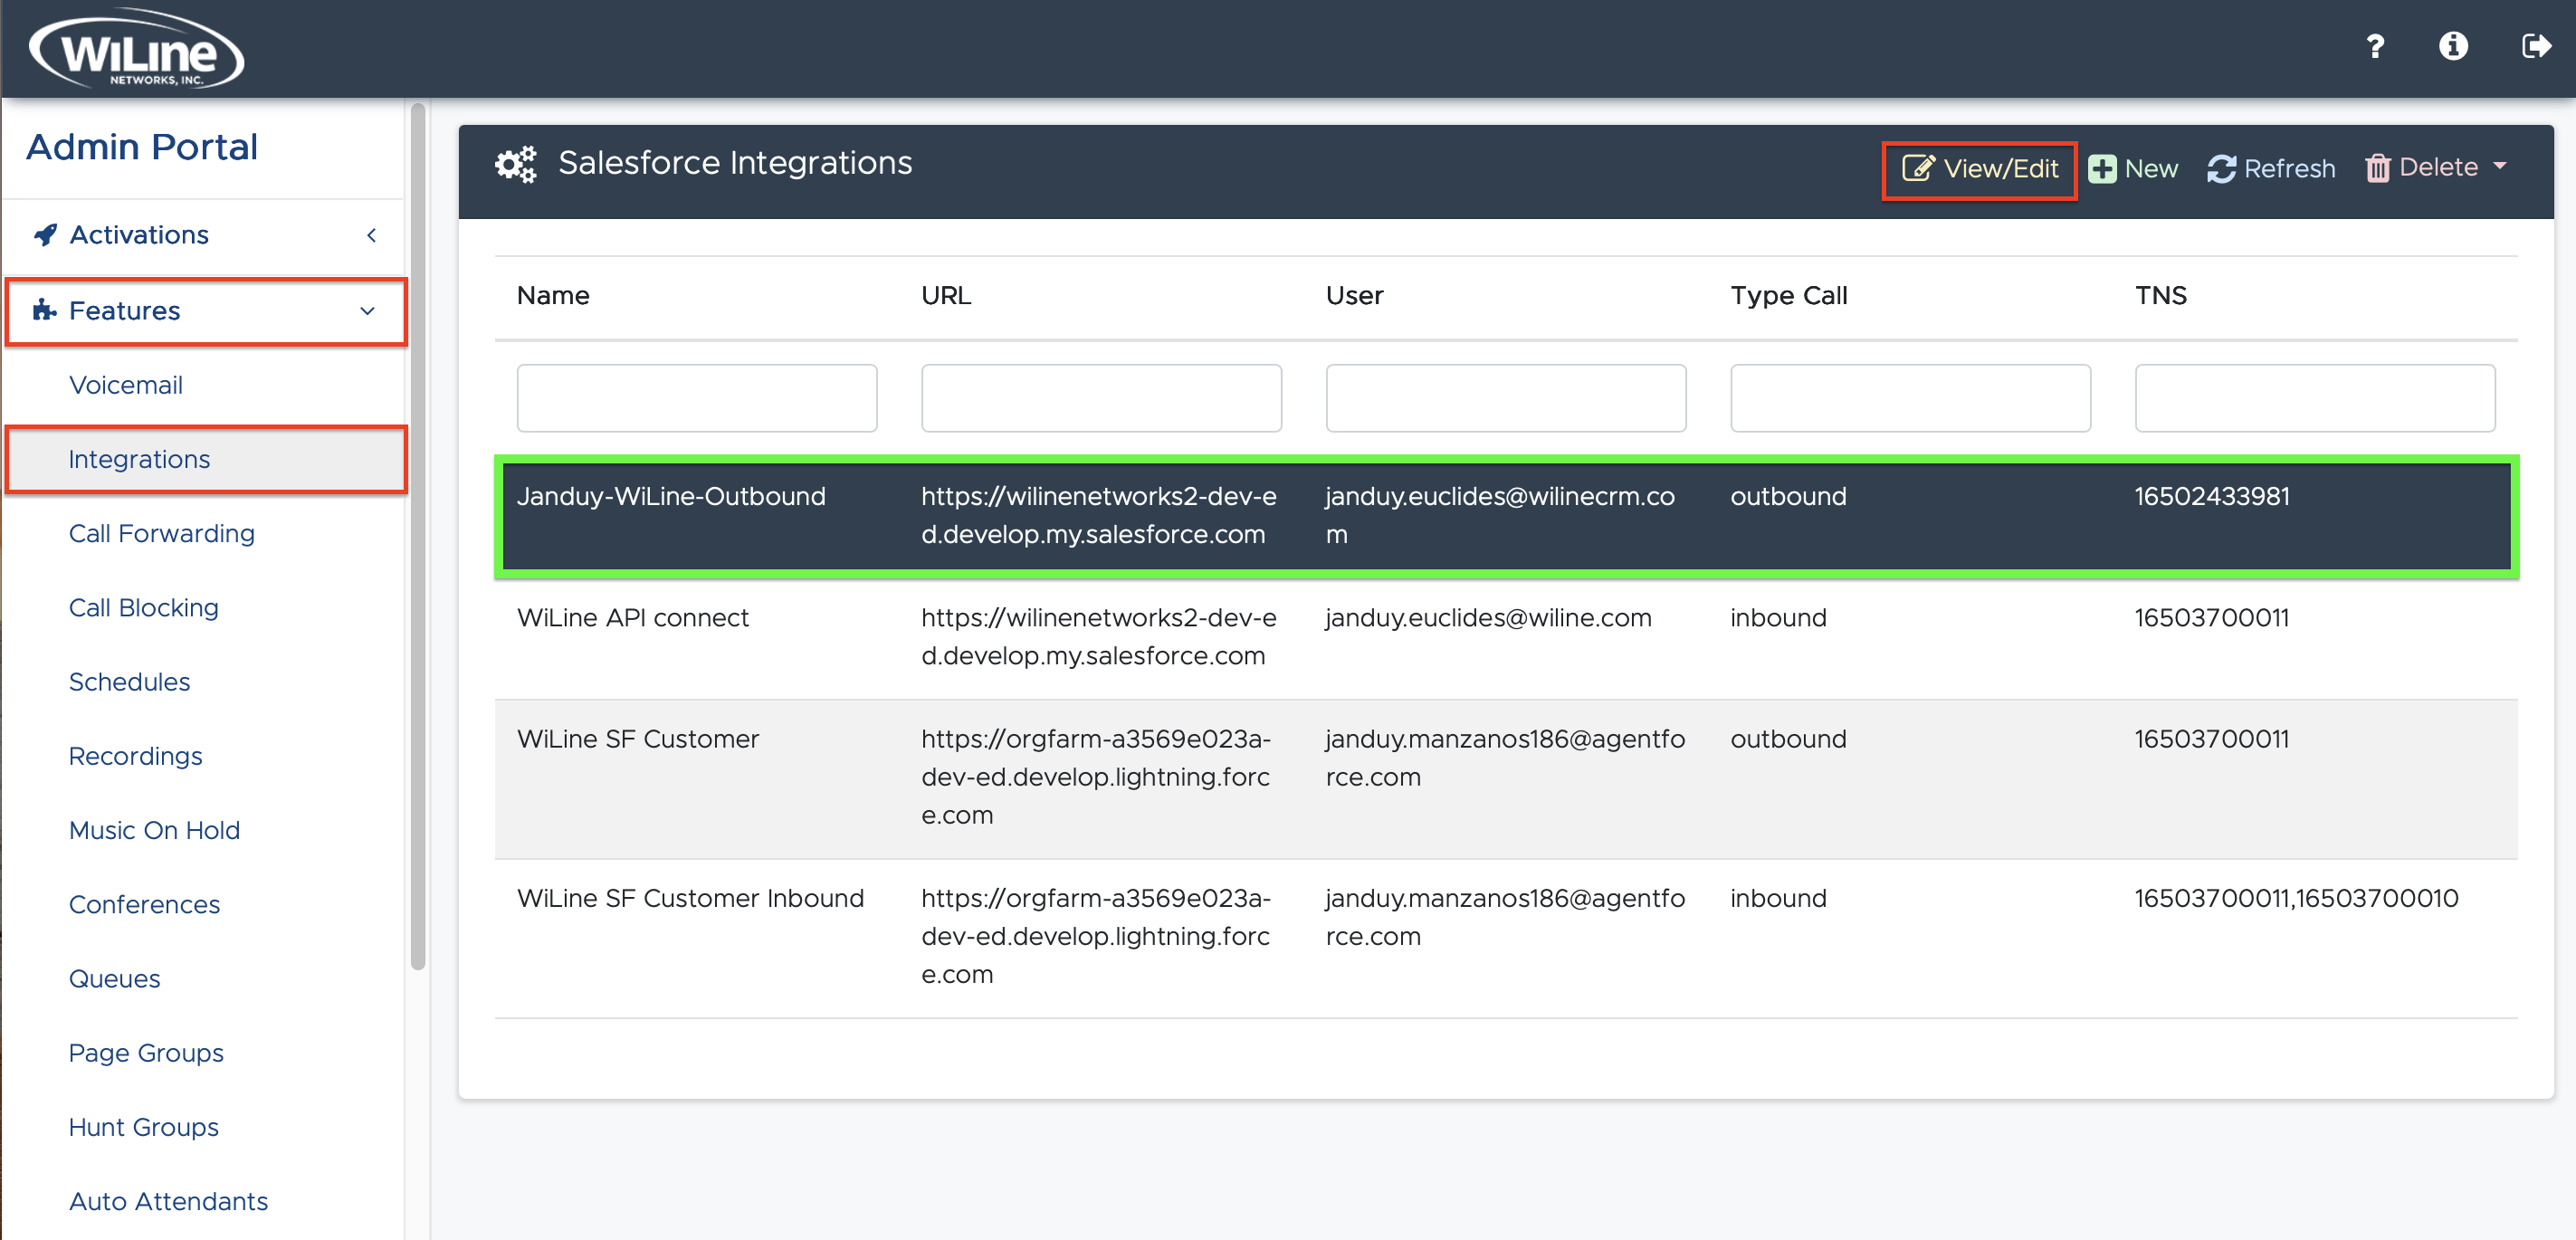
Figure 27. Modify an existing Salesforce integration. -
To move through each step, use the blue Next button.
-
Click the green Finish button to save your changes.
-
If needed, click the gray Previous button to go back and modify an item.
Delete a Salesforce Integration
To delete a Salesforce integration:
-
Select the Salesforce integration from the list on the Integrations page.
-
To delete the integration, click the red Delete button in the top action bar.
-
Confirm by selecting DELETE! from the dropdown.
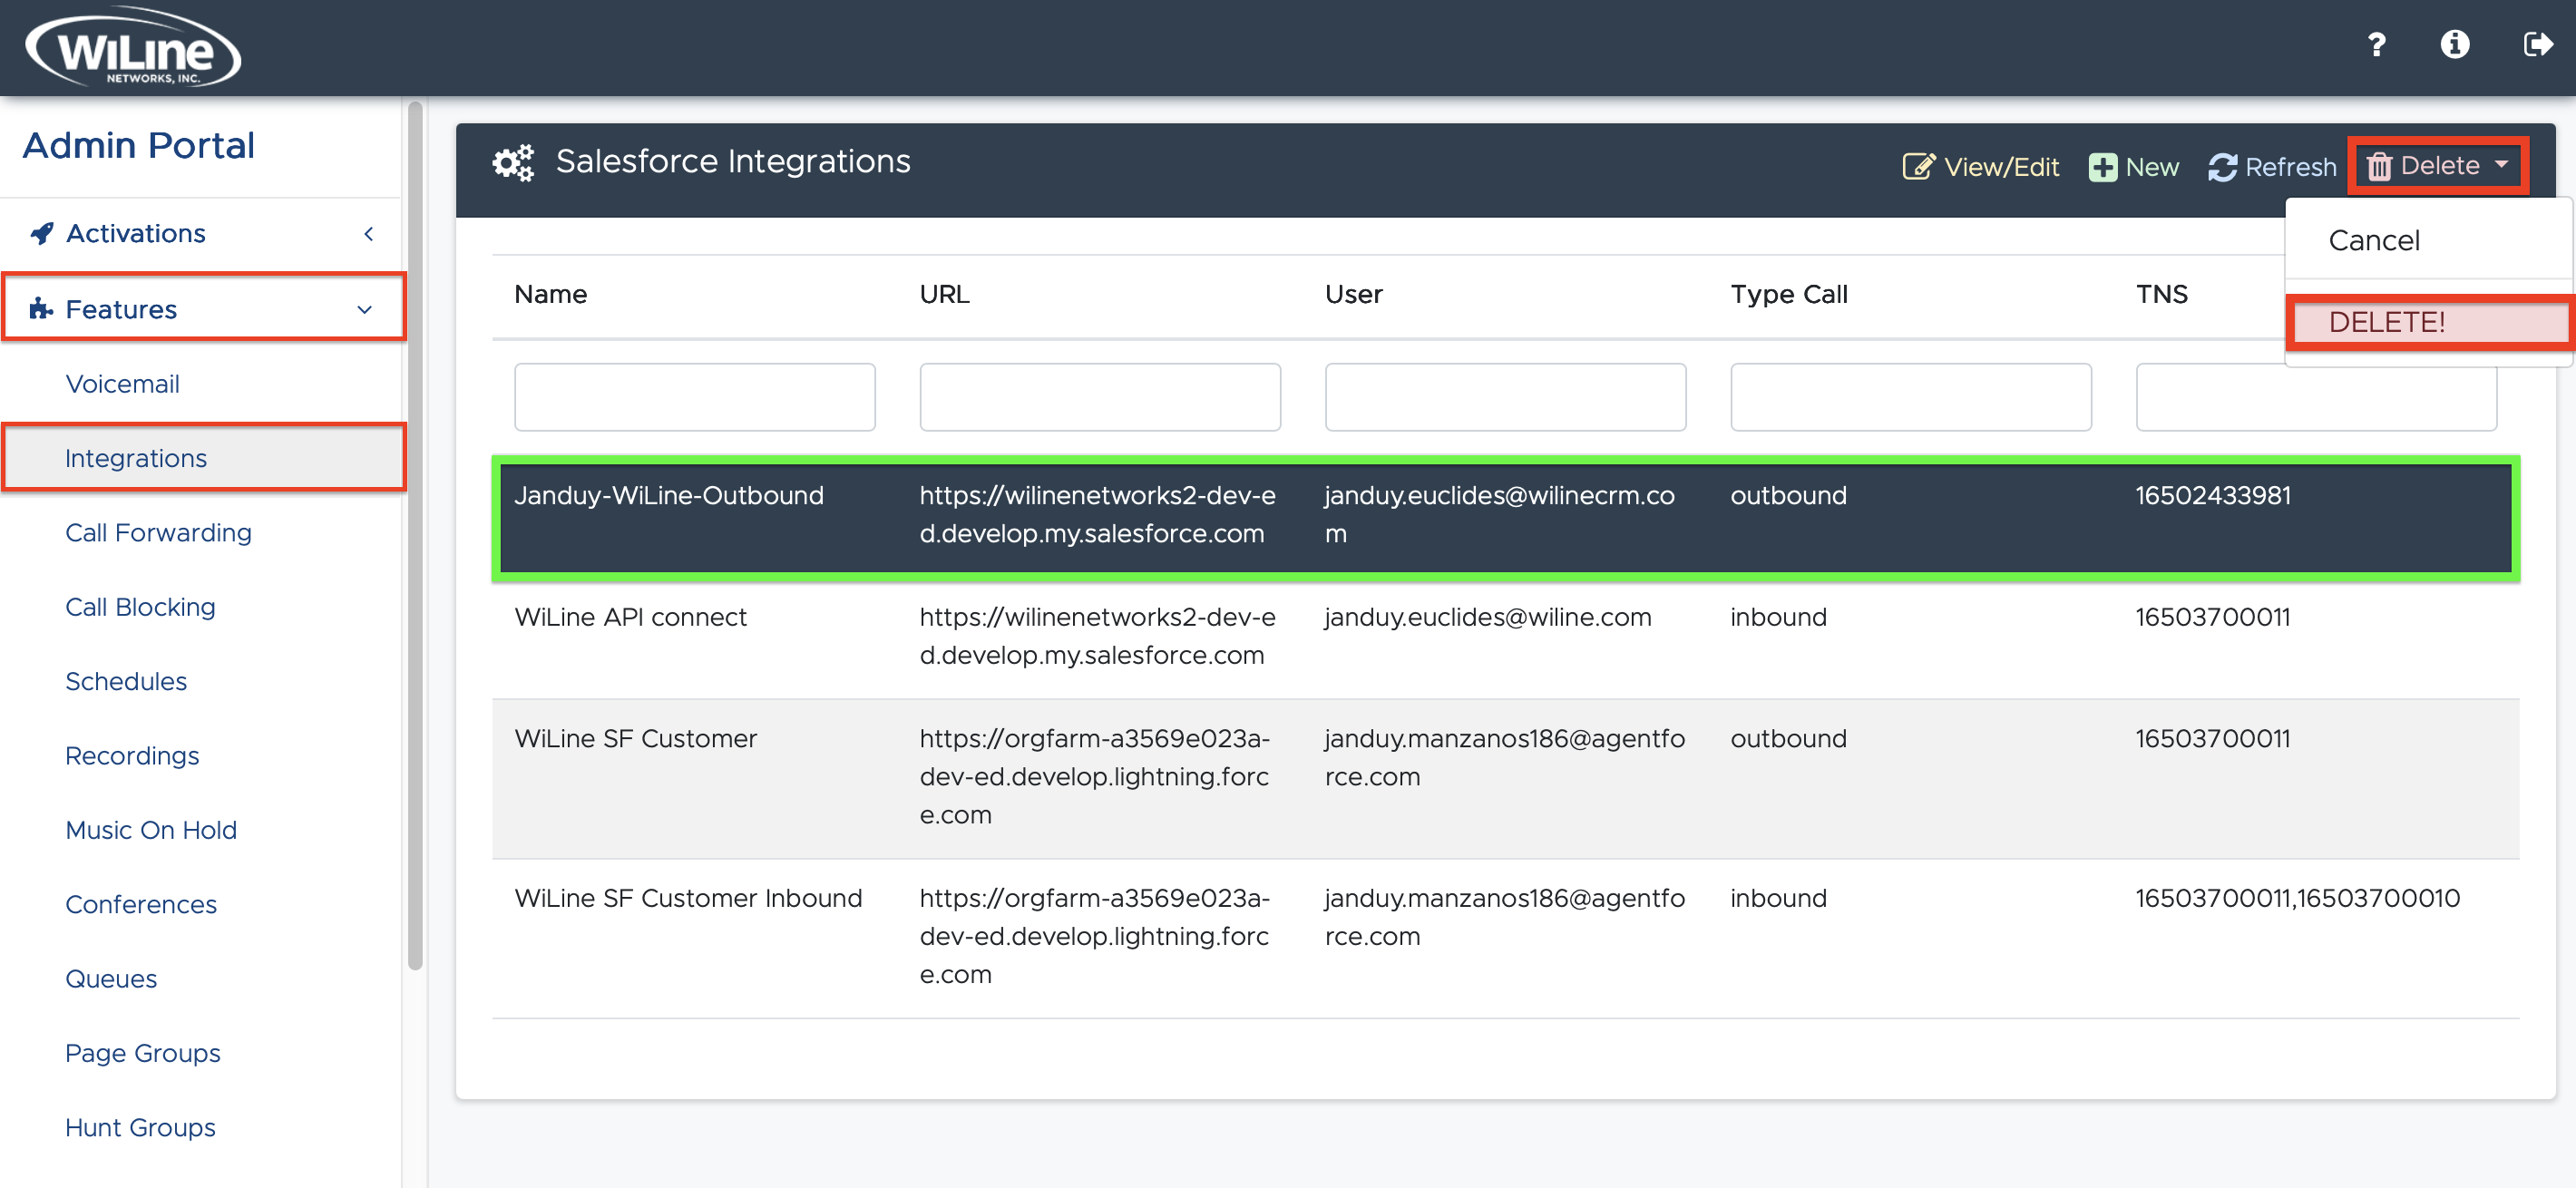
Figure 28. Use the Delete button to permanently remove a Salesforce integration.
Deleting an integration is irreversible. Please confirm before proceeding.
Additional Notes
- Verify that your Salesforce account has API access permissions.
- Keep your Salesforce credentials secure; do not share them.
- Confirm that your Salesforce URL and credentials are correct if you encounter issues.
- Ensure user emails match between Salesforce and WiLine to enable proper synchronization.
- If necessary, contact support for additional help with OAuth setup or integration configuration.
- Confirm that the Salesforce Connected App has the correct OAuth scopes and that API access has been granted by your administrator.