Manage Audio Recordings
Recordings are audio files created or uploaded for use in features like Auto Attendant, providing instructions for callers. In the Admin Portal, manage your recordings easily for streamlined organization and playback.
Create a New Recording
Follow these steps to add a new audio recording:
- Log in to the Admin Portal.
- Navigate to Features > Recordings in the left-side menu to view your recordings.
- Click the New button in the top blue bar to start creating a new recording.
- In the Name field, enter a descriptive name for your recording.
- Choose the Language for the recording.
Language Support:
The Admin Portal supports multiple languages for audio recordings.
- Upload a Recording: Available in both English and Spanish.
- Text-to-Speech: Currently available only in English.
Please ensure you select the correct language option for your recording method.
Upload a File
To upload an existing recording:
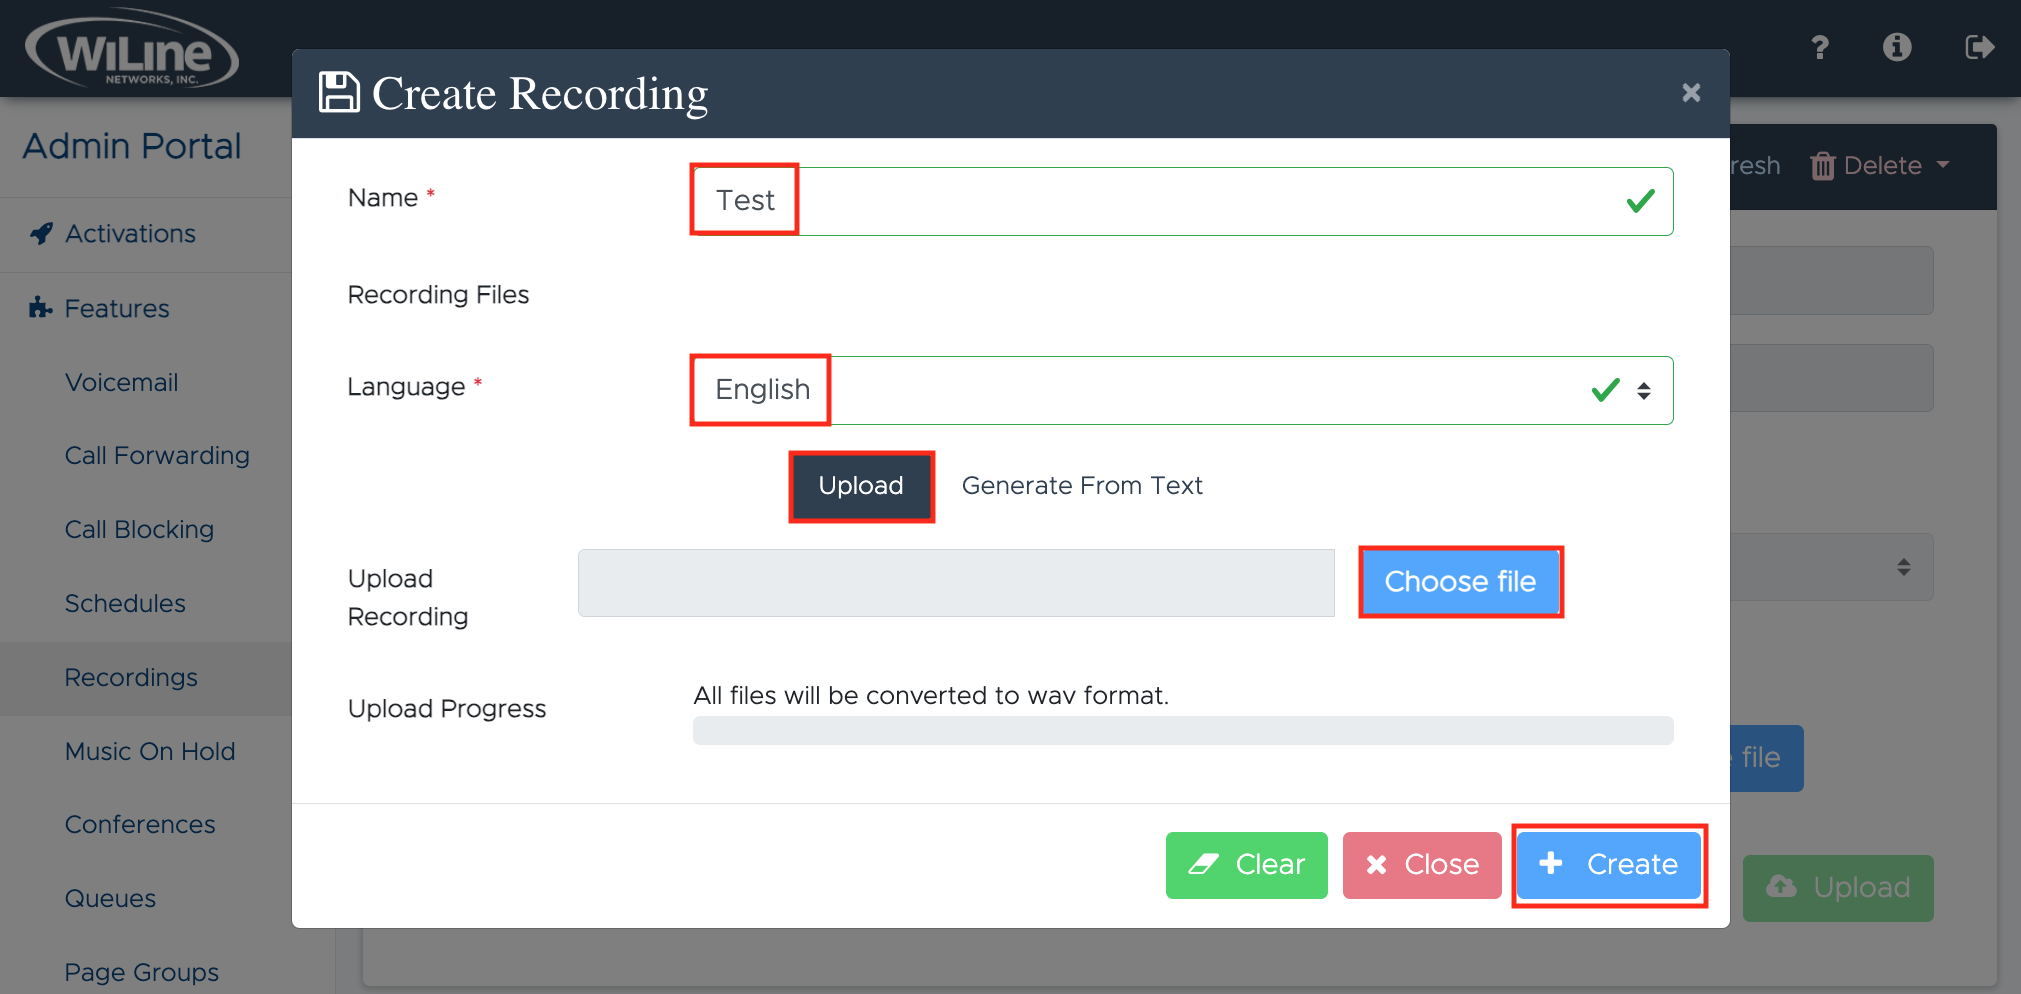
- Select the Upload option under the Language field.
- Click Choose file to select the audio file from your computer.
To ensure compatibility, all audio files will be converted to .wav format.
-
The Upload Progress bar will show the conversion of your file.
-
Once the upload is complete, click Create to save your recording.

Figure 1. Uploading a new recording in the Admin Portal.
Use Text-to-Speech
Alternatively, you can generate a recording using the Text-to-Speech feature:
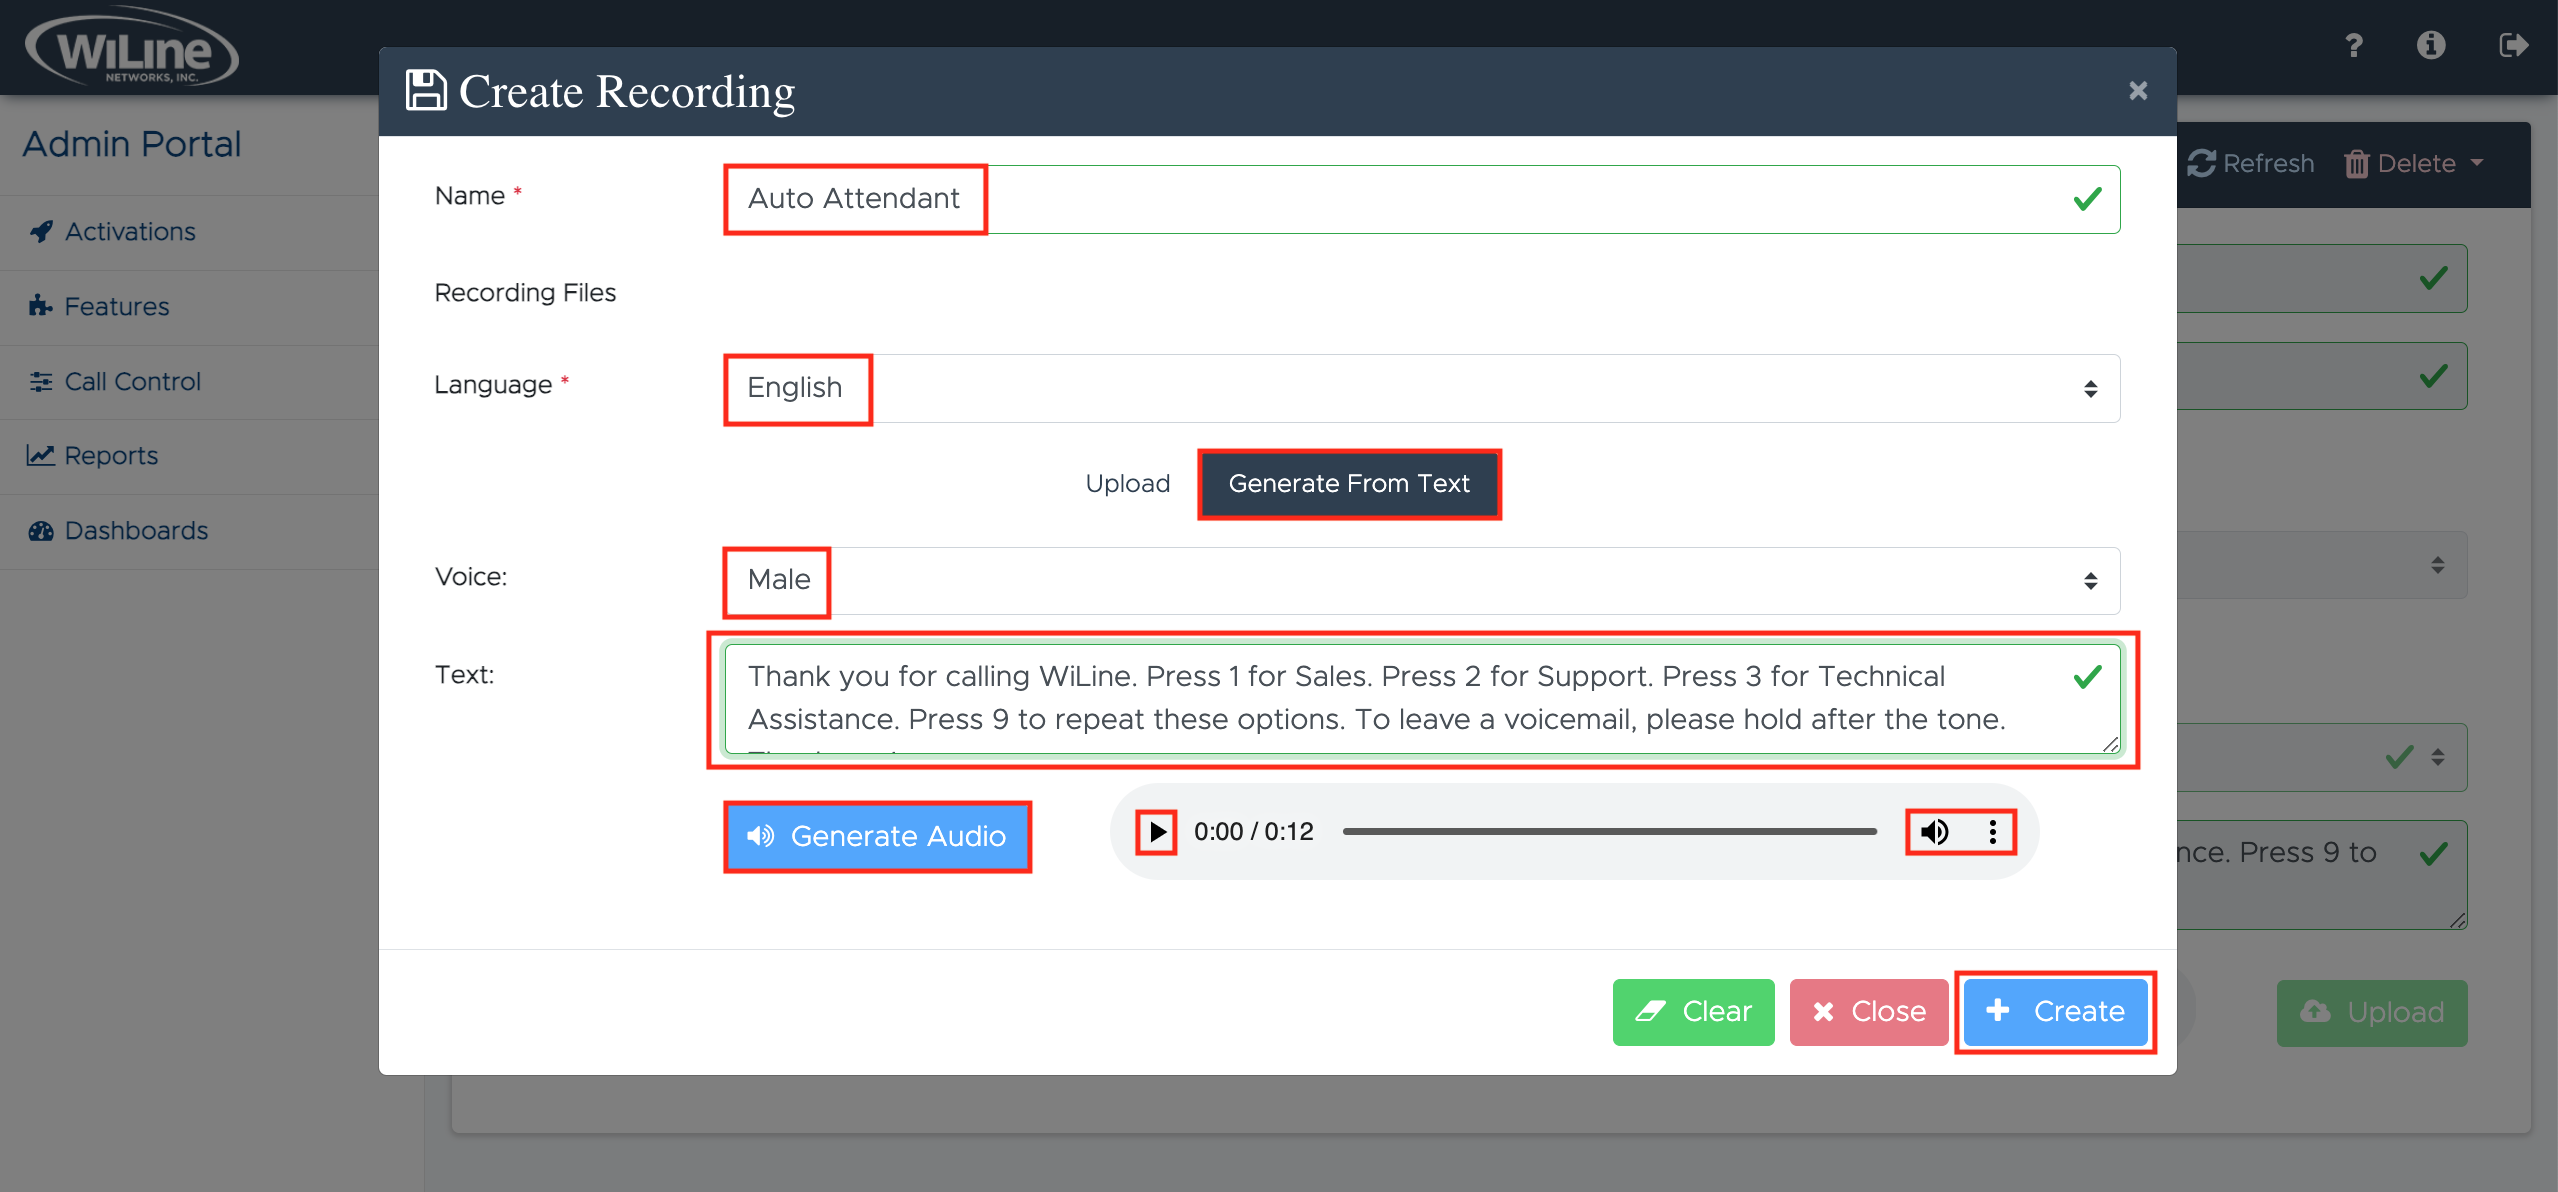
- Select Generate From Text under the Language field.
- Choose a Voice (male, female, or neutral).
- Enter your desired text in the Text field and click Generate Audio.
Keep your text concise. There is a200 character limit.
- Play the audio, adjust the volume by selecting one of these options. You can also download the file and adjust the playback speed if needed by clicking the three dots.
- When satisfied, click Create to save your recording.

You’ve successfully added your first recording!
Edit a Recording
To edit an existing recording:
-
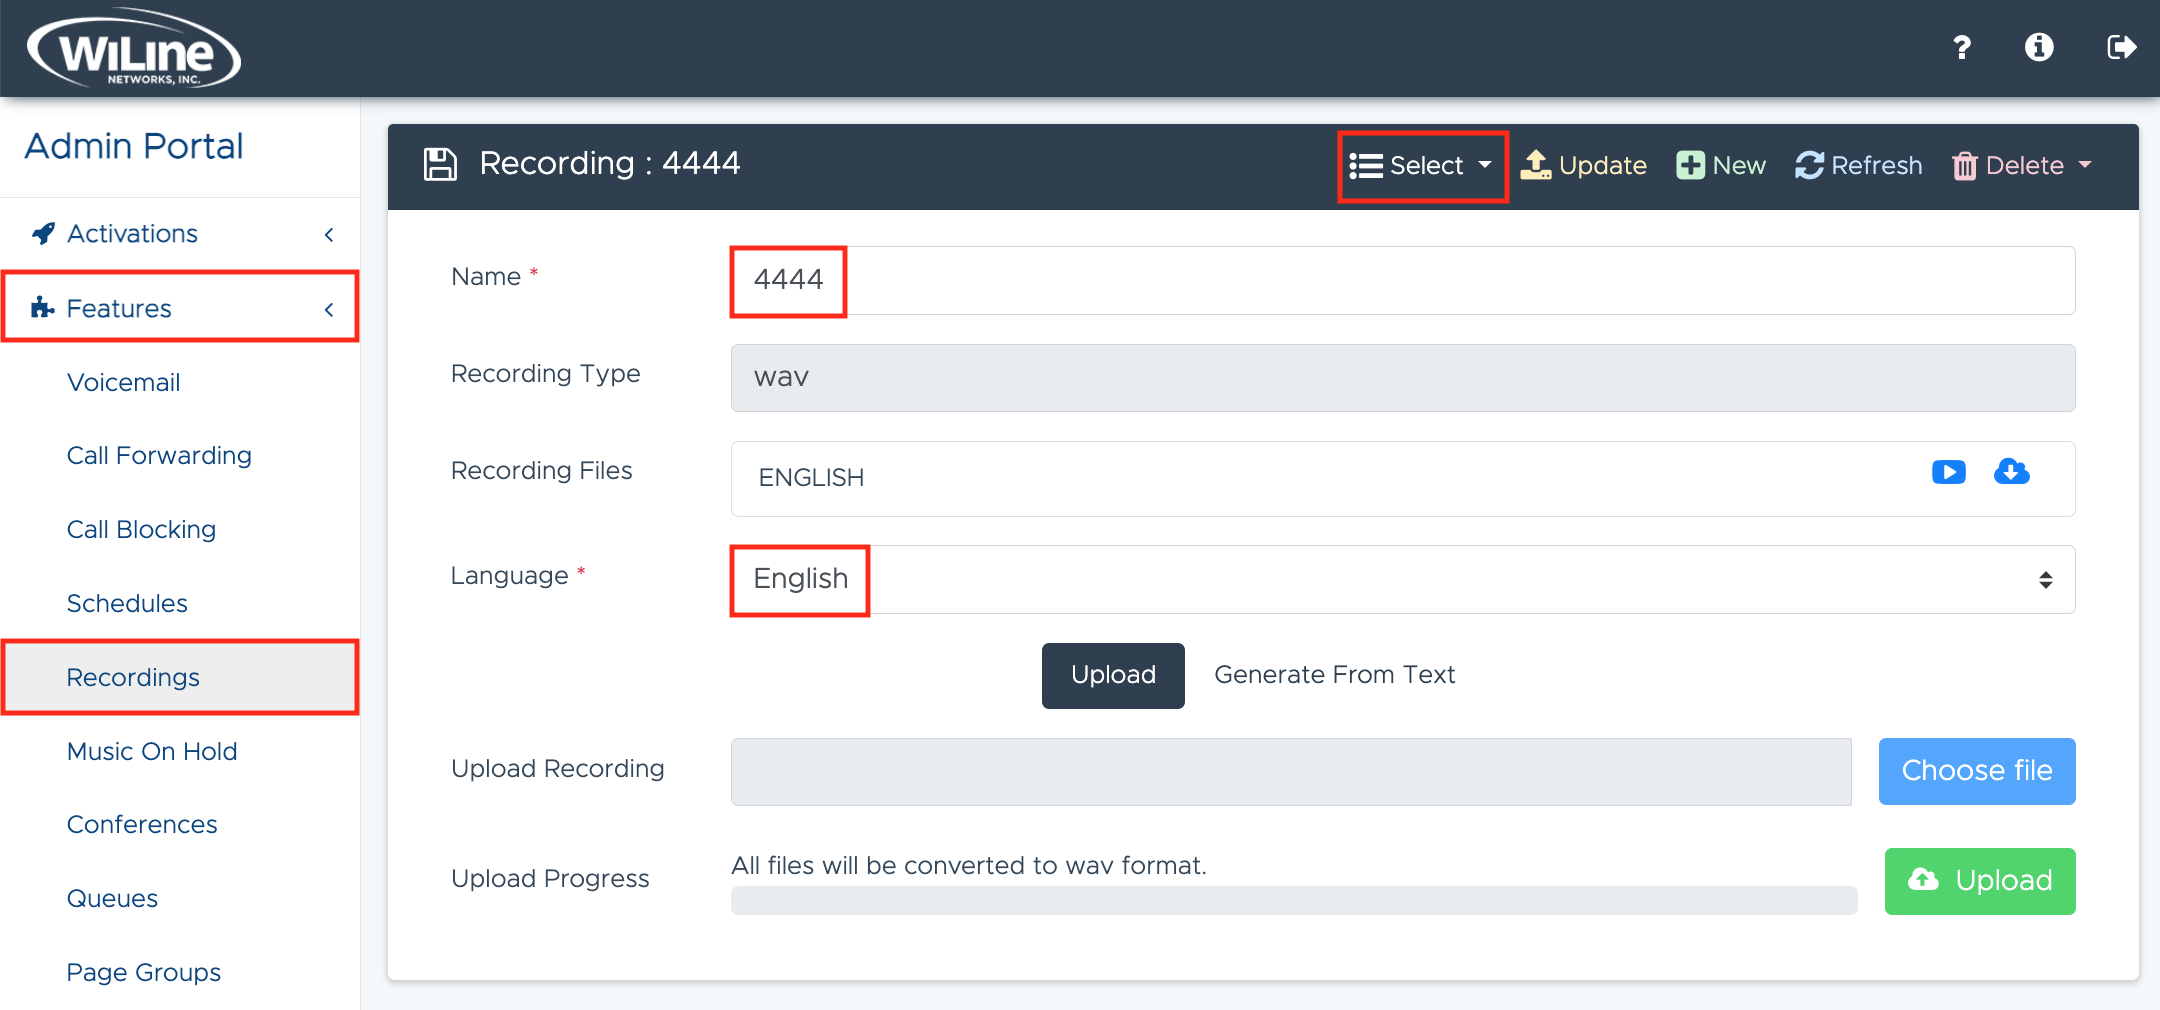
Select the recording you wish to update by clicking the Select checkbox next to it.
-
Modify the recording details such as Name and Language.
-
In Recording File, you can play and download the current file by clicking the icons.
-
To upload a new audio file from your computer, click Choose File and then select Upload. In the Upload Recording field, you can monitor as the file is converted to .wav through the Upload Progress bar.

Figure 3. Updating a recording in the Admin Portal.
Click Update from the options bar to save all changes.
Alternatively, you can use Text-to-Speech to generate a new recording. Simply:
- Choose a Voice (male, female, neutral).
- Enter a message in the Text field and click Upload.
- Click Generate Audio and adjust the audio as needed.
- When you're done, click Upload to save your audio.
Click Update from the options bar to save all changes.
Refresh the List
To refresh your recordings list, click the Refresh button in the top blue bar. This is particularly useful after uploading new recordings or making changes to existing ones, ensuring you see the most up-to-date information.
Delete a Recording
To remove a recording, follow these steps:
-
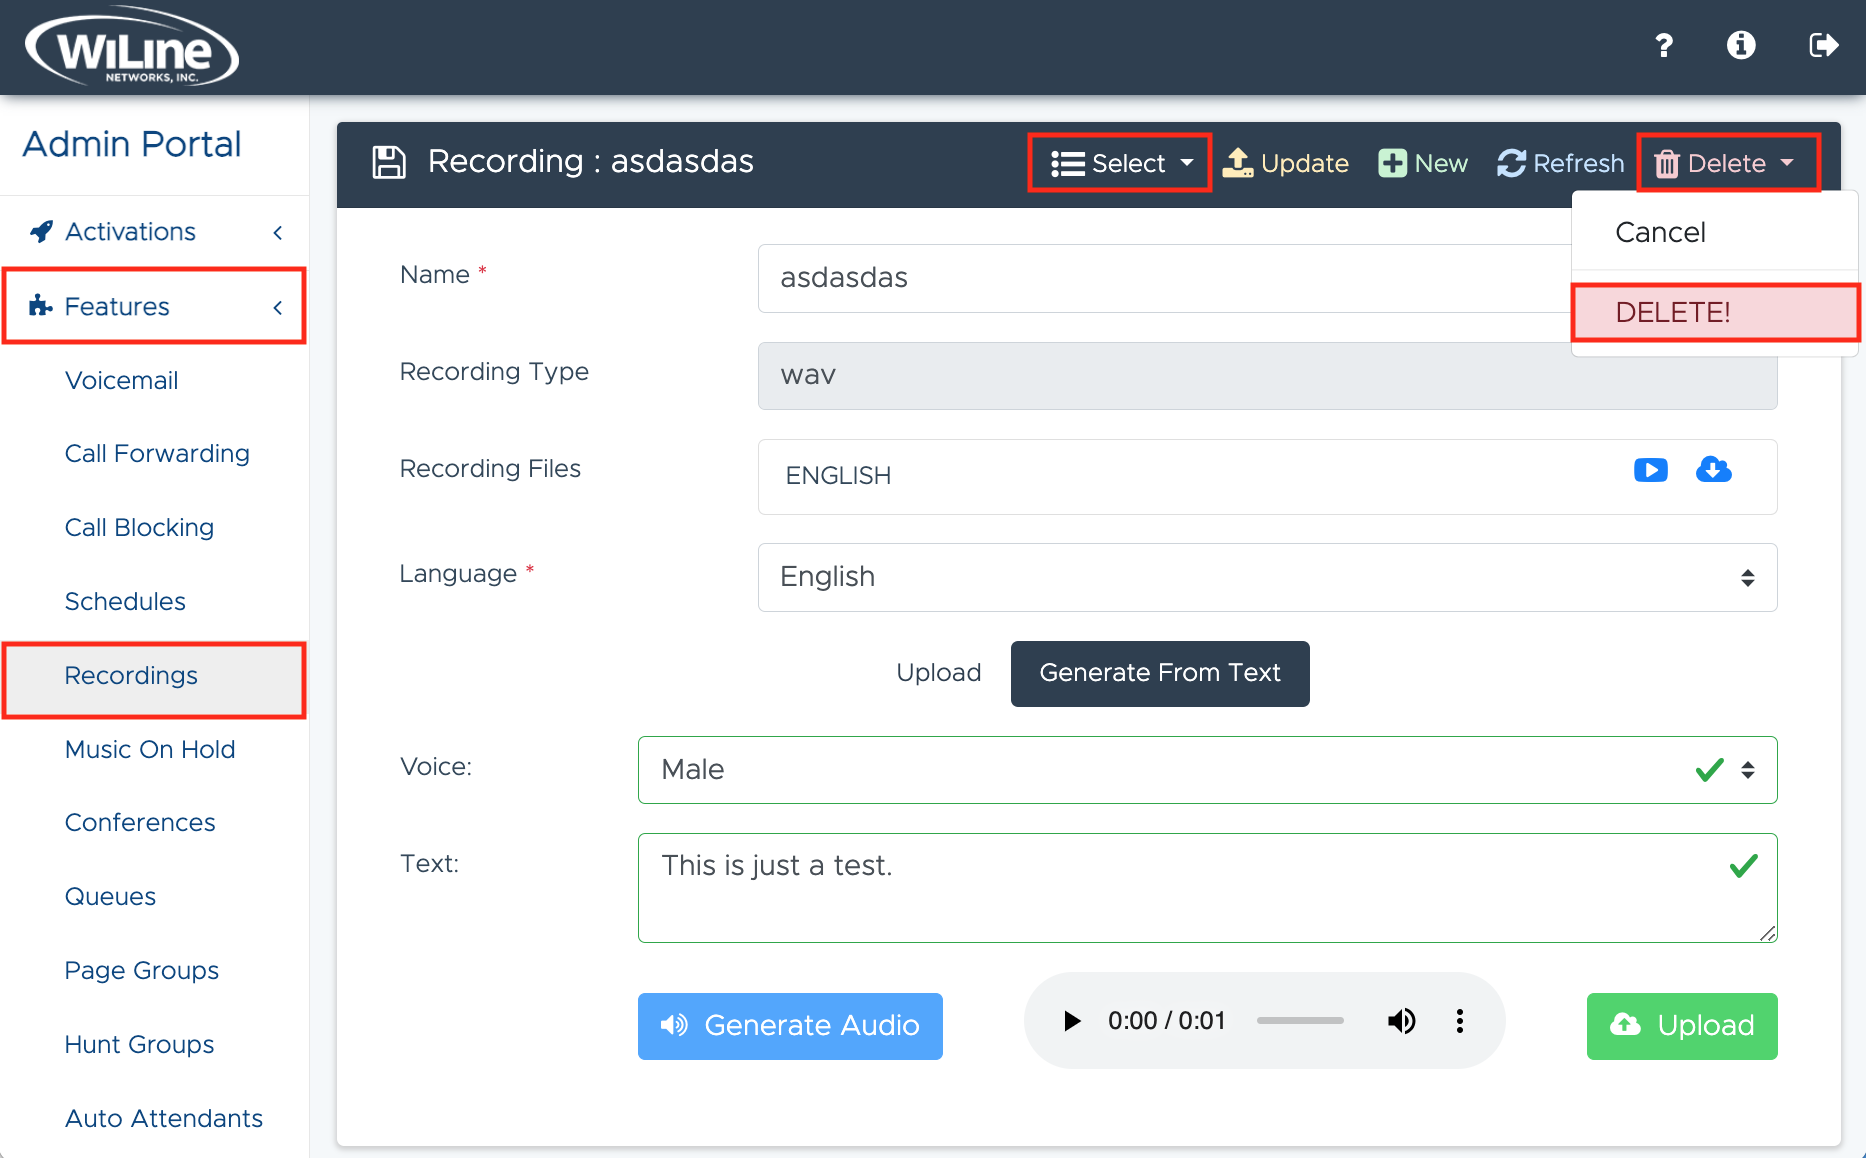
Select the recording you wish to delete from the list.
-
Click the Delete button in the right corner of the options bar.
-
Choose DELETE! from the dropdown menu to confirm.

Figure 4. Deleting a recording in the Admin Portal.
A pop-up window will appear - click Delete to finalize, or Cancel if you change your mind.
You have now successfully deleted the selected recording.
By effectively managing your recordings within the Admin Portal, you can streamline the process of creating, updating, and organizing audio content. This enhances both the quality of your recordings and the overall experience for your users. If you need further assistance or have any questions, please refer to the help documentation or contact support. er assistance or have any questions, please refer to the help documentation or contact support.