Manage Schedules
Use the scheduling feature in the Admin Portal to create, organize, and manage schedules efficiently. This capability is essential for defining availability for features like auto attendants, optimizing communication and enhancing user engagement.
View and Manage Your Schedules
-
Log in to the Admin Portal.
-
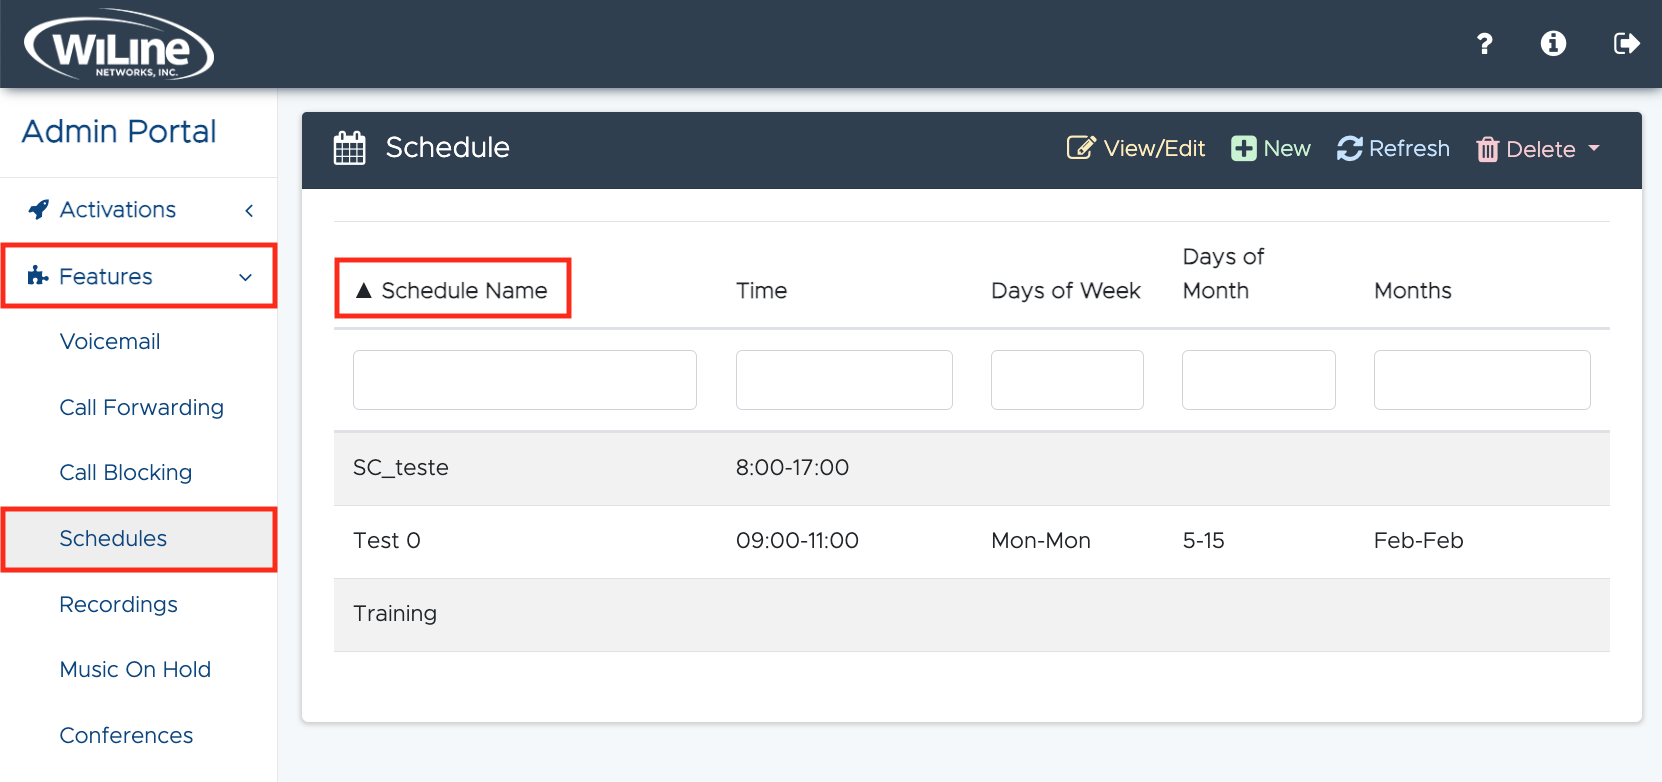
Navigate to Features > Schedules from the left-side menu to view all scheduled events.

Figure 1. Viewing your list of schedules.
Filter Schedules
To filter schedules by column:
- Click a column header (e.g., Schedule Name). An upward arrow will appear, sorting the results in ascending order, as shown in Figure 1.
- Click the column header again to sort in descending order (a downward arrow will appear).
View or Edit Schedule Details
To view or edit a schedule:
- Double-click an event from the list, or
- Select an event and click the yellow View/Edit button at the top of the page.
An Edit Schedule pop-up window will open, allowing you to modify the event's details.

You can update the following details:
- Name: Enter a descriptive name for the schedule.
- Event Type: Choose between:
- Inclusive: Participants can join at any time during the schedule.
- Exclusive: Attendance is limited to specific individuals or groups.
- Timezone: Select the appropriate timezone (e.g., America/Los_Angeles).
- Start and End Times: Specify when the event begins and ends (e.g., 9:00 AM – 11:00 AM).
- Days of the Week: Choose the days for the event (e.g., Monday – Wednesday).
- Day and Month: Specify the day(s) of the month and the month(s) for the event (e.g., 1 – 30, January – March).
- Exceptions: Select holidays to exclude from the event using the Add Exception dropdown. Click Add to include any exceptions.
Click Update to save changes, Close to exit, or Reset to start fresh.
Refresh and Delete a Schedule
Refresh Your Schedules List
To refresh your schedules list, click the Refresh button in the top blue bar. This is especially useful if you have made changes to a schedule but can't see the updated item in the list.
Delete a Schedule
To delete a schedule, follow these steps:
- Select the item you wish to delete from the list of schedules.
- Click the Delete button in the top right corner of the bar.
- Confirm your action by selecting DELETE! from the dropdown menu.
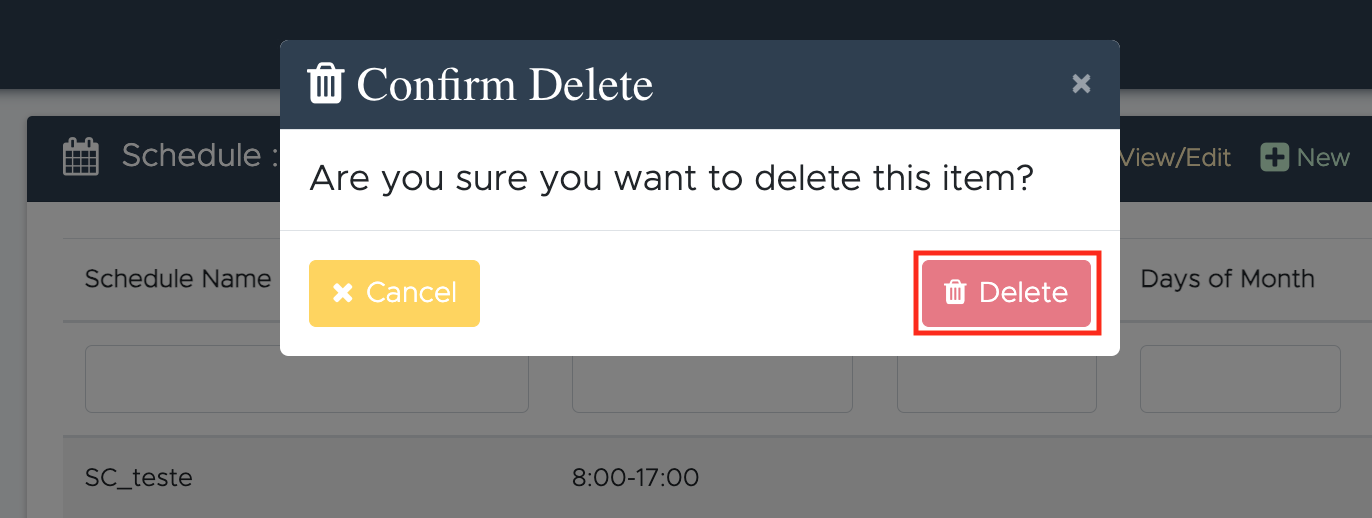
A pop-up window will appear prompting you to confirm your decision. Confirm by clicking Delete or choose Cancel if you change your mind.

You have now successfully deleted the selected schedule.
Create a New Schedule
To create a new schedule:
- Log in to the Admin Portal.
- Navigate to Features > Schedules.
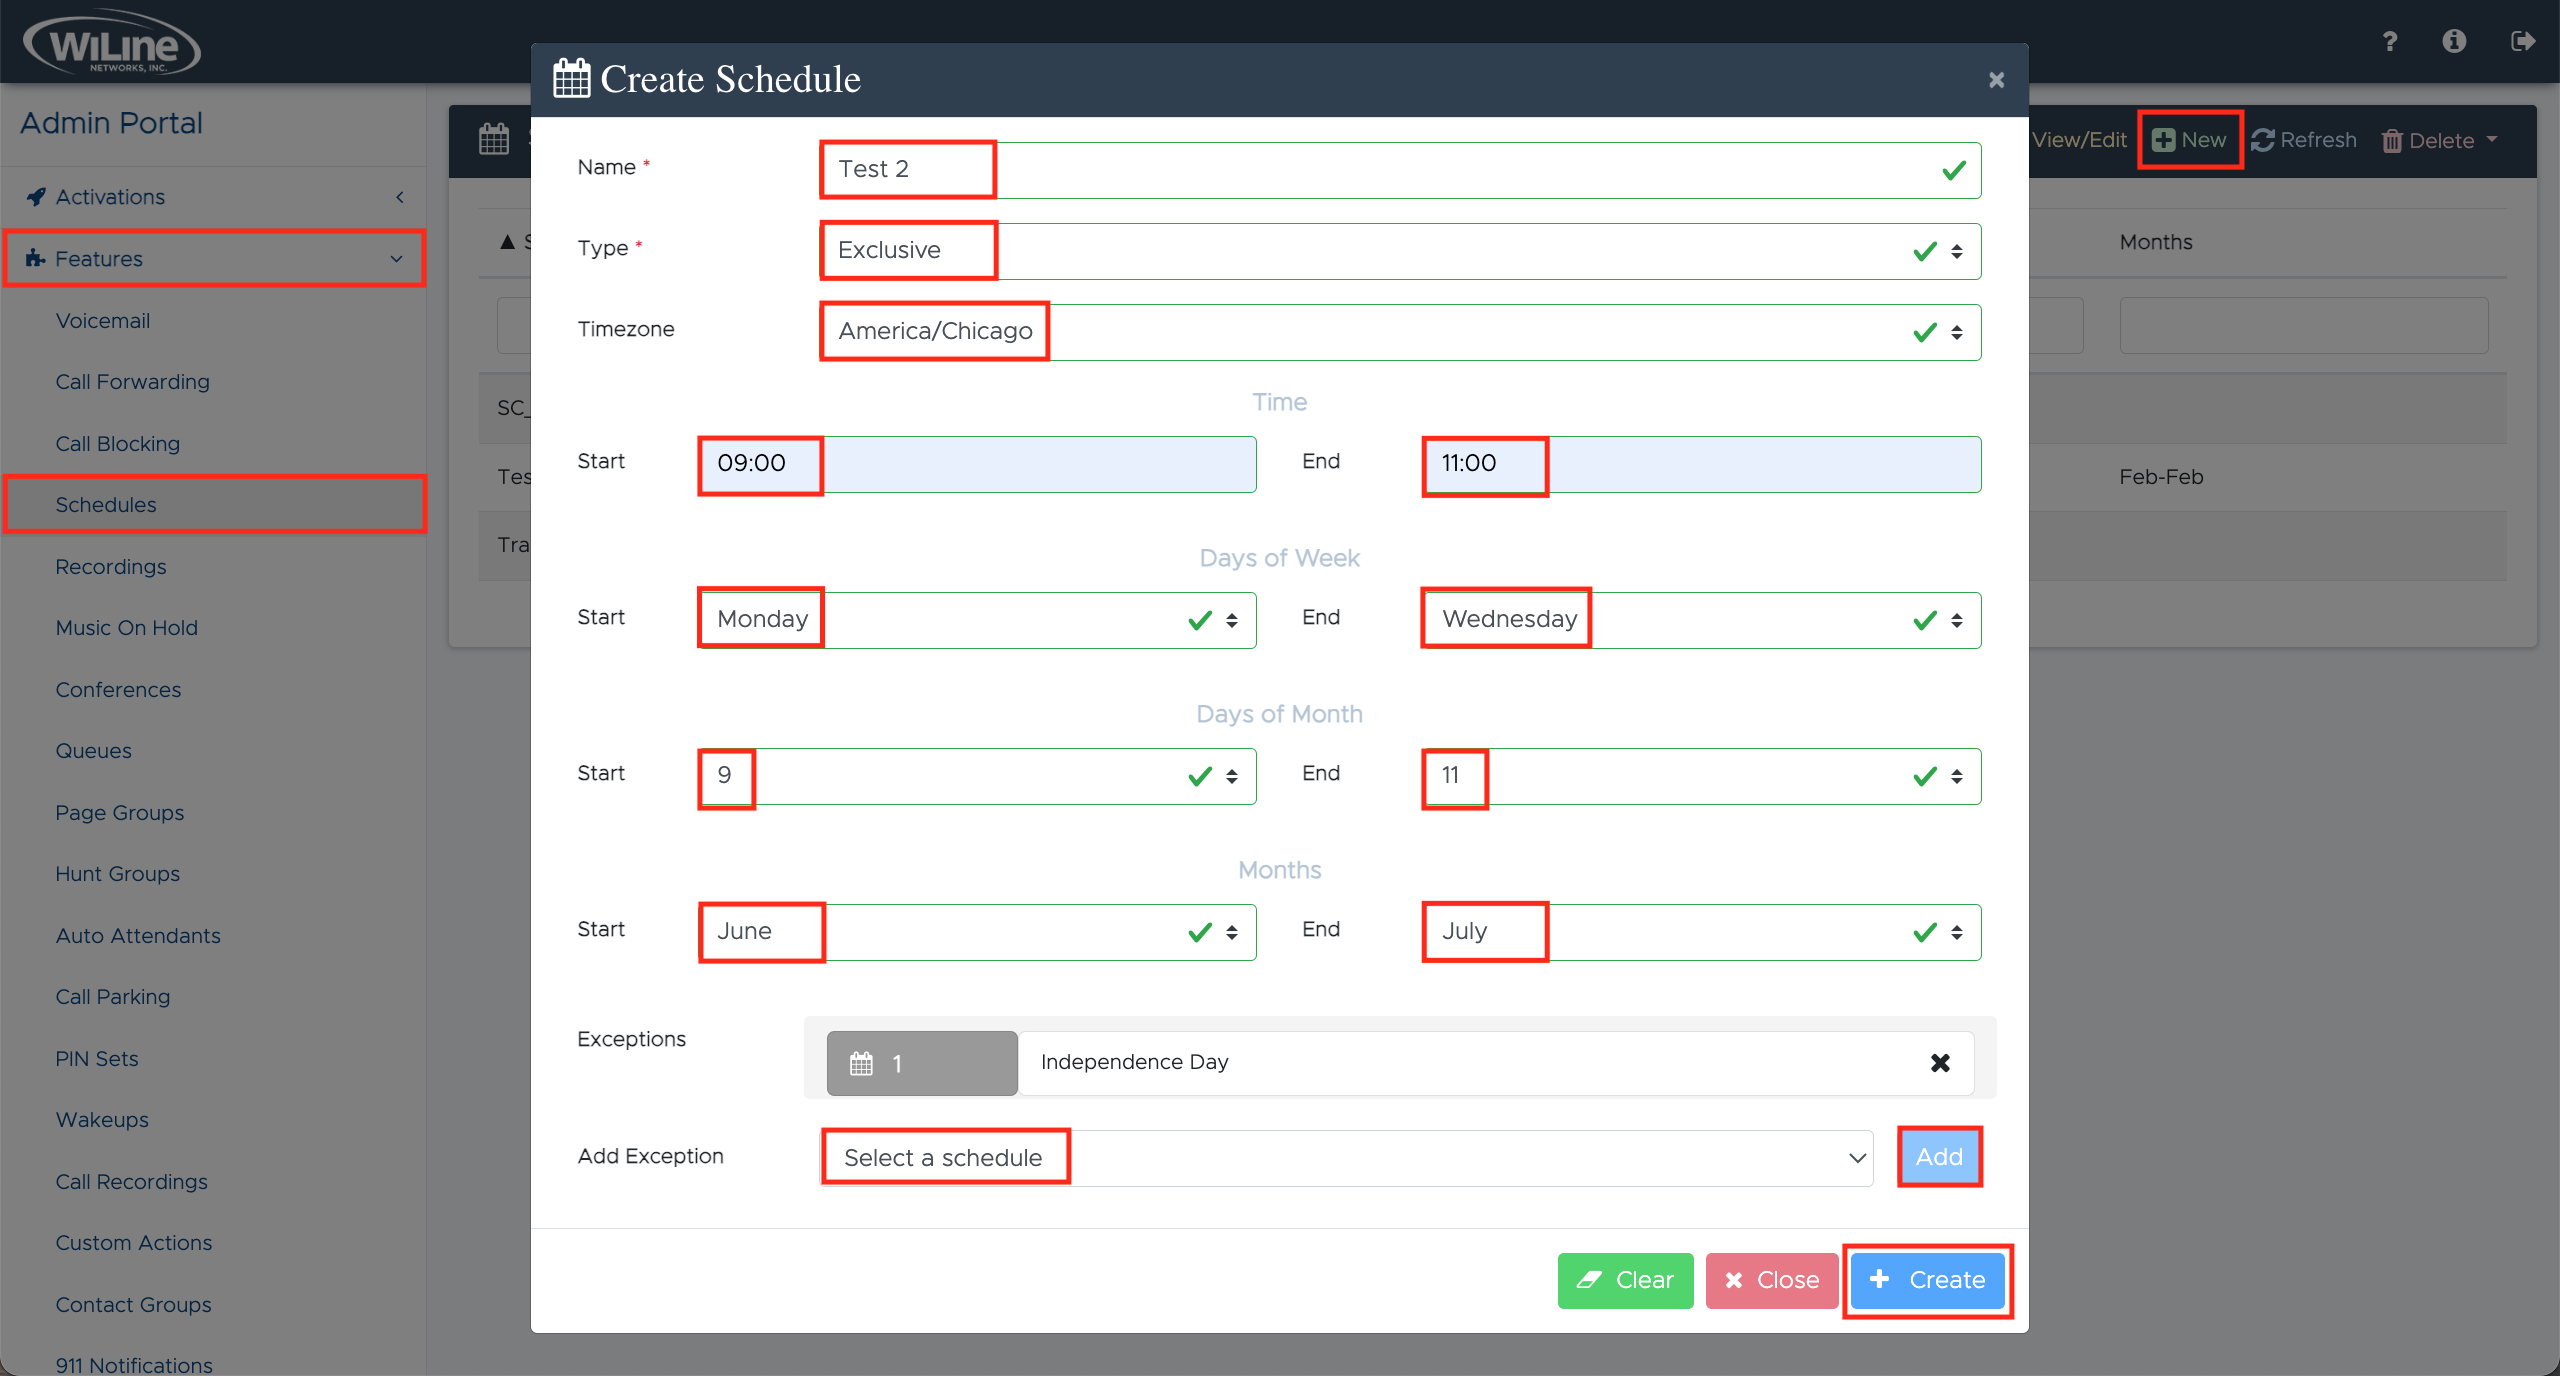
- Click the green New button at the top of the page.
A Create Schedule pop-up window will open for you to enter schedule details:
- Name: Enter a descriptive name for the event.
- Event Type: Choose between:
- Inclusive: Participants can join at any time during the event.
- Exclusive: Attendance is limited to specific individuals or groups.
- Timezone: Select the appropriate timezone from the dropdown (e.g., America/Los_Angeles).
- Start and End Times: Set the time for the event (e.g., 9:00 AM – 11:00 AM).
- Days of the Week: Select the days for the event (e.g., Monday – Wednesday).
- Day and Month: Choose the day(s) of the month and the month(s) (e.g., 1 – 30, January – March).
- Exceptions: Add exceptions such as holidays from the Add Exception dropdown (e.g., Independence Day). Click Add to include any exceptions.
Click Create to create the new schedule, Close to exit, or Reset to start fresh.

Congratulations! You have successfully created a new schedule.
By utilizing these features in the Admin Portal, you can effectively manage your schedules and ensure seamless functionalities, such as auto attendants. If you have any further questions or need assistance, refer to the Need Help documentation and contact support.