Configure PIN Sets
In the Admin Portal, use PIN sets to control access to specific functionalities and resources by assigning PIN codes. Authorize calls, grant access to restricted services, and enhance security with user authentication, ensuring that operations remain secure and properly managed.
Configure a New PIN Set
To configure a new PIN set, follow these steps:
-
Log in to the Admin Portal.
-
From the left-side menu, navigate to Features > PIN Sets.
A dashboard will appear, allowing you to configure a new PIN set:
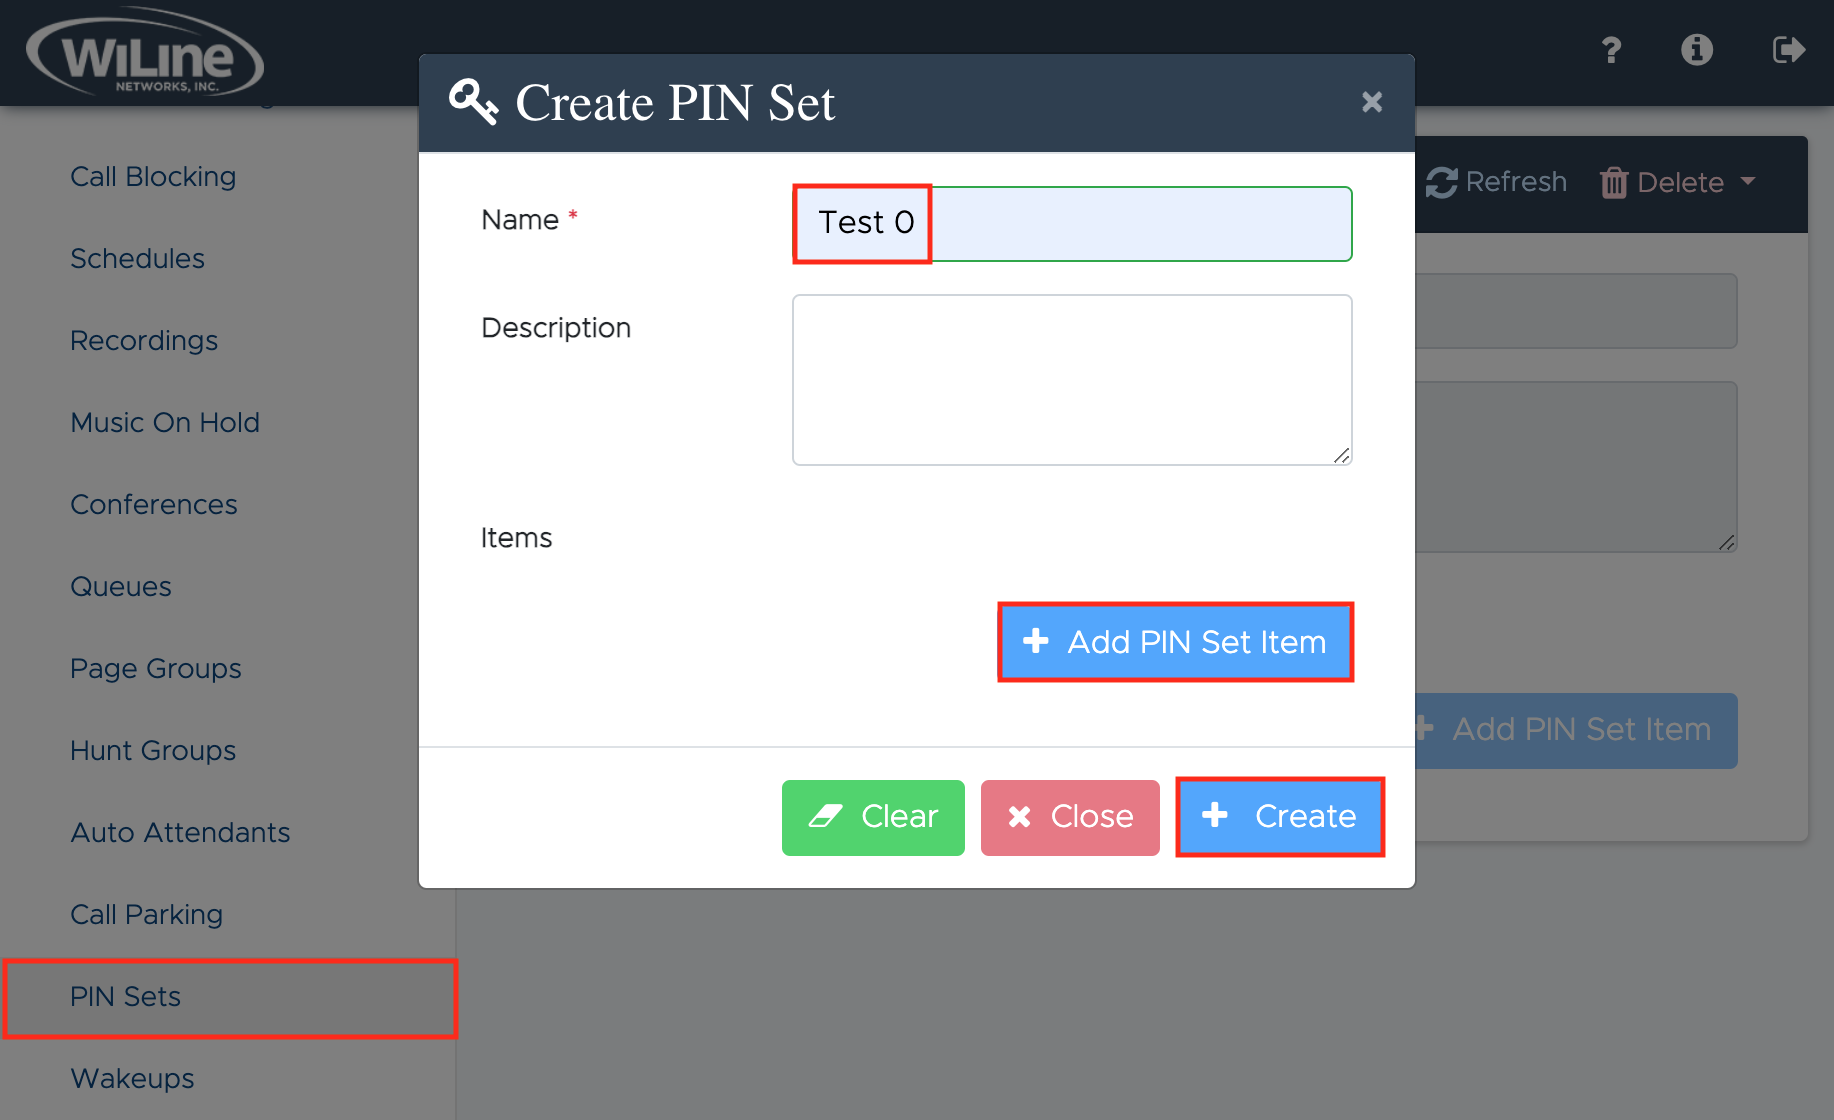
Figure 1. Creating a new PIN set. -
Fill in the following fields for setting up the PIN set:
- Name (required): Enter a unique name for the PIN set.
- Description: Provide a brief description of the PIN set (optional).
- Items: Specify the list of PINs to include. Click + Add PIN Set Item to add items.
A new Update PIN window will appear, where you can configure the details of the new PIN:
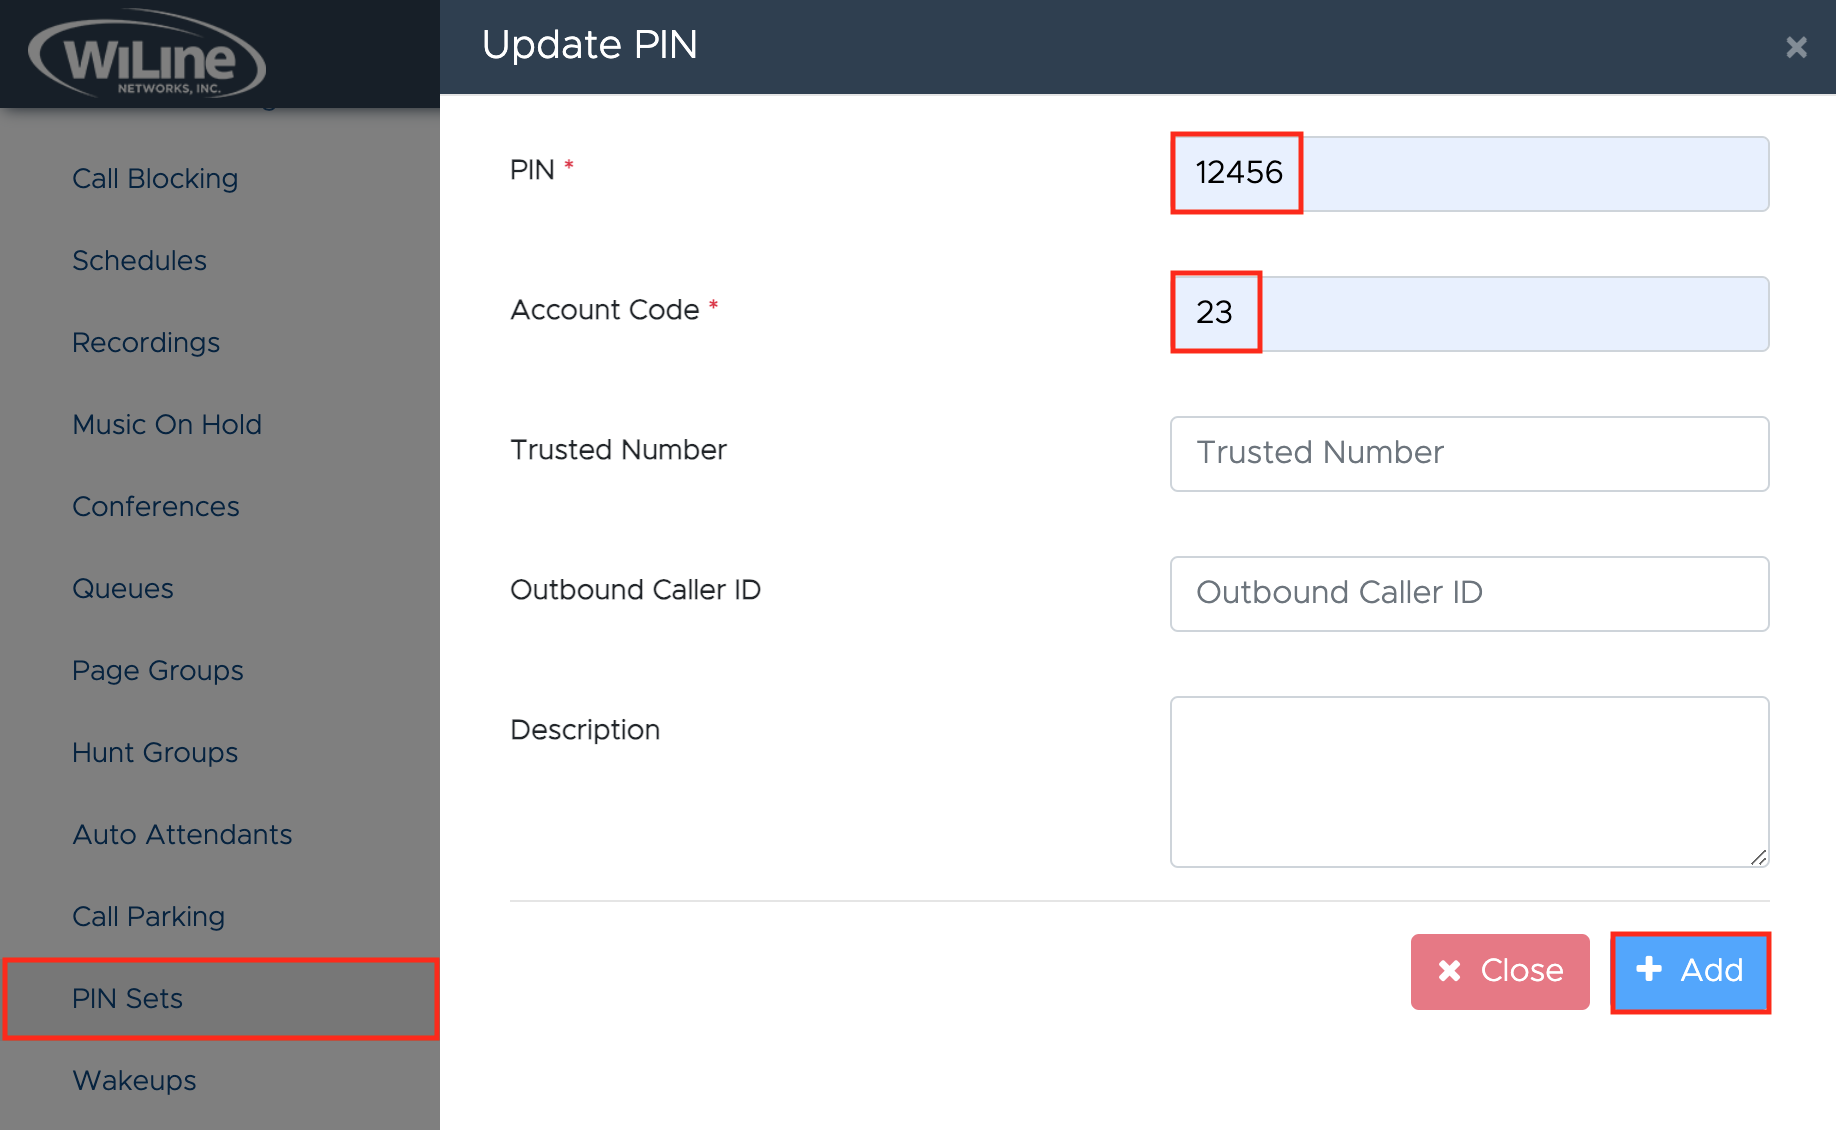
- Configure the following details for the new PIN:
- PIN (required): Enter the PIN number (e.g.,
12456). - Account Code (required): Assign an account code (e.g.,
23). - Trusted Number: Specify a trusted number (optional).
- Outbound Caller ID: Set the outbound caller ID (optional).
- Description: Provide a description for the item (optional).
When you're done, click + Add. To cancel, click x Close.
After adding the item, you will be redirected to the Create PIN Set window:
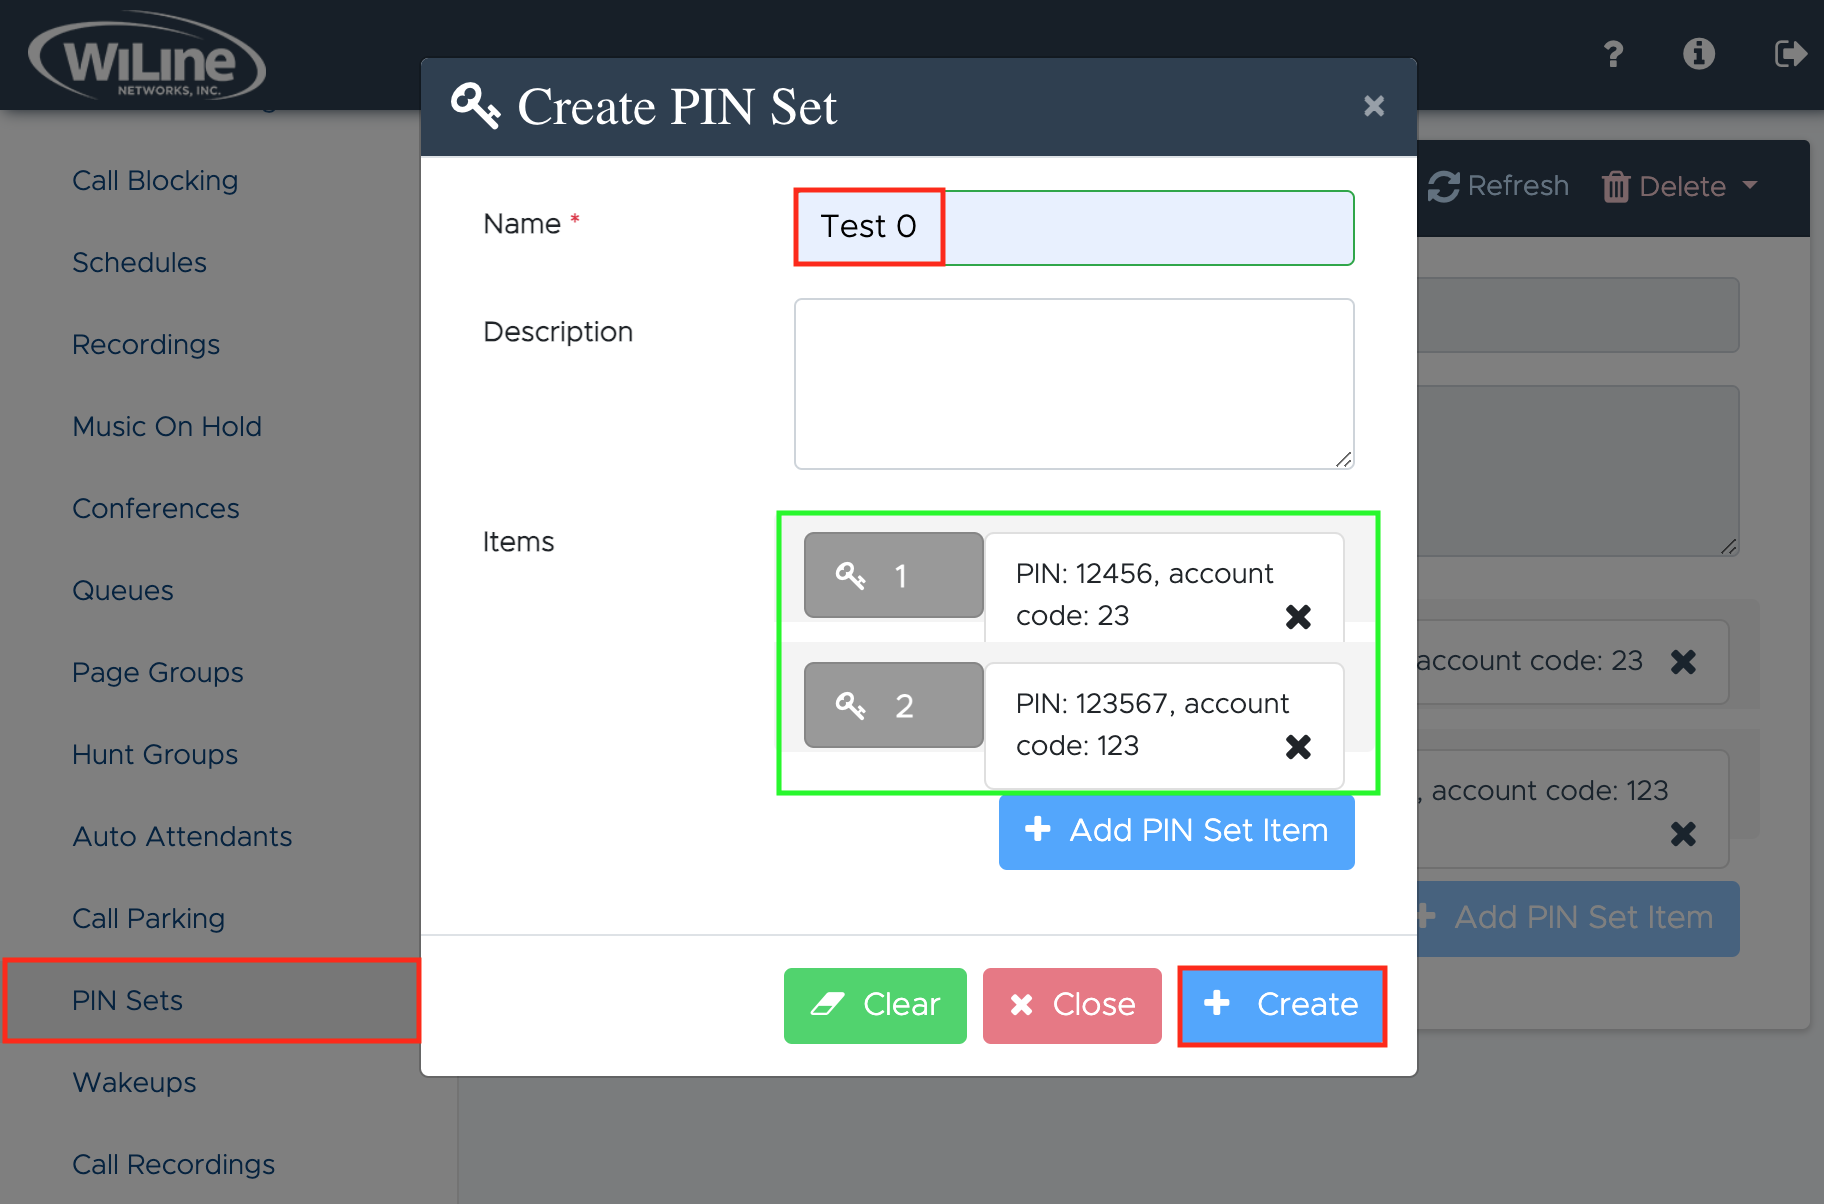
- Click Create to finalize the new PIN set. To start over, click Clear. To cancel, click Close.
Edit a PIN Set
To edit an existing PIN set, follow these steps:
- Log in to the Admin Portal.
- From the left-side menu, navigate to Features > PIN Sets.
- Click Select from the top blue bar to access a list of all created PIN sets.
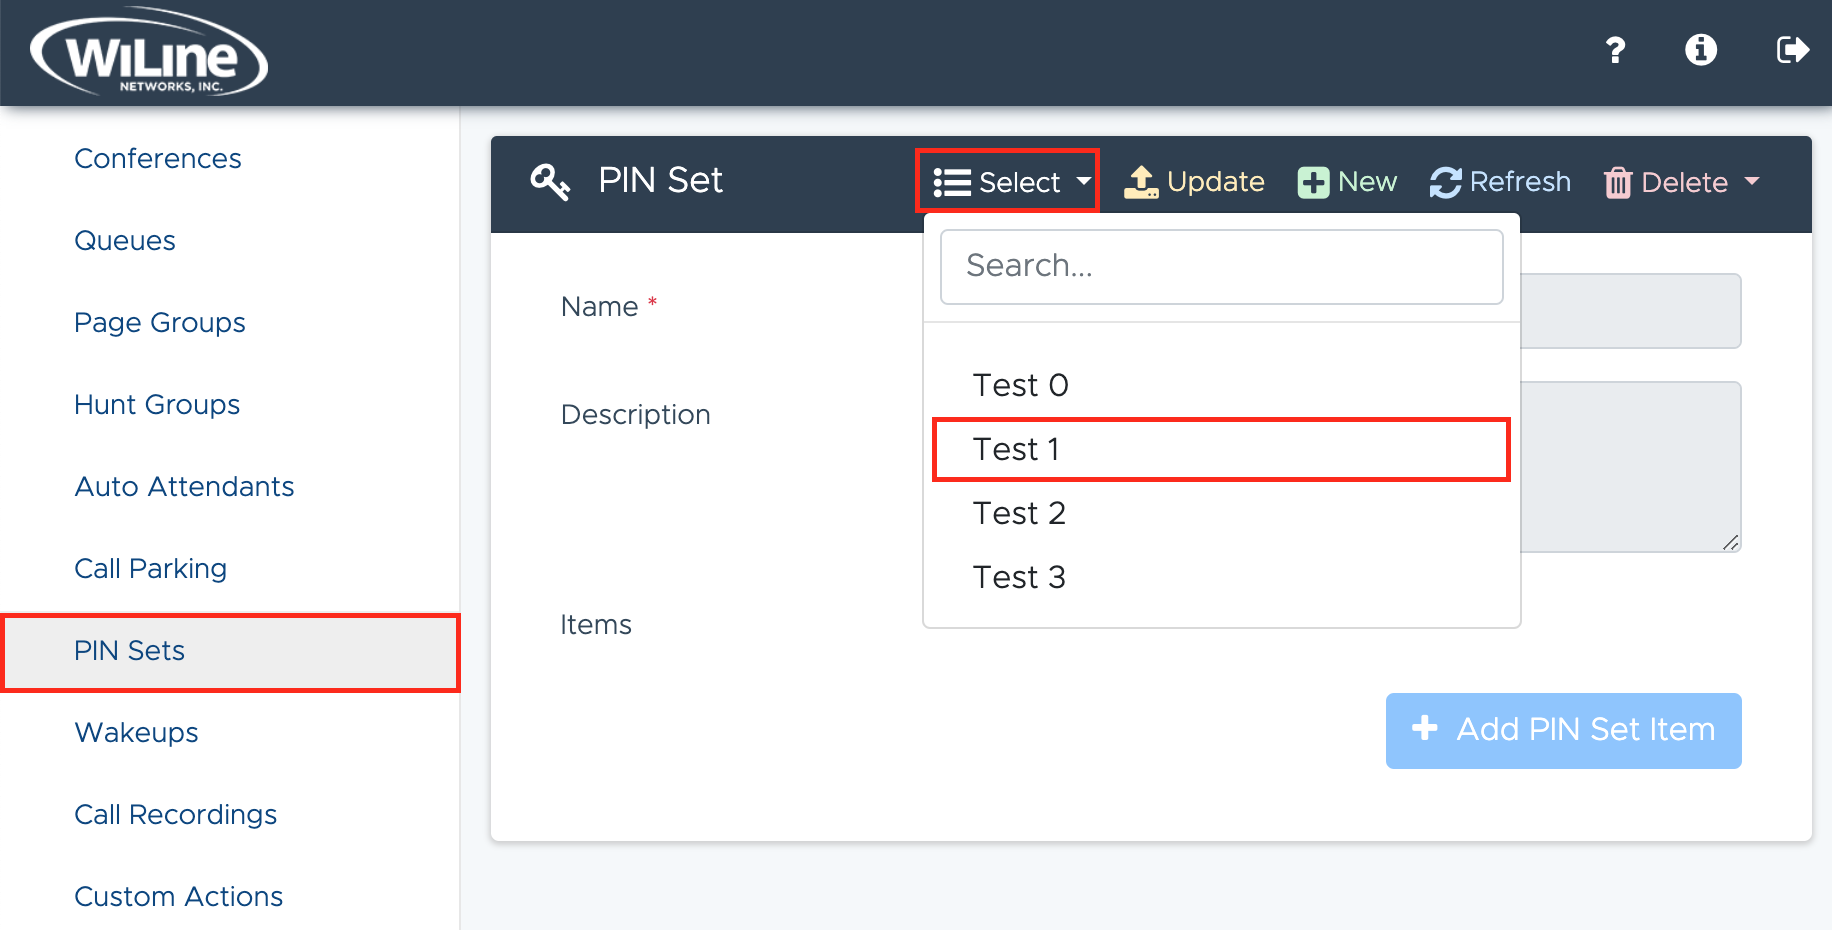
- Follow these steps to update the PIN set, similar to the instructions in the Configure a New PIN Set section:
- Name (required): Update the name of the PIN set.
- Description: Modify the description of the PIN set (optional).
- Items: Edit or remove items from the PIN set. Click X to delete an item. To add new items, click + Add PIN Set Item.
A new Update PIN window will appear, allowing you to modify the PIN details:
- PIN (required): Edit the PIN number (e.g.,
1356). - Account Code (required): Update the account code (e.g.,
14). - Trusted Number: Adjust the trusted number (optional).
- Outbound Caller ID: Update the outbound caller ID (optional).
- Description: Modify the description (optional).
When you're done, click + Add. To cancel, click Close.
- Save the changes to your PIN set by clicking Update at the top of the screen.
Delete a PIN Set
To delete a PIN set, follow these steps:
- Select the PIN group from the list.
- Click the red Delete button in the top blue bar.
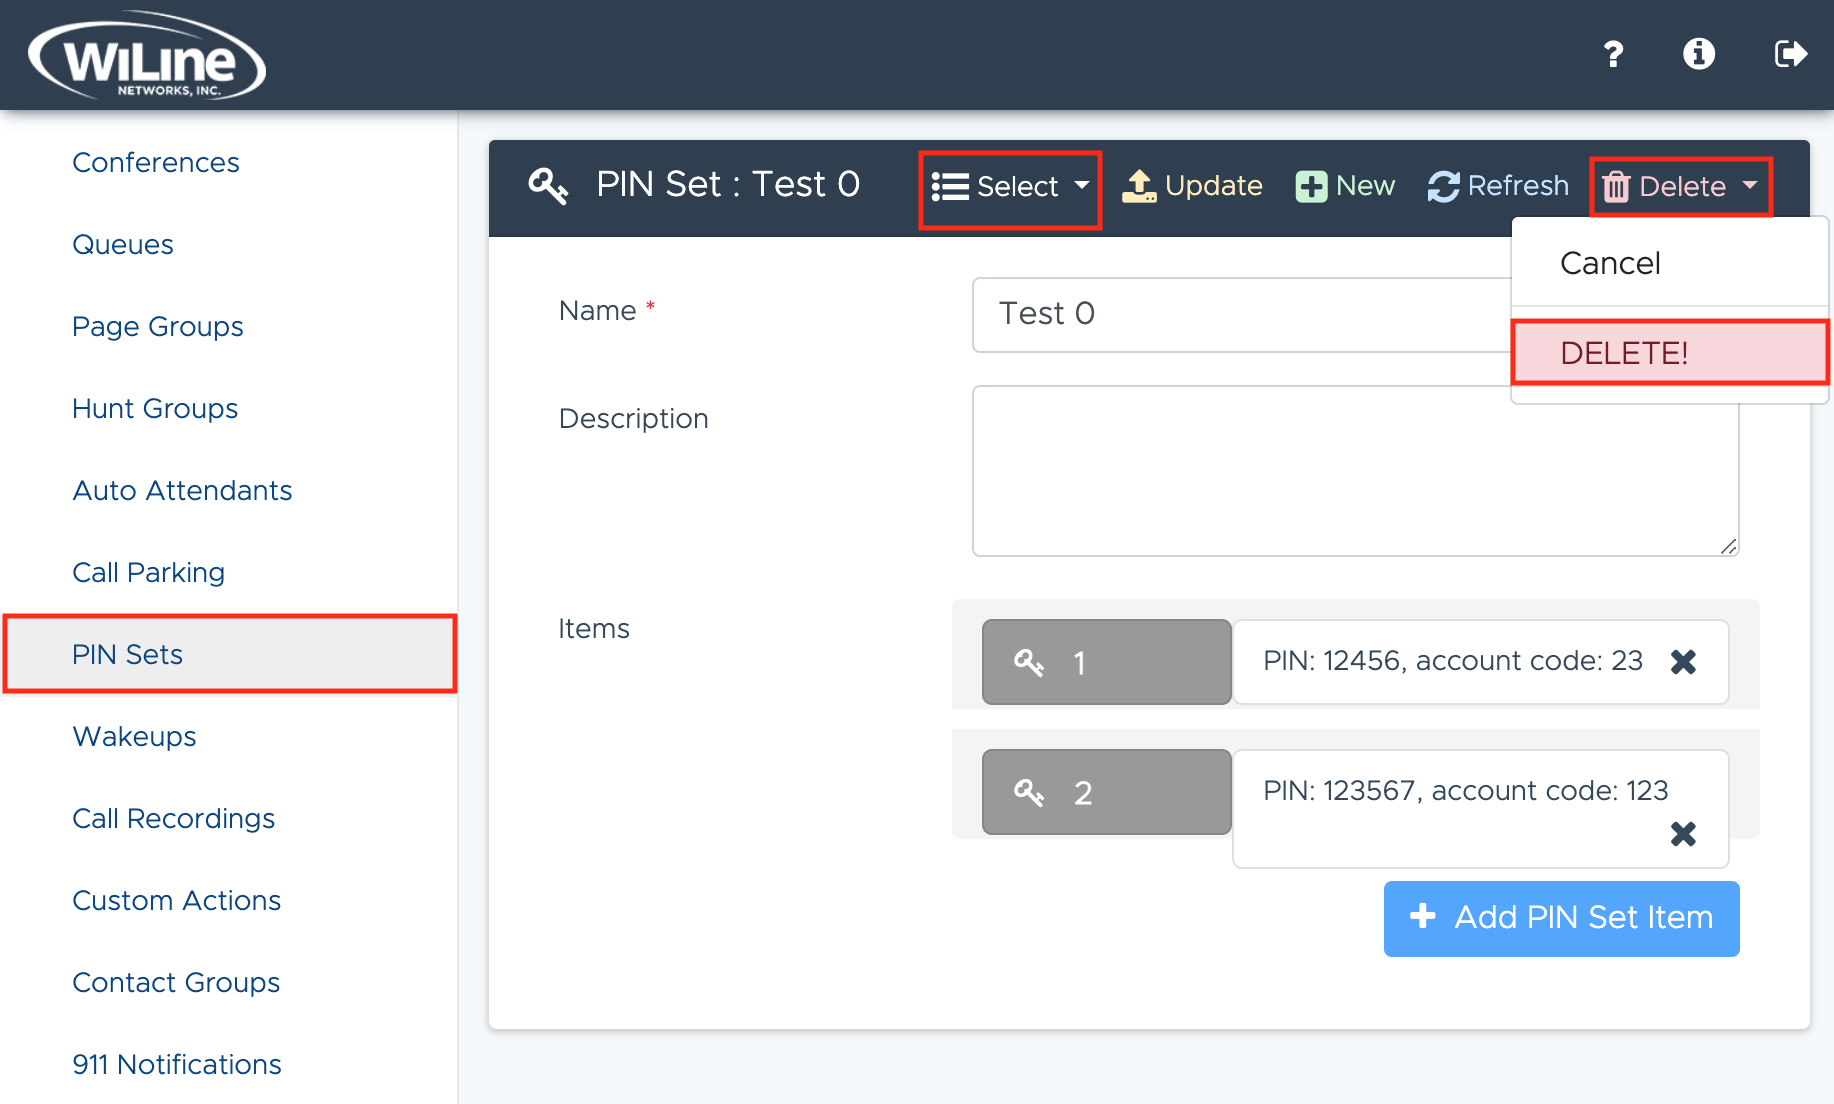
A confirmation pop-up will appear. Click Delete to confirm, or Cancel if you canged your mind.
You can only delete PIN sets that you created.
By following these steps, you can effectively manage and secure access to various features in the Admin Portal using PIN sets.