Set Up Page Groups
In the Admin Portal, set up page groups to send announcements or messages to multiple users simultaneously that don’t necessarily require a response. For example, a supervisor can use a page group to announce, "Team meeting in 10 minutes" to all members.
Create a New Page Group
-
Log in to the Admin Portal.
-
Navigate to Features > Page Groups from the left-side menu.
-
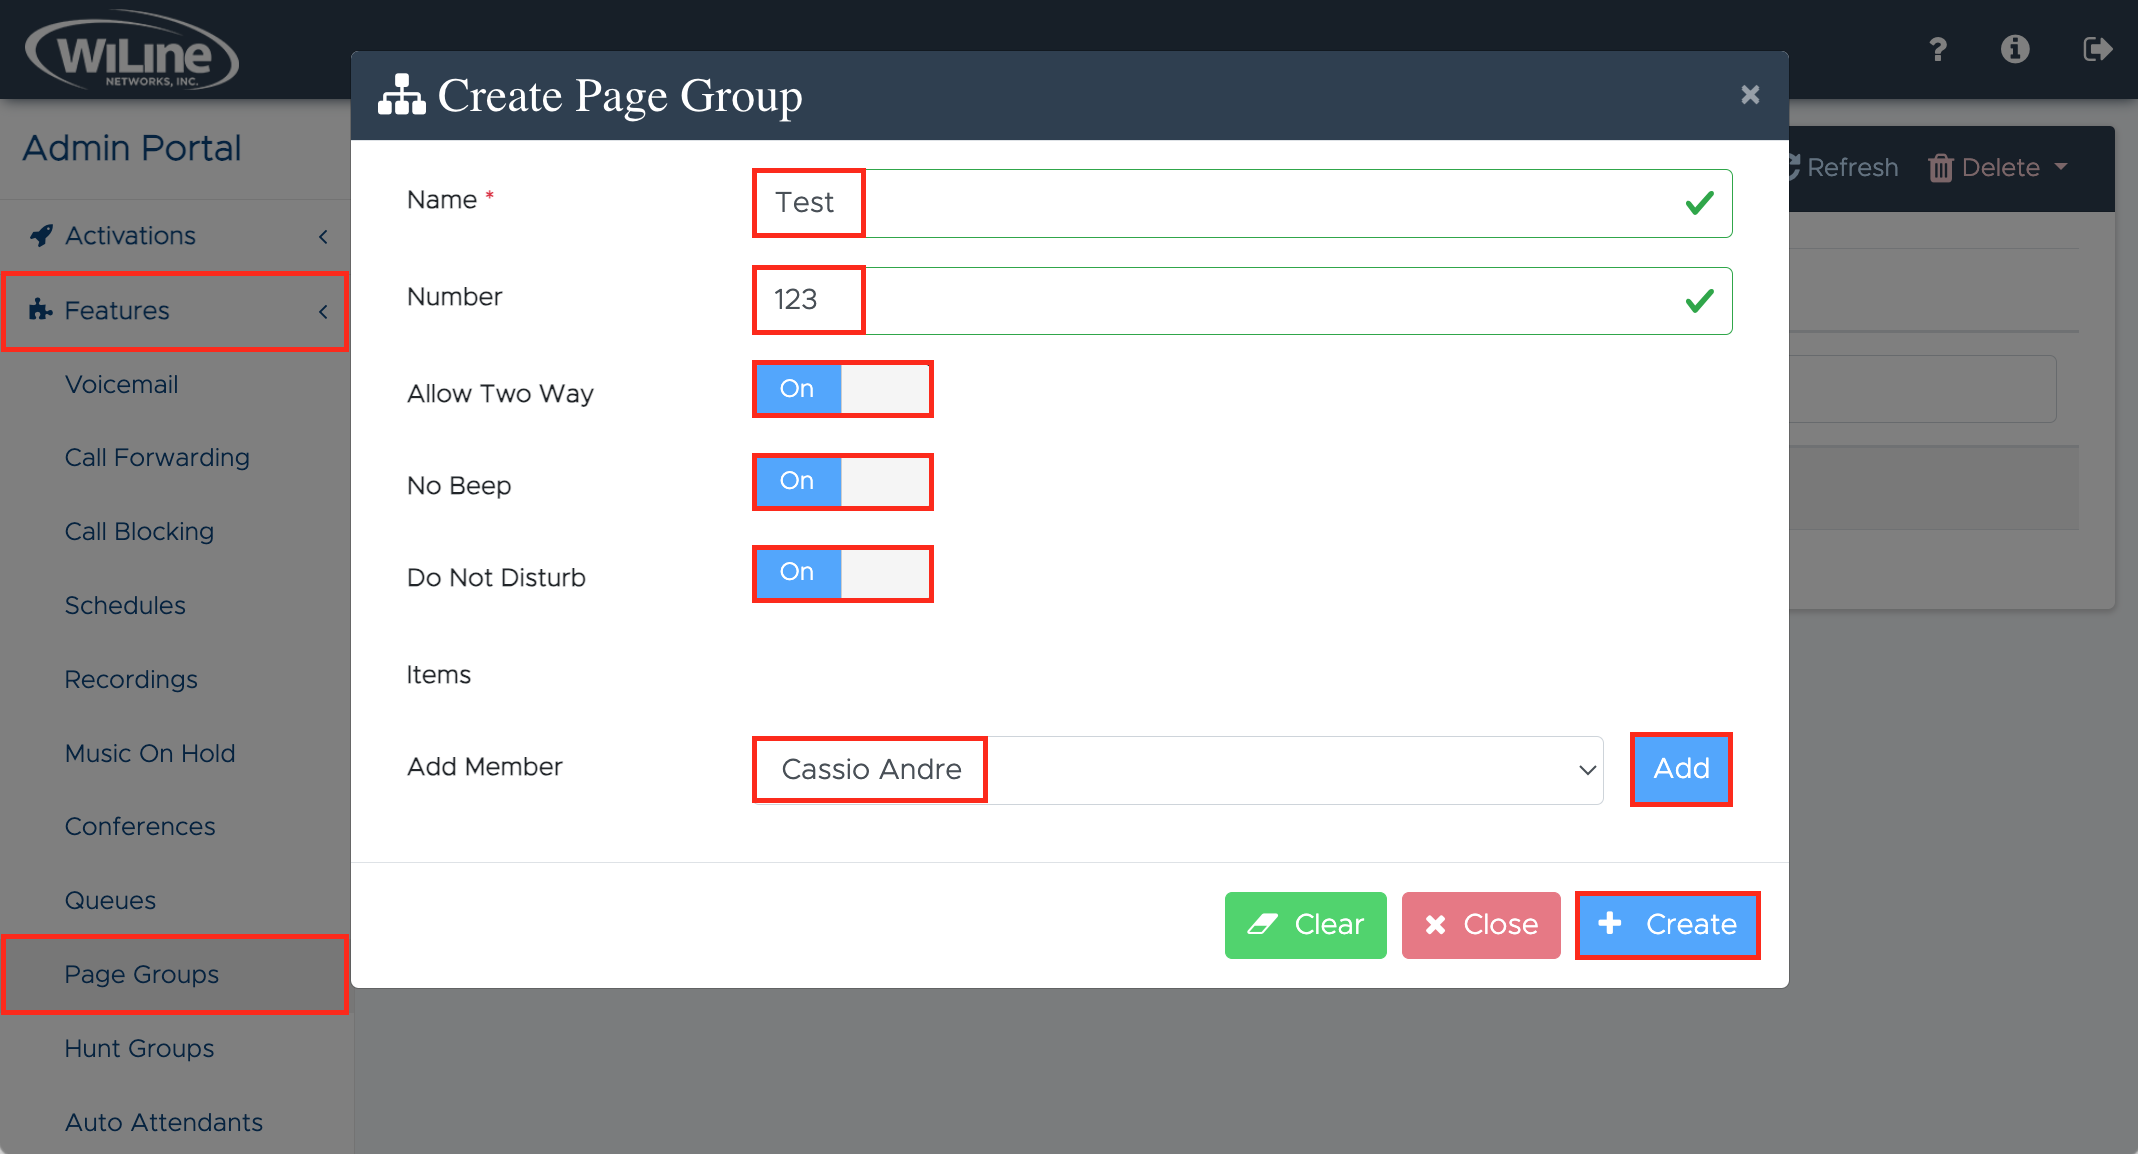
Click New in the top blue bar to create a new page group.

Figure 1. Creating a new page group. -
Enter the following details:
- Name (required): Assign a name to the page group.
- Number: Specify a unique number for the group.
- Allow Two Way: Enable or disable two-way communication within the group.
- No Beep: Decide whether to disable beep notifications.
- Do Not Disturb: Set the group to "Do Not Disturb" if needed.
-
Under Items, click Add Member to select users or extensions from the dropdown to include in the page group, and click Add to confirm.
To finalize, click Create. If you need to start over, click Clear. To cancel, click Close.
View Your Page Groups List
To view a list of your page groups:
- Log in to the Admin Portal.
- Navigate to Features > Page Groups from the left-side menu.
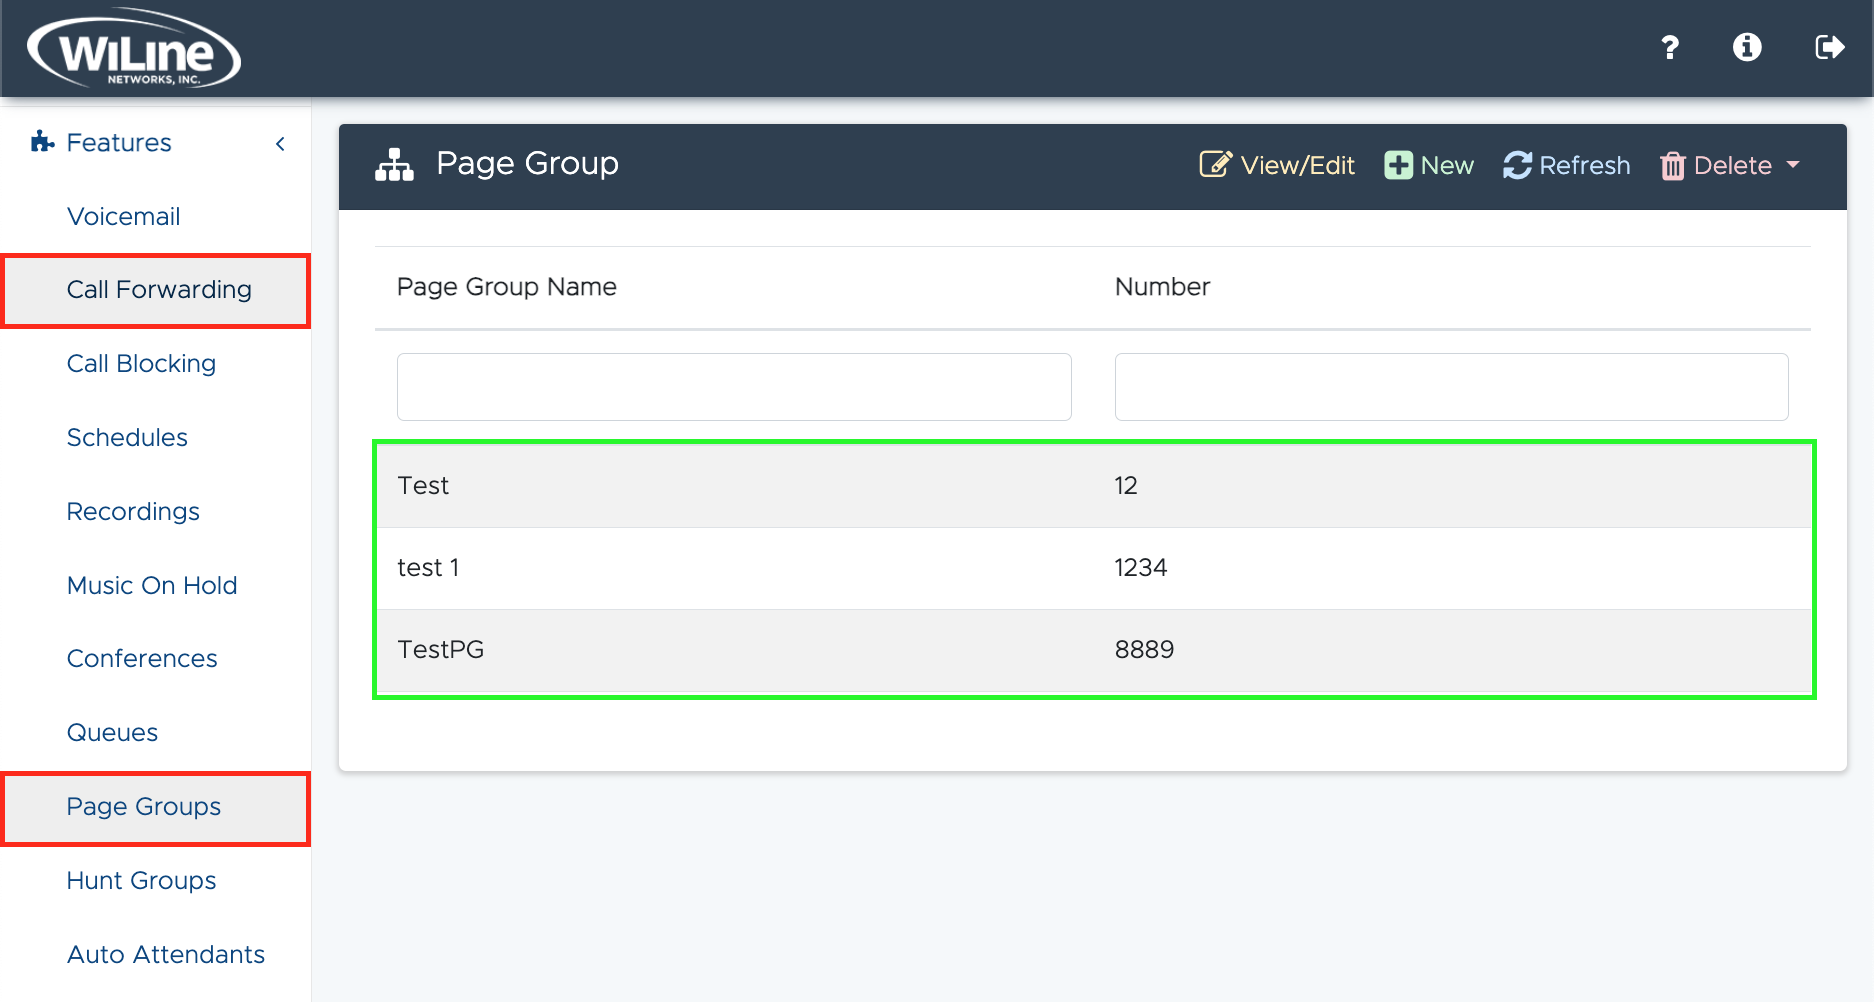
A list of all your created page groups will appear on your dashboard:

To filter or search for specific items, enter text in the fields under the column headers Page Group Name and Number.
Edit a Page Group
To edit a page group:
- Double-click a page group from the list, or
- Select a page group and click the yellow View/Edit button in the top blue bar.
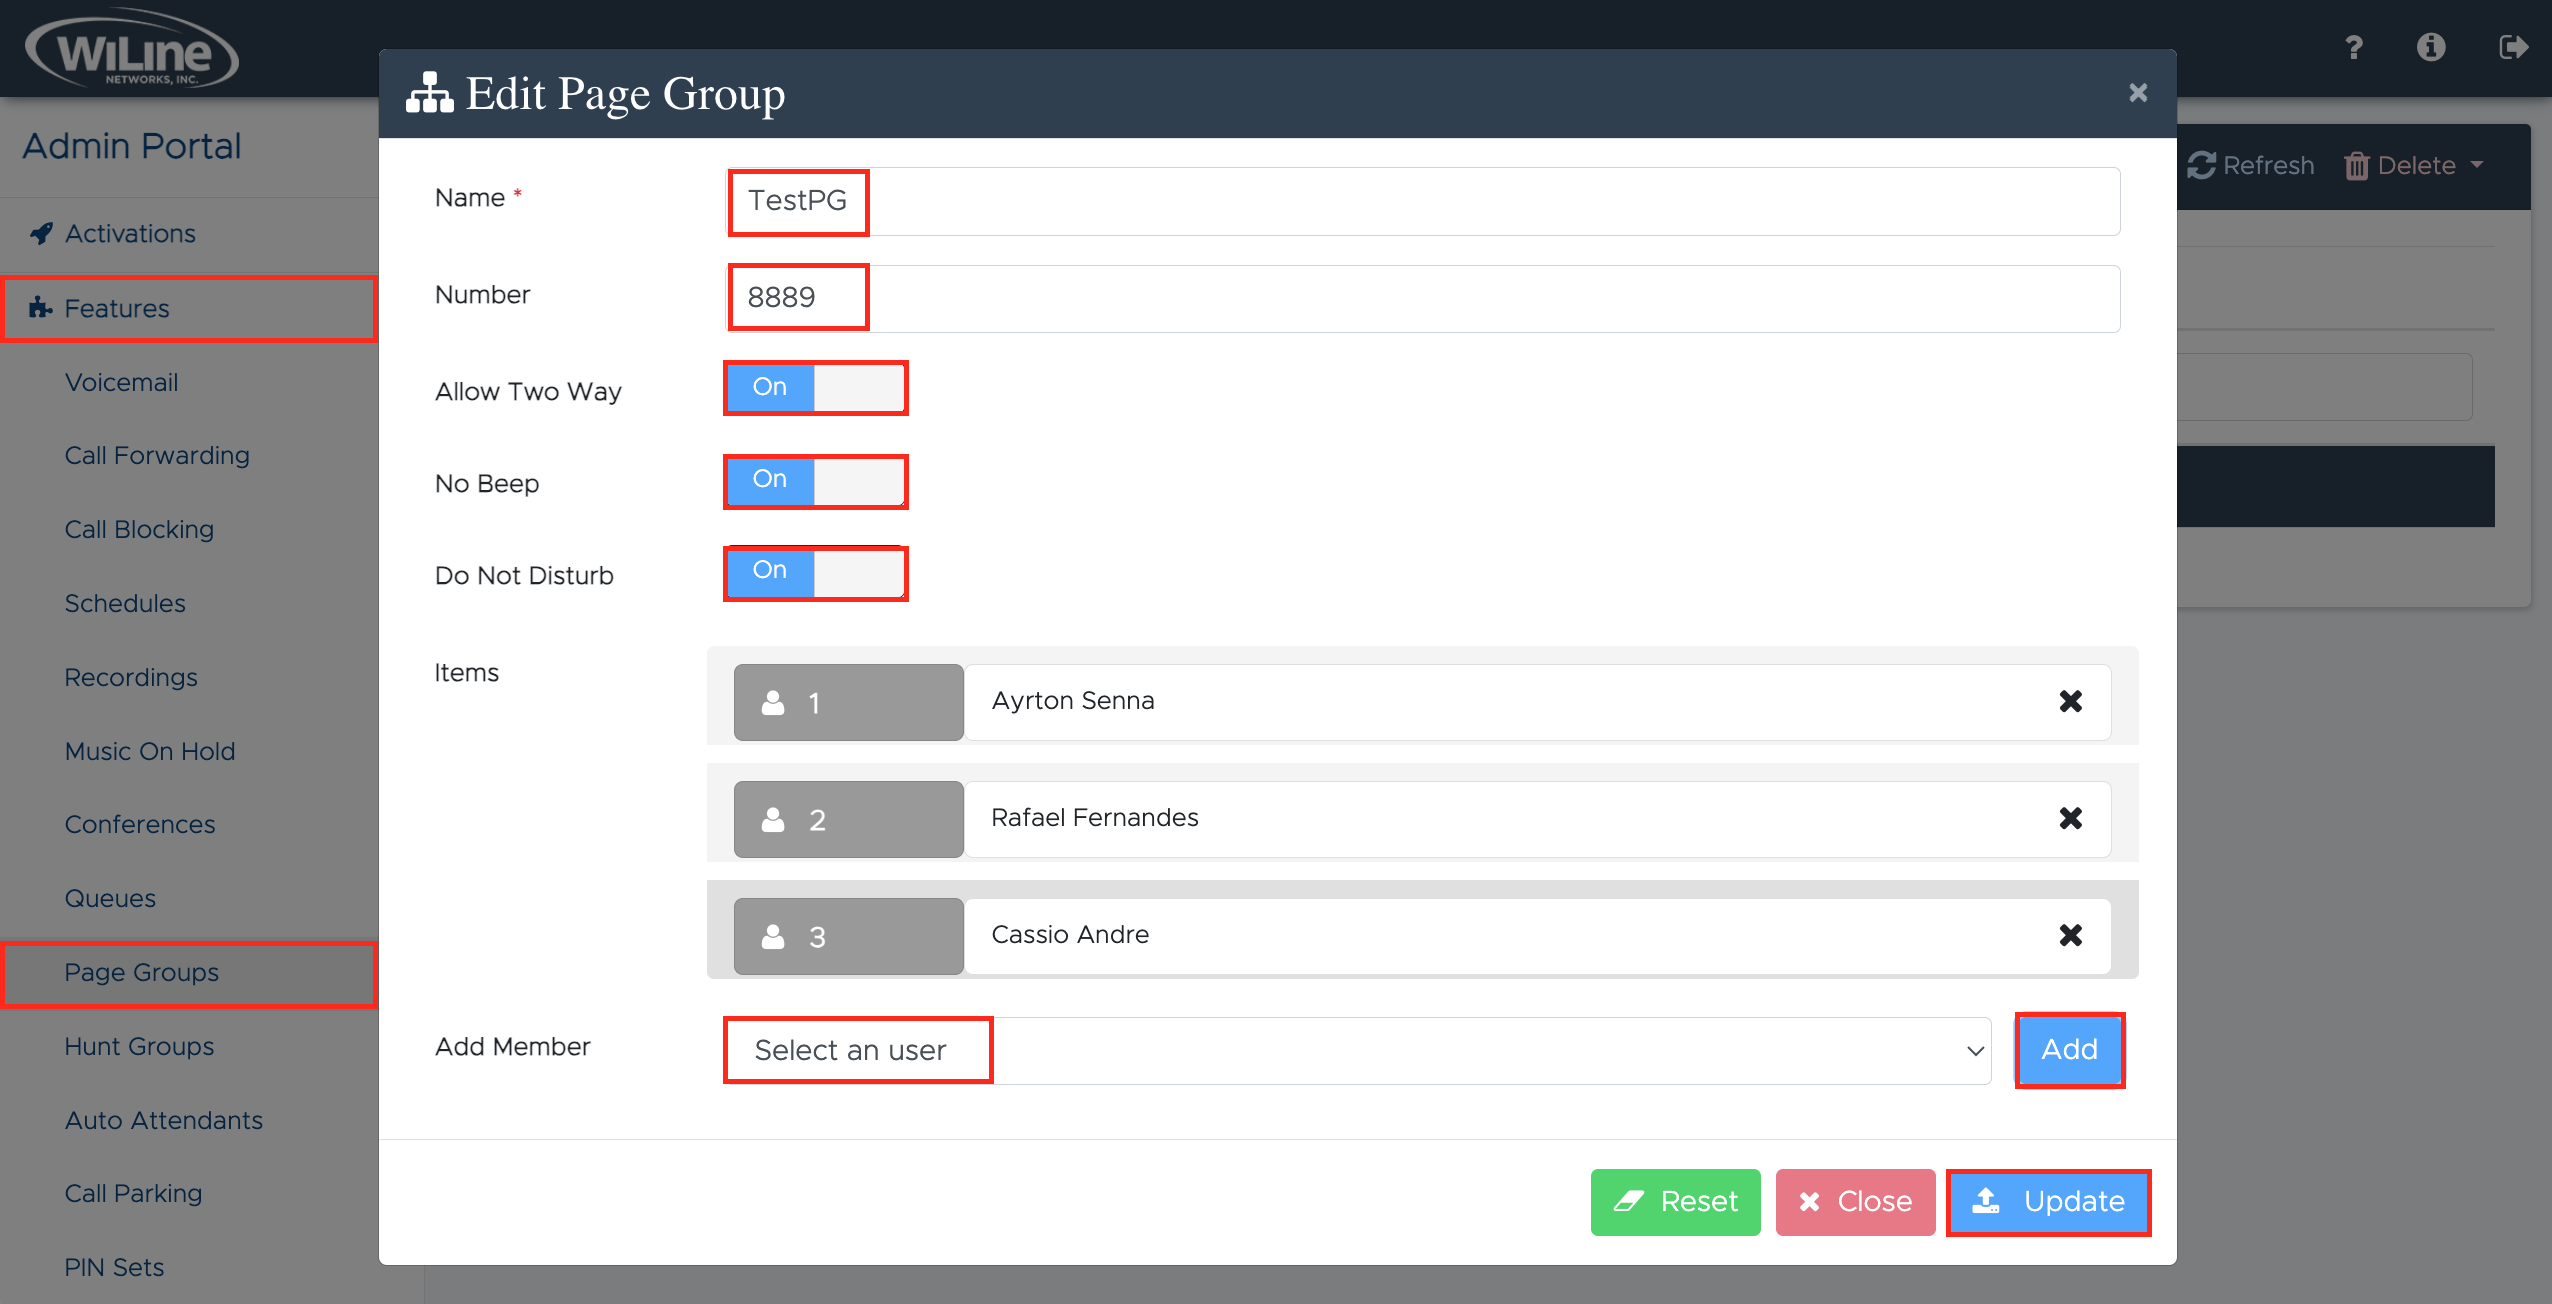
An Edit Page Group pop-up window will open, allowing you to modify the page group details.

-
Similar to the instructions in the Create a New Page Group section, provide the following information:
- Name (required): Assign a name to the page group.
- Number: Enter a unique number for the group.
- Allow Two Way: Toggle two-way communication for the group.
- No Beep: Decide whether to disable beep notifications.
- Do Not Disturb: Optionally set the group to "Do Not Disturb."
-
Under Items, click Add Member to choose users or extensions from the dropdown to include in the page group, and confirm by clicking Add.
When done, click Create. To start over, click Clear. To cancel, click Close.
Delete a Page Group
To delete a page group, follow these steps:
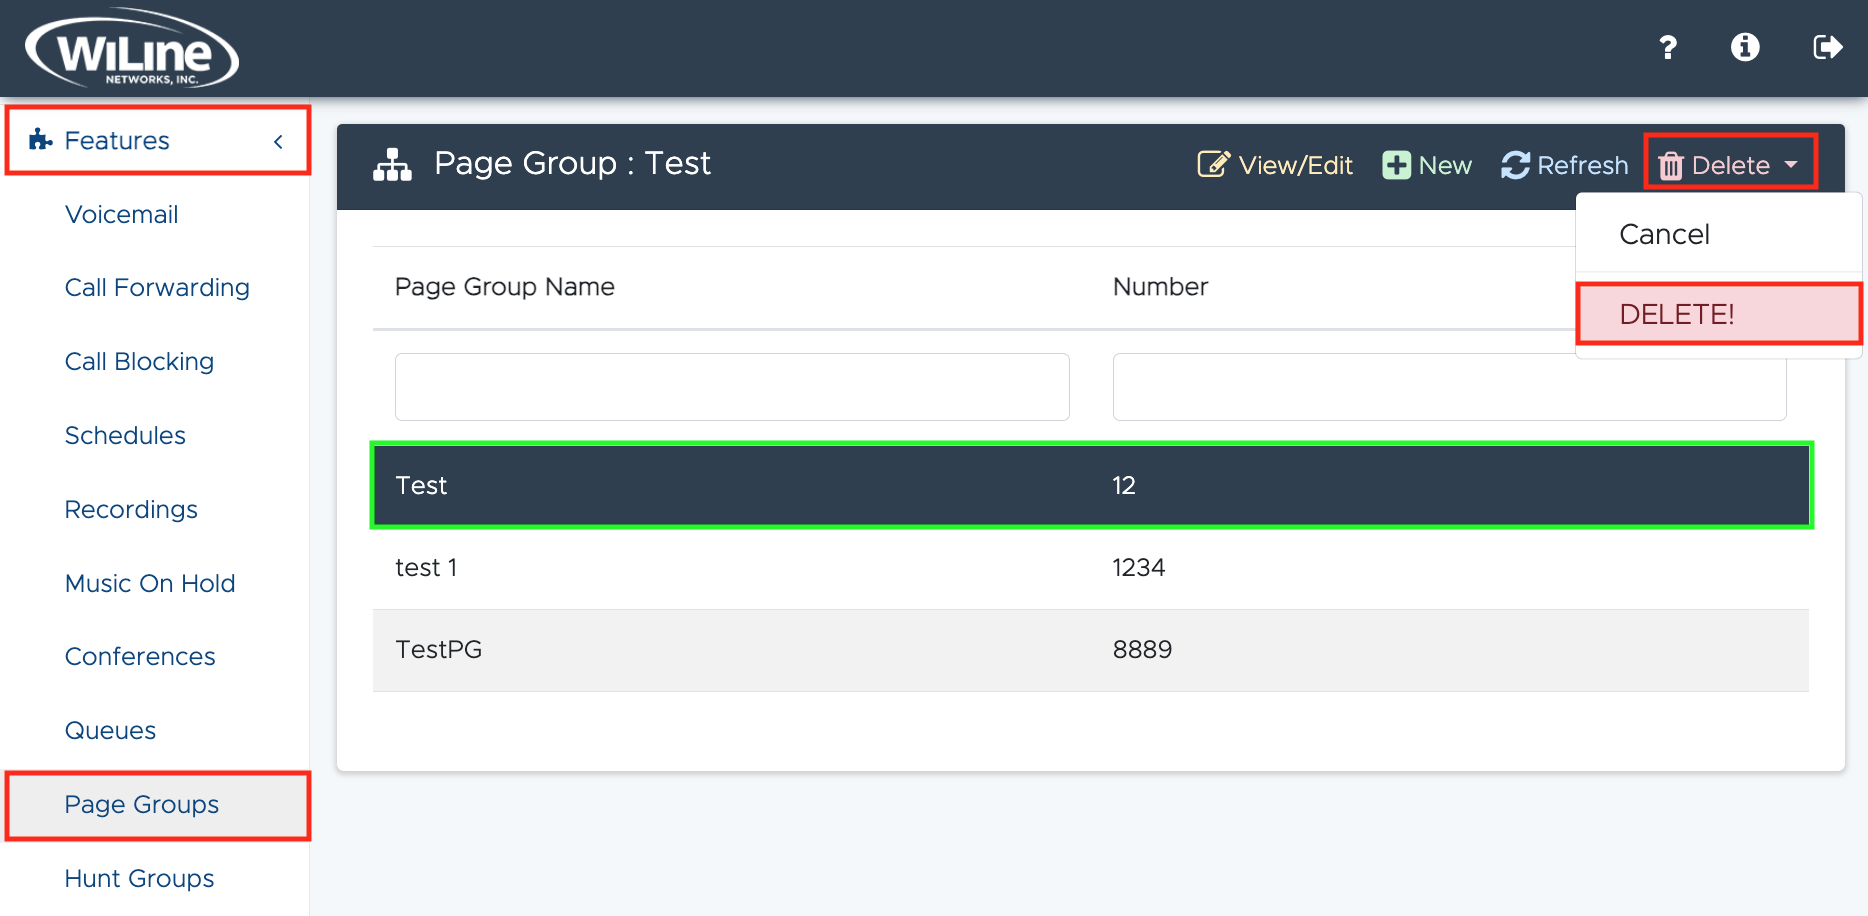
- Select the page group from the list.
- Click the red Delete button in the top blue bar.

A confirmation pop-up will appear. Click Delete to confirm, or Cancel to return to the queue list.
You can only delete page groups that you created.
By managing page groups through the Admin Portal, you can streamline communication by broadcasting messages to multiple users efficiently without necessarily requiring a response. These settings offer enhanced control over announcements, ensuring seamless, organized communication within your teams.