Create Custom Actions
In the Admin Portal, create custom action plans to automate call handling. For instance, route customer service calls to available agents, manage queues during peak times, or forward after-hours calls to designated numbers, ensuring smooth communication.
Create a New Custom Action Plan
Follow these steps to create a new custom action plan:
- Log in to the Admin Portal.
- Navigate to Features > Custom Actions from the left-side menu.
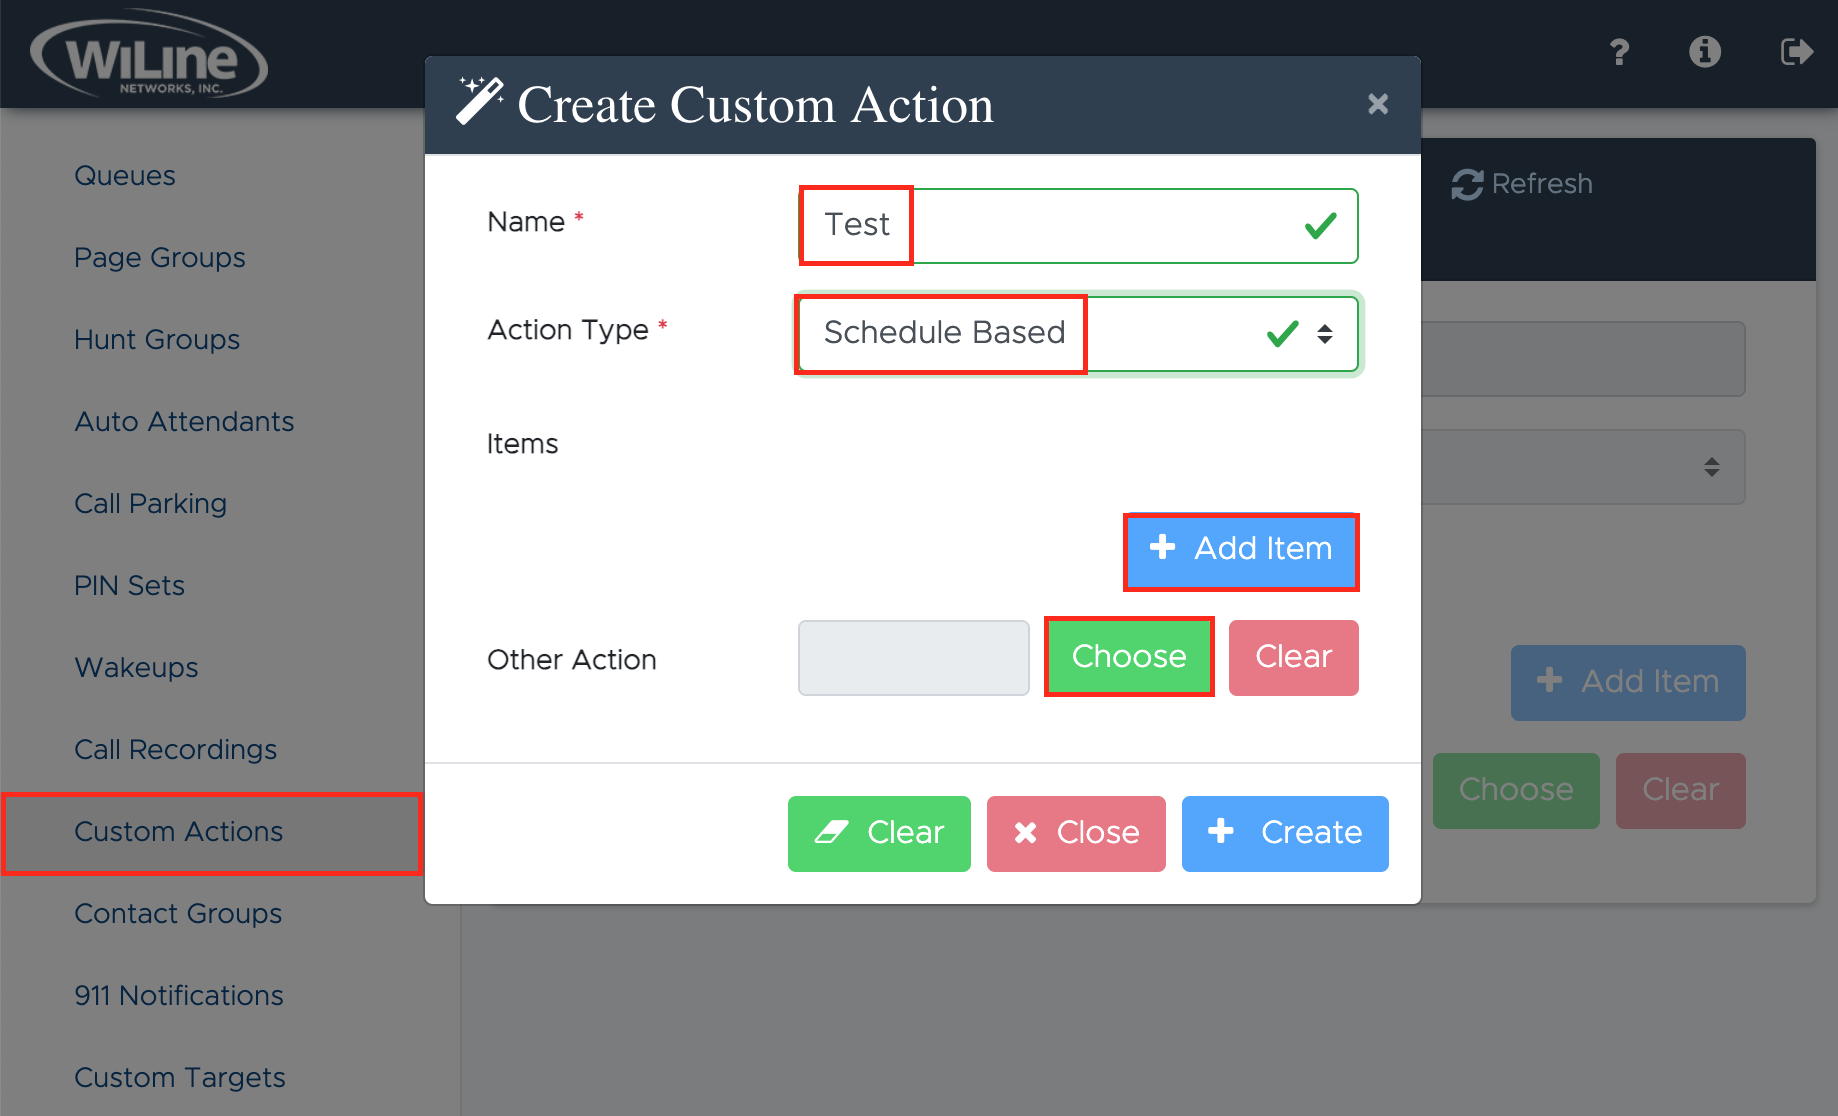
- Click New in the top blue bar to start creating a custom action.
-
Enter the following details for the custom action(s):
- Name (required): Assign a meaningful name to identify the custom action.
- Action Type (required): Select one of the following:
- Sequential: Actions will be executed in a specific order.
- Schedule Based: Actions will be triggered based on a predefined schedule.
-
Under Items, click Add Item to specify actions for your plan. A new pop-up window will allow you to select an Action Type from the dropdown list:
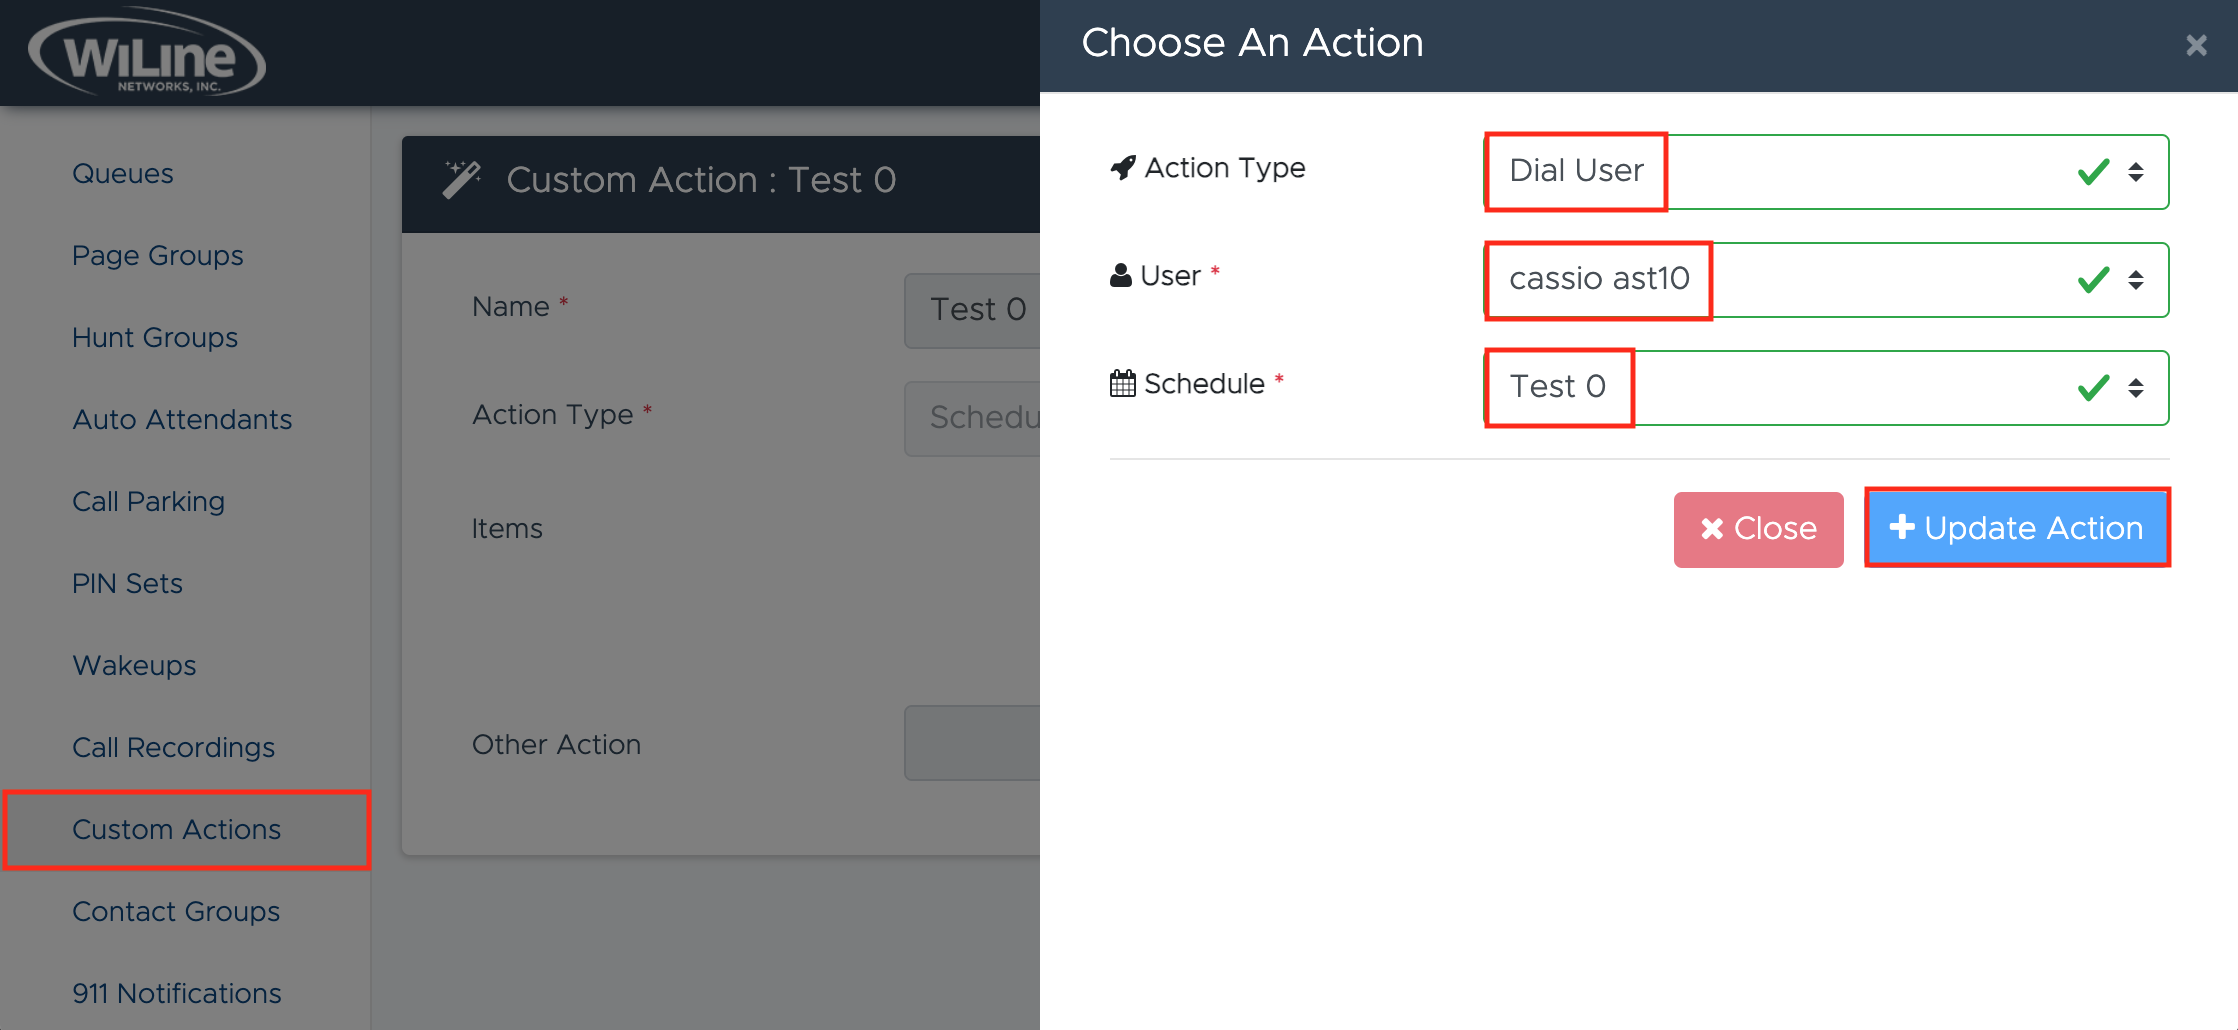
Select from these action options:
- No Action: No action will be triggered.
- Dial Line for Emergency Callback: Connect the call to an emergency line.
- Dial User: Route the call to a specific user.
- Dial Line: Direct the call to a specific line.
- Distinctive Ringtone: Set a unique ringtone for incoming calls.
- Join Conference: Allow the caller to join an existing conference call.
- Enter Queue: Place the caller in a queue for assistance.
- Queue Login/Logout: Manage the agent's availability in the queue.
- Queue Member Pause/Unpause: Temporarily pause or resume an agent's participation in the queue.
- Page Group: Send an announcement to a group of users.
- Hunt Group: Route the call to a group of users in a predefined order.
- Auto Attendant: Direct the caller to an interactive menu (IVR).
- Forward: Forward the call to another number.
- Check Voicemail: Allow the caller to access their voicemail.
- Leave Voicemail: Enable the caller to leave a voicemail.
- Directory: Provide a directory for the caller to navigate.
- New Recording: Start a new audio recording for greetings or messages.
- Update Recording: Modify an existing recording.
- Play Recording: Play a specific audio recording to the caller.
- Fax to Email: Convert an incoming fax and send it to an email address.
- PIN Set: Require a PIN for accessing certain features.
- Custom Action: Execute a previously created custom action.
- Custom Target: Route the call to a custom-defined target.
-
Based on your selection, fill out any additional fields that appear. For example:
- If you select Dial User, choose a specific User from the list.
- If you select Enter Queue, choose the desired Queue.
You may also need to define a Schedule, depending on the selected action:
-
Click Update Action to save the action or Close to cancel.
To add more actions, repeat the steps above until your custom action plan is complete.
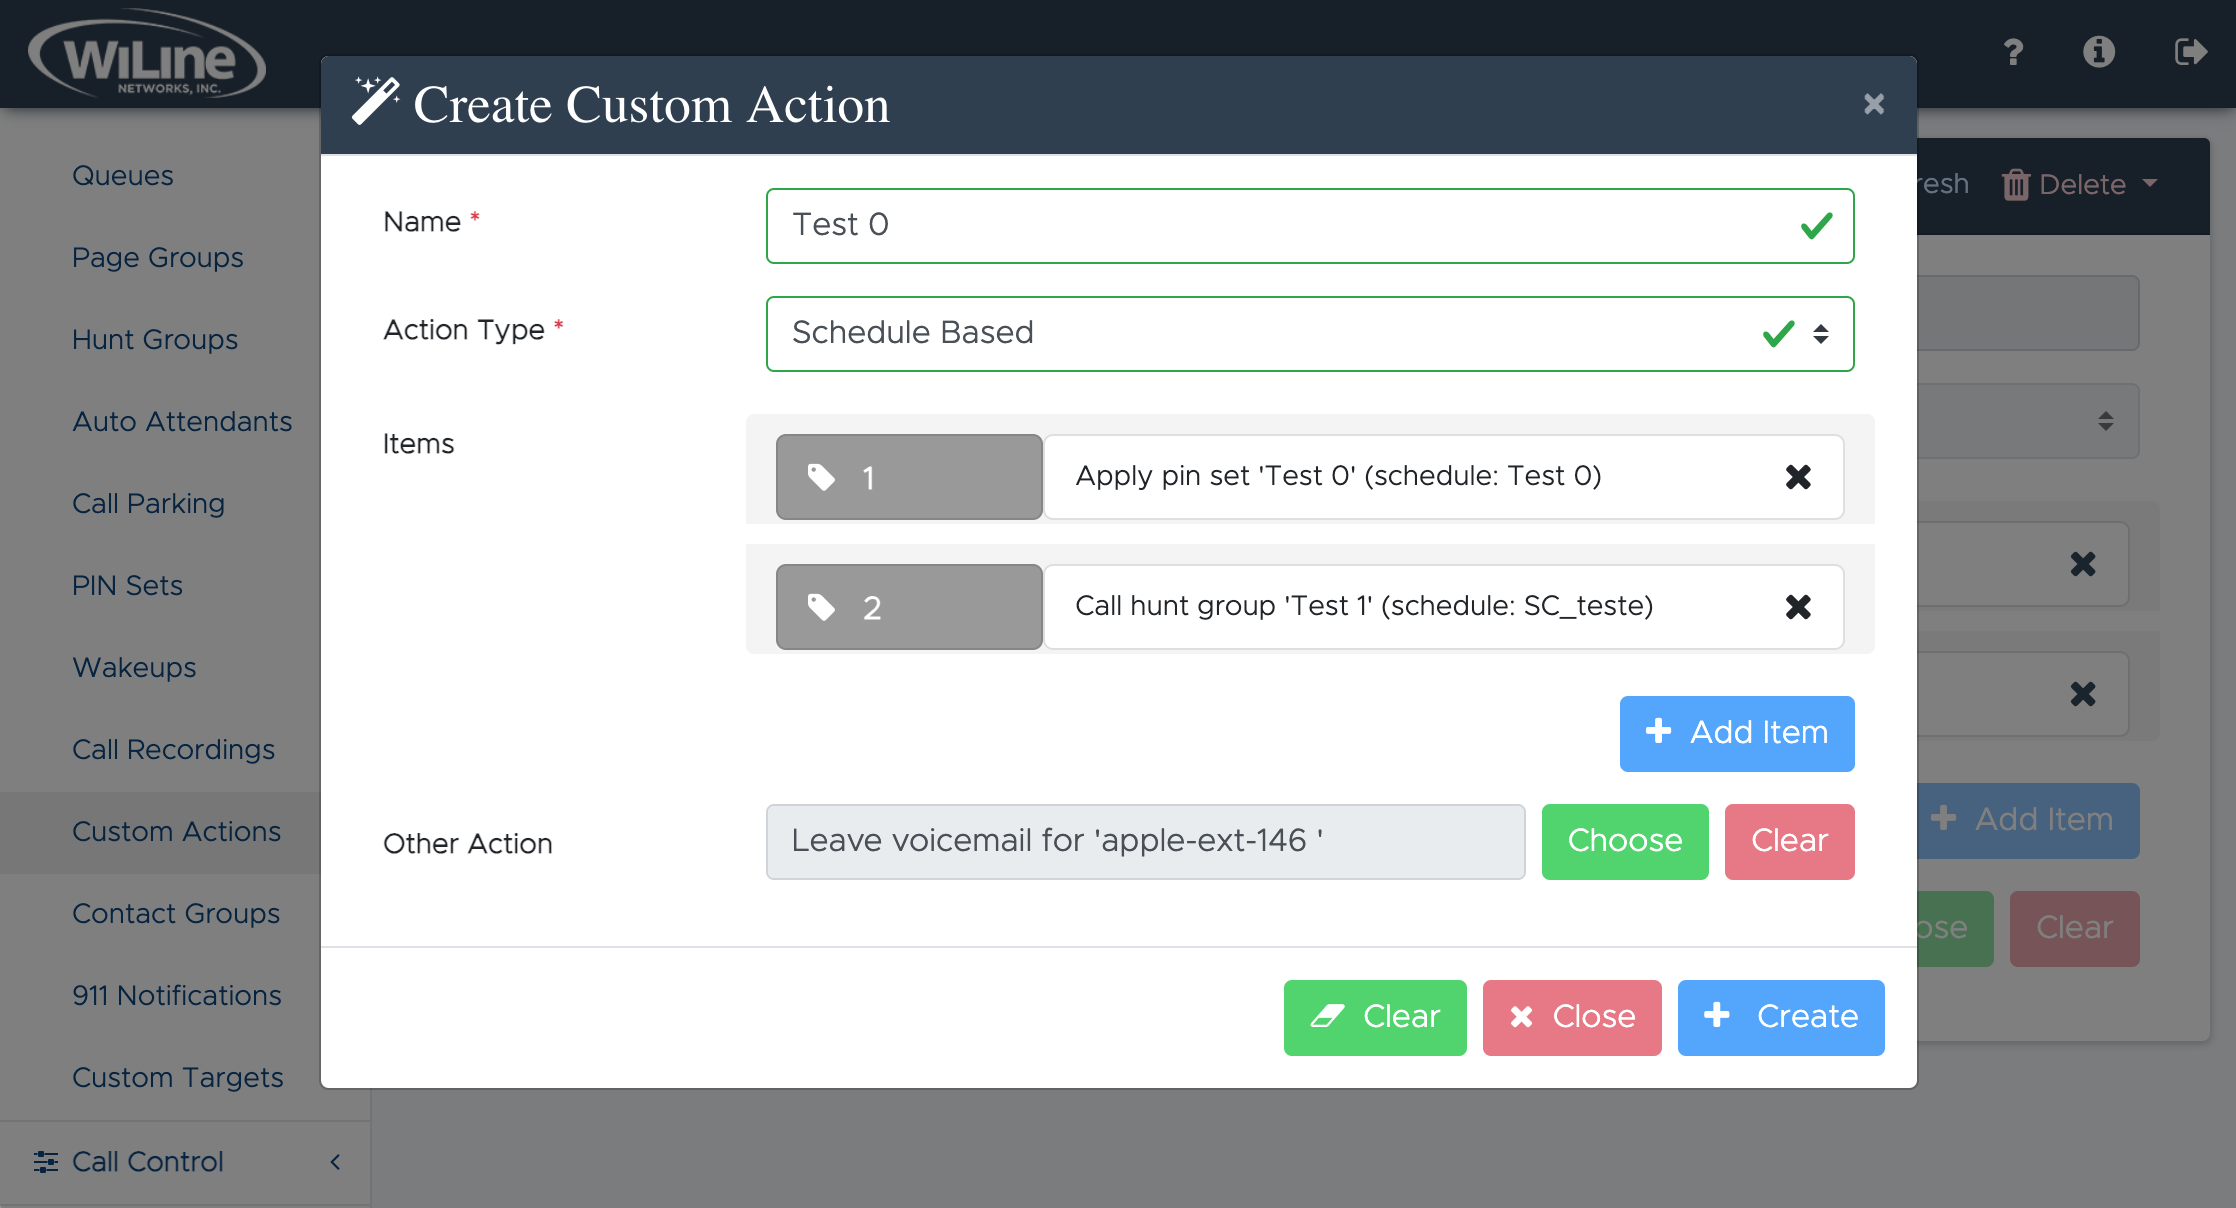
If you selected Schedule Based under Action Type, you will also need to define an Other Action by following similar steps.
- When all actions are configured, click Create to finalize your plan. Click Clear to reset and start fresh or Close to exit.
Edit an Existing Custom Action Plan
To edit an existing plan, follow these steps:
- Log in to the Admin Portal.
- Navigate to Features > Custom Actions from the left-side menu.
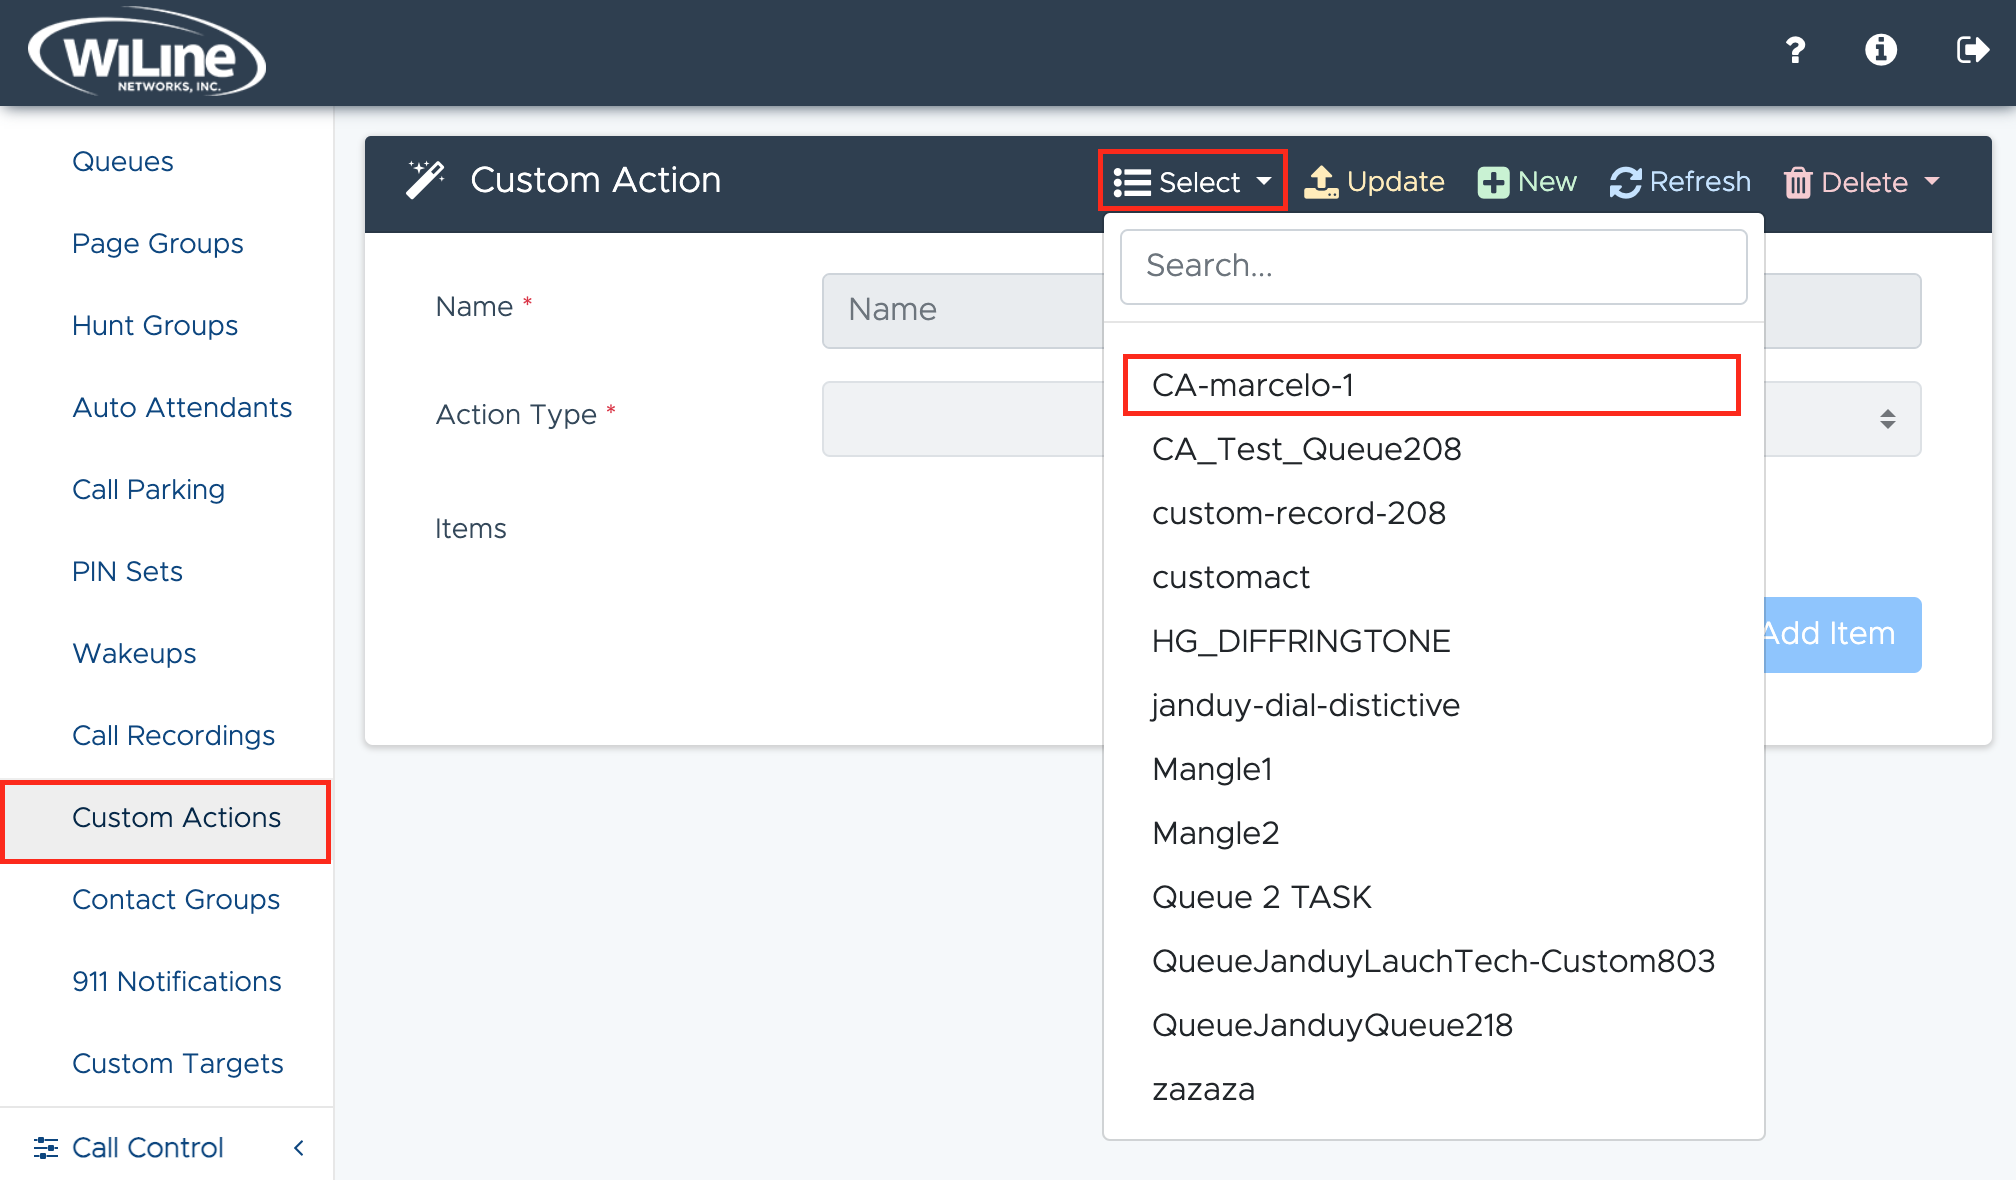
- Click Select in the top bar to choose the action you wish to edit.
-
Similar to the instructions in the Create a New Custom Action Plan section, update the fields as needed, such as:
- Name (required)
- Action Type (required): Sequential or Schedule Based.
- Click X to delete actions or Add Item to define new ones.
-
Complete any additional fields based on the selected action type.
-
Click Update Action to save or Close to cancel.
If you chose Schedule Based, remember to define an additional Other Action.
- Once all finished, click Create to save. To start over, click Clear. To cancel, click Close.
Delete a Custom Action Plan
To delete a custom action plan, follow these steps:
- Log in to the Admin Portal.
- Navigate to Features > Custom Actions from the left-side menu.
- Click Select in the top blue bar and choose a custom action plan to delete.
- Click the red Delete button in the top blue bar.
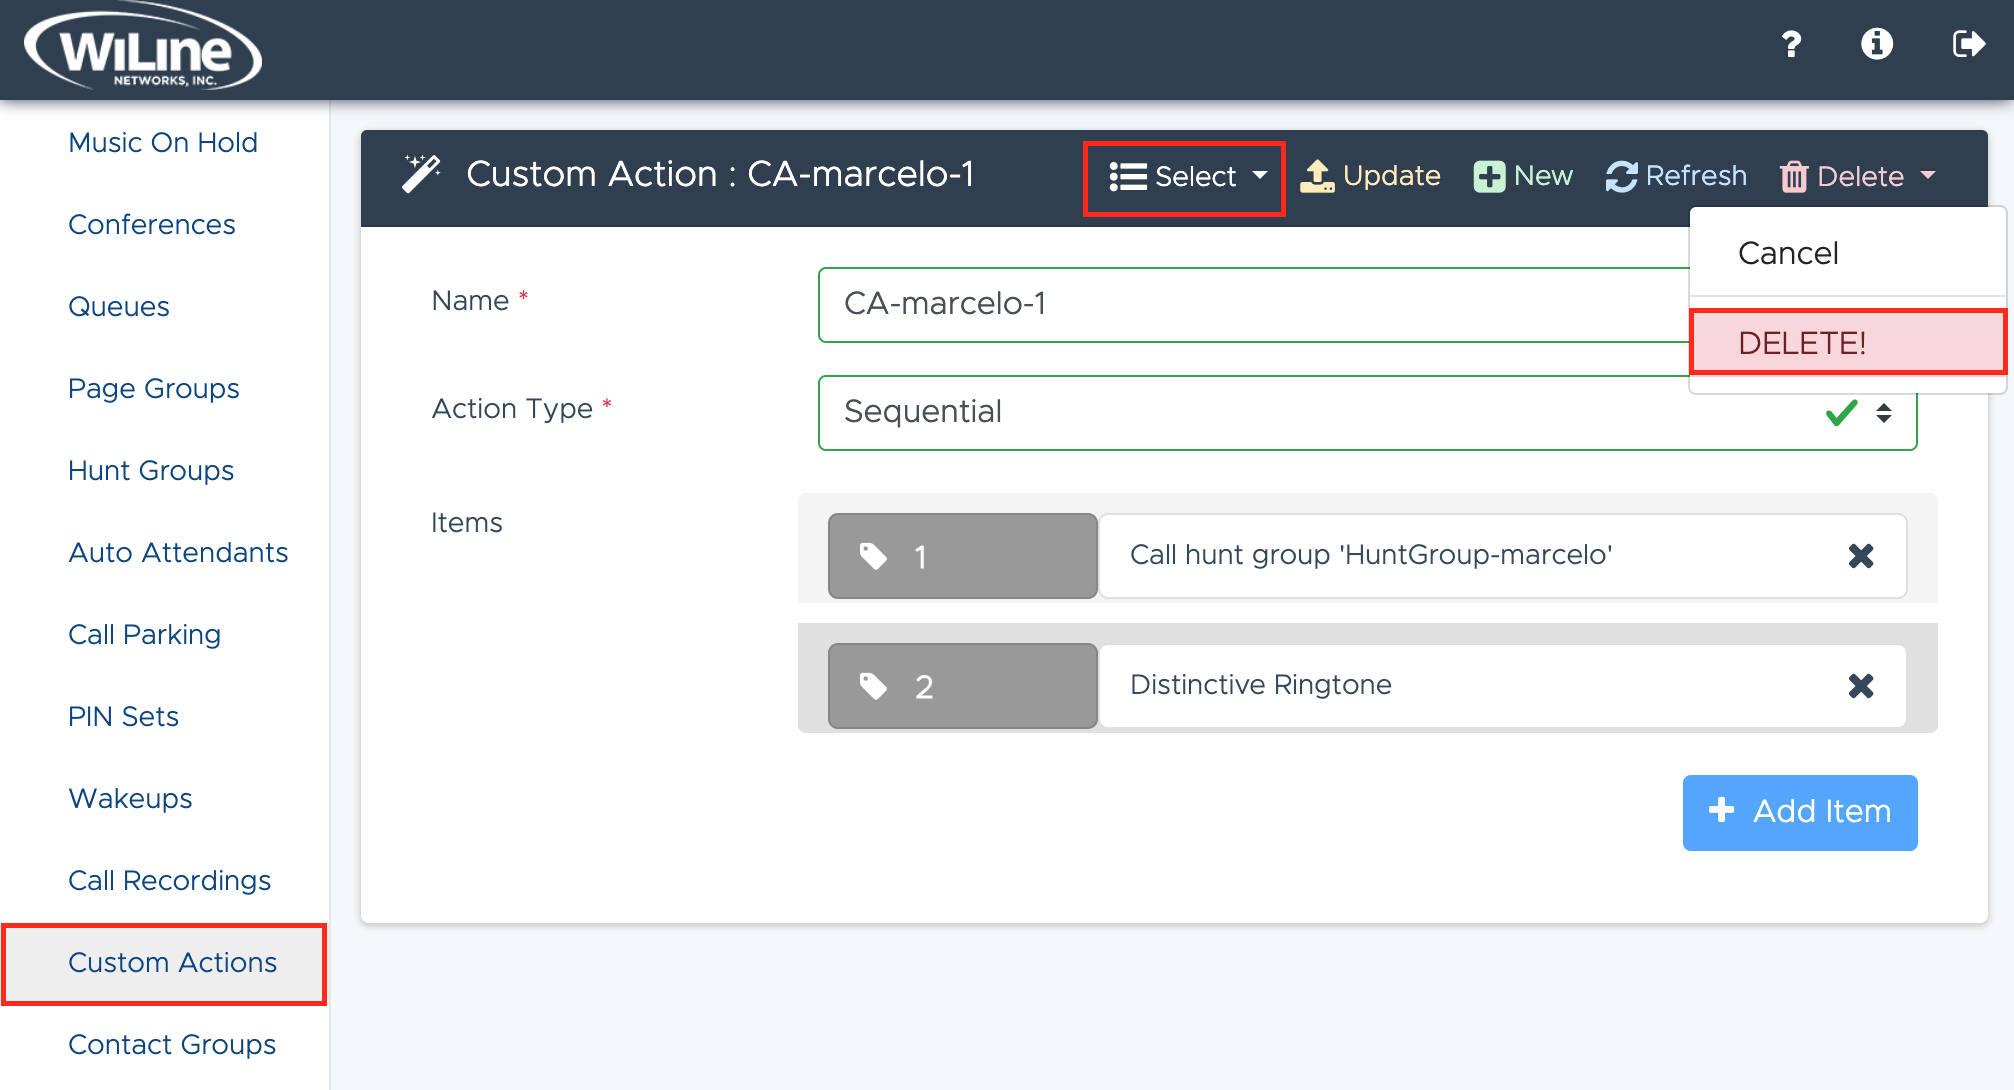
A confirmation pop-up will appear. Click Delete to confirm, or Cancel if you changed your mind.
You can only delete custom action plans that you created.
Leveraging custom actions through the Admin Portal allows administrators to streamline call management, fostering a more responsive and efficient communication environment.