Set Up Hunt Groups
In the Admin Portal, create hunt groups to distribute incoming calls to multiple phone lines or extensions based on predefined rules. For example, direct customer service calls to a hunt group so that the first available agent can answer promptly.
Create a New Hunt Group
-
Log in to the Admin Portal.
-
Navigate to Features > Hunt Groups from the left-side menu.
-
Click New in the top blue bar to create a new hunt group.
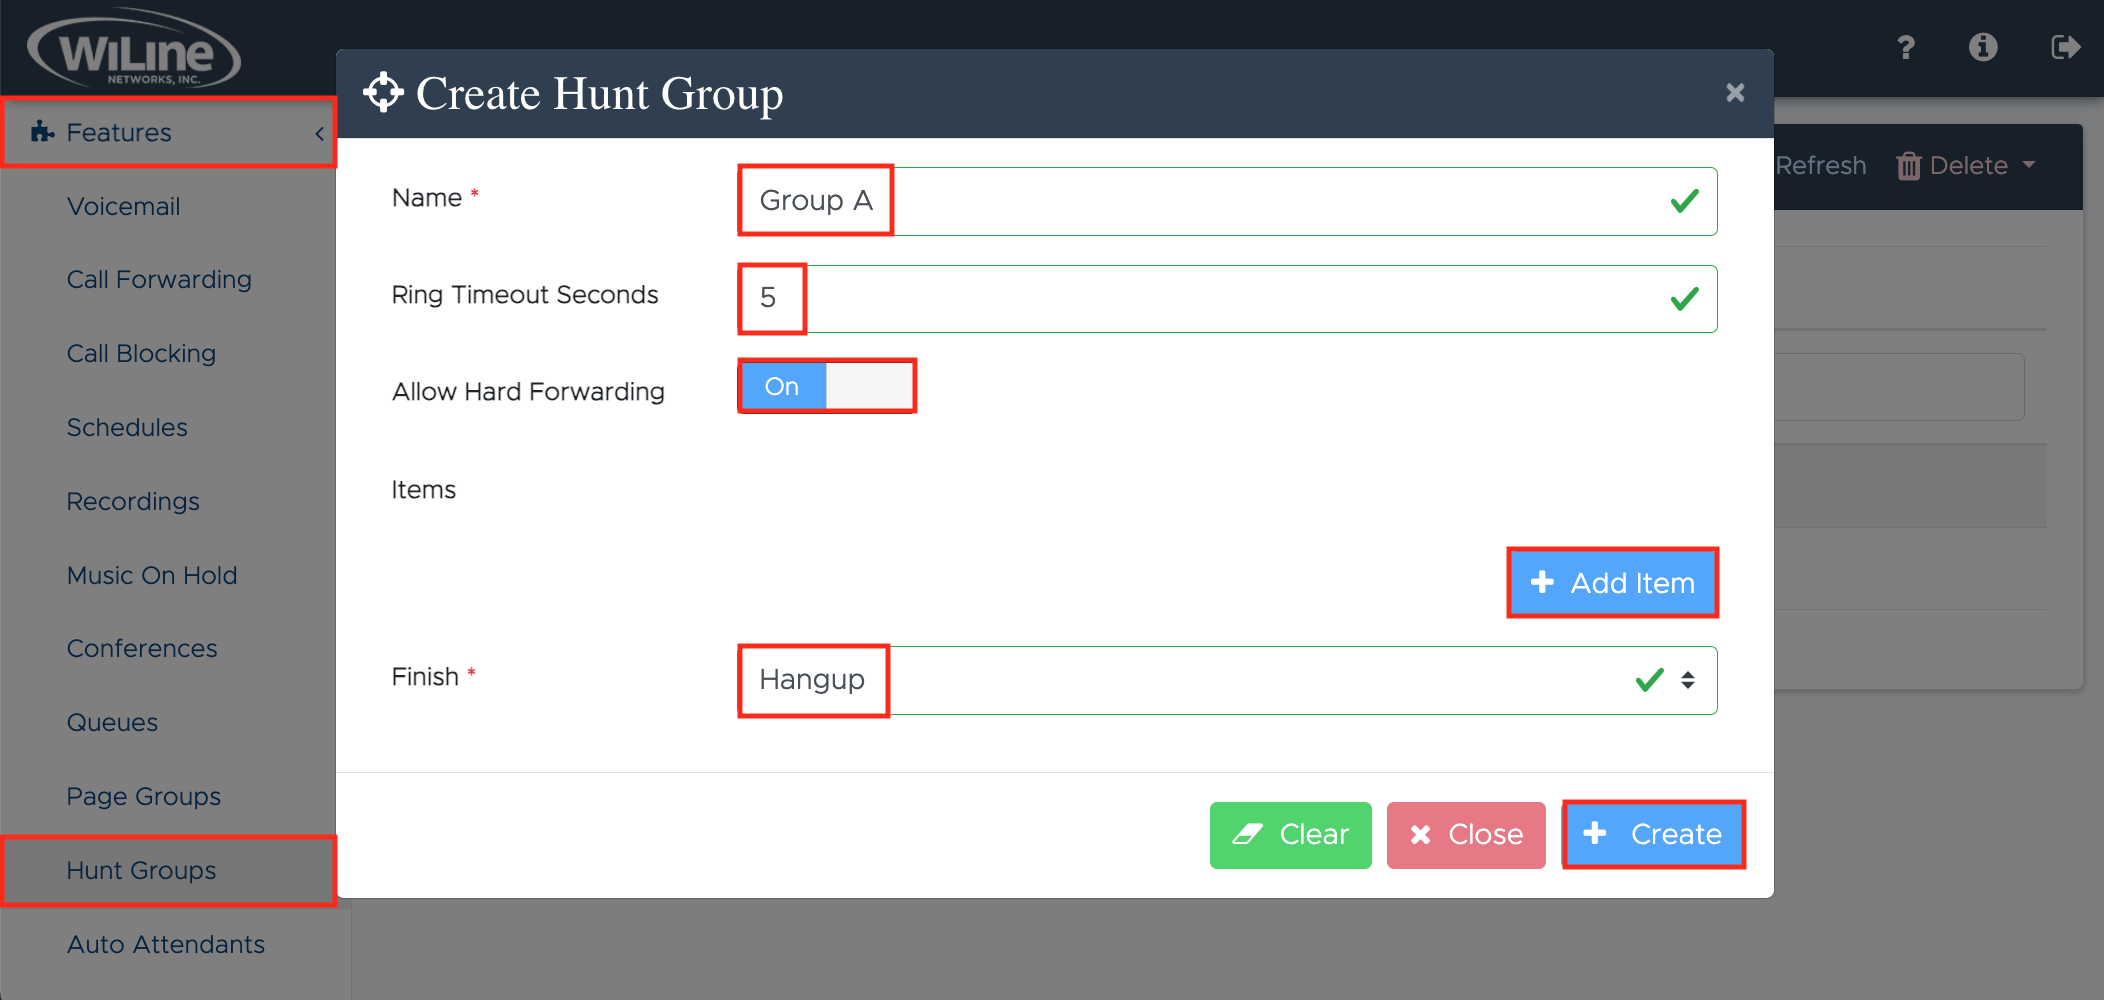
Figure 1. Creating a new hunt group. -
Enter the following details for the hunt group:
- Name (required): Assign a name to the hunt group.
- Ring Timeout (Seconds): Specify how long (in seconds) the system should wait before moving to the next member if the call is not answered.
- Allow Hard Forwarding: Enable this option to allow calls to be forwarded to another number.
-
To add a hunt group item, click + Add Item under Items. A pop-up window will appear, prompting you for details.
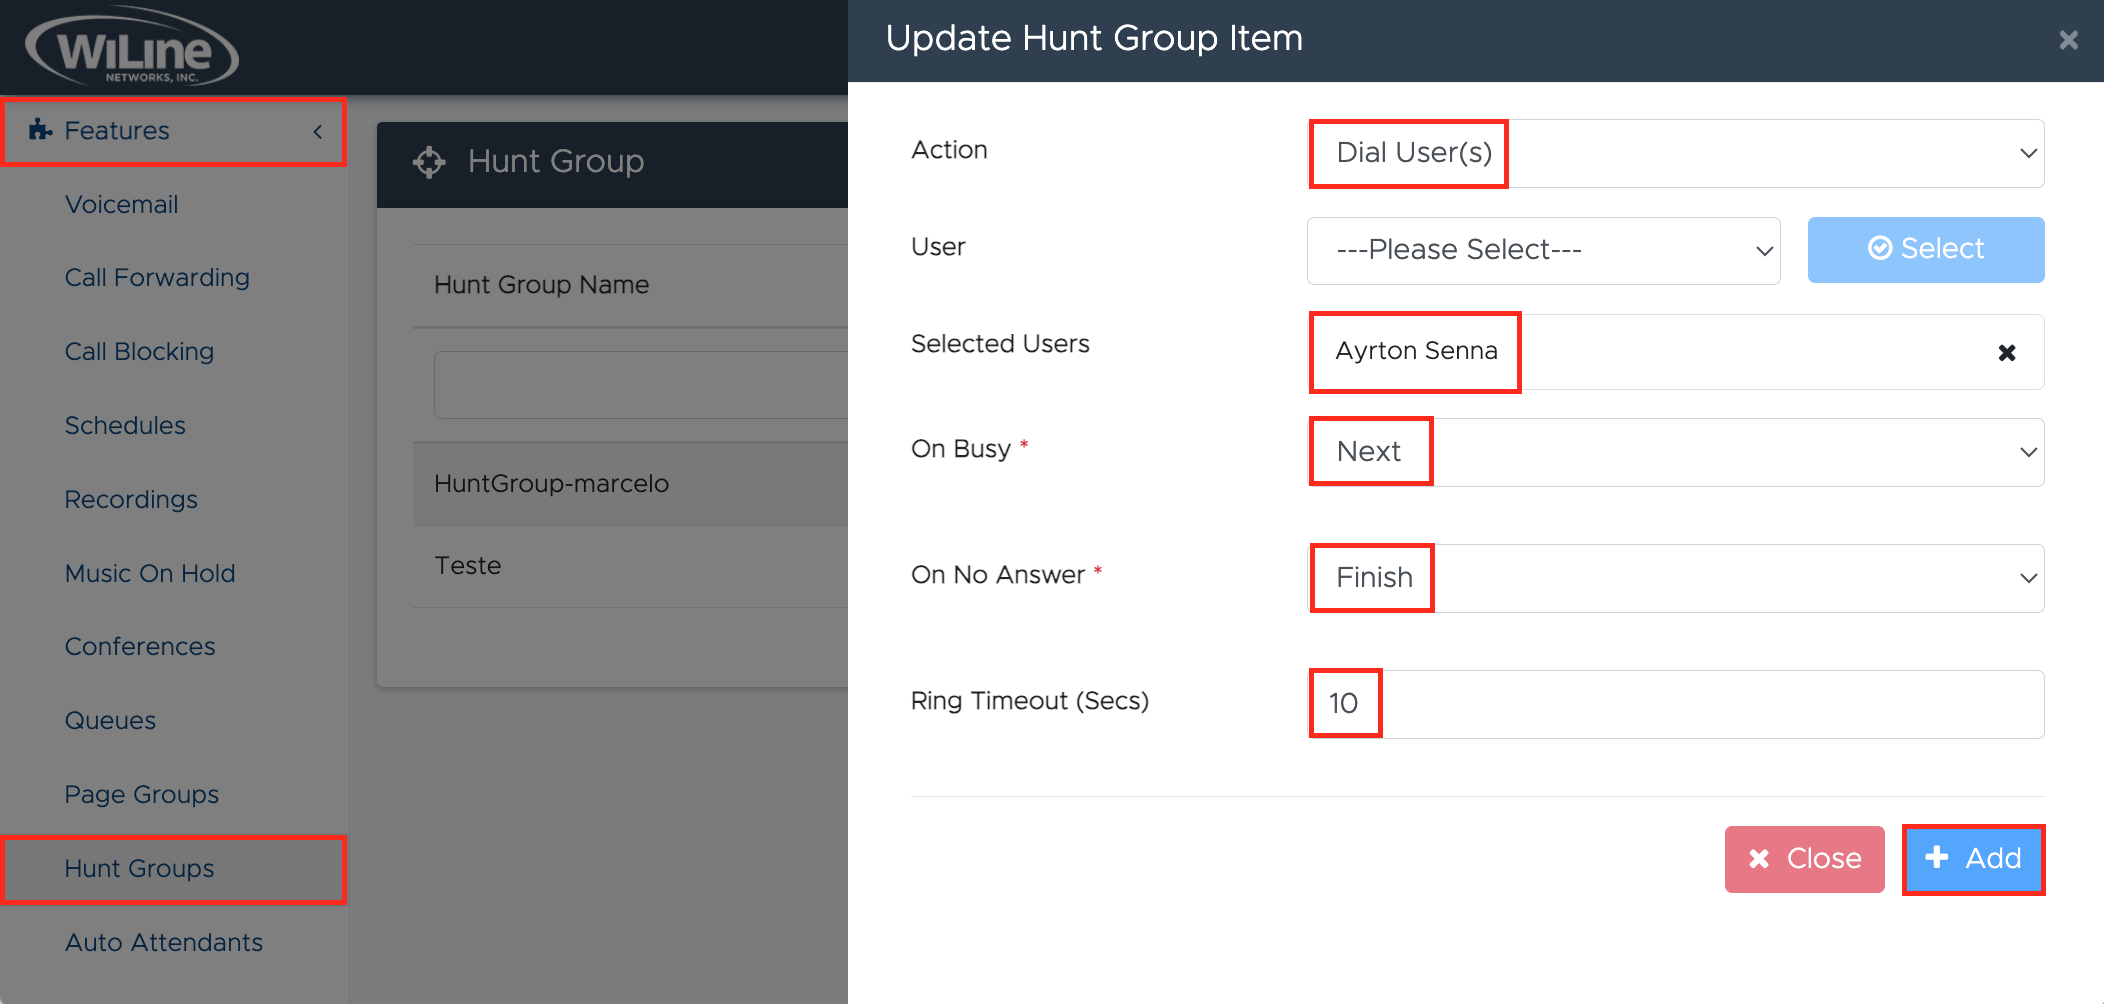
Figure 2. Adding a hunt group item. -
Select an Action: Choose either Dial User(s) or Dial Line(s) from the dropdown menu.
-
Choose User(s) or Line(s): Select the desired user(s) or line(s) from the corresponding dropdown list and click Select.
-
On Busy (required): Specify the action if the hunt group is busy. Options include:
Next: Proceed to the next step without finalizing.Finish: Complete the current task and save the settings for the hunt group item.
-
On No Answer (required): Specify the action if there is no answer from the hunt group. Options are:
Next: Proceed to the next step without finalizing.Finish: Complete the current task and save the settings for the hunt group item.
-
Ring Timeout (Secs): Reiterate the duration (in seconds) before the system moves to the next member if the call is not answered.
-
-
Click Add to save the updates. If you wish to cancel, click Close.
You will be redirected to the Create a New Hunt Group pop-up.
-
Lastly, set up a Finish action:
- Hangup: End the call.
- Busy: Mark the line as busy.
- Voicemail: Forward the call to voicemail (choose from the Finish Voicemail dropdown).
- Auto Attendant Route the call to an auto-attendant (choose from the Finish Auto Attendant dropdown).
When you’re done configuring the hunt group, click Create. To start over, click Clear. To cancel, click Close.
View Your Hunt Groups List
To view a list of your hunt groups:
-
Log in to the Admin Portal.
-
Go to Features > Hunt Groups from the left-side menu.
A list of all your created hunt groups will appear on your dashboard:
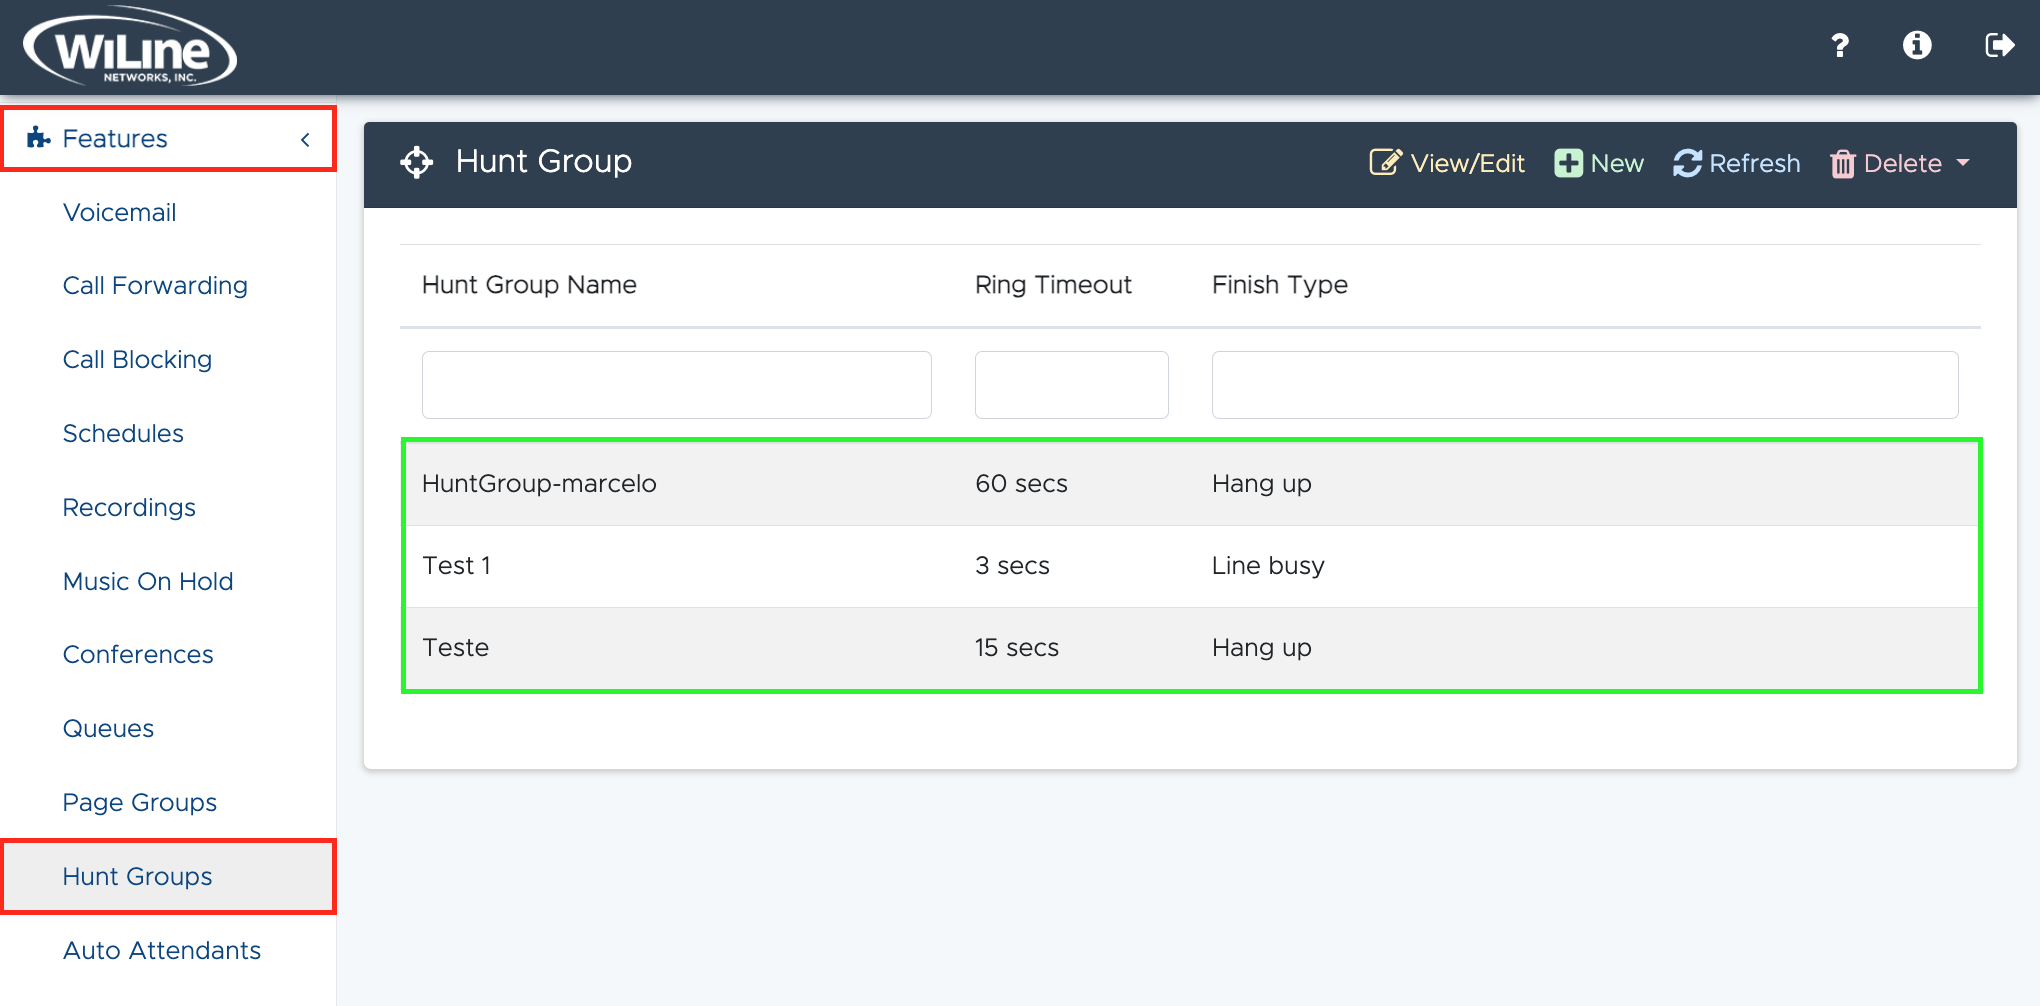
Figure 3. Viewing your hunt groups list. -
To reorder or filter the results:
- Click the column headers Page Group Name, Hunt Group Name, Ring Timeout, or Finish Type to organize the results in ascending or descending order.
- To filter or search for specific items, type in the fields under the corresponding headers.
Edit a Hunt Group
To edit a hunt group:
-
Double-click an item from the list, or
-
Select a hunt group and click the yellow View/Edit button in the top blue bar.
An Edit Hunt Group pop-up window will open, allowing you to modify the hunt group details.
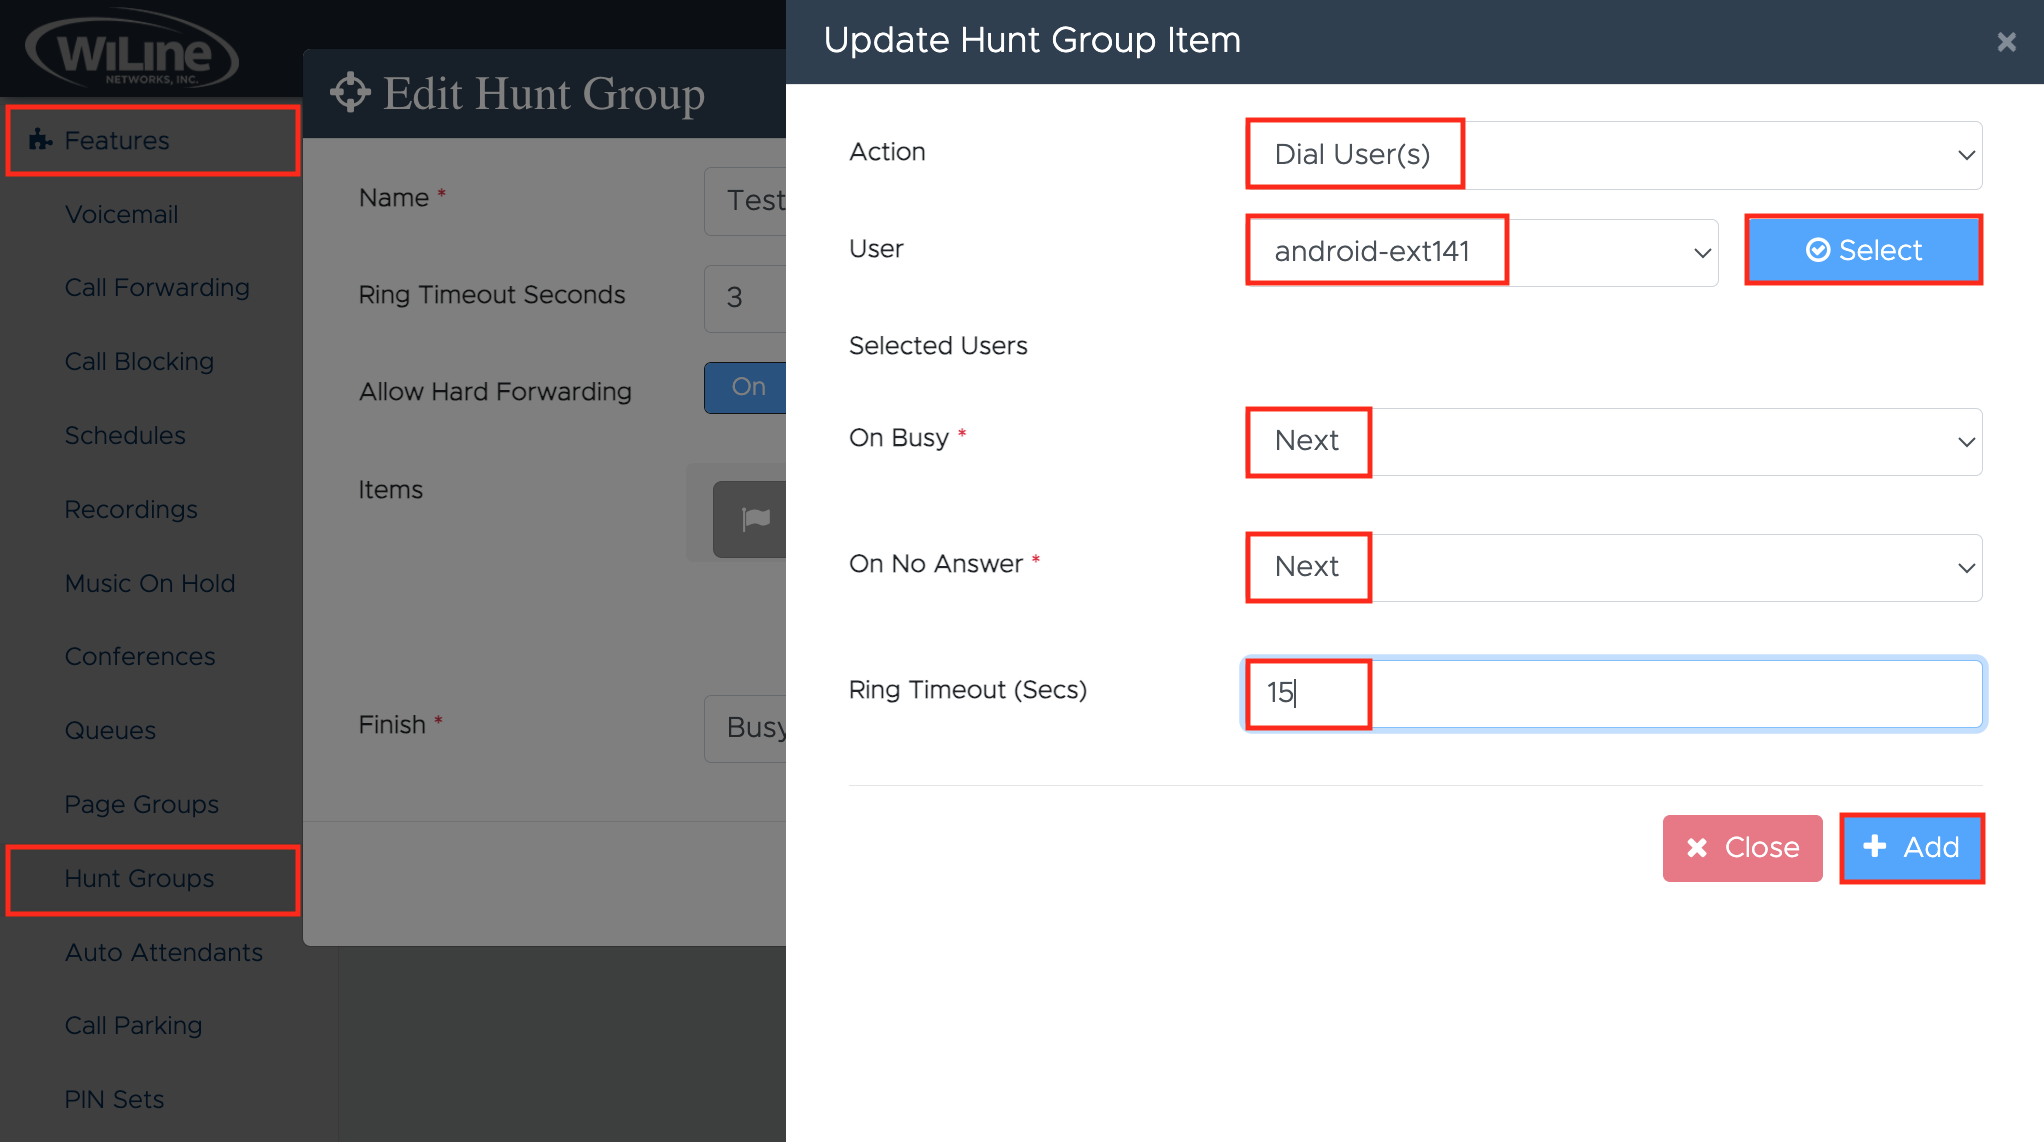
Figure 3. Editing a hunt group. -
Follow these steps, similar to the instructions in the Create a New Hunt Group section, to update the hunt group details:
-
Name (required): Assign a name to the hunt group.
-
Ring Timeout (Seconds): Enter the timeout duration before moving to the next group member.
-
Allow Hard Forwarding: Enable or disable the option for calls to be forwarded to another number.
-
Items: Update the hunt group items. You can add, modify, or disable items.
- Action: Choose an action like Dial User(s) or Dial Line(s).
- On Busy (required): Specify the action if the group is busy.
- On No Answer (required): Specify the action if no one answers.
- Ring Timeout (Secs): Set the duration before moving to the next member.
-
Click Add to save the updates. If you wish to cancel, click Close.
-
-
Configure the Finish action:
- Hangup: End the call.
- Busy: Mark the line as busy.
- Voicemail: Send the call to voicemail (choose from the Finish Voicemail dropdown).
- Auto Attendant: Route the call to an auto-attendant (choose from the Finish Auto Attendant dropdown).
When you’re done configuring the hunt group, click Create. To start over, click Clear. To cancel, click Close.
Delete a Hunt Group
To delete a hunt group, follow these steps:
-
Log in to the Admin Portal.
-
Navigate to Features > Hunt Groups from the left-side menu.
-
Select the page group from the list.
-
Click the red Delete button in the top blue bar.
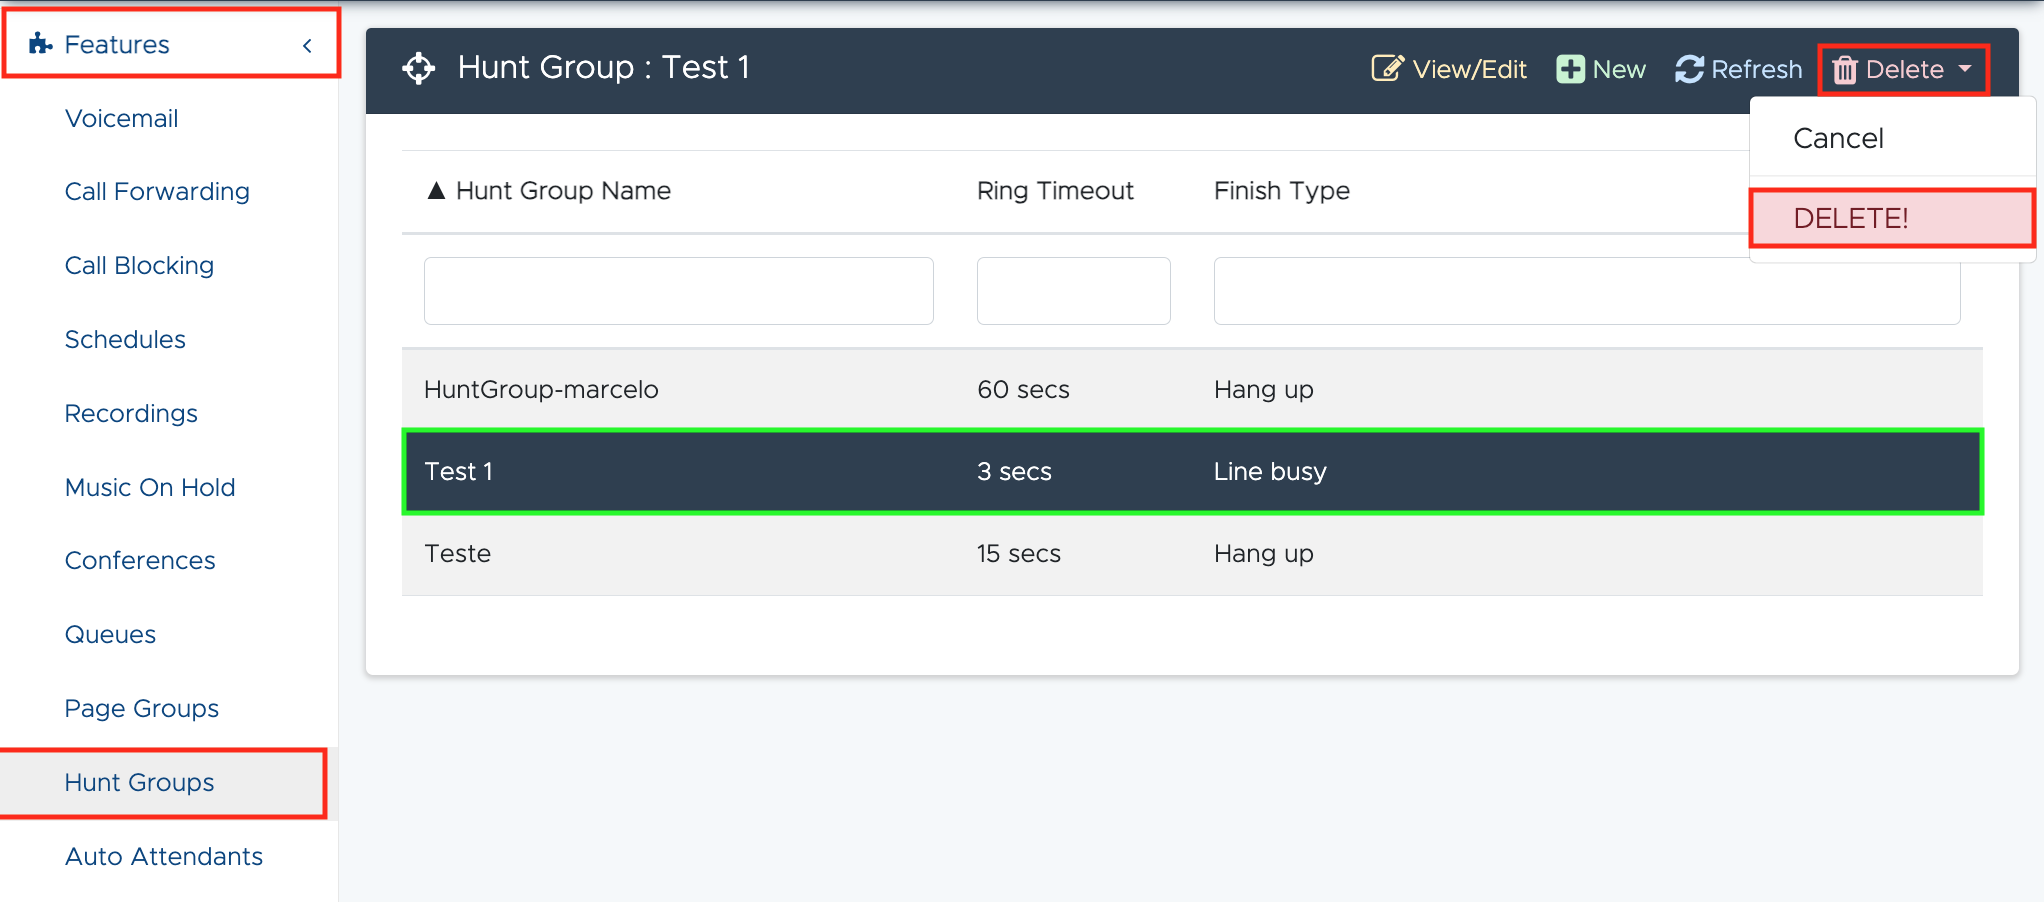
Figure 5. Deleting a hunt group. A confirmation pop-up will appear. Click Delete to confirm, or Cancel if you changed your mind.
You can only delete hunt groups that you created.
By setting up hunt groups through the Admin Portal, you can efficiently manage call distribution. Customizing settings such as timeouts, forwarding options, and finish actions will enhance service quality and improve call handling.