Manage Contact Groups
In the Admin Portal, create and manage contact groups to streamline communication and improve call handling. For example, group all sales representatives' numbers to route incoming calls to the next available agent, ensuring efficient call management.
Create a New Contact Group
Follow these steps to create a new contact group:
- Log in to the Admin Portal.
- Navigate to Features > Contact Groups from the left-side menu.
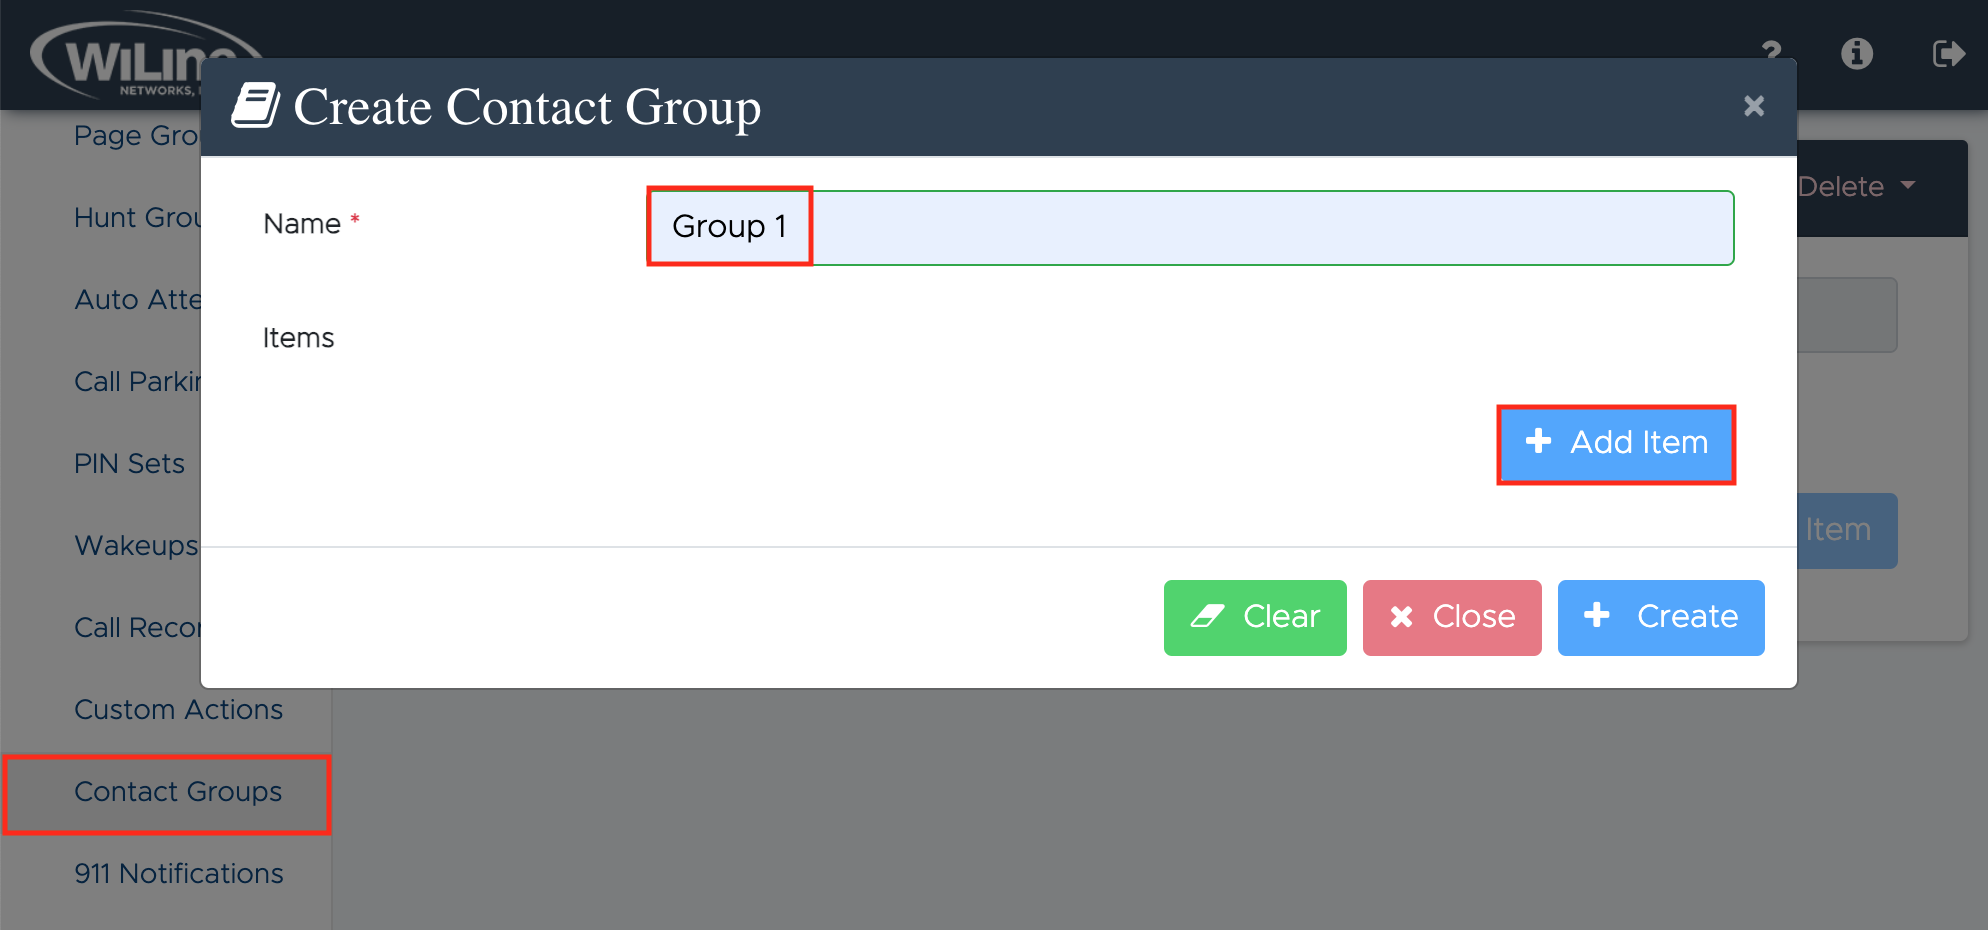
- Click New in the top blue bar to create a contact group.
-
Enter a Name to identify the contact group (required).
-
Under Items, click Add Item to add contacts to the group. A new Update Contact pop-up window will allow you to enter contact details:
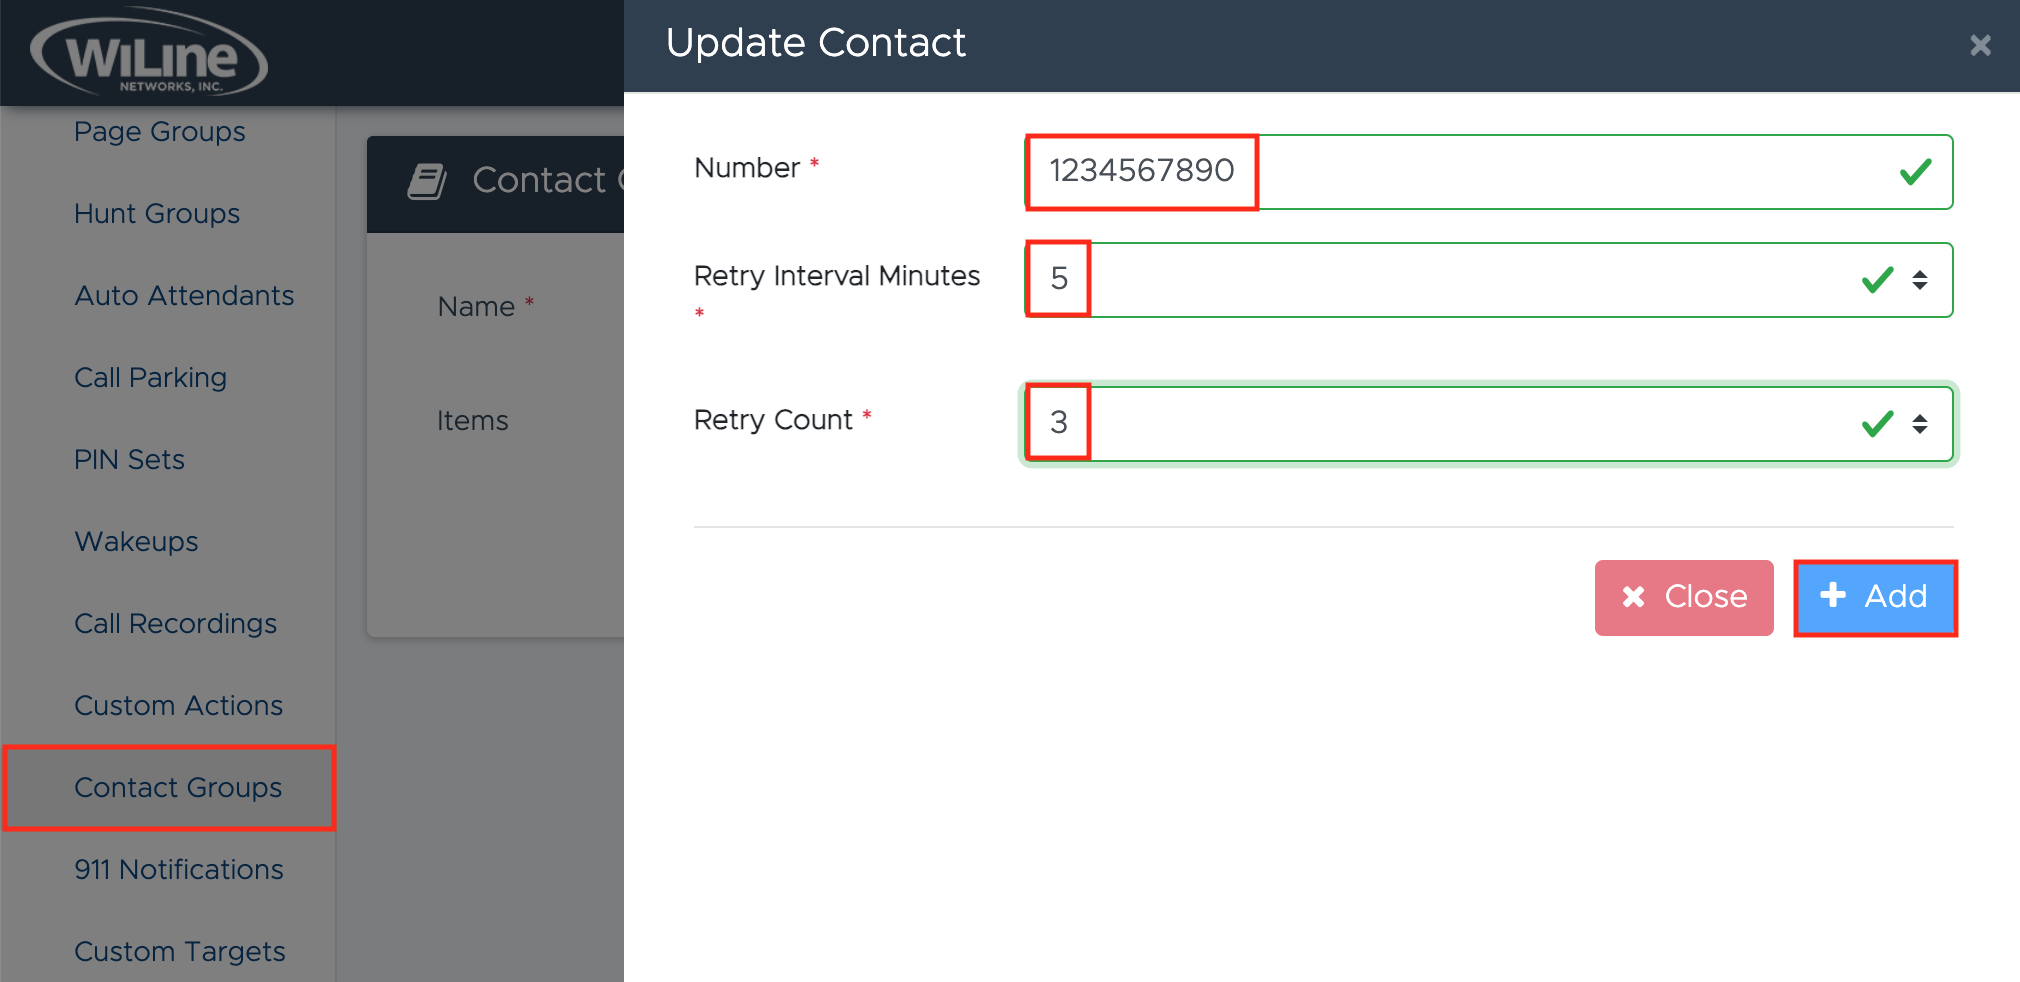
- Number (required): Enter the contact's phone number.
- Retry Interval Minutes (required): Specify the interval before retrying a call.
- Retry Count (required): Set the number of retry attempts.
- Click Add to add the contact or Close to cancel.
Repeat the process to add all the contacts you need:
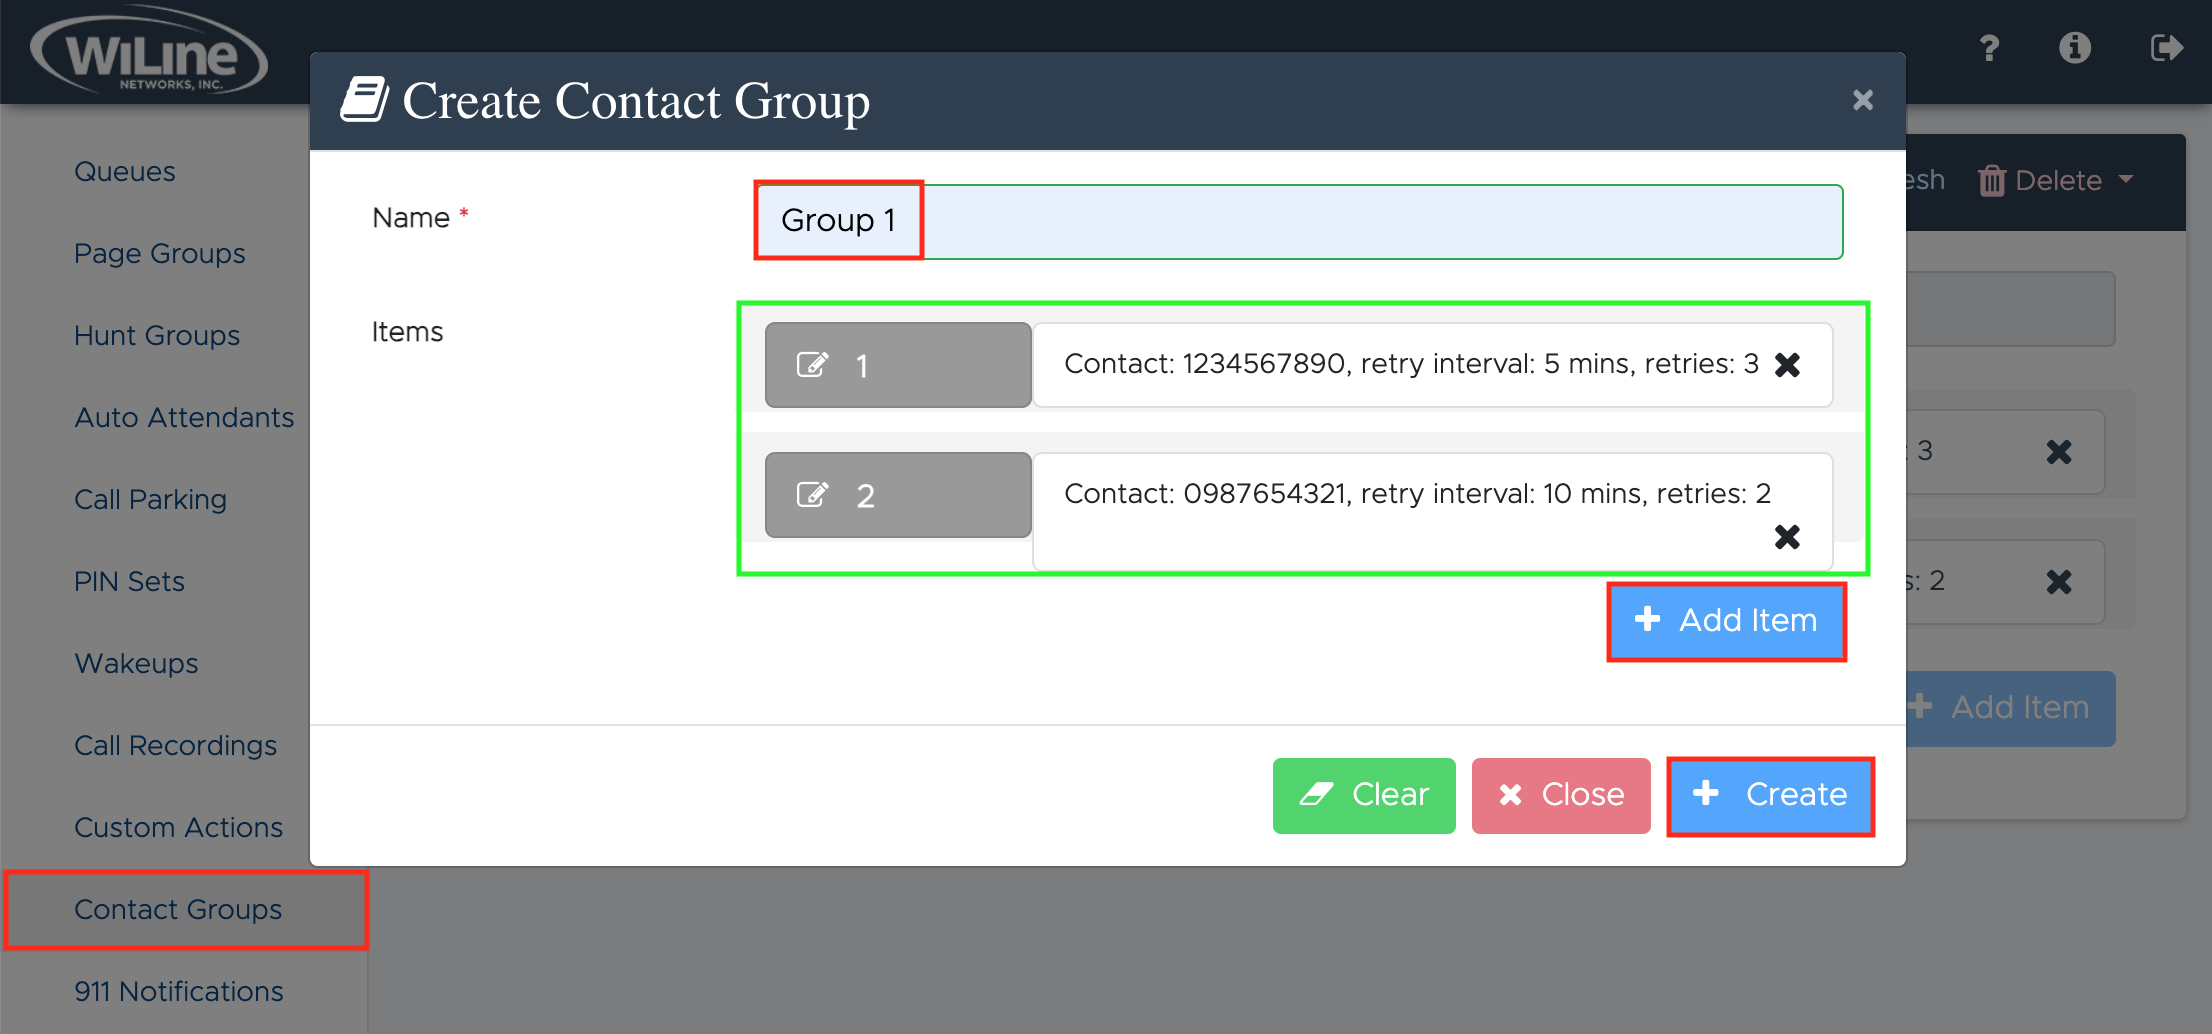
- When all contacts have been added, click Create to finalize the group. To reset and start over, click Clear. To exit without saving, click Close to exit.
Your group has been successfully created!
Edit a Contact Group
To edit an existing contact group, follow these steps:
- Log in to the Admin Portal.
- Navigate to Features > Contact Groups from the left-side menu.
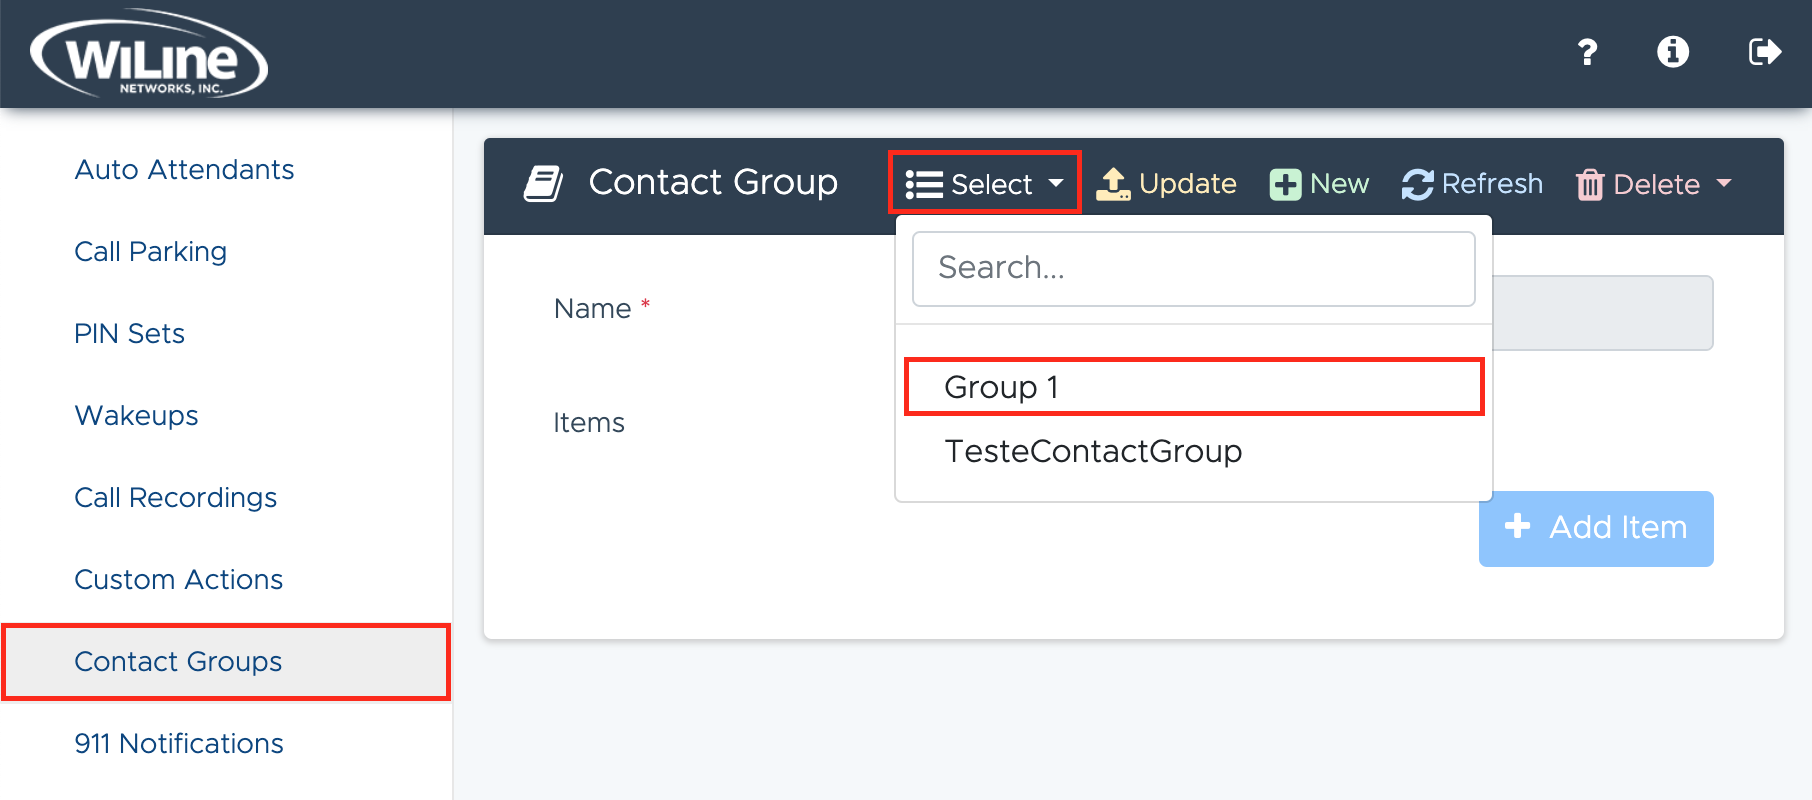
- Click Select in the top bar to choose the action you wish to edit.
-
Similar to the instructions in the Create a New Contact Group section, update the fields as needed, such as:
- Name (required)
- Under Items, click X next to the contact to delete it or Add Item to define new ones (as showin in Figure 3).
-
If you choose to add a new contact, fill in the required fields:
- Number (required)
- Retry Interval Minutes (required)
- Retry Count (required)
-
Click Update from the top blue bar to save your changed.
If successful, a success message will appear:
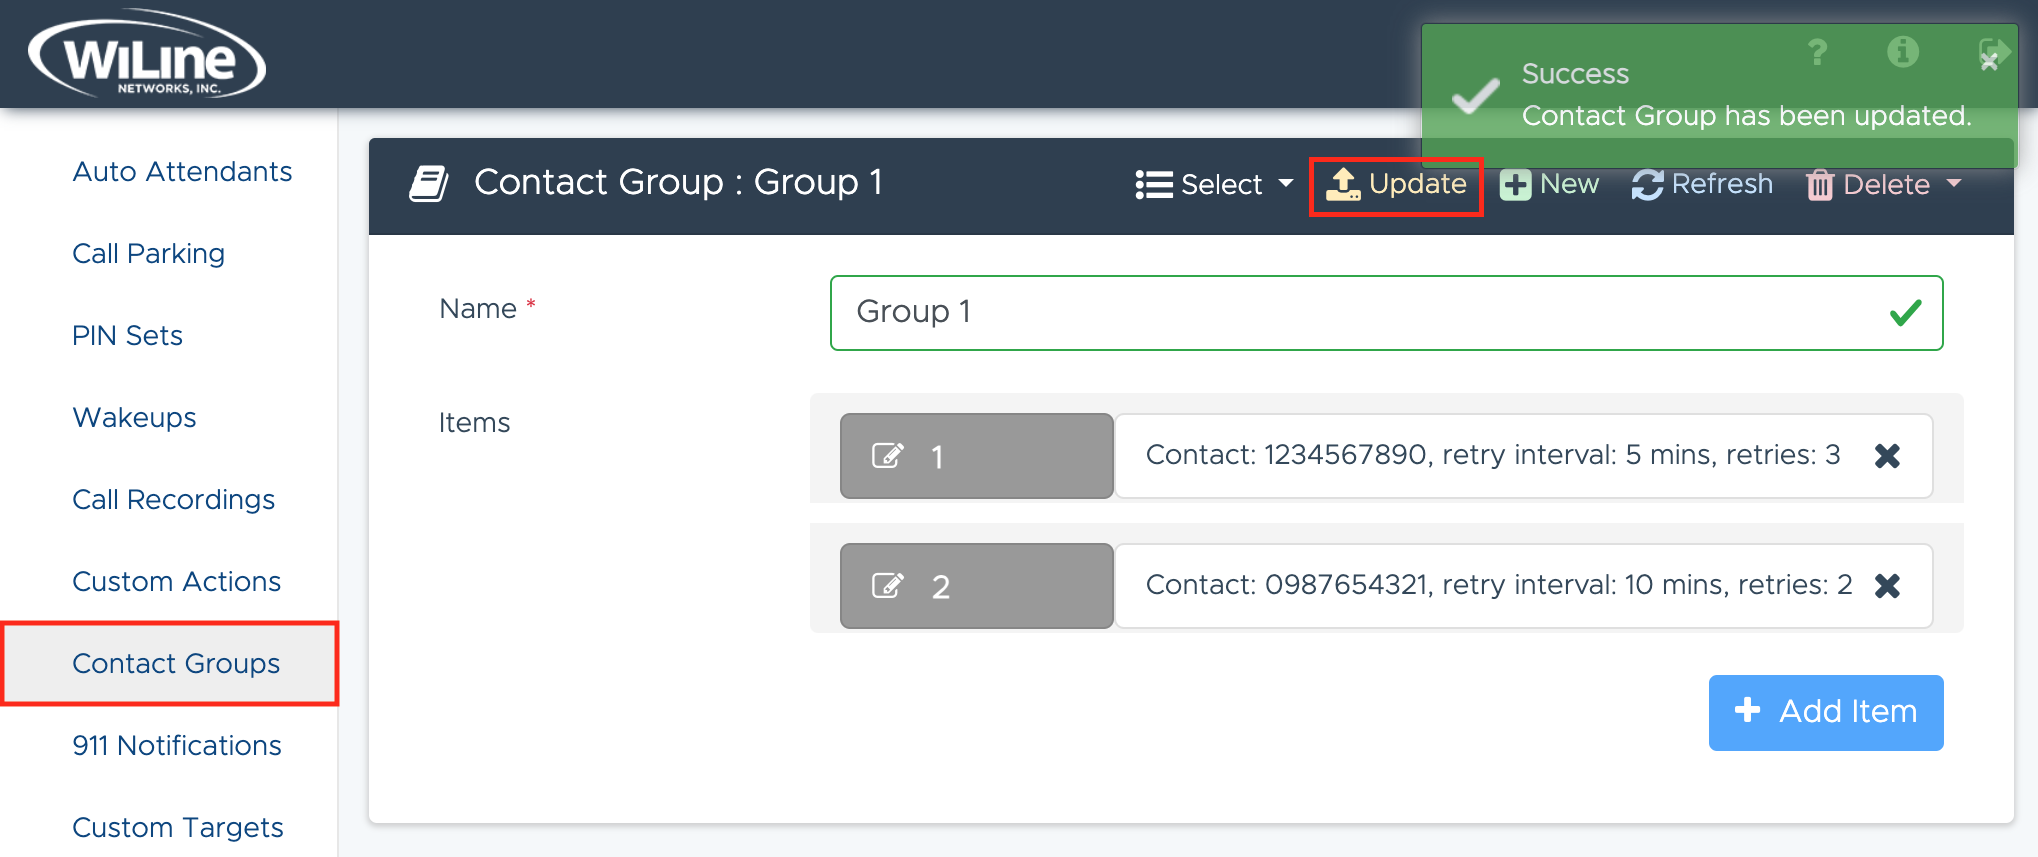
Your group has been successfully updated!
Delete a Contact Group
To delete a custom action plan, follow these steps:
- Log in to the Admin Portal.
- Navigate to Features > Contact Groups from the left-side menu.
- Click Select in the top blue bar and choose the contact group you ou wish to delete.
- Click the red Delete button in the top blue bar.
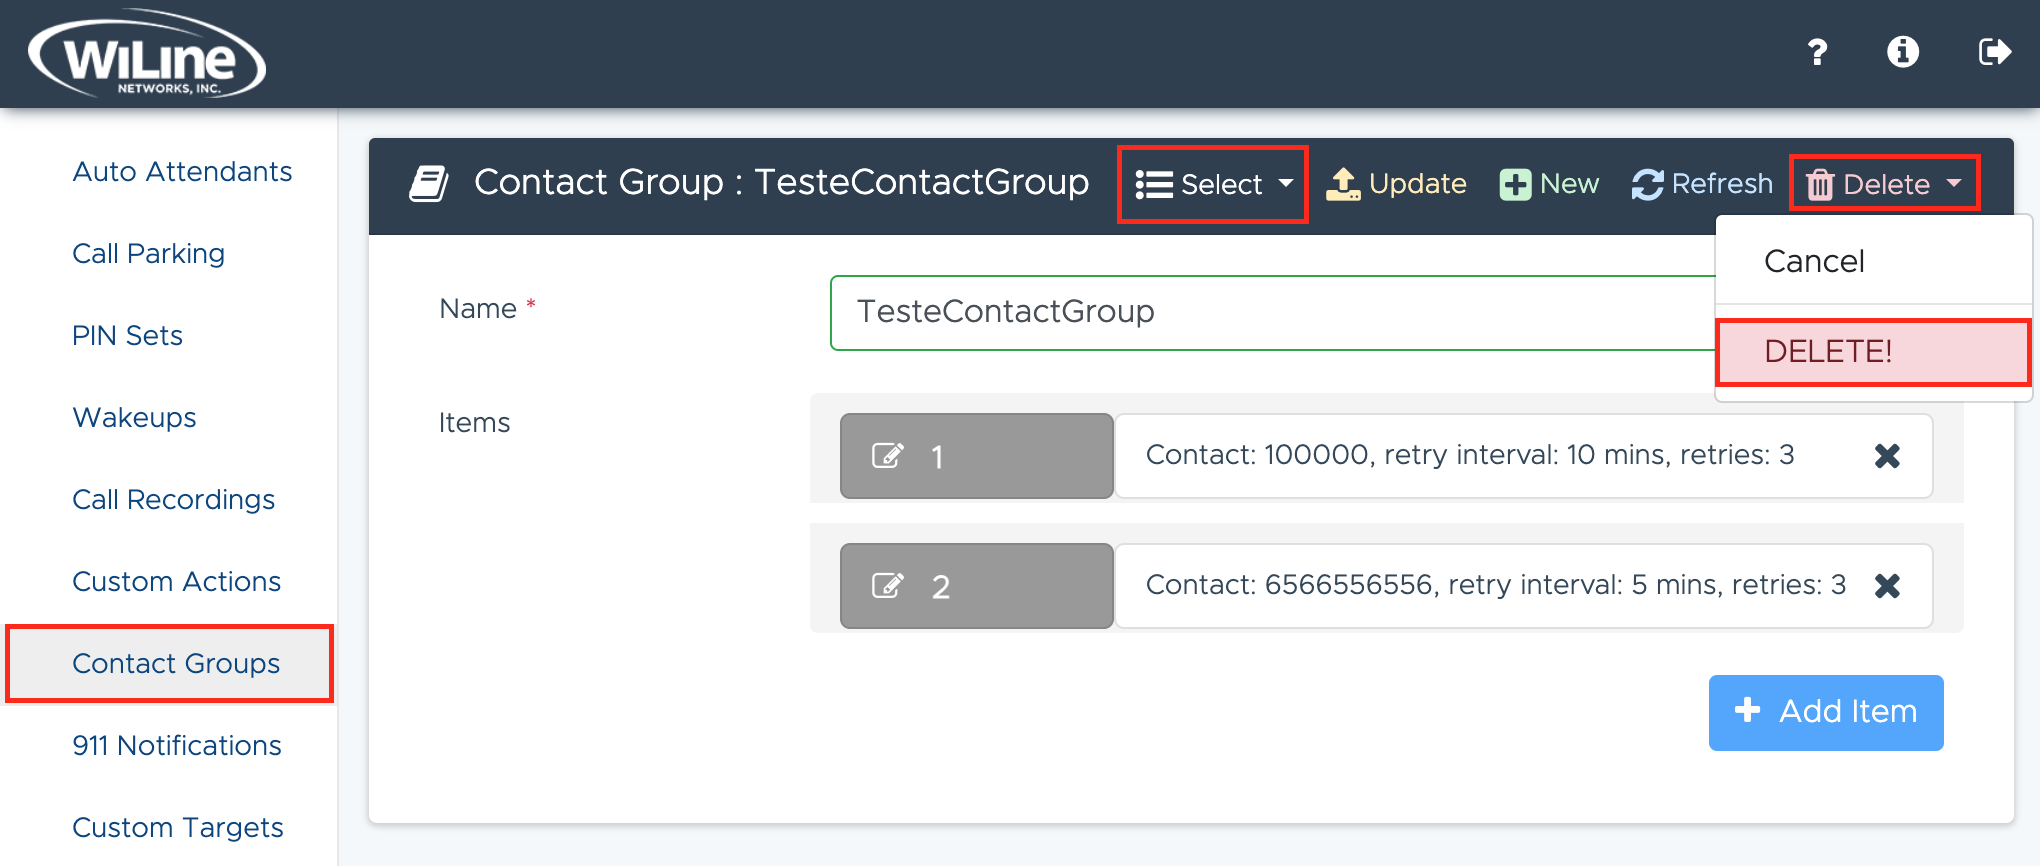
A confirmation pop-up will appear. Click Delete to confirm, or Cancel if you changed your mind.
You can only delete custom contact group that you created.
Effectively managing contact groups in the Admin Portal helps streamline communication, making it faster and more efficient to reach multiple people or manage call flows in a structured way, especially when dealing with frequent or large-scale communication needs.
rge-scale communication needs.
rge-scale communication needs.