Manage Conference Calls
Easily manage conference calls in the Admin Portal to enable seamless communication among multiple participants. This tool is vital for coordinating team meetings, client calls, or any scenario requiring group collaboration, ensuring effective participation.
Create a New Conference
- Log in to the Admin Portal.
- Navigate to Features > Conferences from the left menu.
- Click New in the top blue bar.
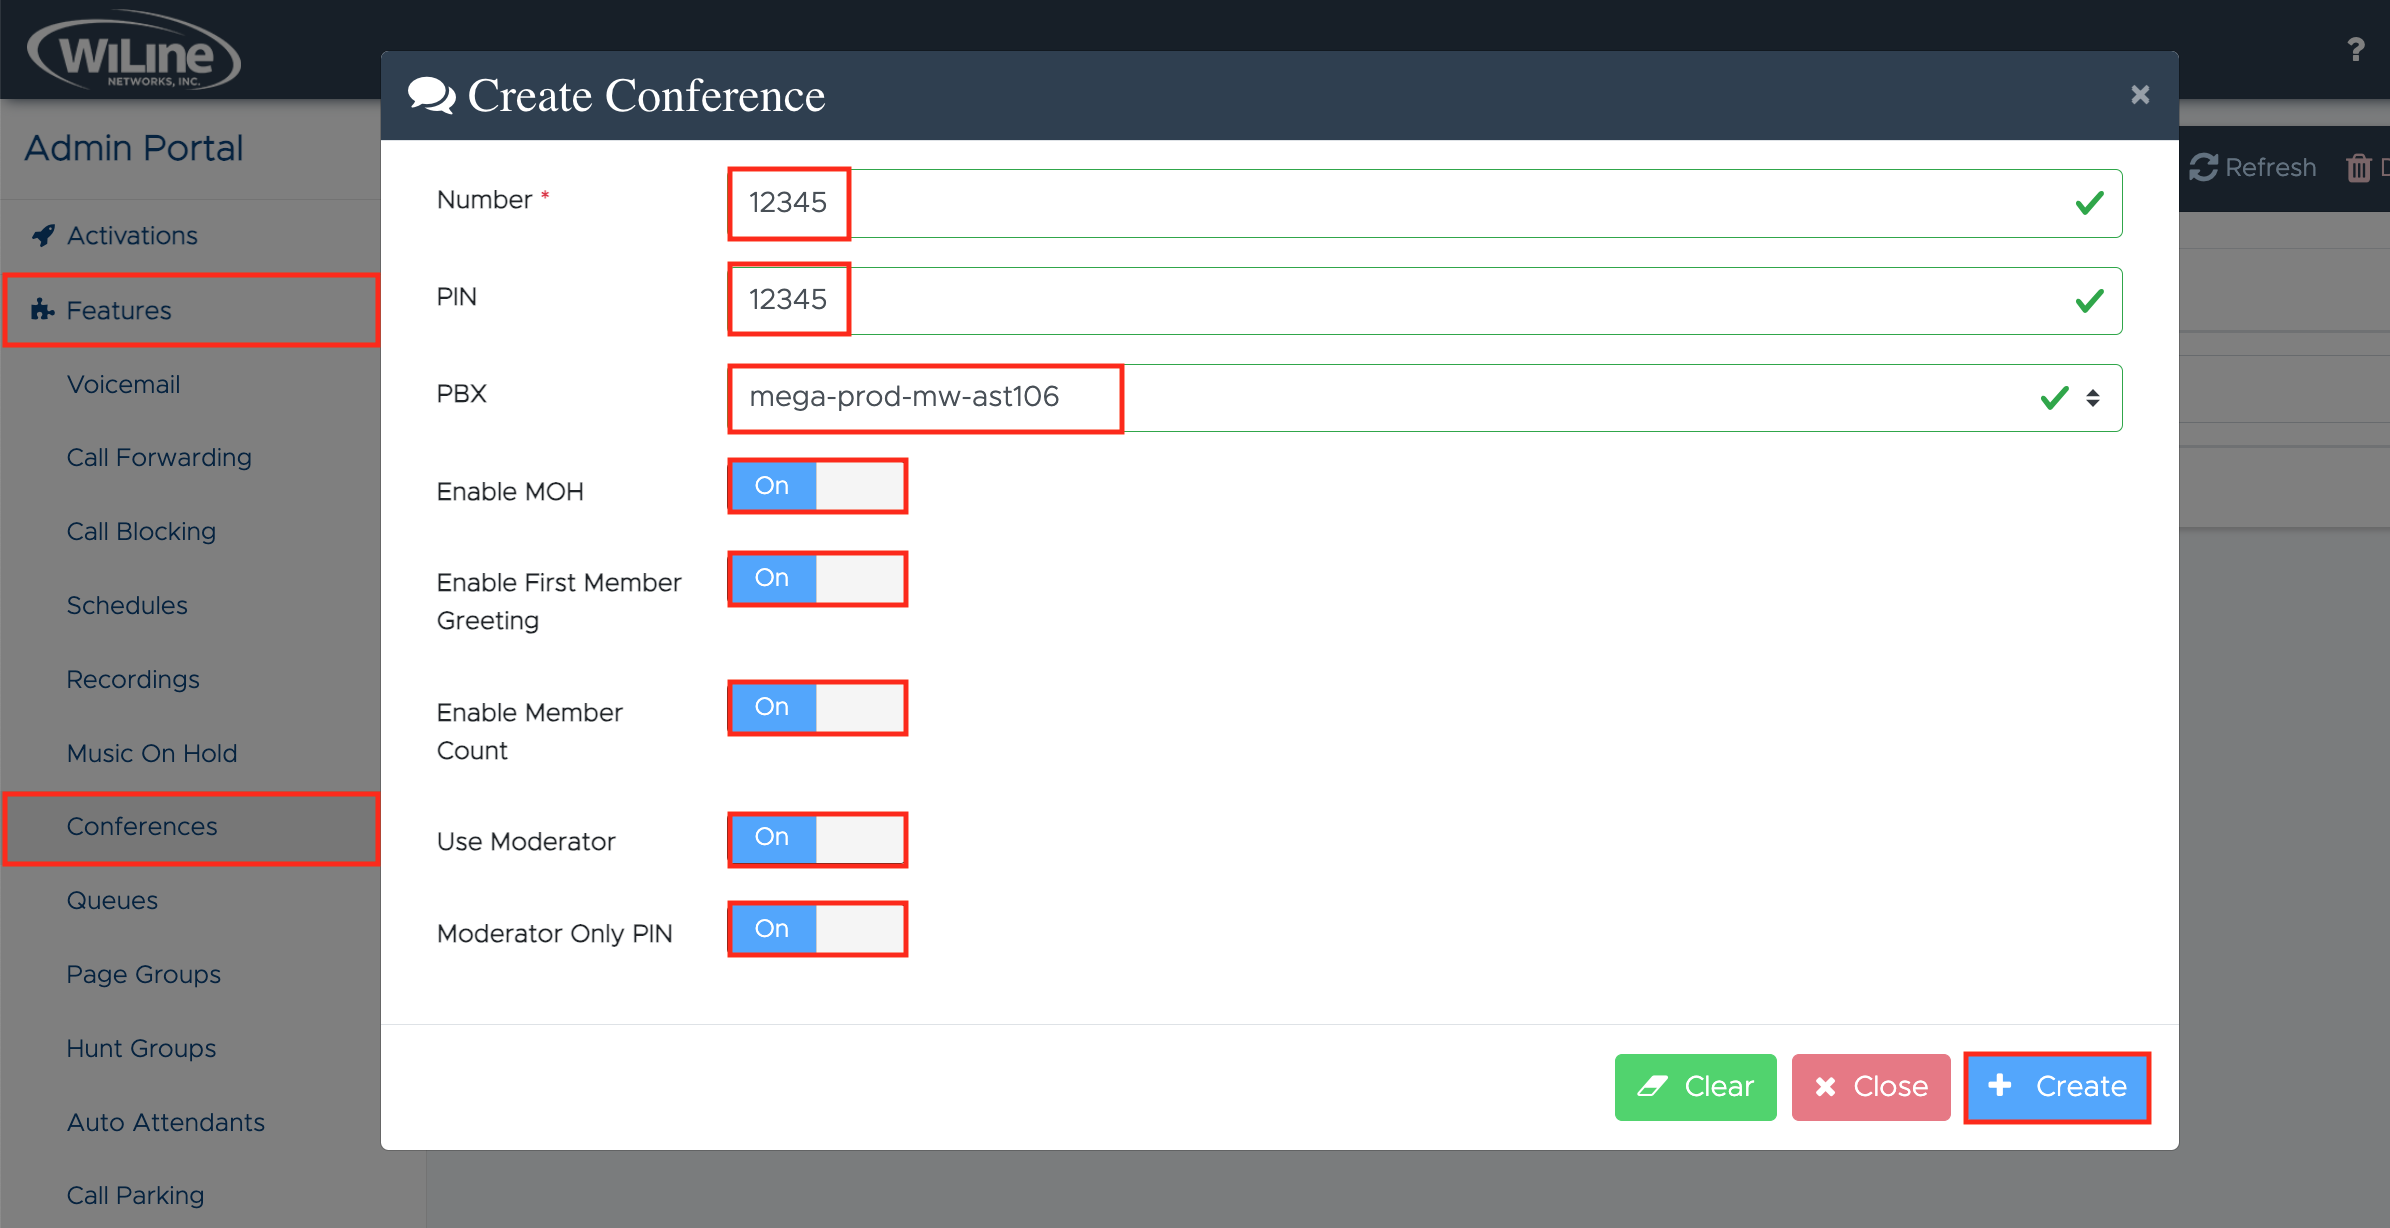
A pop-up window will appear, prompting you to fill in the details for the new conference:

- Enter a Number for the conference. Optionally, you can set a PIN for added security.
- Select a PBX from the dropdown menu to be assigned to the conference.
Additionally, you can enable the following features by toggling the corresponding switches to On:
- Enable MOH to play music on hold for participants.
- Enable First Member Greeting to play a greeting message for the first participant.
- Enable Member Count to announce the number of participants in the conference.
- Use Moderator to designate a moderator for the conference.
- Moderator Only PIN to set the PIN for moderator access only.
To finalize, click Create.
Click Clear in the bottom left corner to erase all data and start fresh. If you change your mind about creating a new conference, click Close.
Success! Your new conference is now set up and ready to use.
View Conference List
- Log in to the Admin Portal.
- Navigate to Features > Conferences from the left menu.
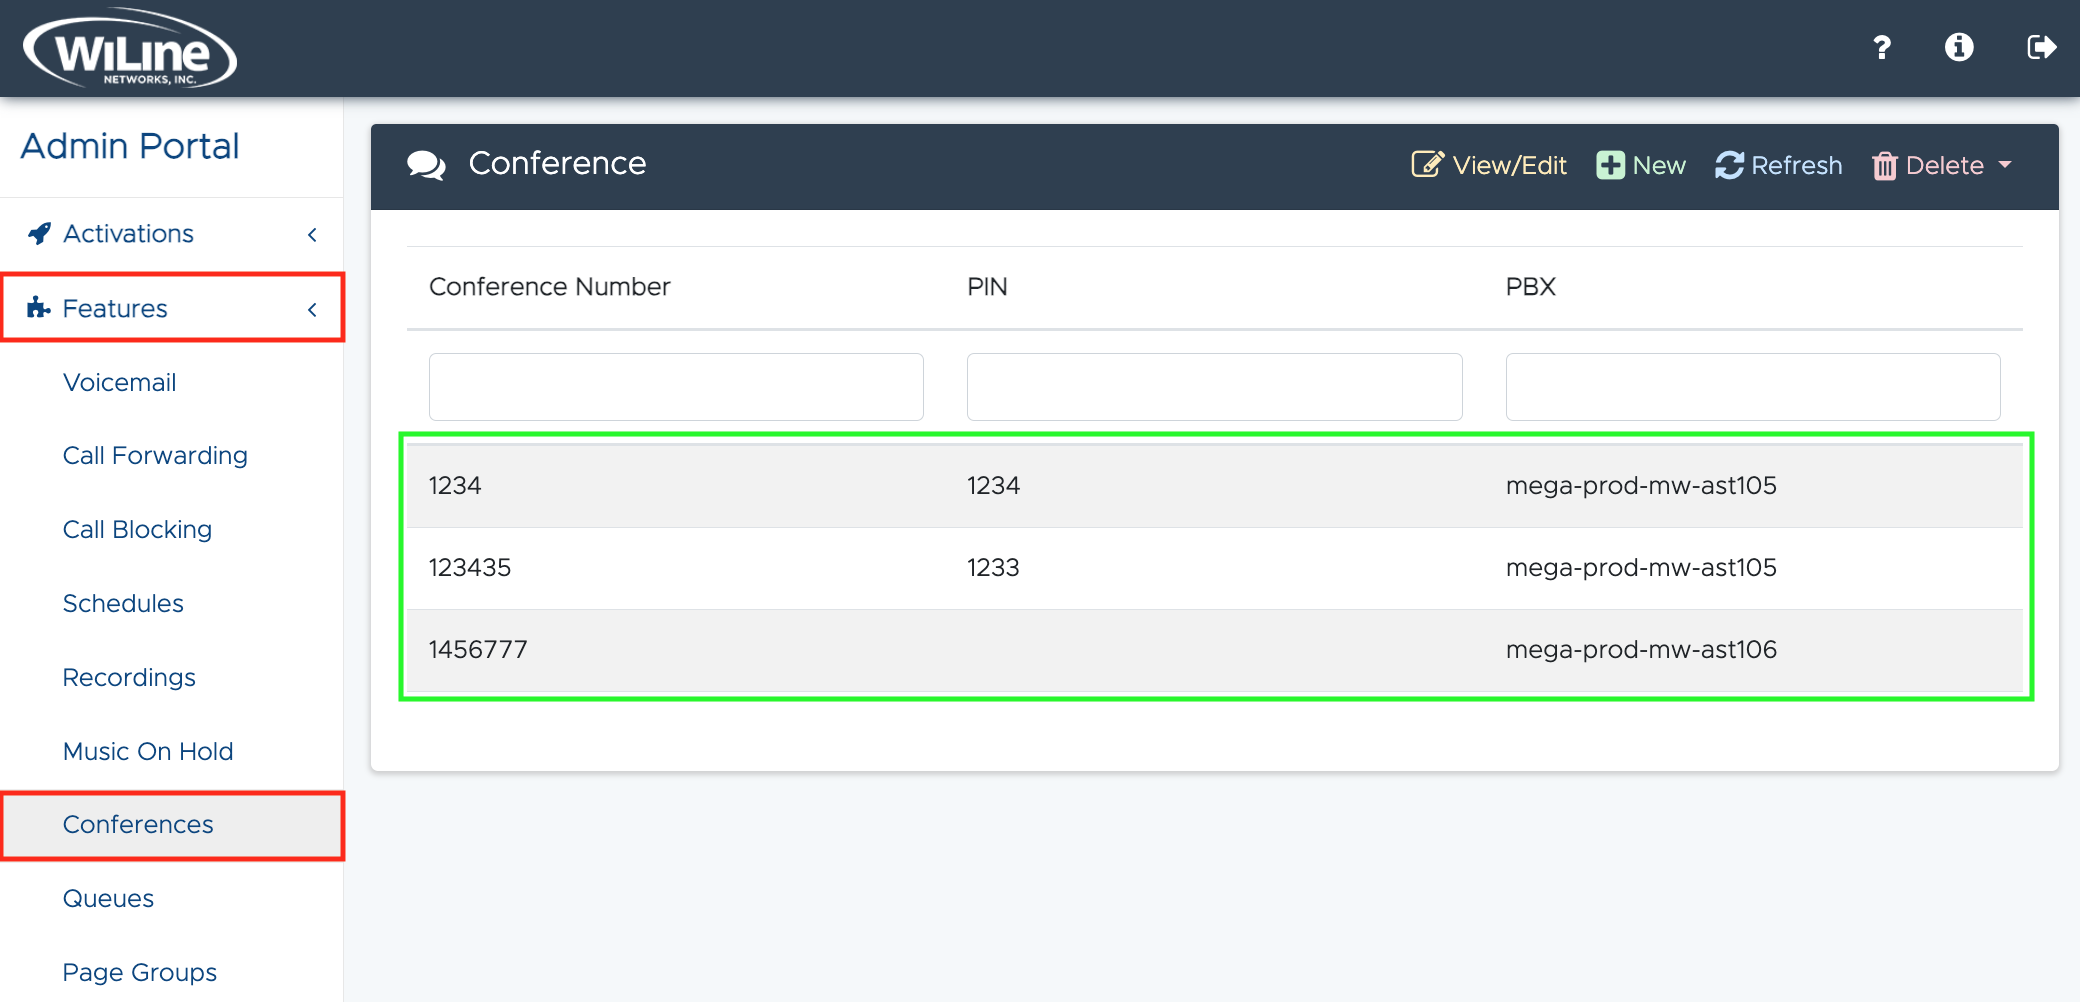
A list of all your created conferences will appear on your dashboard:

Success! It's as simple as that!
Edit a Conference Item
To edit a conference item:
- Click on the item you wish to edit, then select View/Edit from the top blue bar. Alternatively, you can double-click the item to achieve the same result.
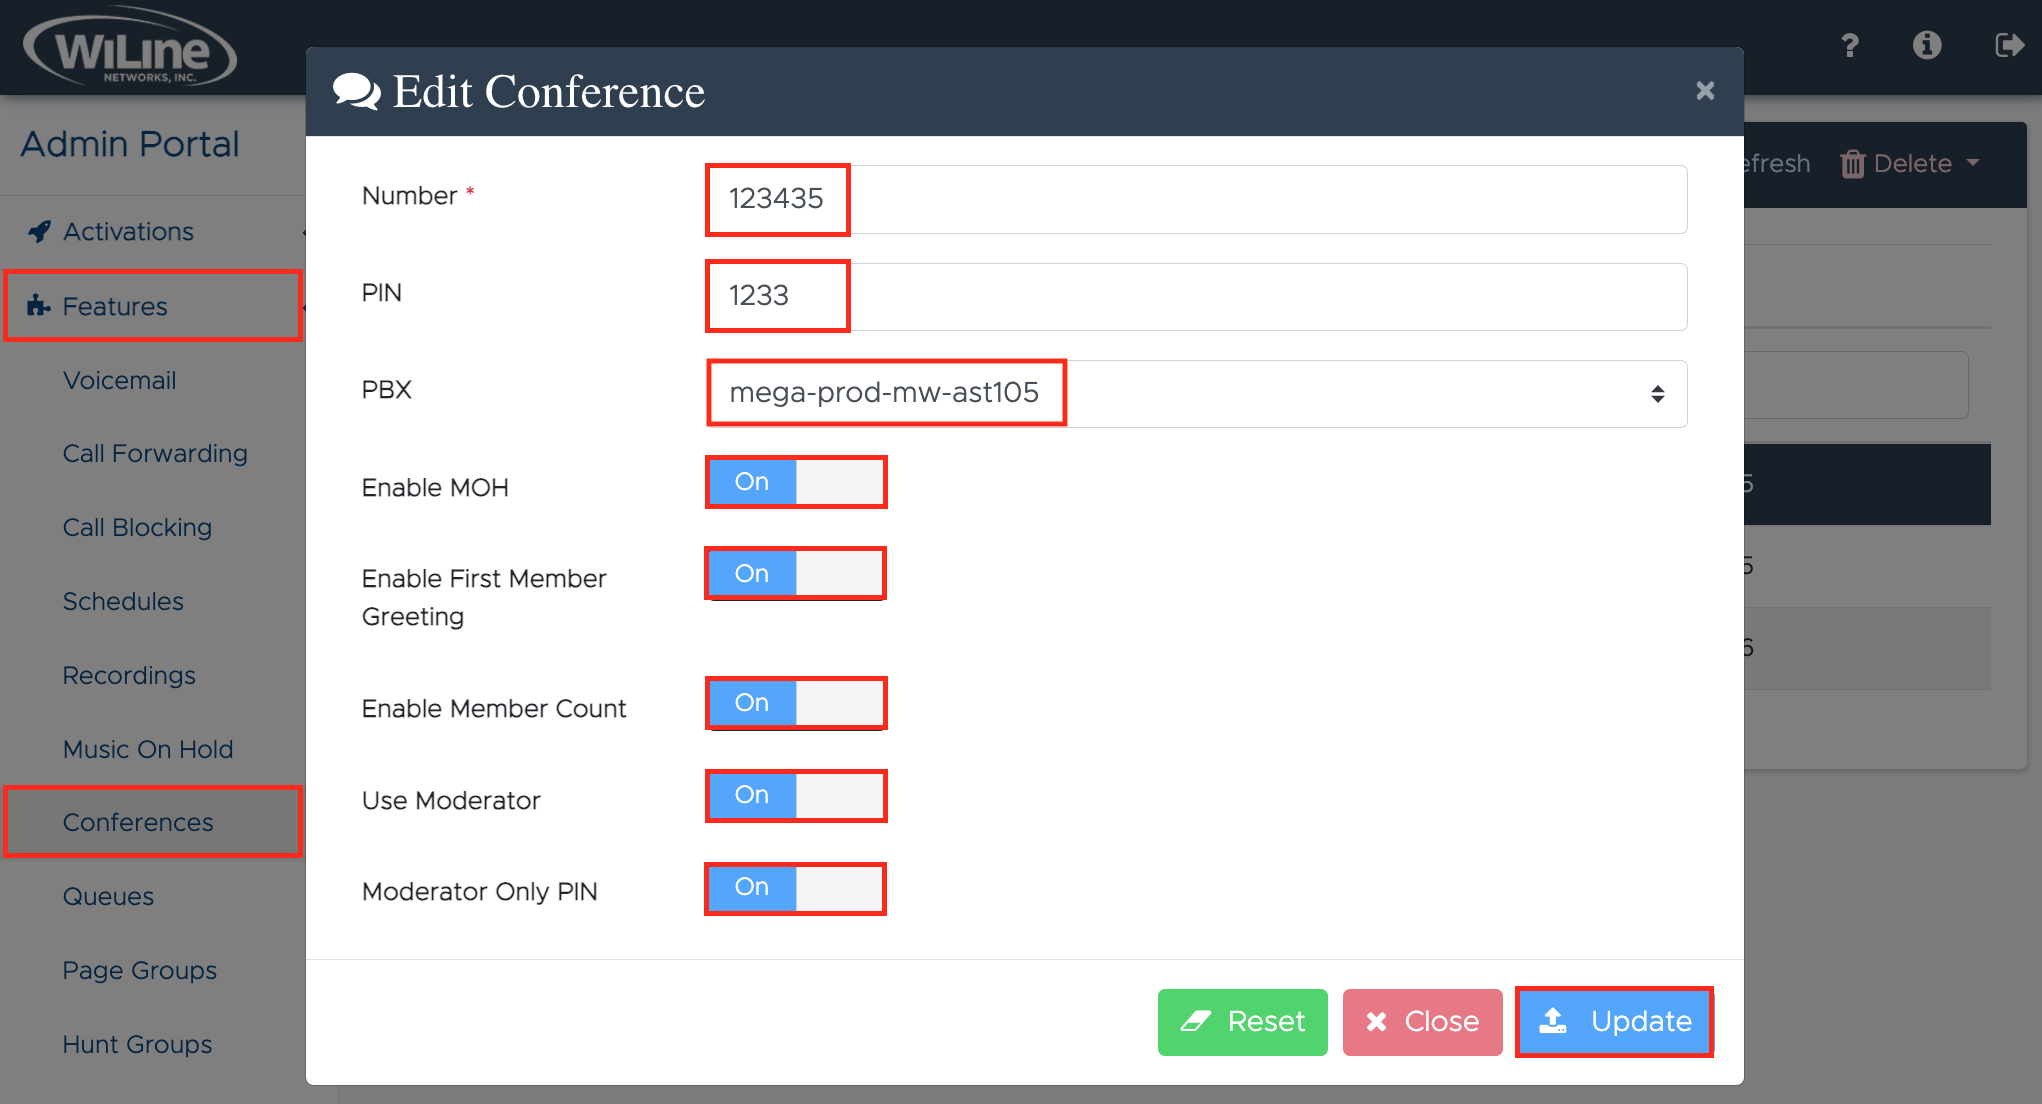
A new window, similar to the one used for creating a new conference, will appear, allowing you to modify the item’s details:

From here, you can:
- Change the conference Number. Optionally, you can update the PIN for added security.
- Alter the PBX assignment using the dropdown menu.
Additionally, you can enable or disable the following advanced features by toggling the corresponding switches to On according to your needs:
- Enable MOH to play music on hold for participants.
- Enable First Member Greeting to play a greeting message for the first participant.
- Enable Member Count to announce the number of participants in the conference.
- Use Moderator to designate a moderator for the conference.
- Moderator Only PIN to set a PIN for moderator access only.
To save your changes, click Update.
Click Clear in the bottom left corner to erase all data and start fresh. If you change your mind about editing the conference, click Close.
Refresh the Conference List
To refresh the list, click the Refresh button in the top blue bar. This is especially useful after creating a conference or altering existing ones if your changes are not immediately visible.
Delete an Item from the List
To delete a conference item, follow these steps:
-
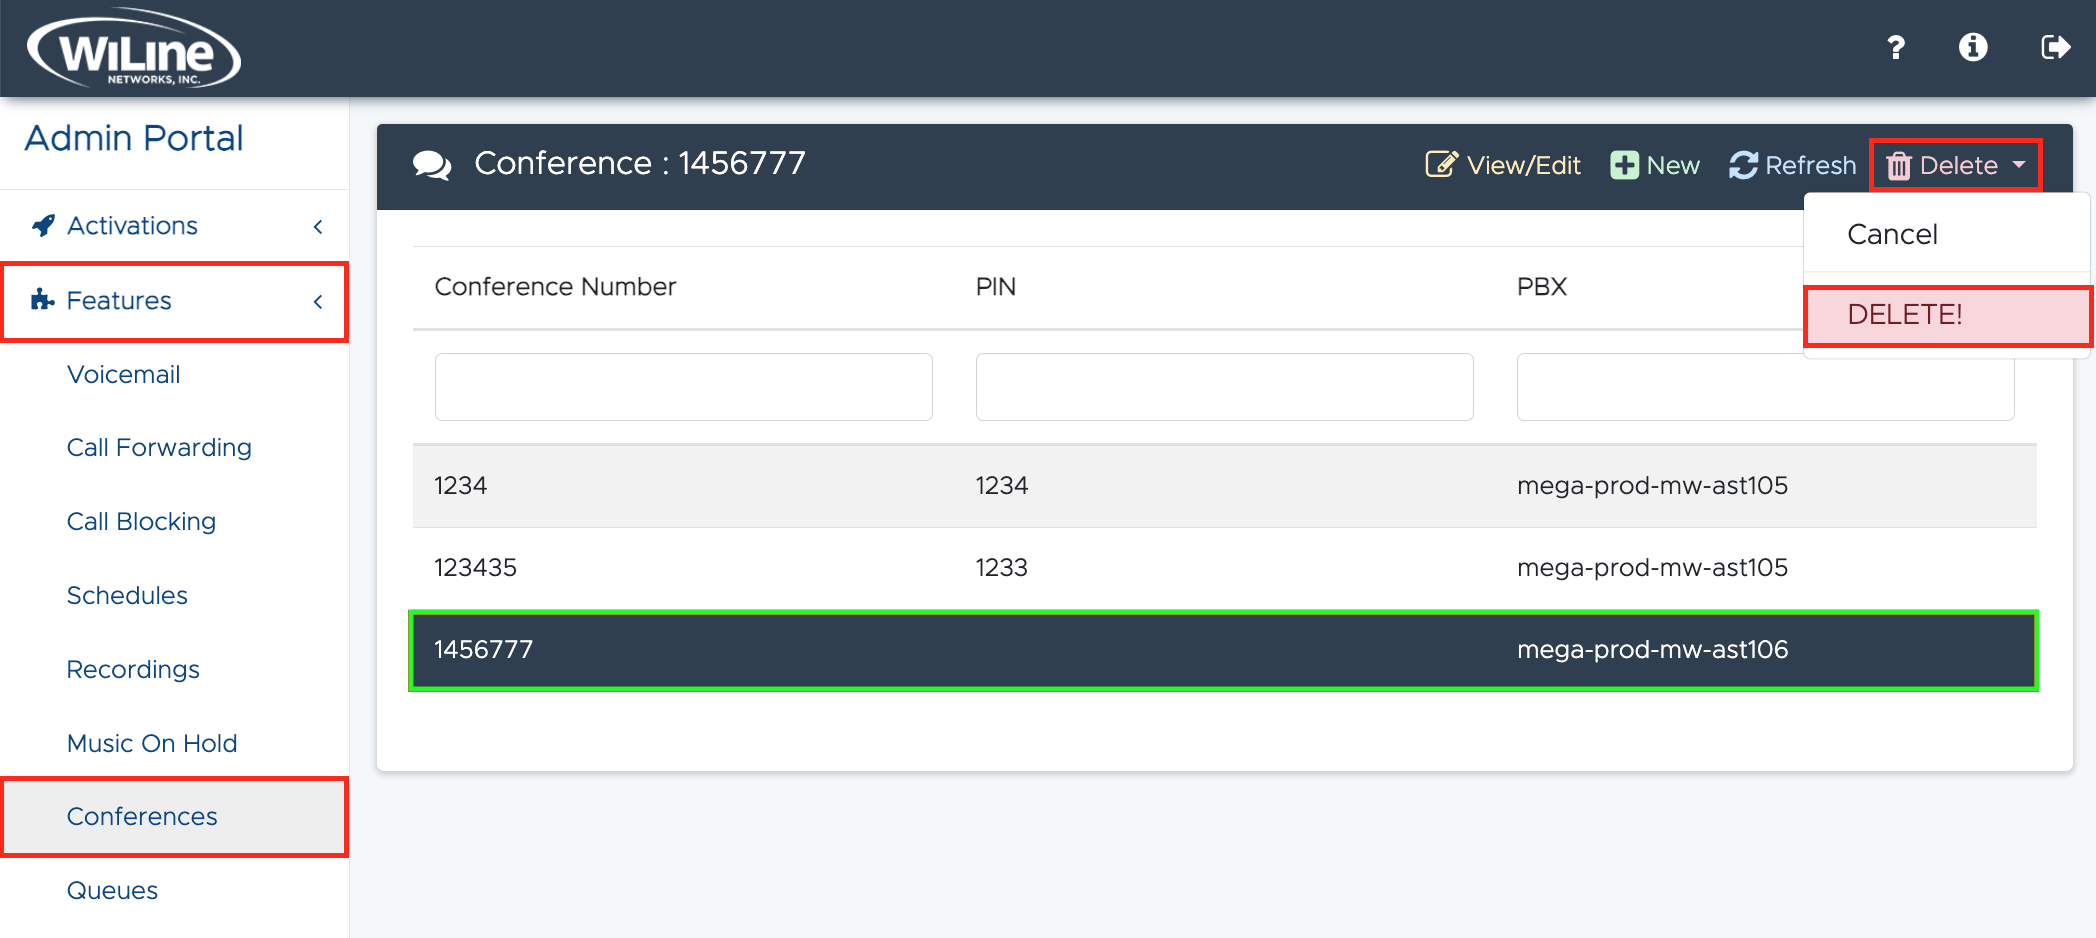
Select the item from the list that you wish to delete.
-
Click the Delete button in the right corner of the options bar.
-
Choose DELETE! from the dropdown menu to confirm.

Figure 4. Deleting a conference item.
A pop-up window will appear—click Delete to finalize, or Cancel if you change your mind.

You have now successfully deleted the conference item.
By following these steps, you can efficiently manage your conference calls in the Admin Portal, ensuring seamless communication and collaboration within your organization. Should you need further assistance, refer to the Help Center or contact our support team.