Integrate with Outlook Calendar
Easily sync your Outlook calendar with the Connect Portal using the Wiline add-in.
The Wiline Connect Portal add-in works with Microsoft Outlook 2019 and later.
How to Install Add-in from a File
Installing custom add-ins from an XML file is currently only available on Windows via the Add-Ins for Outlook dialog. Support for this functionality in the new Store in Outlook (All Apps > Add Apps) for other platforms is in development.
Access the Outlook Add-Ins Dialog
-
Log into Outlook via the following link: https://aka.ms/olksideload.
-
Once logged in, proceed with the following steps:
-
In the Add-ins for Outlook pop-up window, scroll down to the Custom Add-ins section.
-
Click Add a custom add-in.
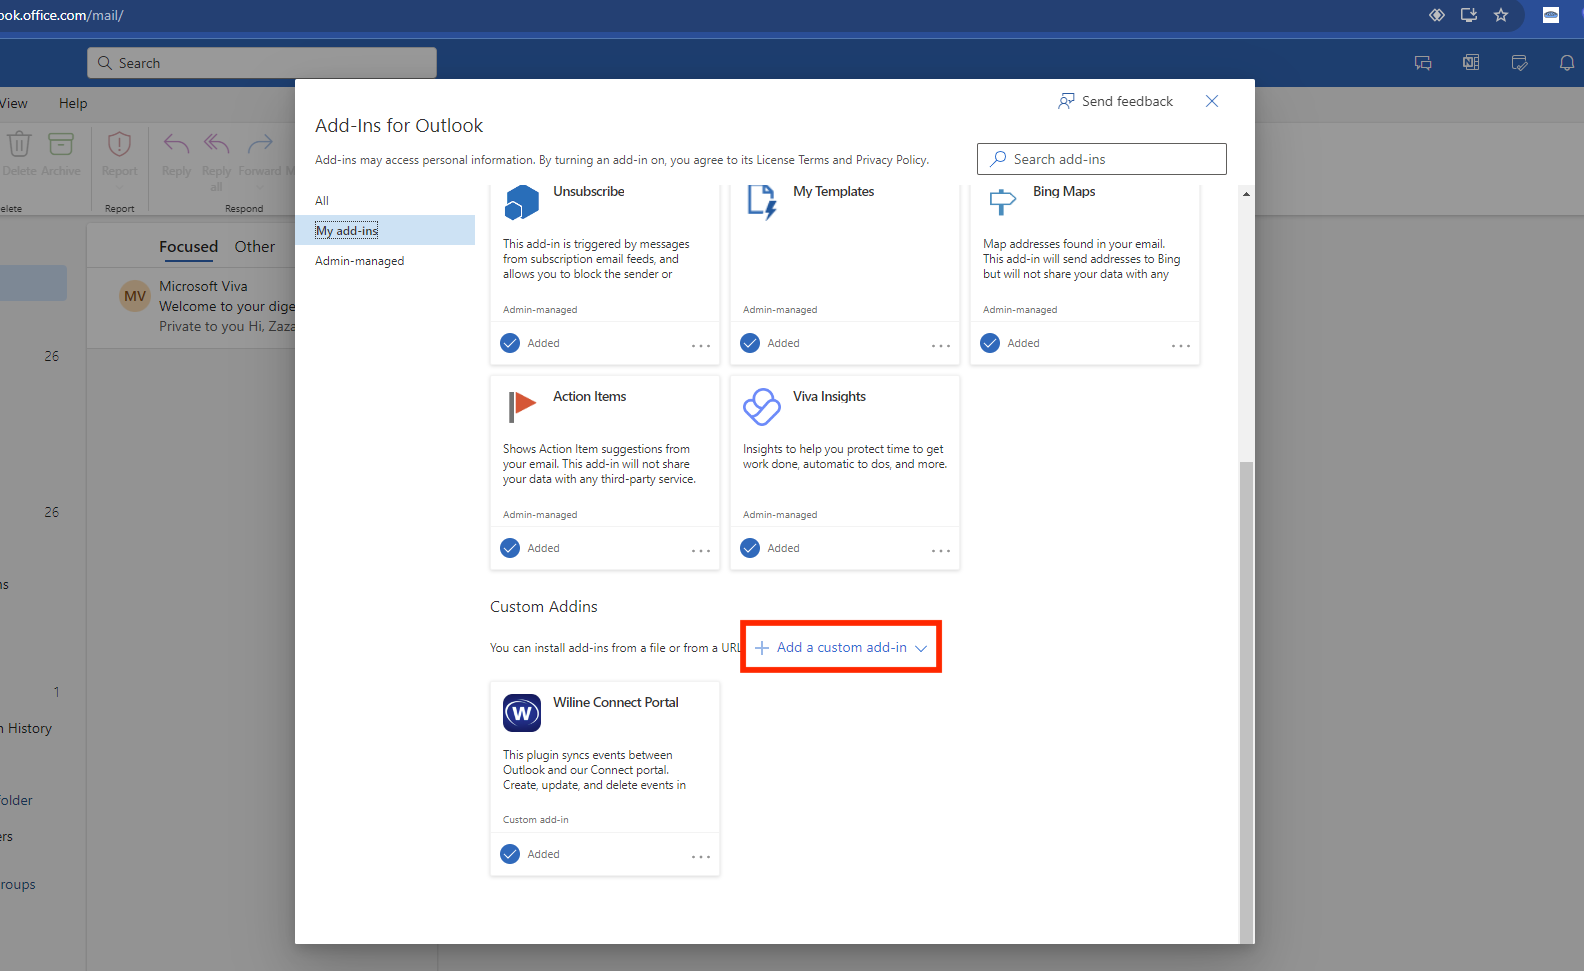
Figure 1. Installing WiLine Add-in from a File.
-
-
When prompted, upload the file downloaded from the Connect Portal (see the instructions below).
If using the classic Outlook app on Windows, you can click Manage Add-ins under Account Information. This will take you to Outlook on the web.
Download the Outlook Plug-In File
-
Log into the Connect Portal.
-
Navigate to Connect > Schedule Meeting in the left-side menu.
-
Right-click the Download Connect Outlook Plugin icon.
-
Select Save Link As and choose a location to save the file.
-
Click Save to confirm.
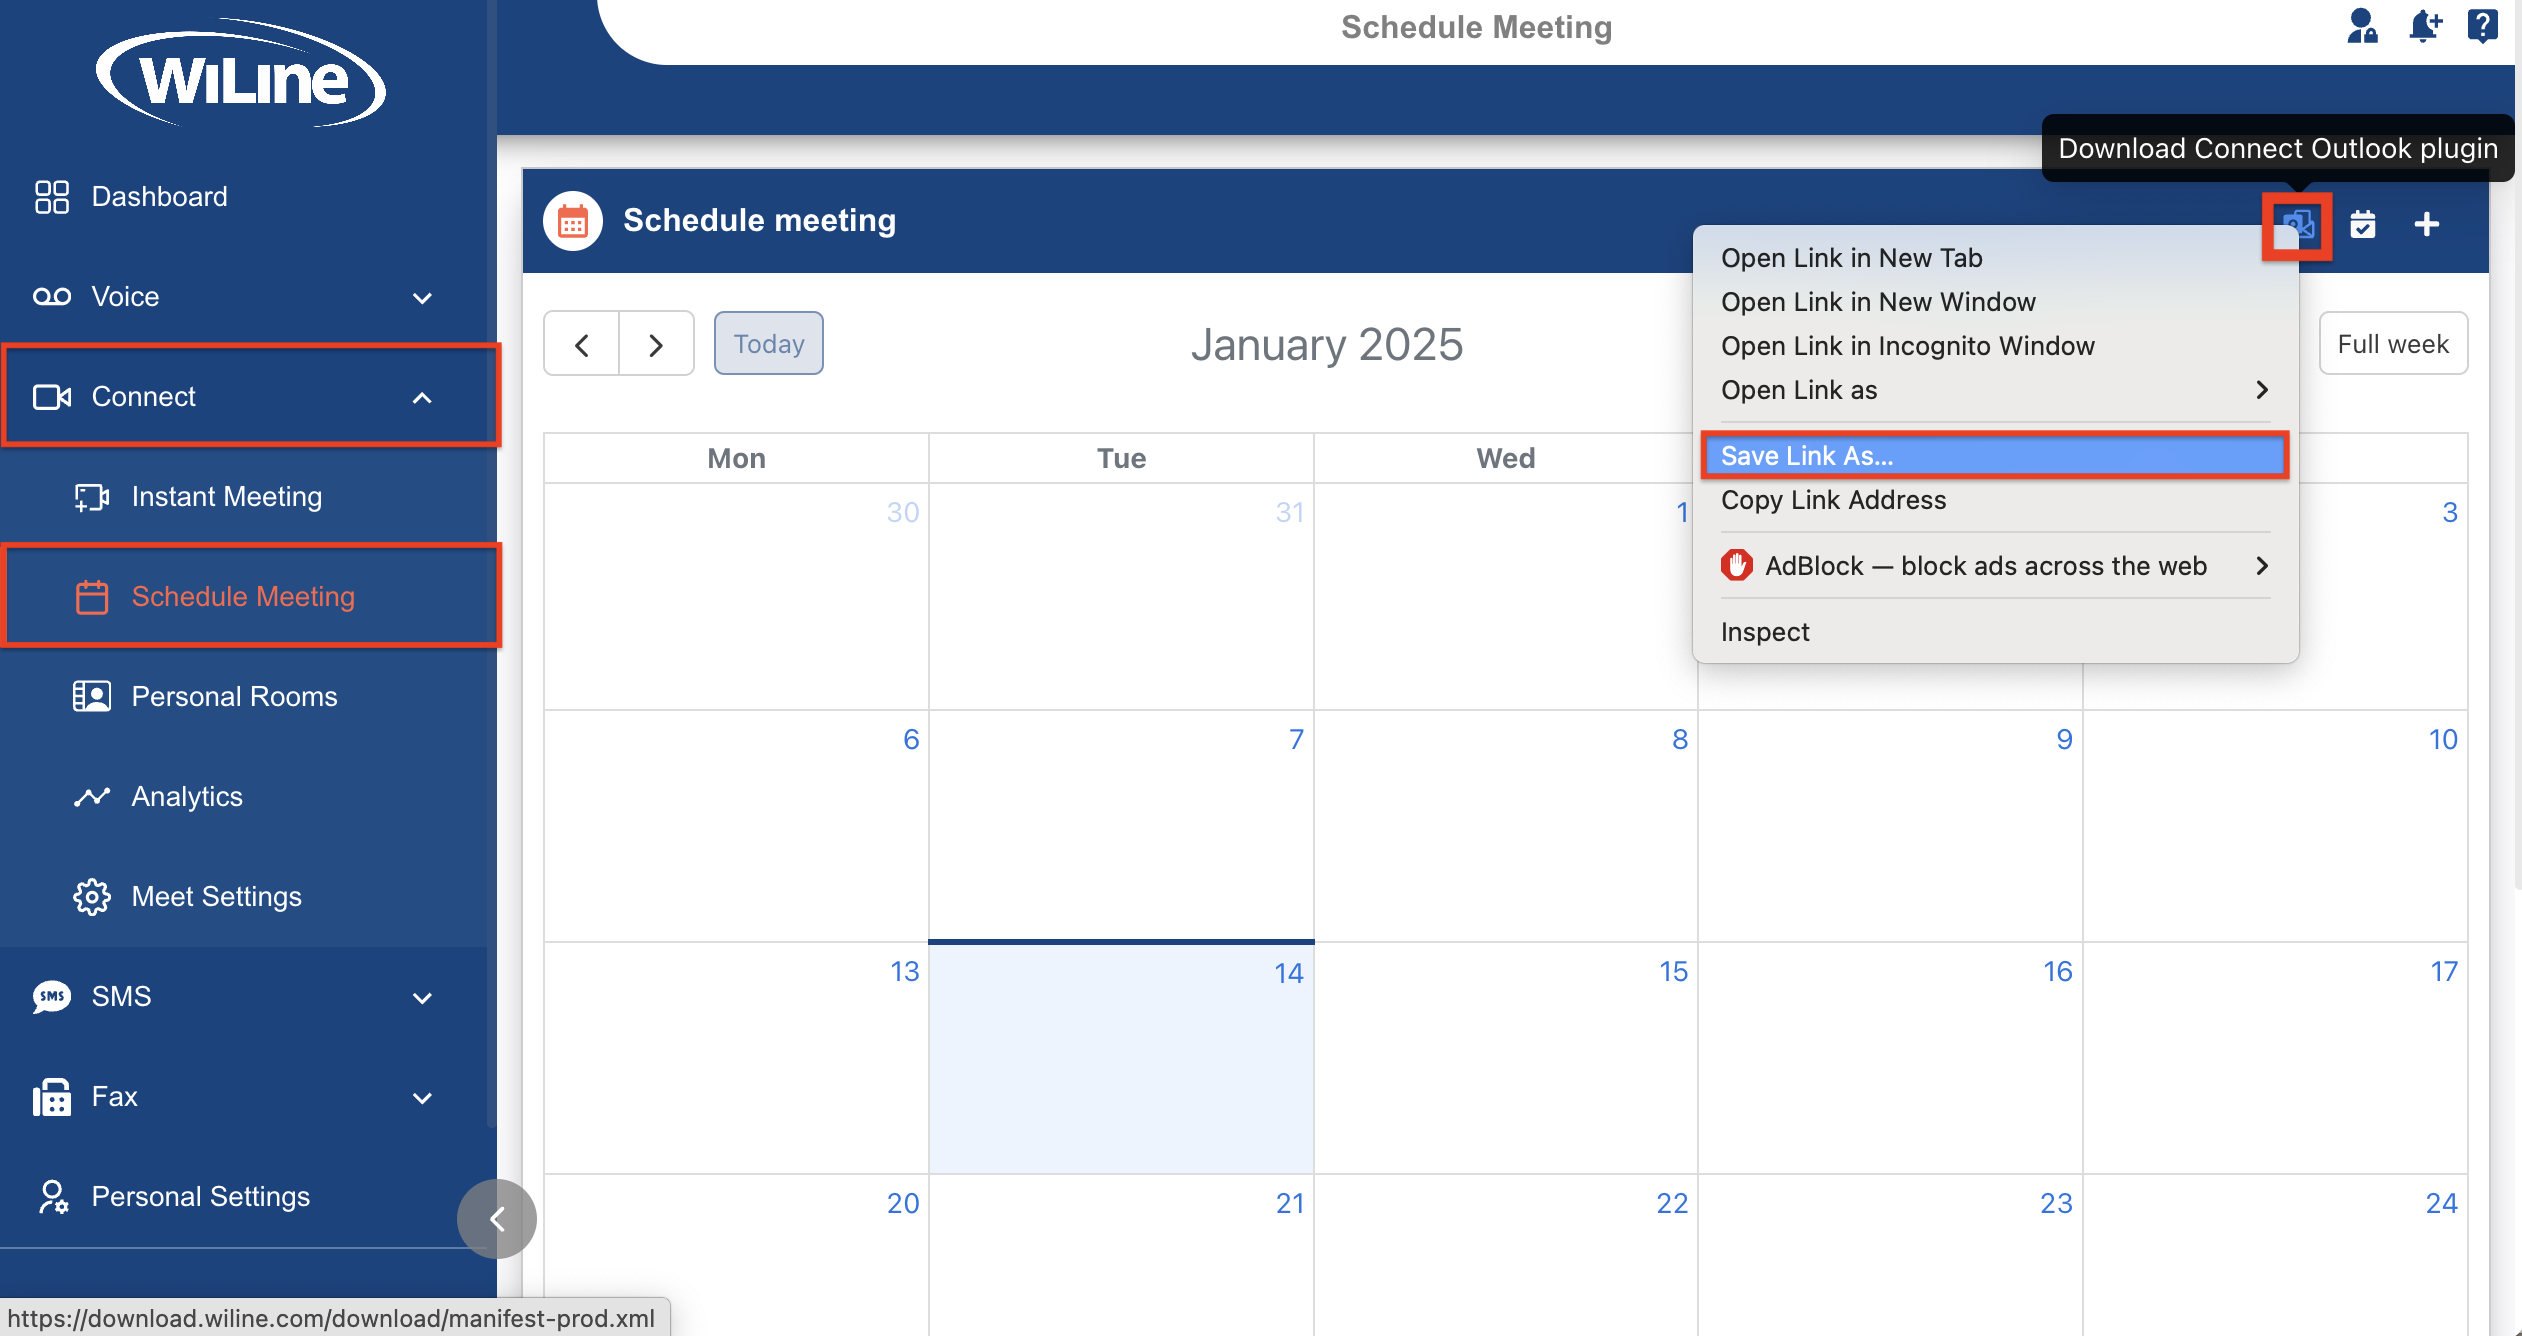
Figure 2. Downloading the Connect Outlook Plugin. -
The
manifest-prod.xmlfile will now be saved to your device.
Upload the File to Outlook
-
Return to the Outlook Add-ins dialog.
-
Upload the
manifest-prod.xmlfile.Note: A standard warning will appear indicating that the custom add-in may access personal information.
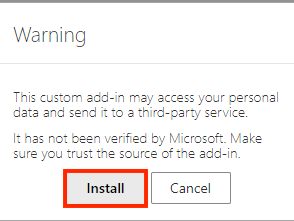
Figure 3. Custom Add-in Warning. -
Click Install to complete the setup.
Activate the Connect Portal Add-in
-
Open or create an event in Outlook.
-
From the ribbon, select the WiLine Connect Portal add-in.
-
Click WiLine Connect Portal > Add/Update a Meeting.
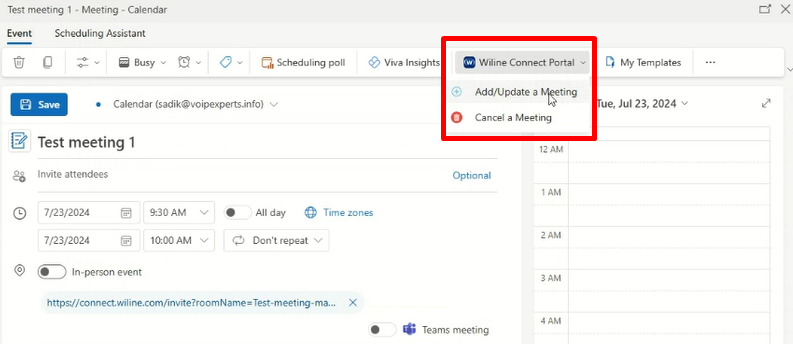
Figure 4. Adding/Updating a Meeting. -
When prompted, log in to the Connect Portal.
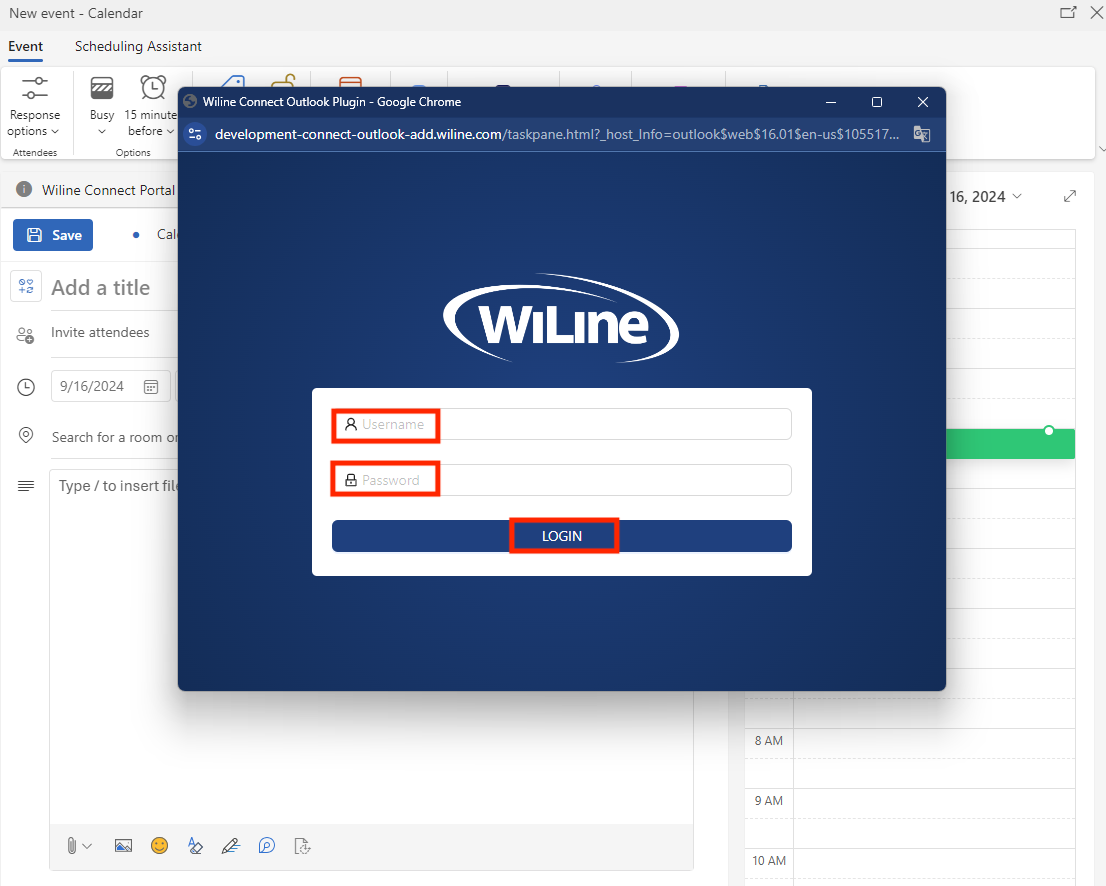
Figure 5. Logging in when prompted. -
Click Allow to grant permissions.
-
To view synced meetings, go to Connect > Schedule Meeting on the Connect Portal.
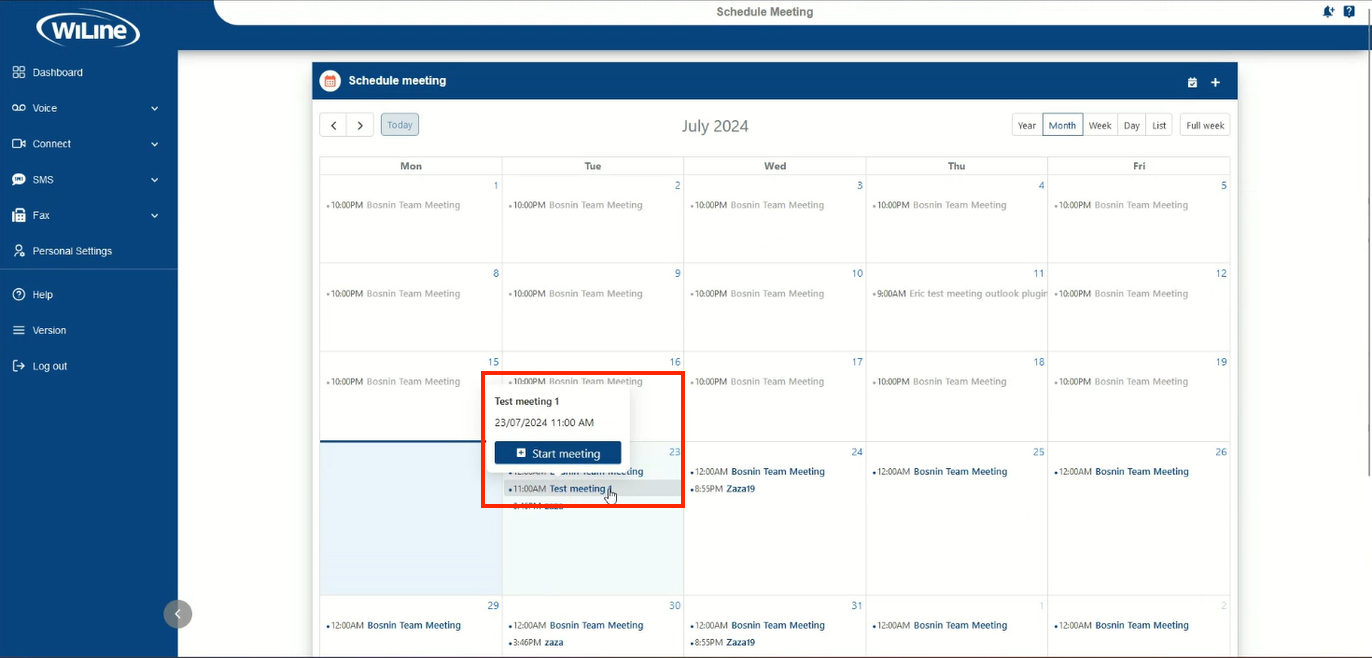
Figure 6. Viewing a synced meeting in the Connect Portal.
Your Outlook calendar is now synced!
By integrating your Outlook calendar with the Connect Portal, you streamline scheduling and ensure all meetings are synchronized across platforms.e synchronized across platforms.