Start an Instant Meeting
Instant meetings provide a quick way to initiate discussions without prior scheduling. This feature is ideal for urgent matters or spontaneous collaboration, allowing you to connect with team members or clients swiftly through the Connect Portal.
How to Start an Instant Meeting
- Log in to the Connect Portal.
- Navigate to Connect > Instant Meeting from the left menu.
- Enter a topic for the meeting in the Topic field.
- Click Start Meeting Now to begin the meeting immediately.
- Optionally, toggle Ask to Join to On if you'd like participants to request access.
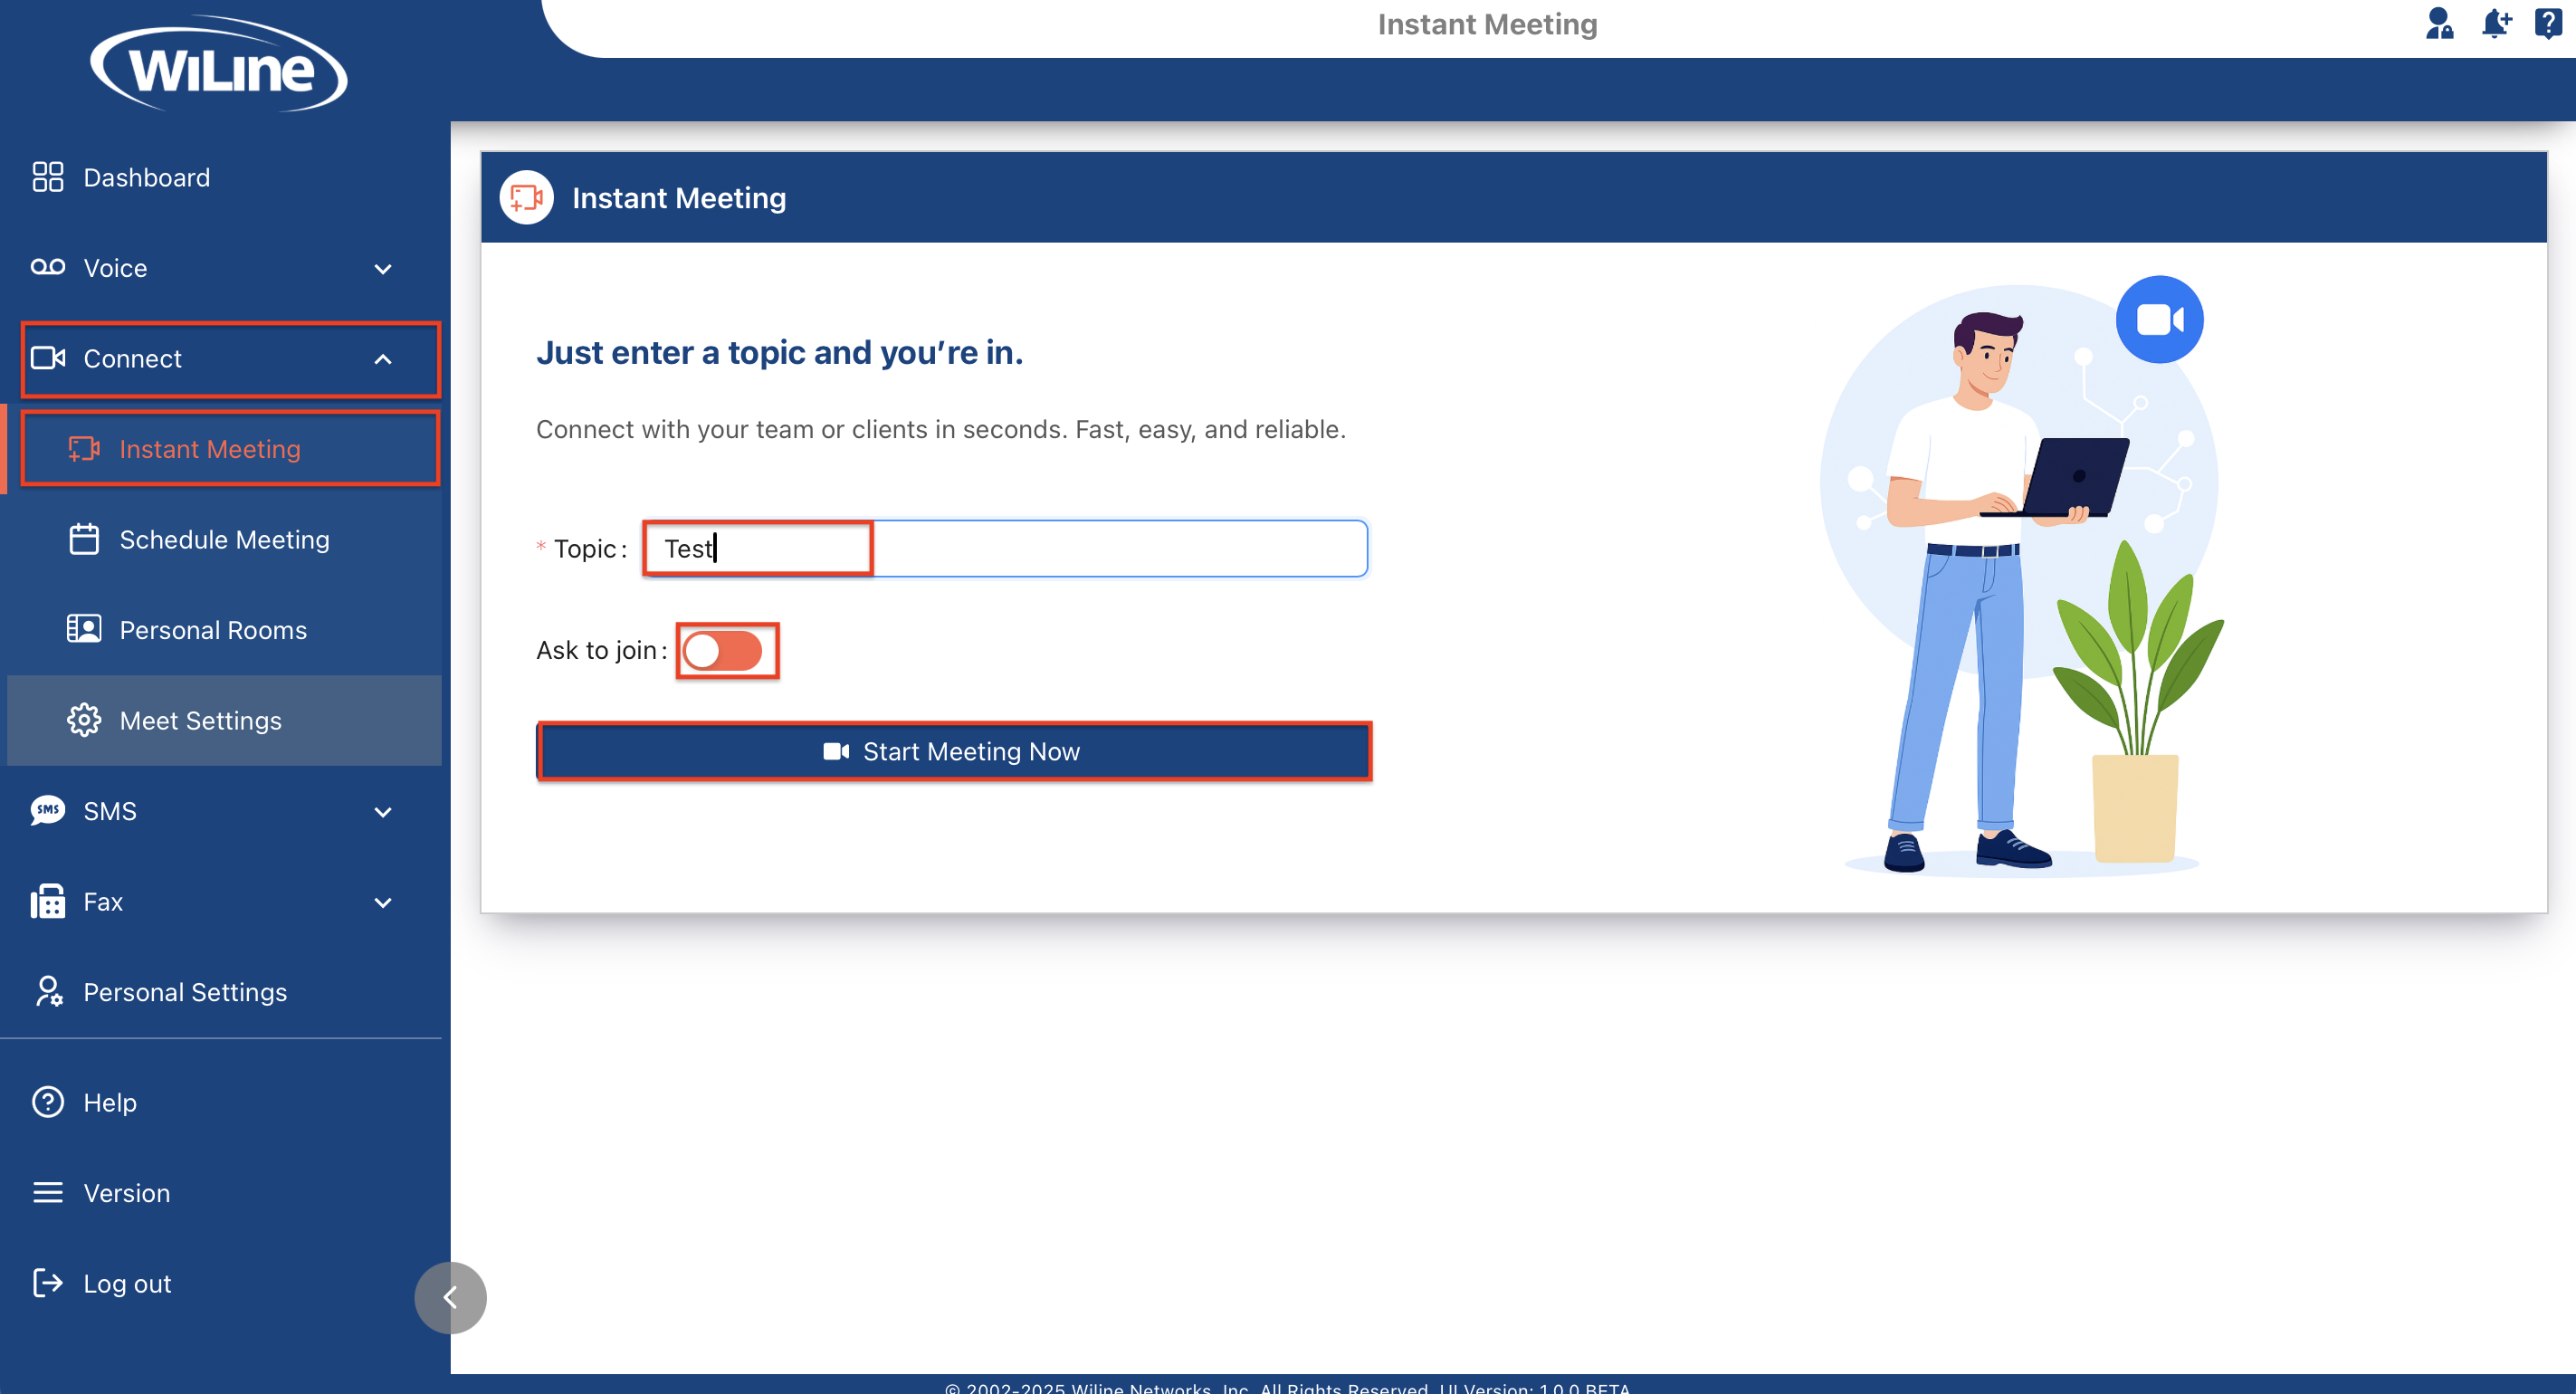
From here, you can begin collaborating right away or invite others to join.
Invite Others to Join
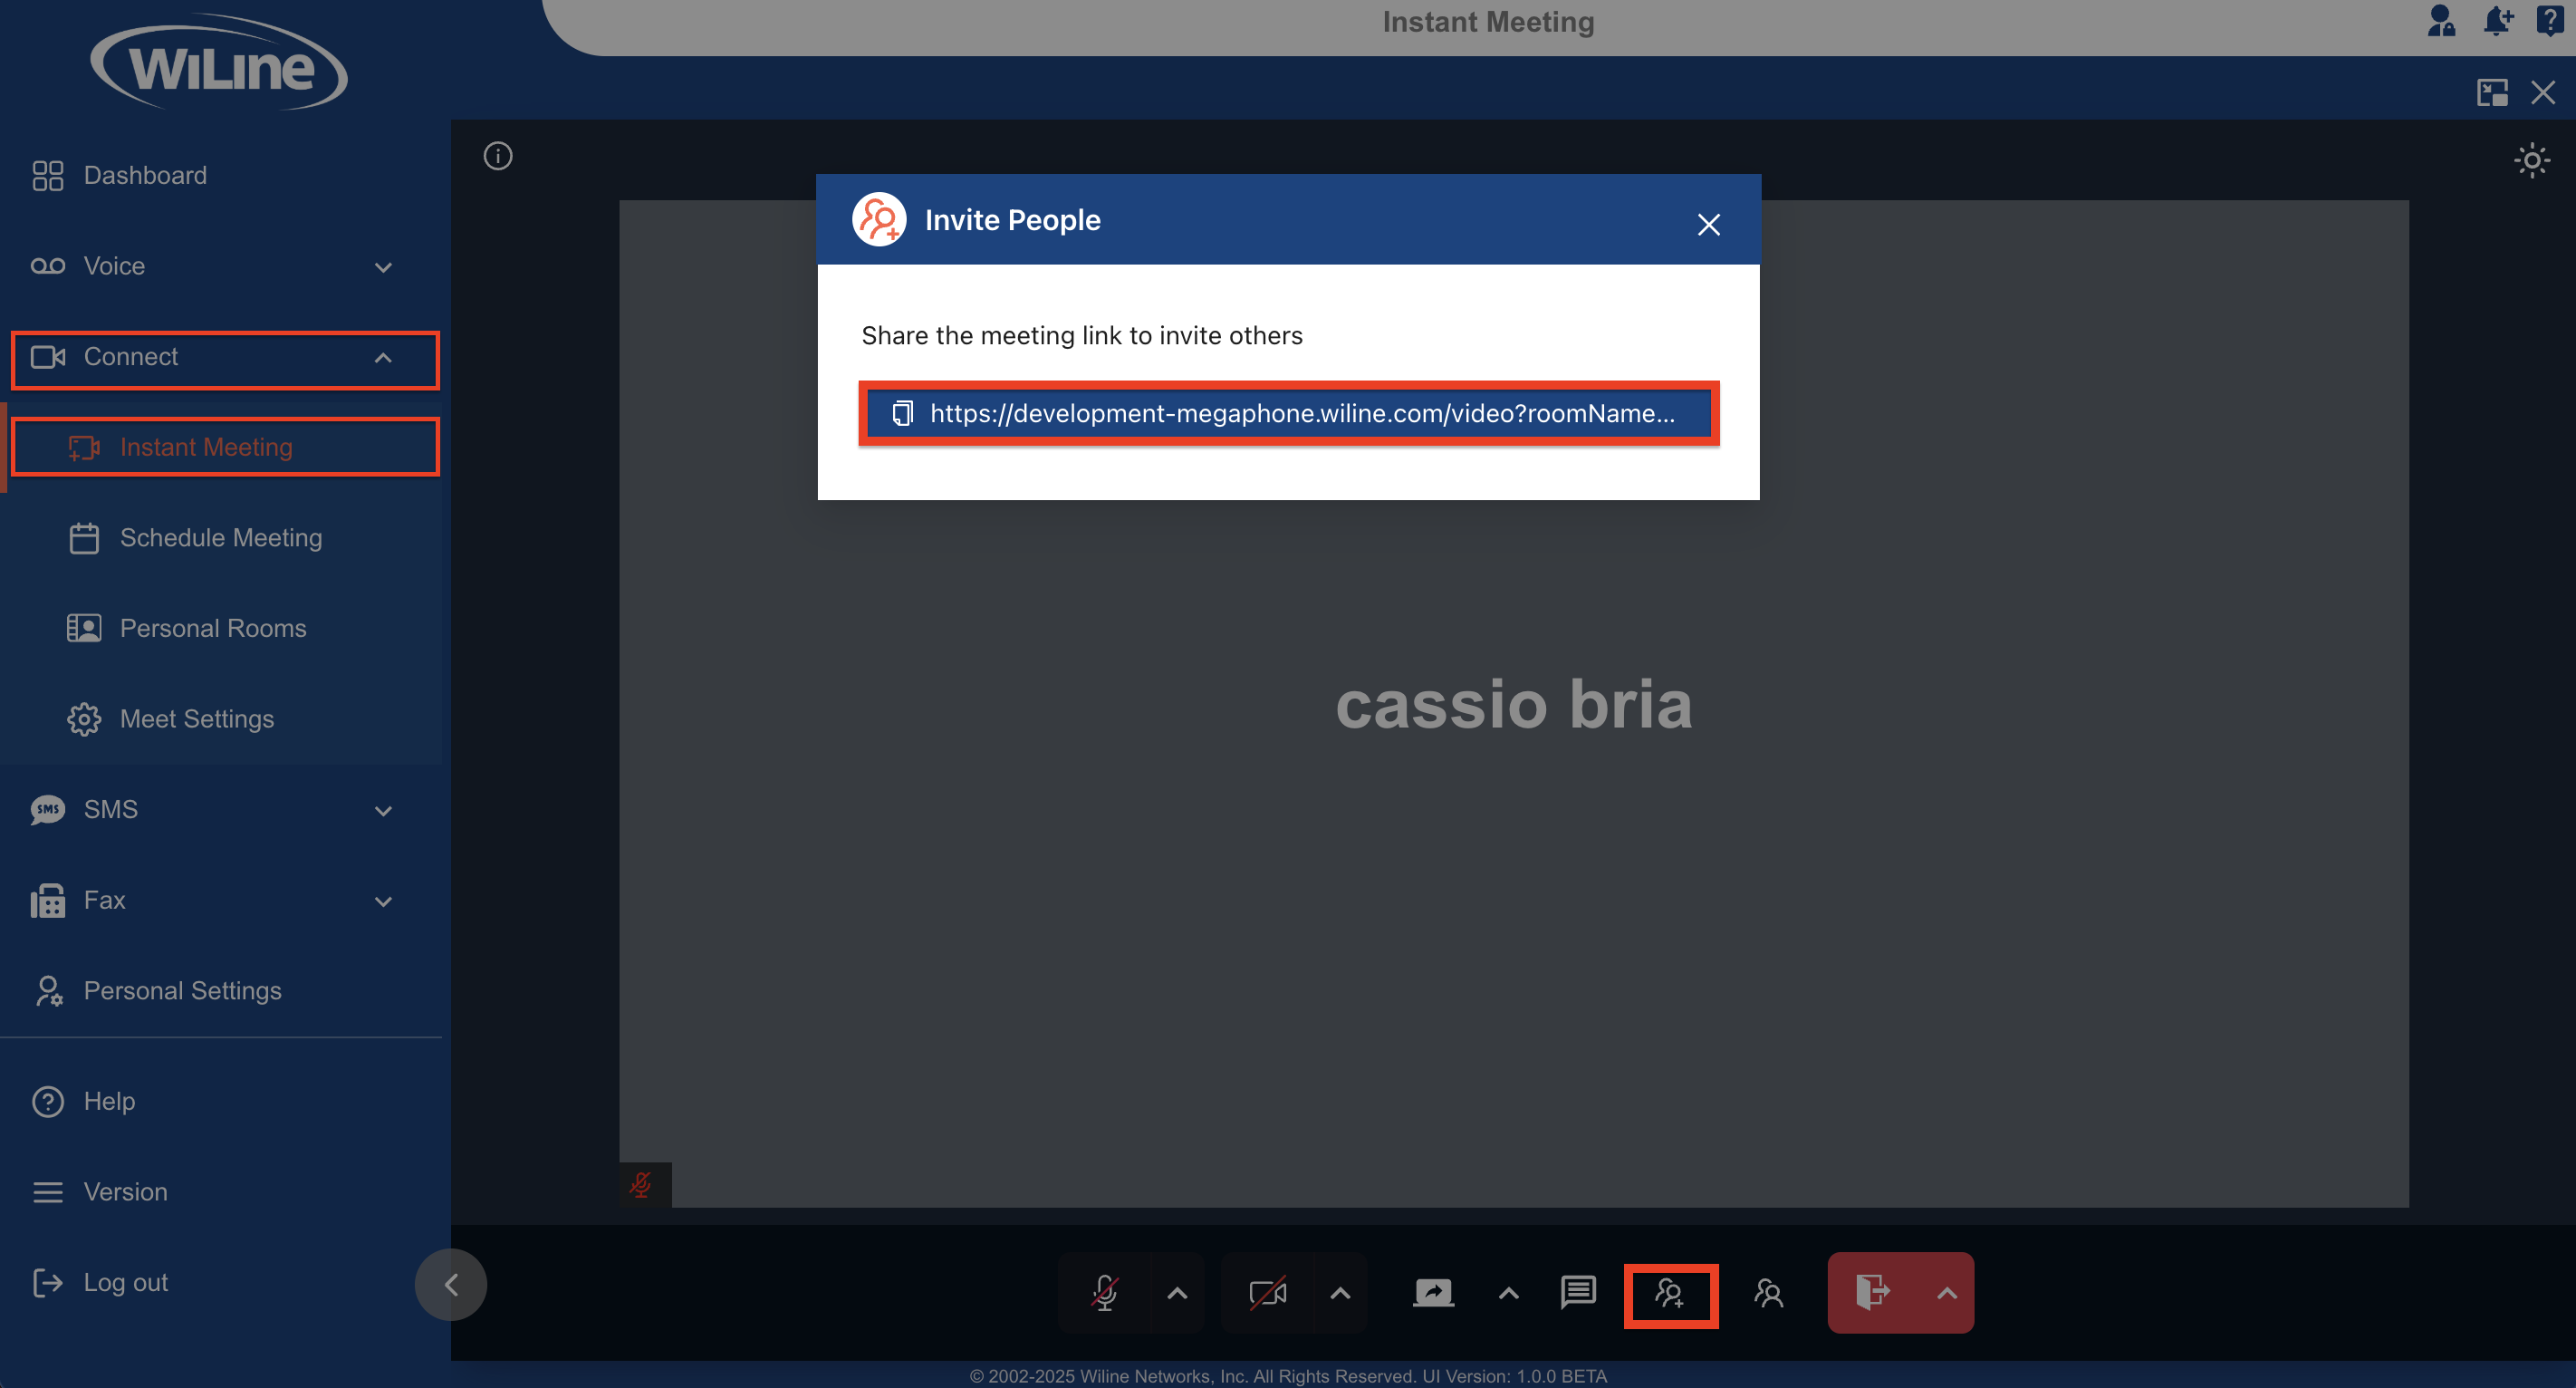
- Click the Invite People button from the meeting controls.
- Click Copy Link and share it with your contacts.
Meeting Controls Overview
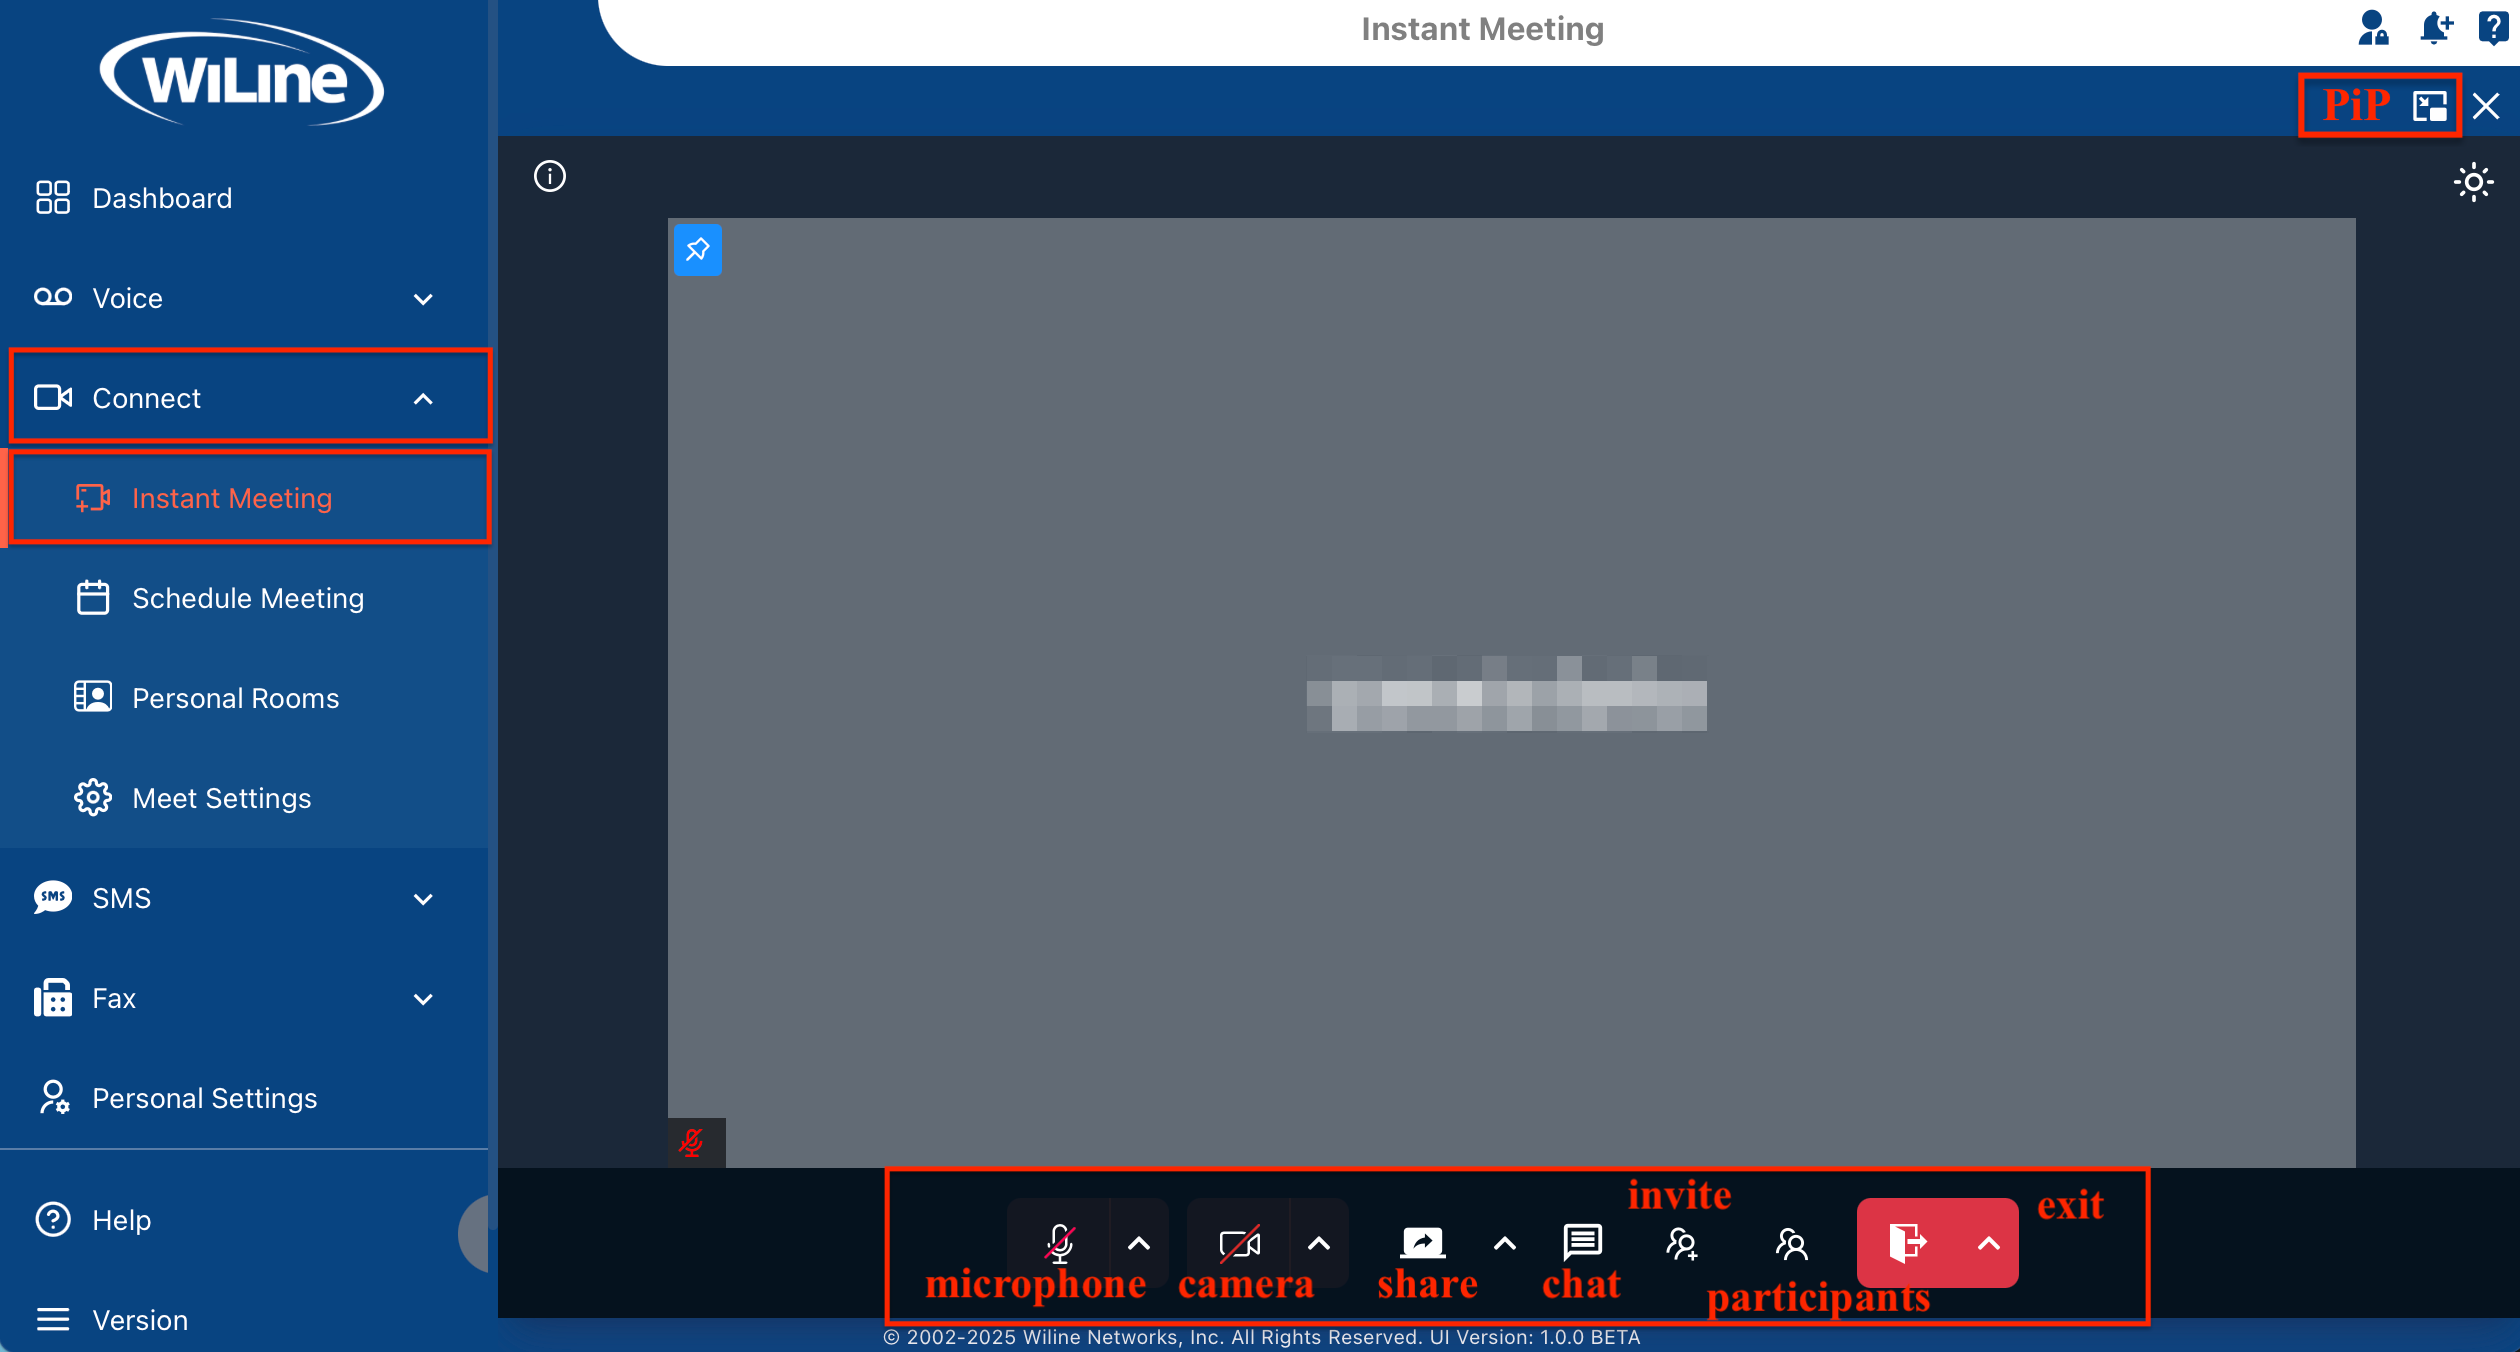
At the bottom of the screen, you'll find controls similar to those in Zoom:
-
Start/Stop Audio: Enable or mute your microphone. For advanced settings (e.g., device selection, noise reduction, statistics), see the Adjust Meeting Settings section.
-
Start/Stop Video: Turn your camera on or off. For background effects, camera selection, and video statistics, see the Adjust Meeting Settings section.
-
Share Screen: Click to share your screen.
- Optionally, lock screen sharing to prevent others from sharing.
-
Chat: Open the chat panel to message everyone or a specific participant.
-
Invite People: Access the invite menu again to copy/share the link.
-
Participants: View who’s in the meeting.
-
Exit / End Session:
- Click Exit to leave the meeting.
- If you're the host, click the arrow next to Exit and select End Session to end the meeting for all.
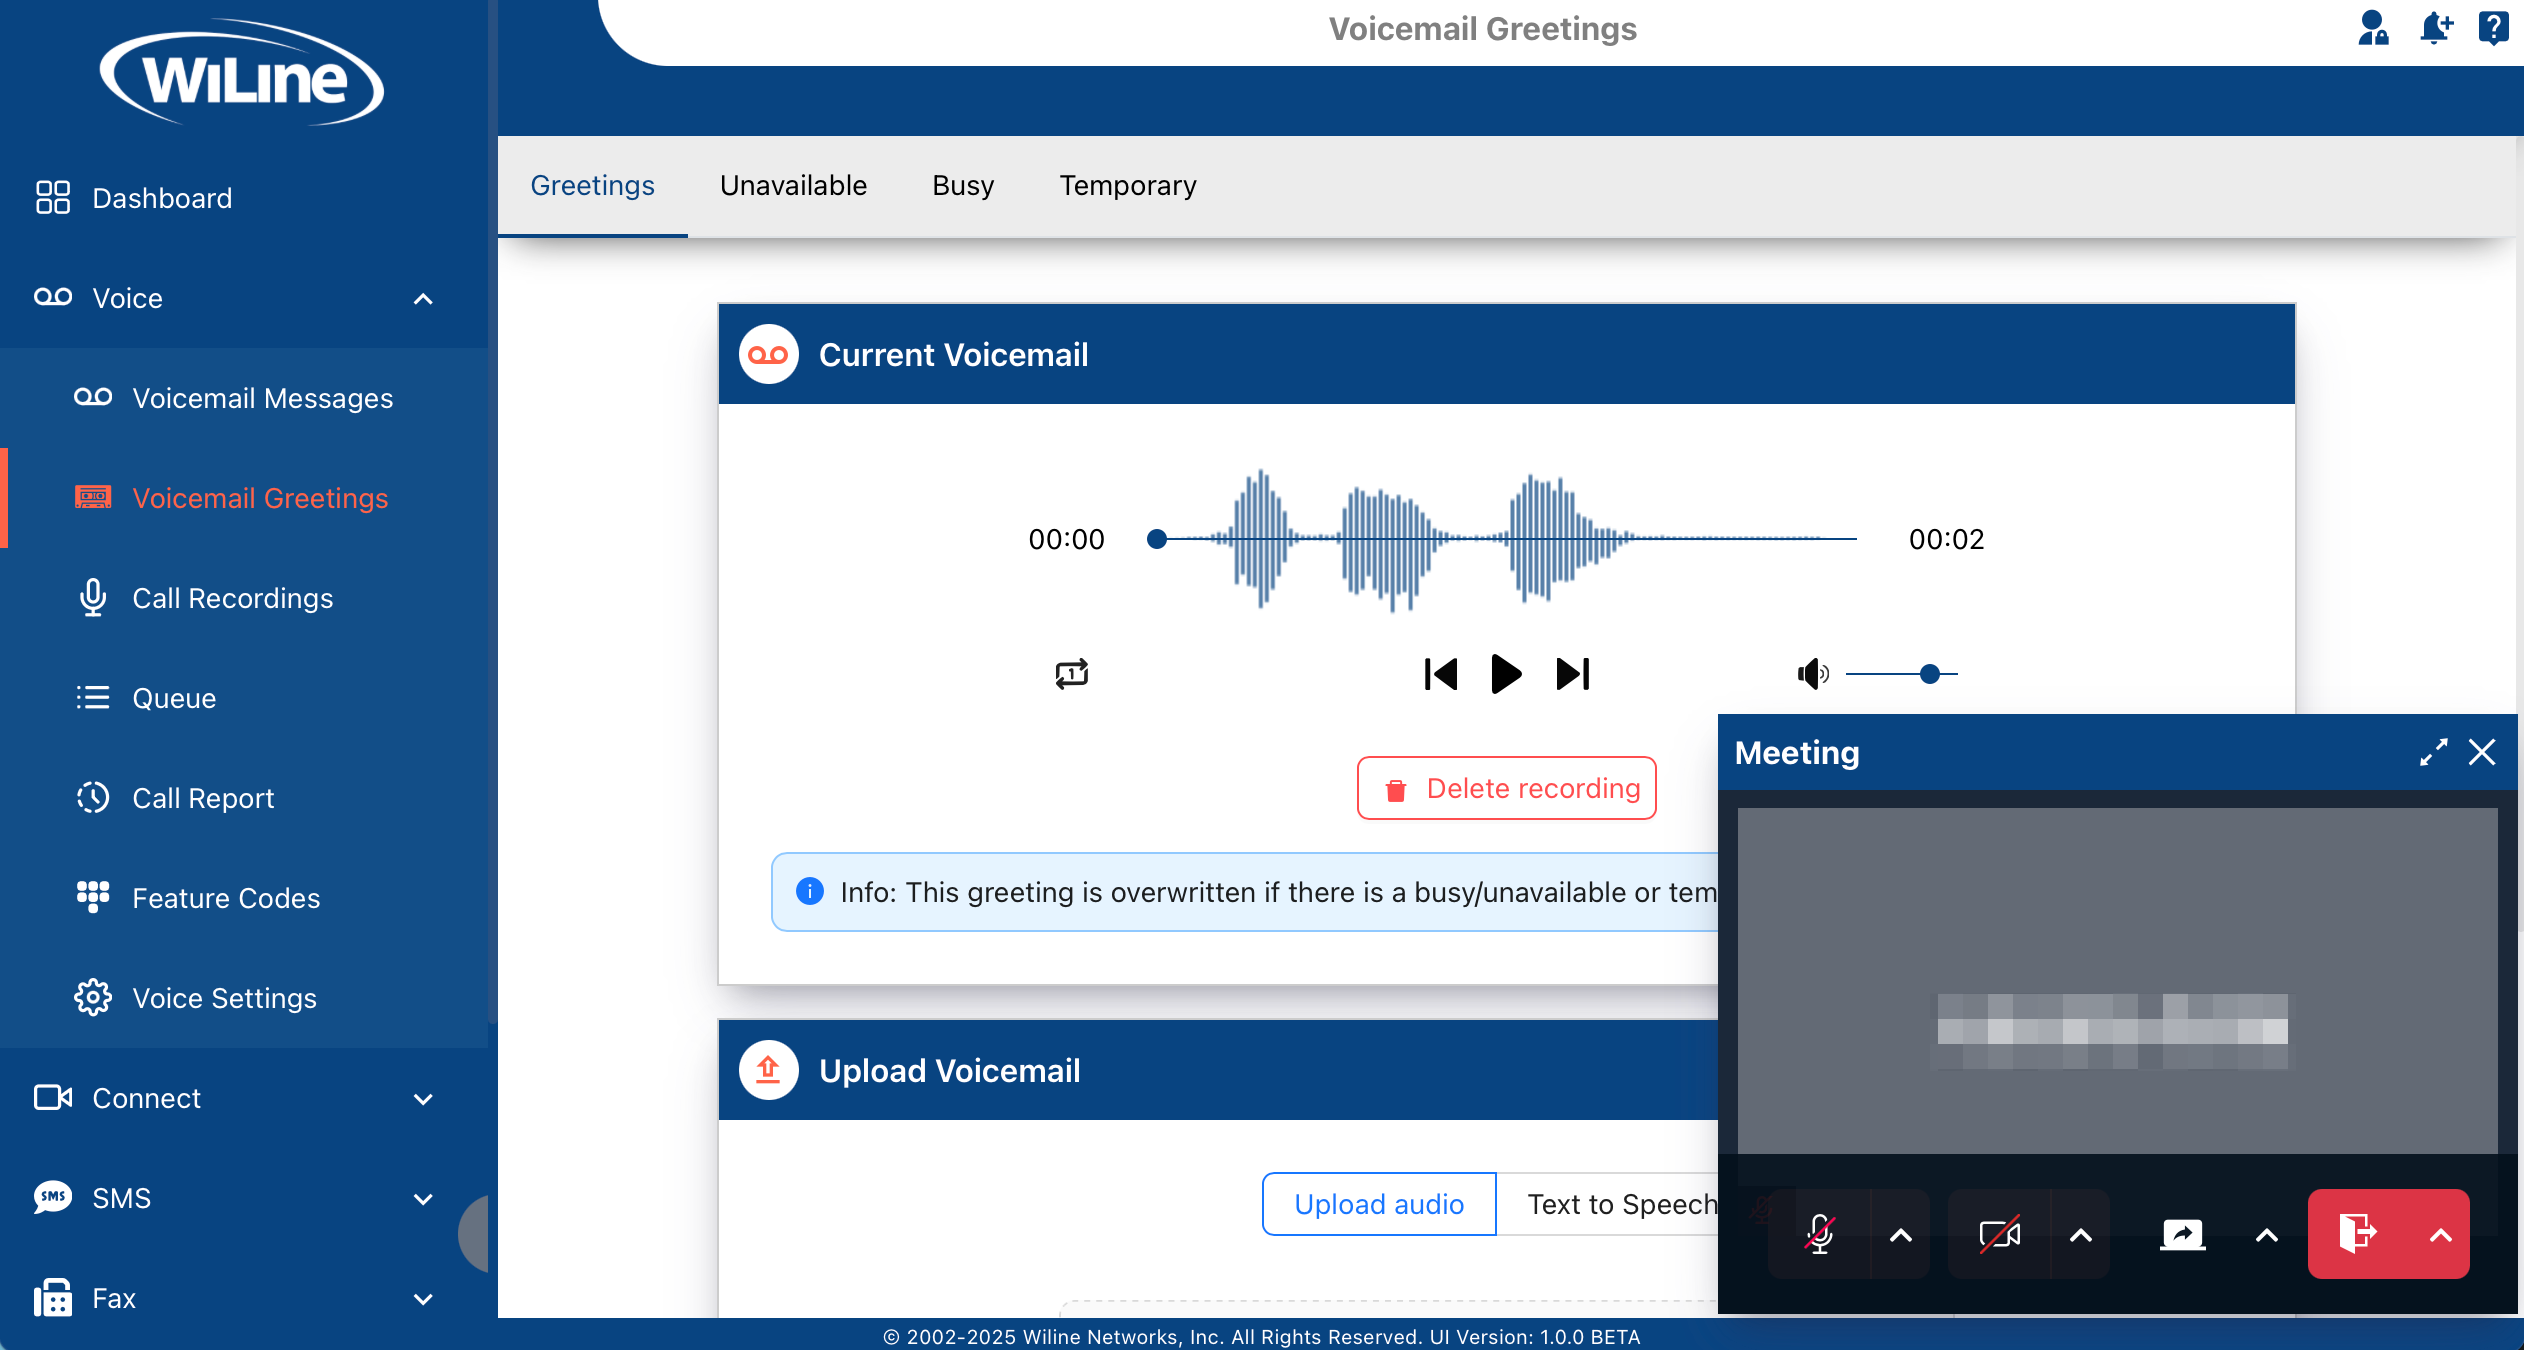
Optional: Picture-in-Picture (PiP) Mode (Only available on Chrome and Firefox)
- If you're using Chrome or Firefox, you can click the PiP icon (if available) in the upper-right corner to keep the meeting in a small, movable window while you work in other tabs or applications.
Optional: Adjust Meeting Settings
- Click the Settings icon to open preferences.
Audio Settings
-
Click the microphone icon to mute or unmute yourself.
-
Click the arrow next to the microphone to:
- Select a Microphone: Choose between your built-in mic or an external one.
- Select a Speaker: Choose which output device you want to use.
- Reduce Background Noise
- Audio Settings: View performance metrics for both Send and Receive, including:
- Frequency
- Byte Rate
- Latency
- Jitter
- Packet Loss (Average and Max)
- Leave Audio
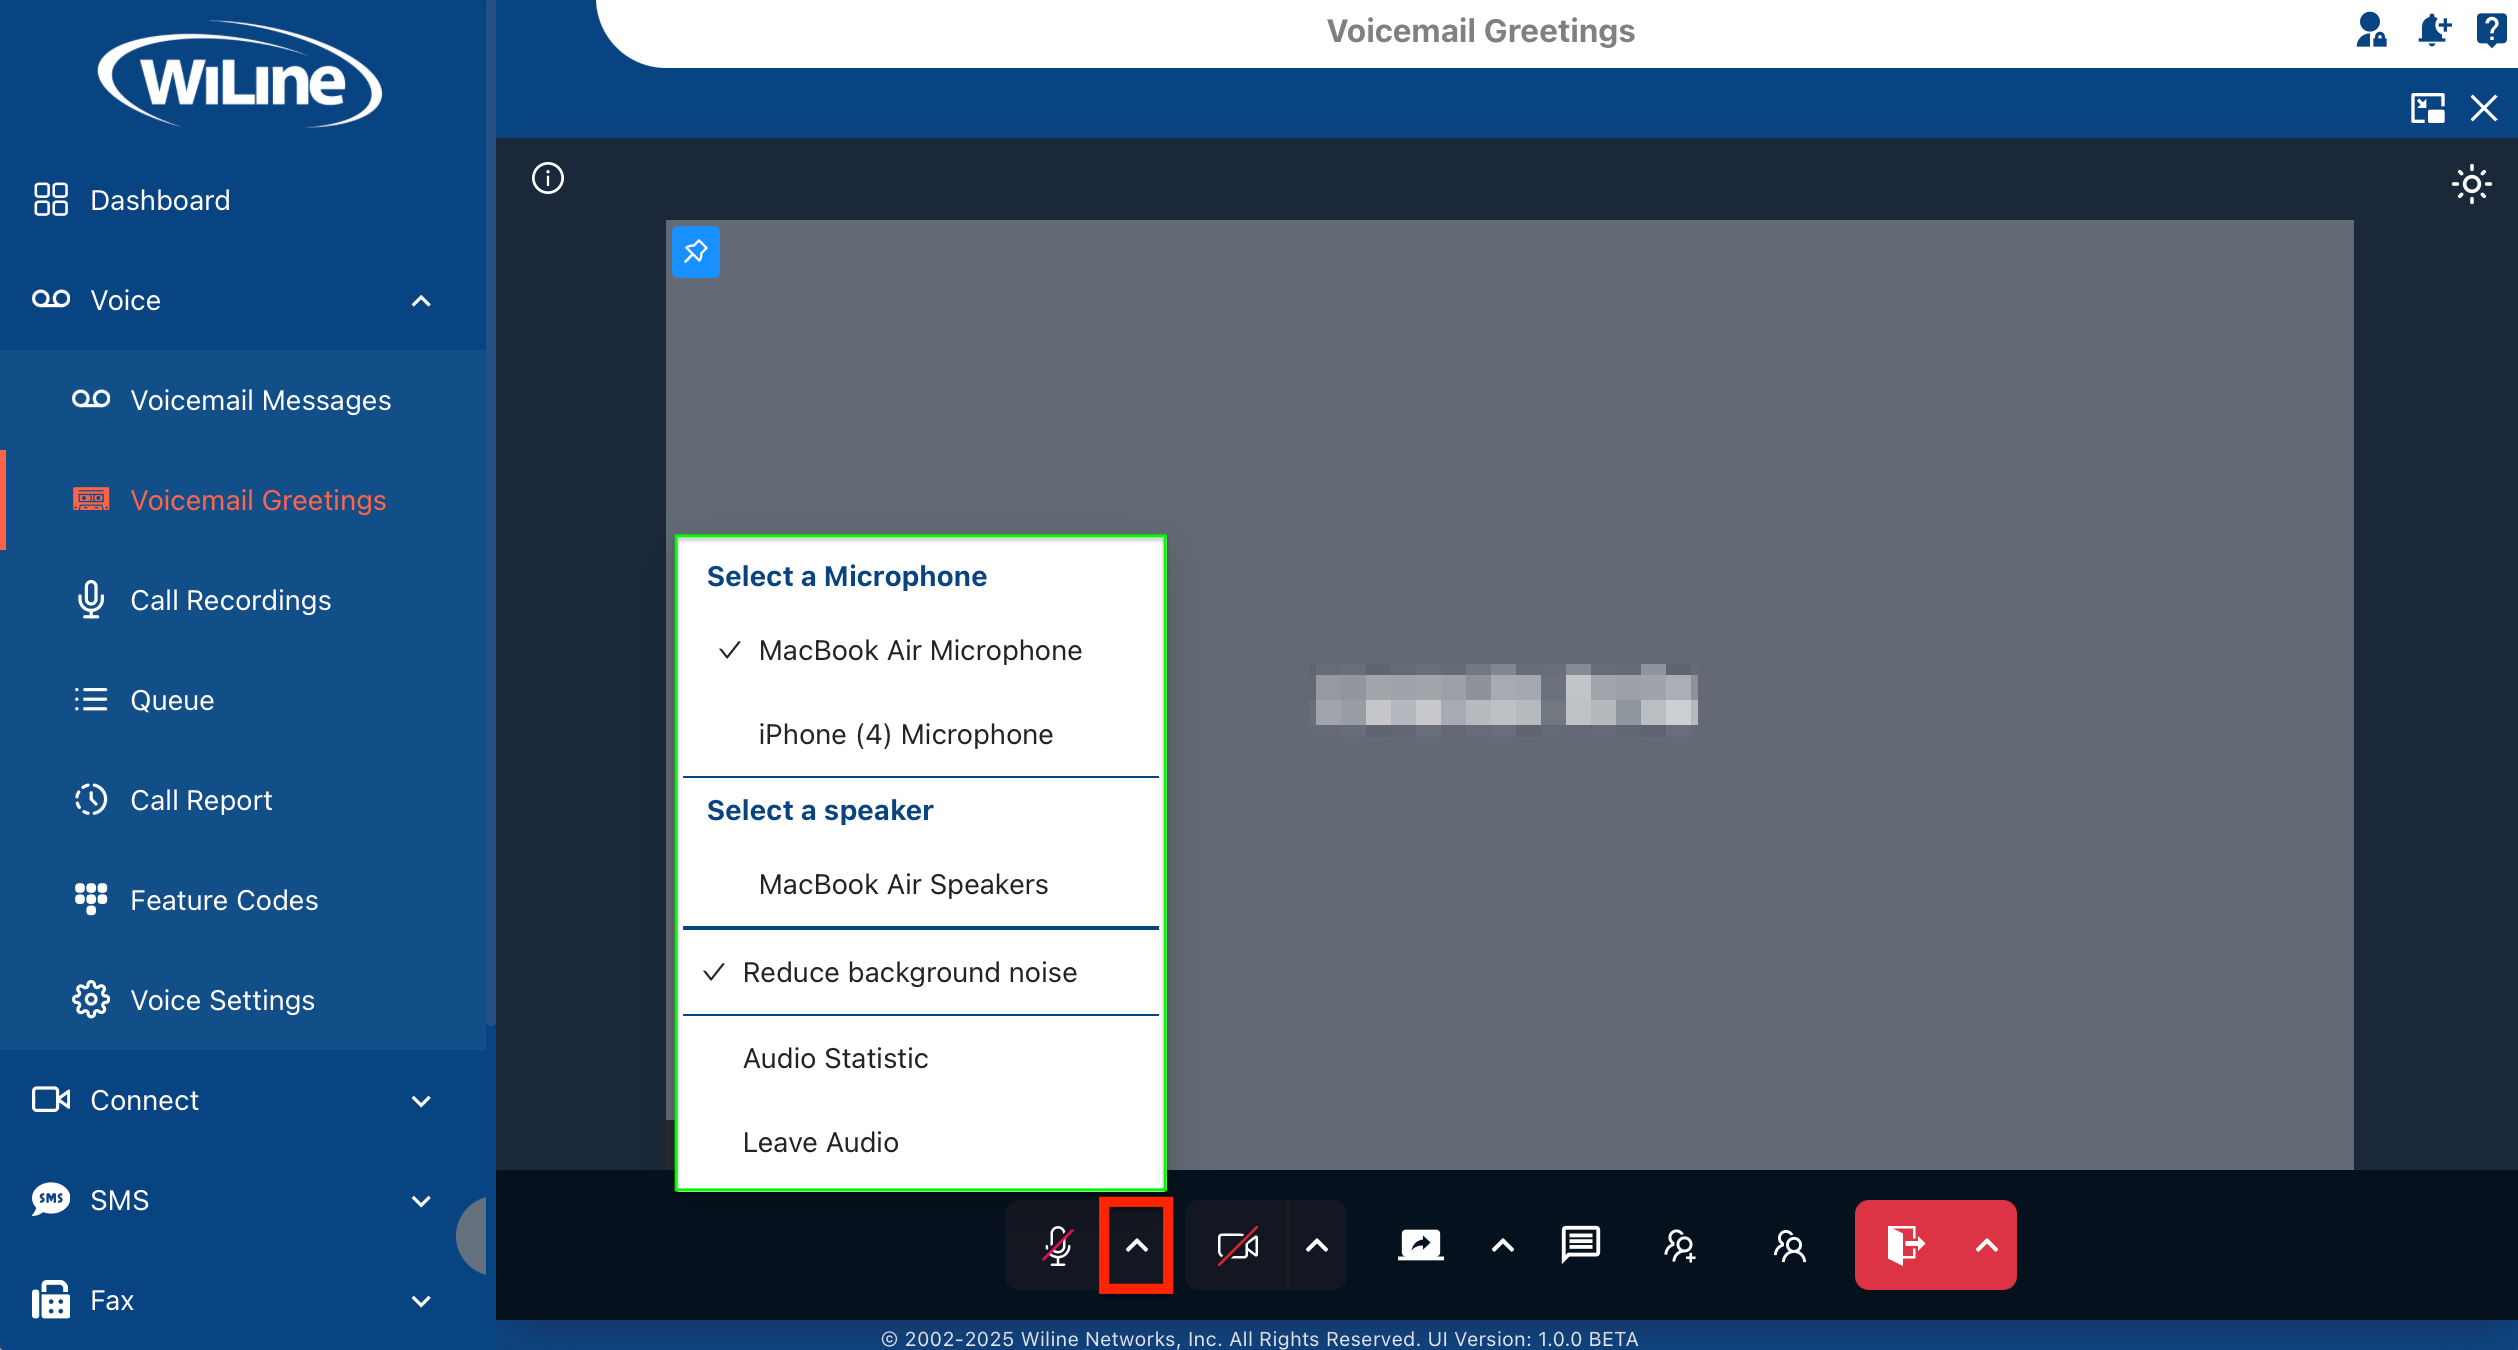
Figure 5. Detailed audio settings.
Video Settings
-
Click the camera icon to turn your video on or off.
-
Click the arrow next to the camera to:
- Select a Camera: Choose from available video devices.
- Mirror My Video
- Blur My Background
- Select Custom Background: Choose from pre-set options.
- Video Statistics: View metrics for both Send and Receive, including:
- Latency
- Jitter
- Bandwidth
- Packet Loss (Average and Max)
- Resolution
- Frames Per Second (FPS)
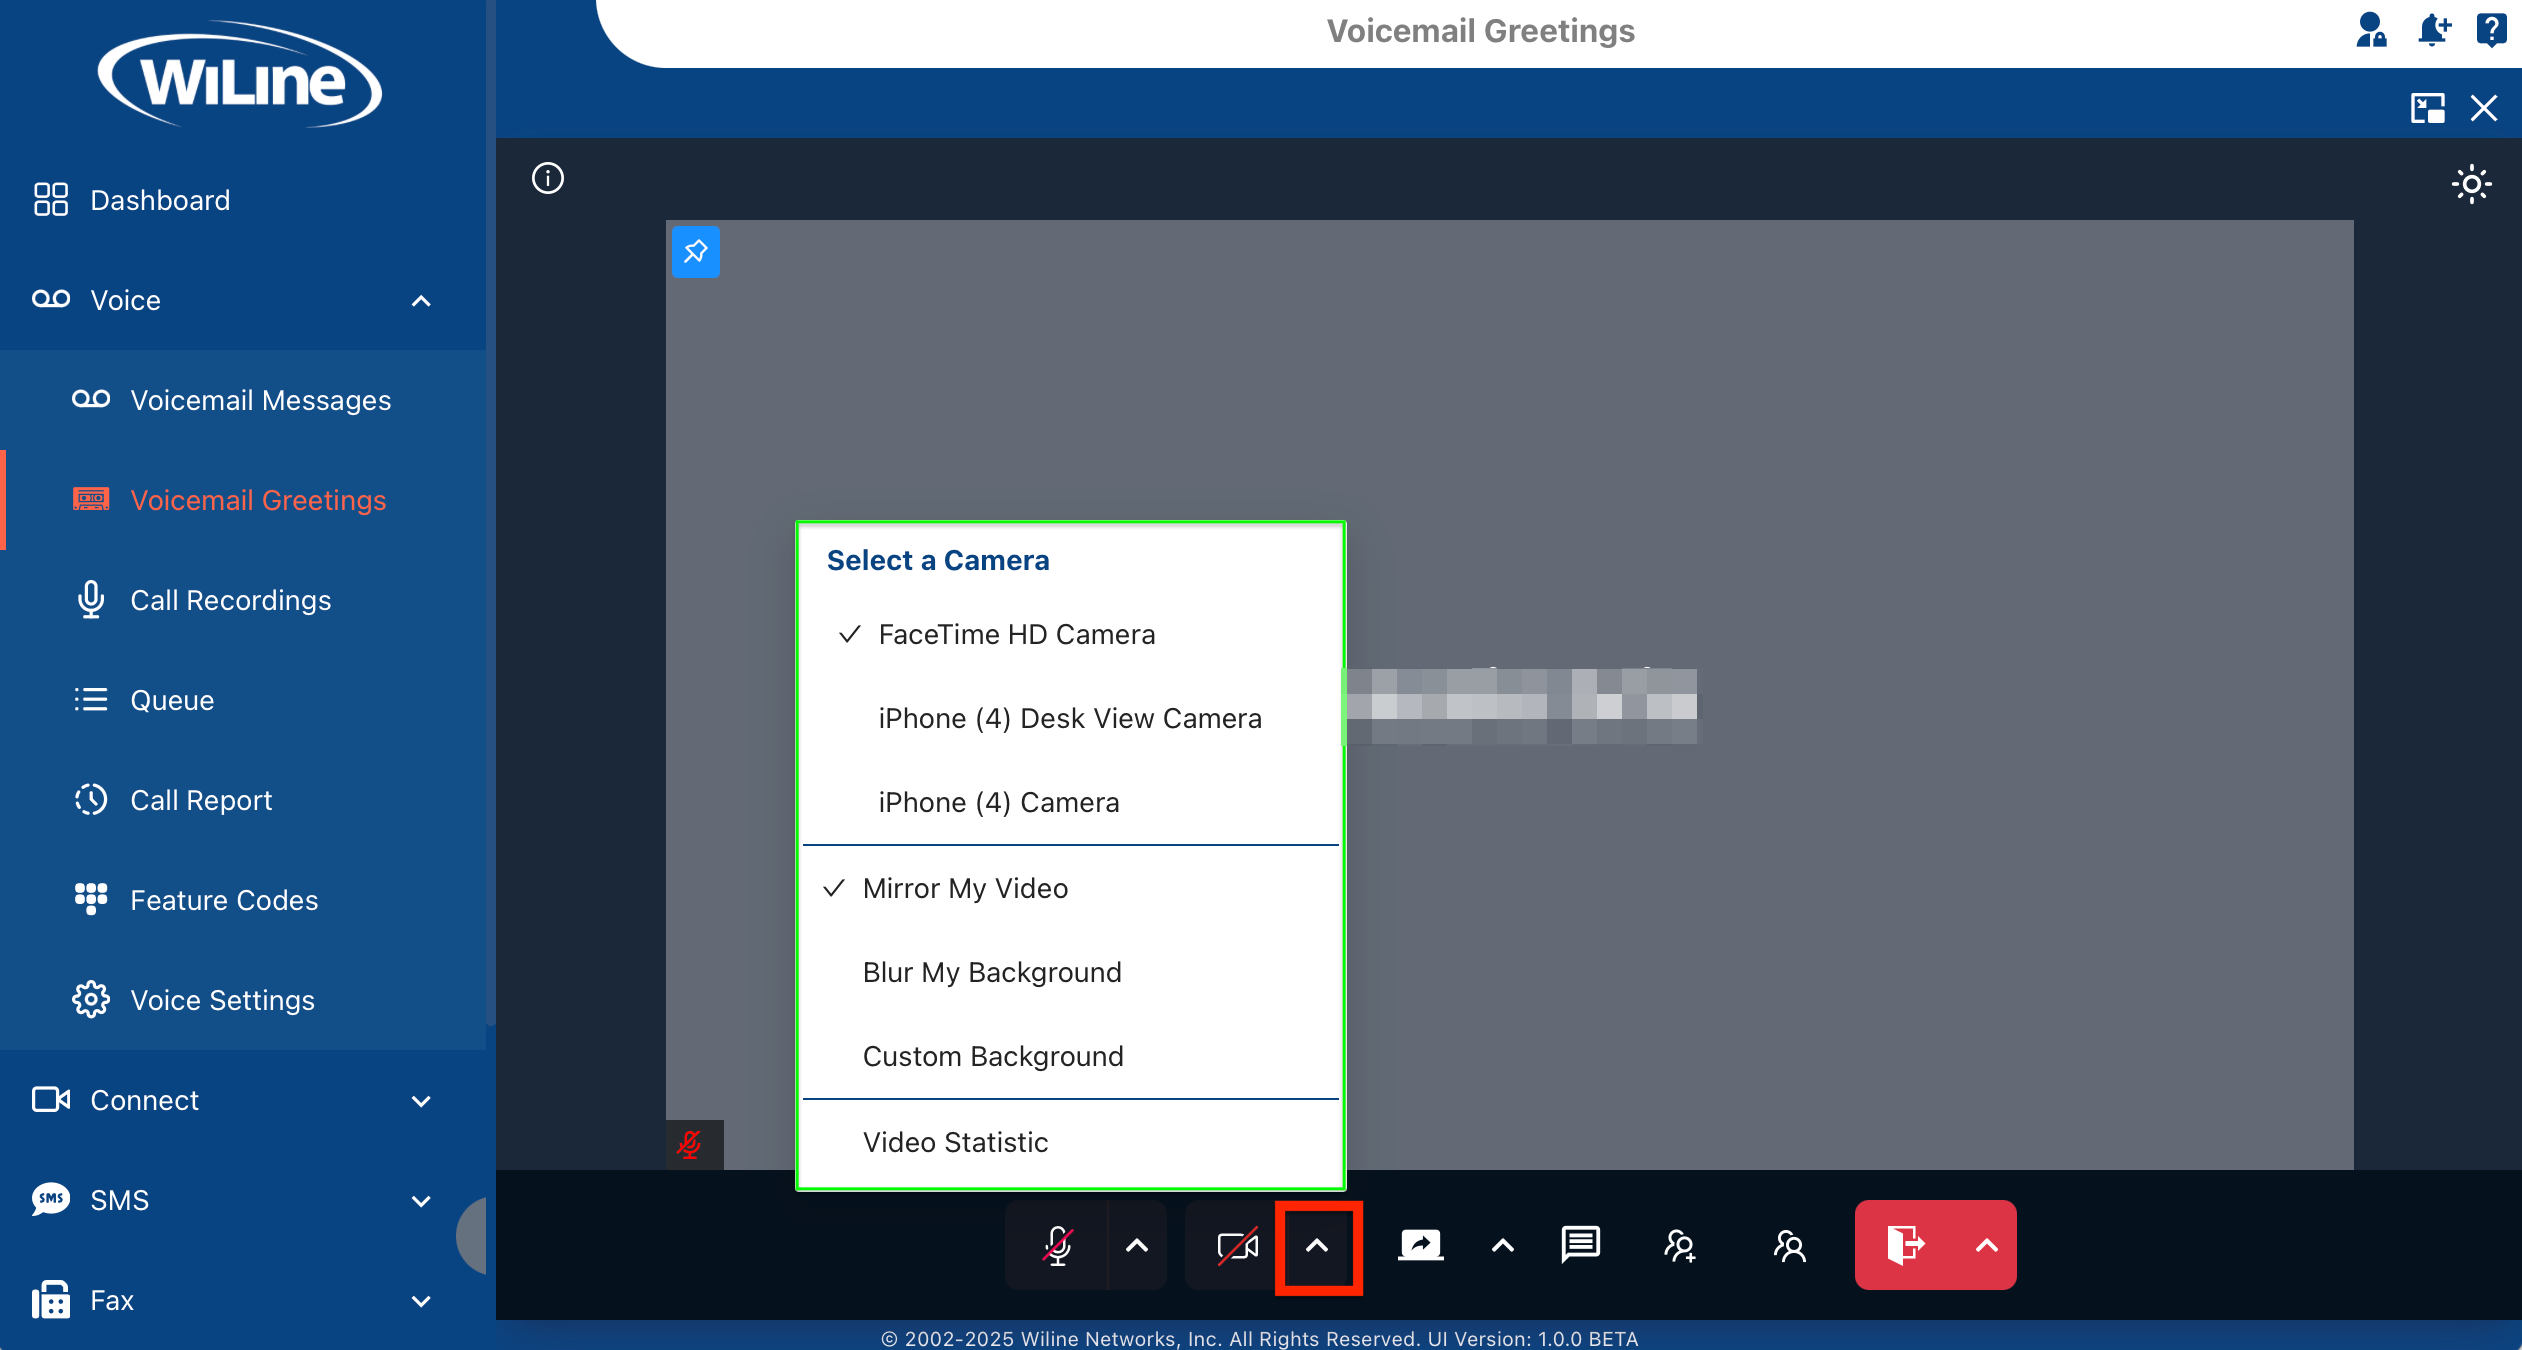
Figure 6. Detailed video settings.
Learn More
For a deeper understanding of network performance metrics like latency, jitter, and packet loss, and their impact on real-time communications, check out these informative resources:
-
NetBeez – How to Troubleshoot Zoom Issues
A beginner-friendly overview of common Zoom performance issues including jitter, packet loss, and troubleshooting tips. -
Cisco – Introduction to Network Performance Issues
Offers clear context and examples of how latency, jitter, and packet loss impact performance in enterprise networks. -
Kentik – Understanding Latency, Packet Loss, and Jitter
Comprehensive definitions of key network performance concepts relevant to video and audio calls.
What You Should Know
Real-time communication quality depends heavily on the following:
- Latency: The time it takes for data to travel from source to destination. Lower latency means less delay.
- Jitter: Variation in packet arrival times, which can cause choppy audio or video.
- Packet Loss: When data packets fail to reach their destination, leading to glitches or interruptions.
Network Performance Diagrams
The following diagrams illustrate common issues that affect call quality: latency, jitter, and packet loss. Each one includes a visual example and a short explanation.
Diagram 1: Latency
Packets arrive with consistent delay, which may cause slight lag in conversation.
Diagram 2: Jitter
Packets arrive at uneven intervals, often resulting in choppy audio or video.
Diagram 3: Packet Loss
Some packets are lost entirely, leading to skipped audio or broken video frames.
With this visual explanation, the Connect Portal helps users better understand how network conditions impact call quality, empowering more effective diagnostics and smoother communication.
Why These Metrics Matter
Monitoring these metrics helps you quickly identify if poor call quality is due to network issues such as unstable Wi-Fi, overloaded routers, or congestion on your internet connection. Understanding these concepts enables effective troubleshooting and helps maintain clear, reliable meetings.
With these intuitive instant meeting features, the Connect Portal empowers you to quickly connect and collaborate with your team, making communication effortless and efficient.