Update Customer Settings
In the Admin Portal, administrators can update customer information such as the default area code, ring timeout, and emergency location. This ensures accurate call routing, smooth handling, and reliable emergency responses.
How to Update Customer Settings
- General
- Caller Presentation
- Restrictions
General Settings
To update general activation settings, follow these steps:
- Log in to the Admin Portal.
- Go to Activations > Customer in the left-side menu.
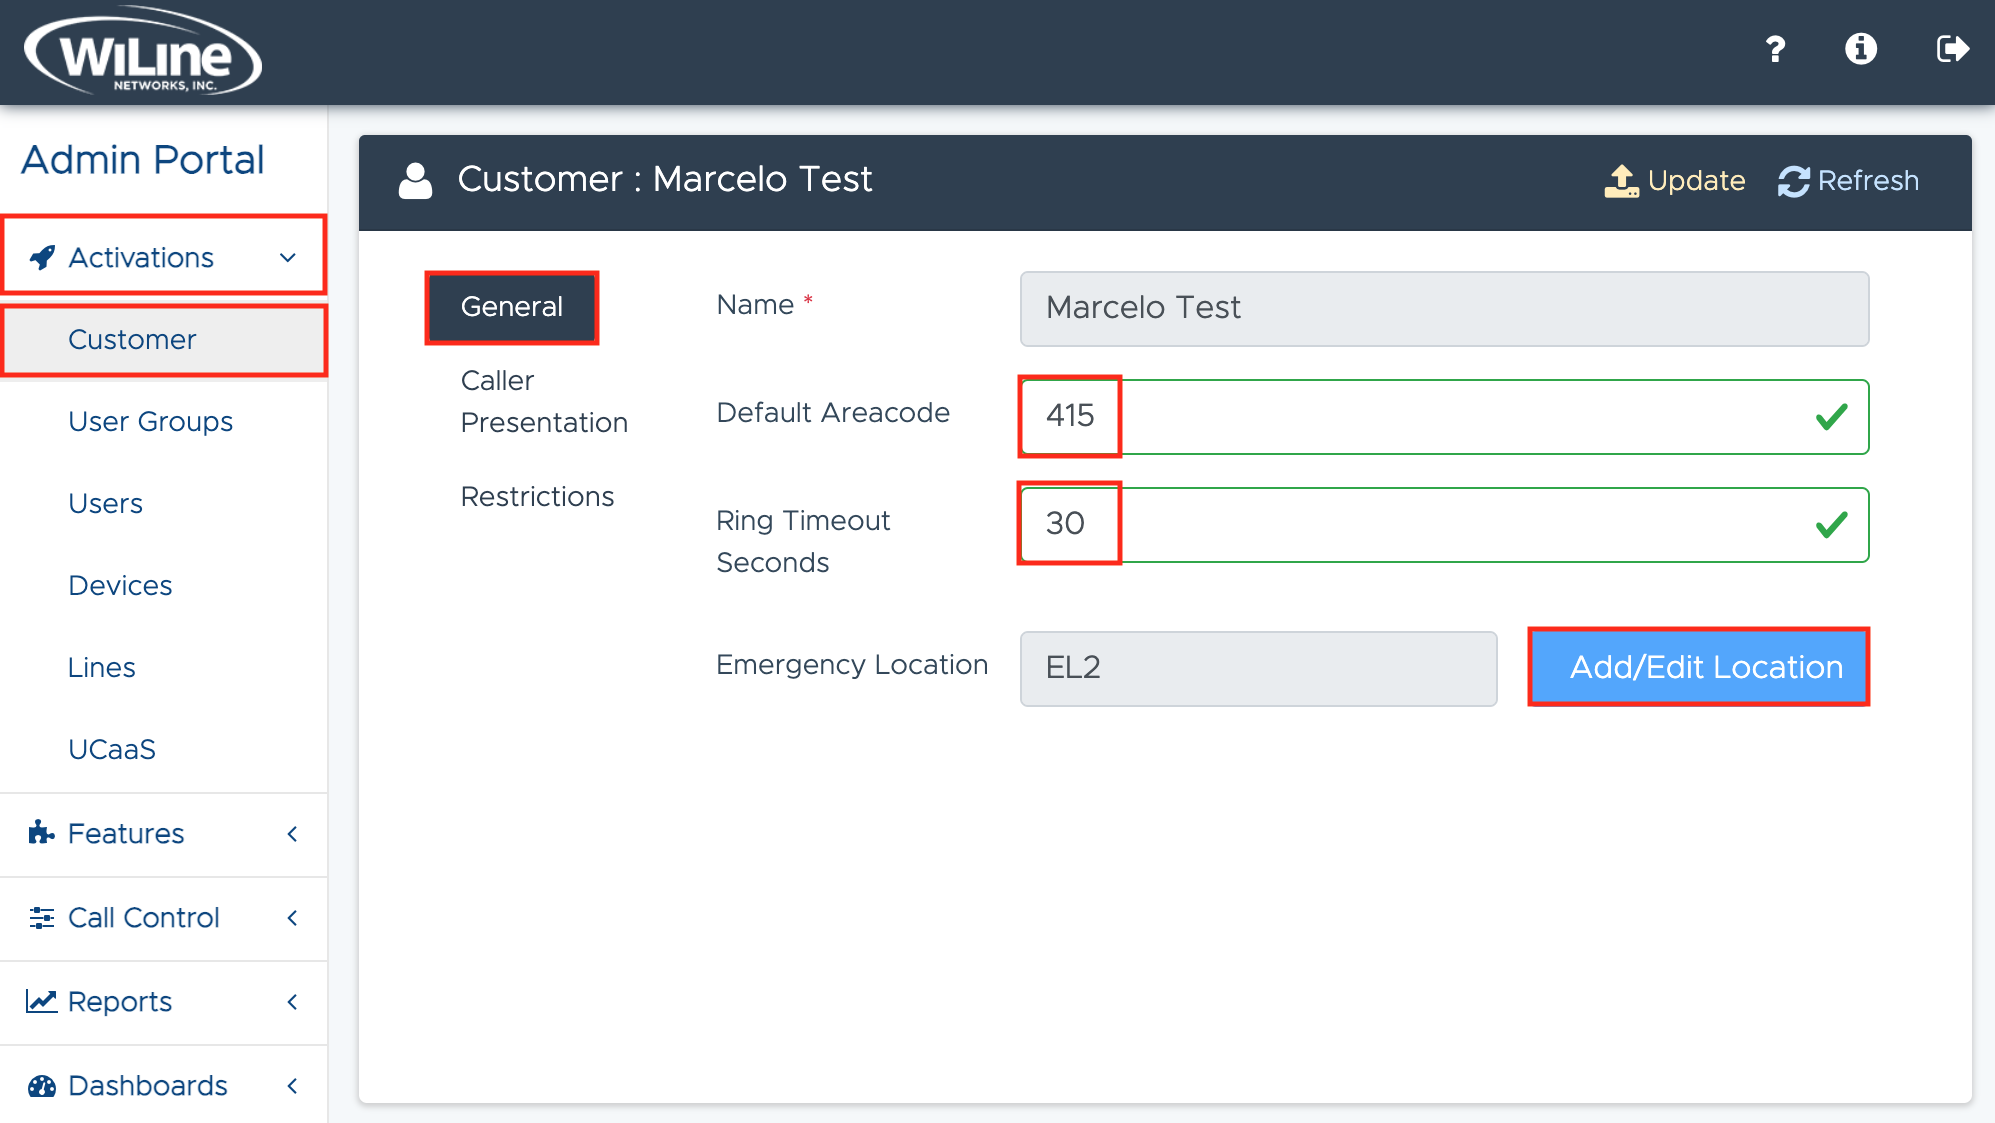
- Click on the General section.

The following setting is not editable:
- Name (required): The customer's name, set by a WiLine UCaaS Admin.
E.g.,Marcelo Test
- Add or edit the following fields:
-
Default Area Code: Specify the default area code for customer calls.
E.g.,415 -
Ring Timeout (seconds): Set the maximum time in seconds the phone will ring before redirecting the call or triggering voicemail.
E.g.,30seconds -
Emergency Location: Assign an emergency location identifier (EL) associated with the customer for accurate emergency call routing.
E.g.,EL2
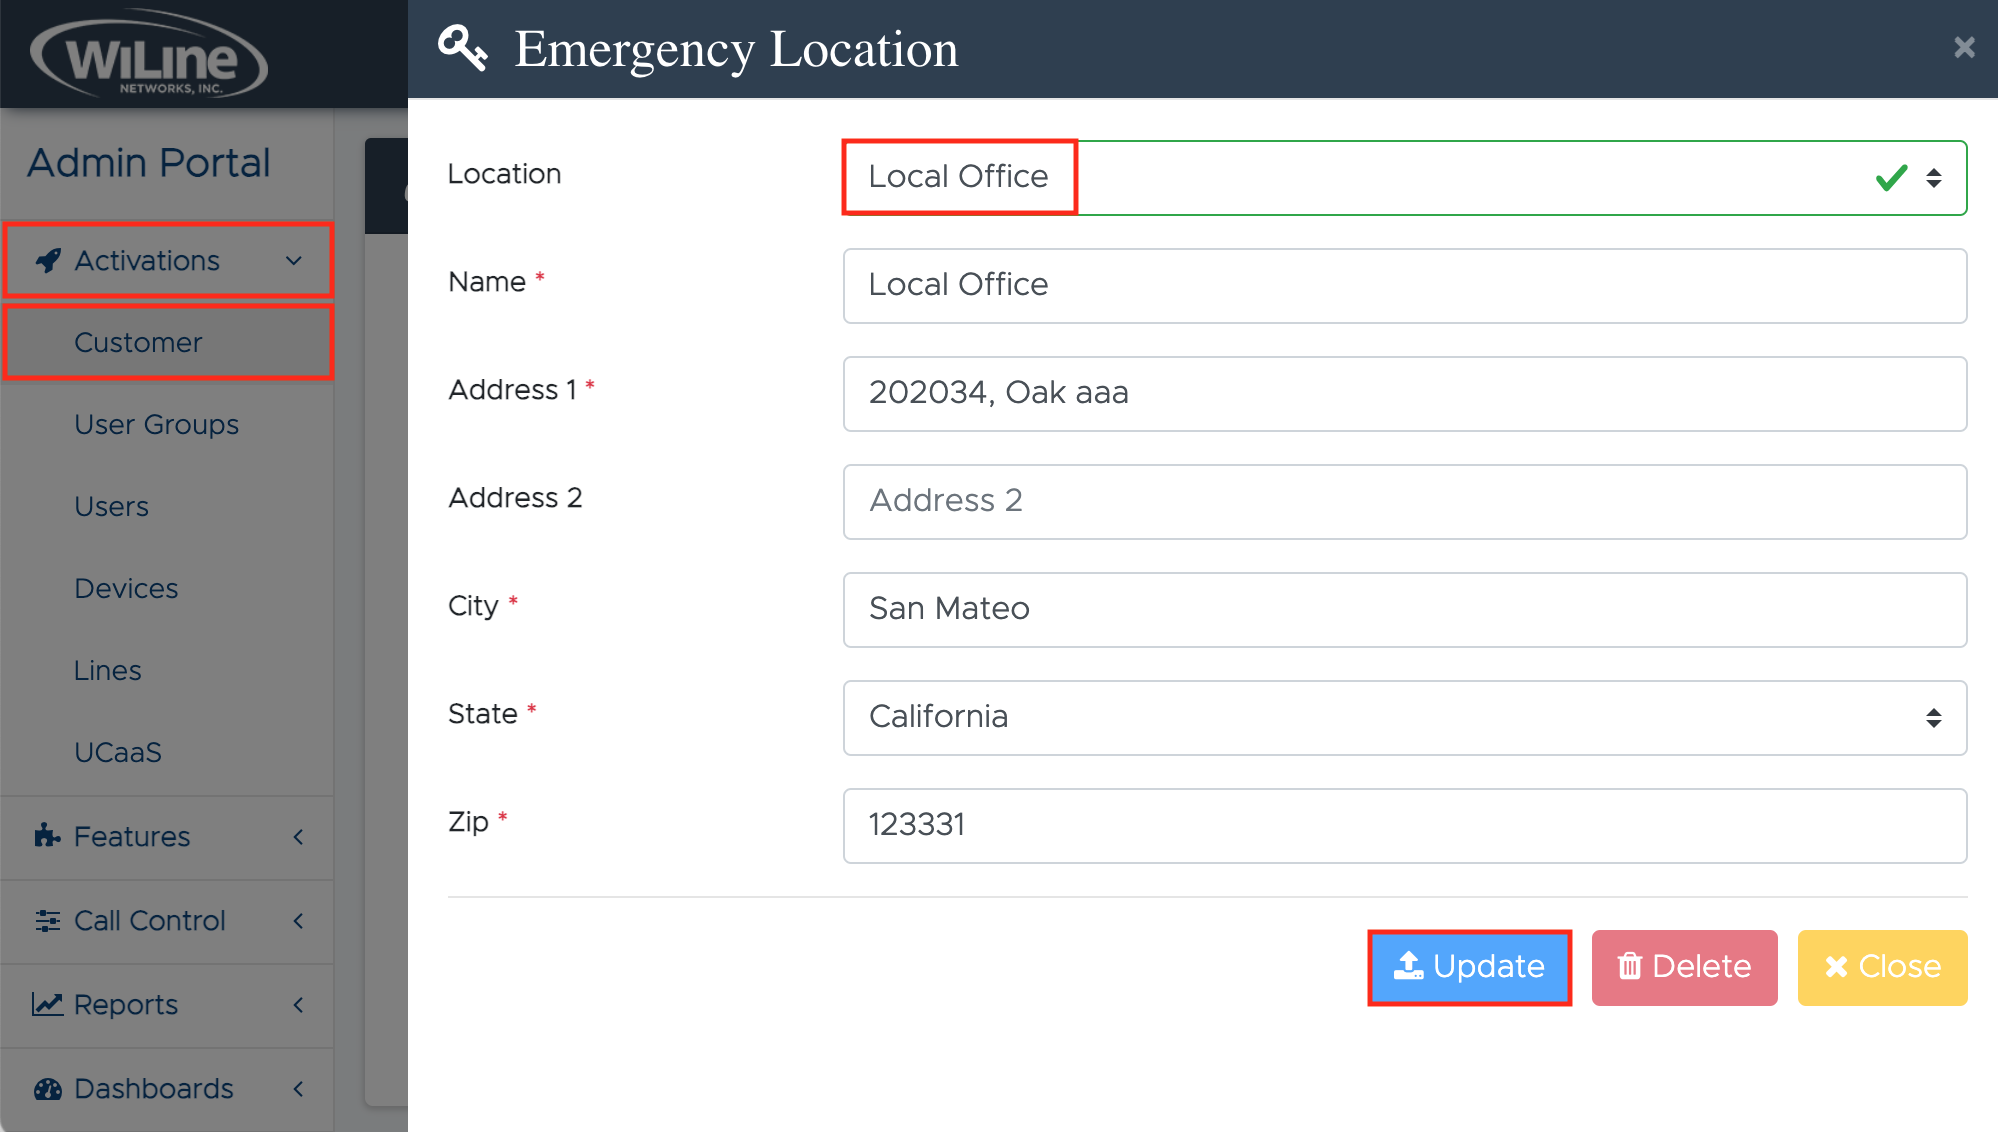
- To add or edit a location, click Add/Edit Location. A pop-up will appear where you can enter the necessary details:

- Select a location from the Location dropdown menu.
Locations are preconfigured by a WiLine UCaaS Admin.
- Click Update to save your changes, Delete to remove all entries, or Close to exit without saving.
Caller Presentation Settings
To update caller presentation settings, follow these steps:
- Log in to the Admin Portal.
- Go to Activations > Customer in the left-side menu.
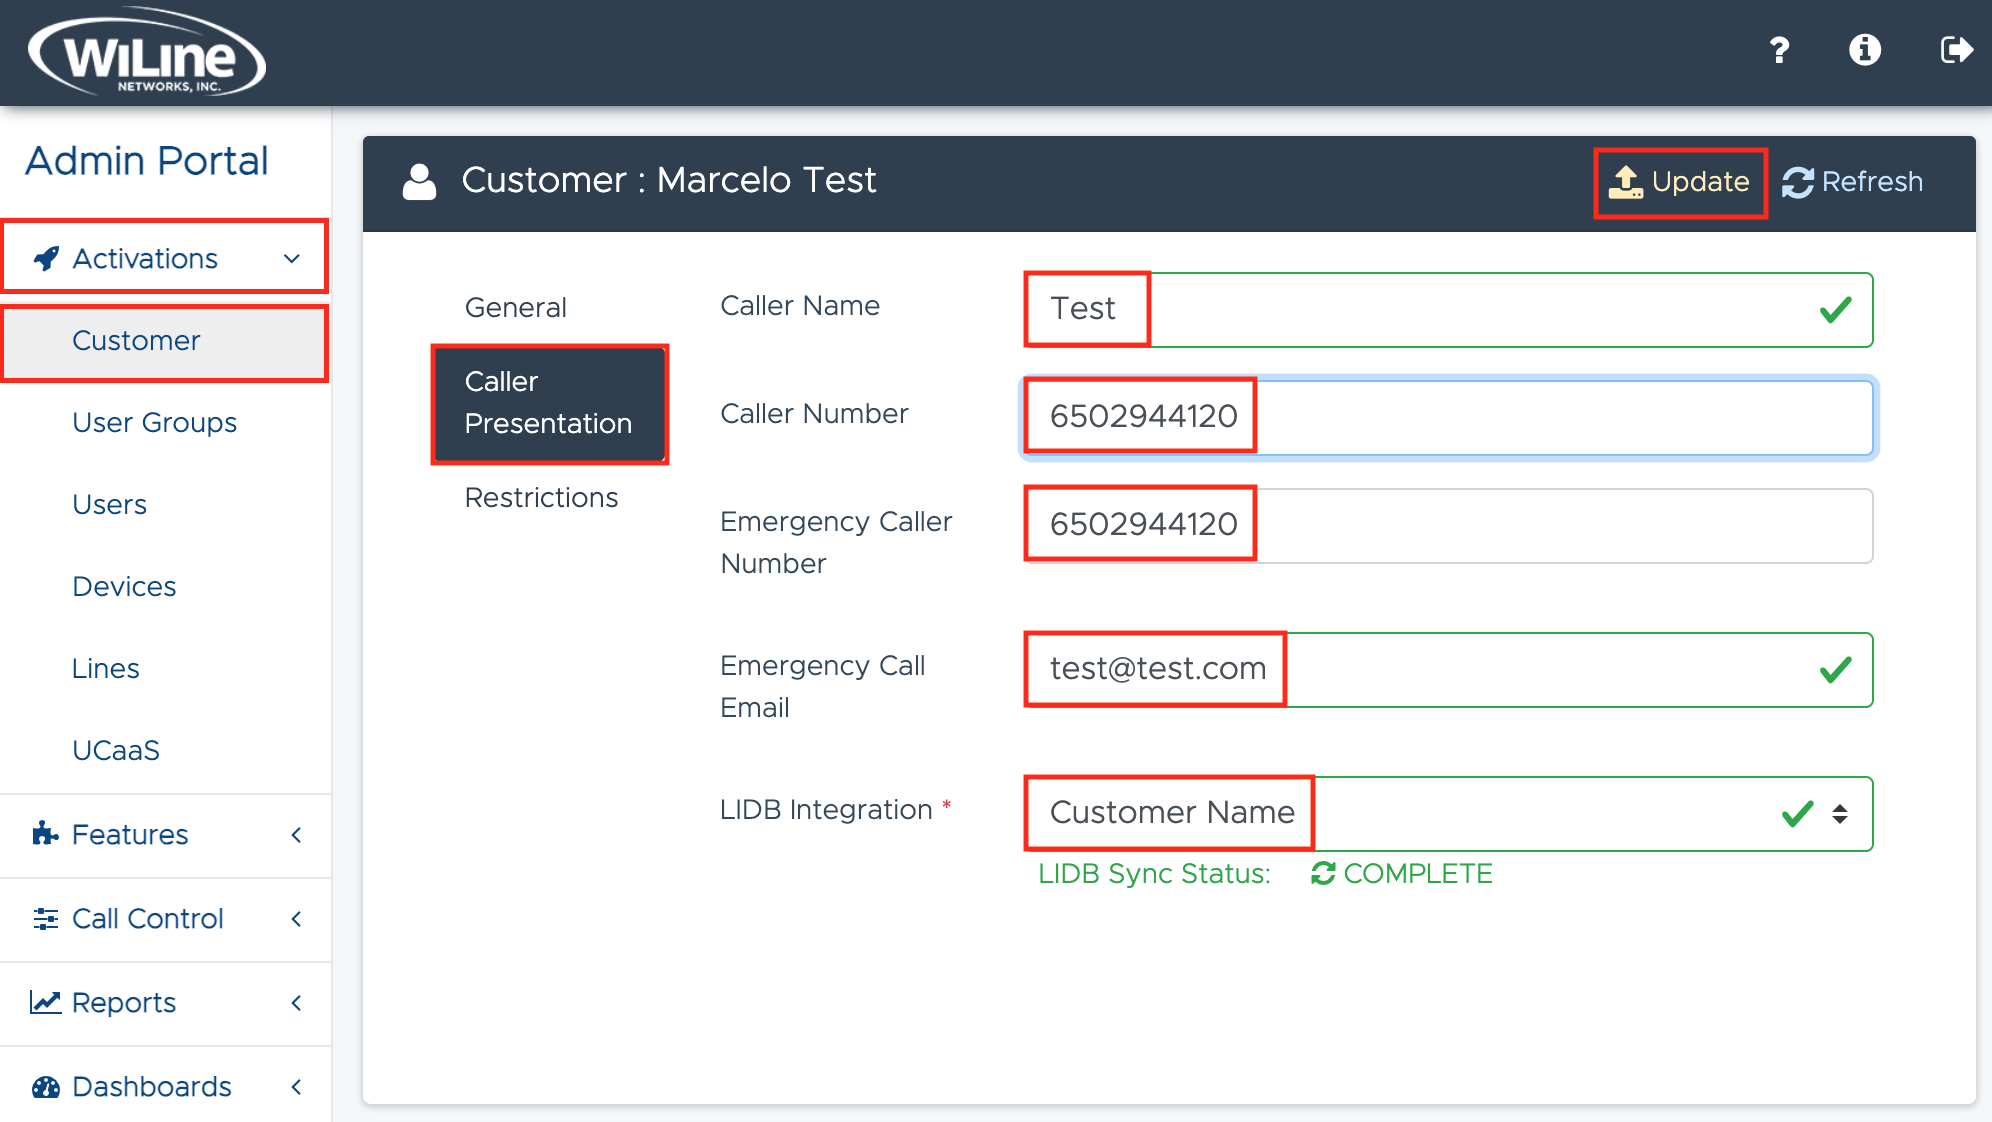
- Click on the Caller Presentation section.

- Configure the following fields:
-
Caller Name: Enter the name displayed on outbound calls.
E.g.,Test -
Caller Number: Specify the phone number shown to recipients for outbound calls.
E.g.,6502944121 -
Emergency Caller Number: Enter the number used for emergency calls, ensuring it matches the emergency location.
E.g.,6502944121 -
Emergency Call Email: Set an email for receiving emergency call notifications.
E.g., test@test.com -
LIDB Integration: Choose an option for caller ID display:
- Disabled: No caller information is sent.
- Customer Name: Displays the customer’s business name.
- User Group Name: Shows the caller's user group information.
- User Name: Displays the caller's individual name.
- Click Update to save your changes or Refresh if updates are not immediately visible.
Restriction Settings
To update restrictions settings, follow these steps:
- Log in to the Admin Portal.
- Go to Activations > Customer in the left-side menu.
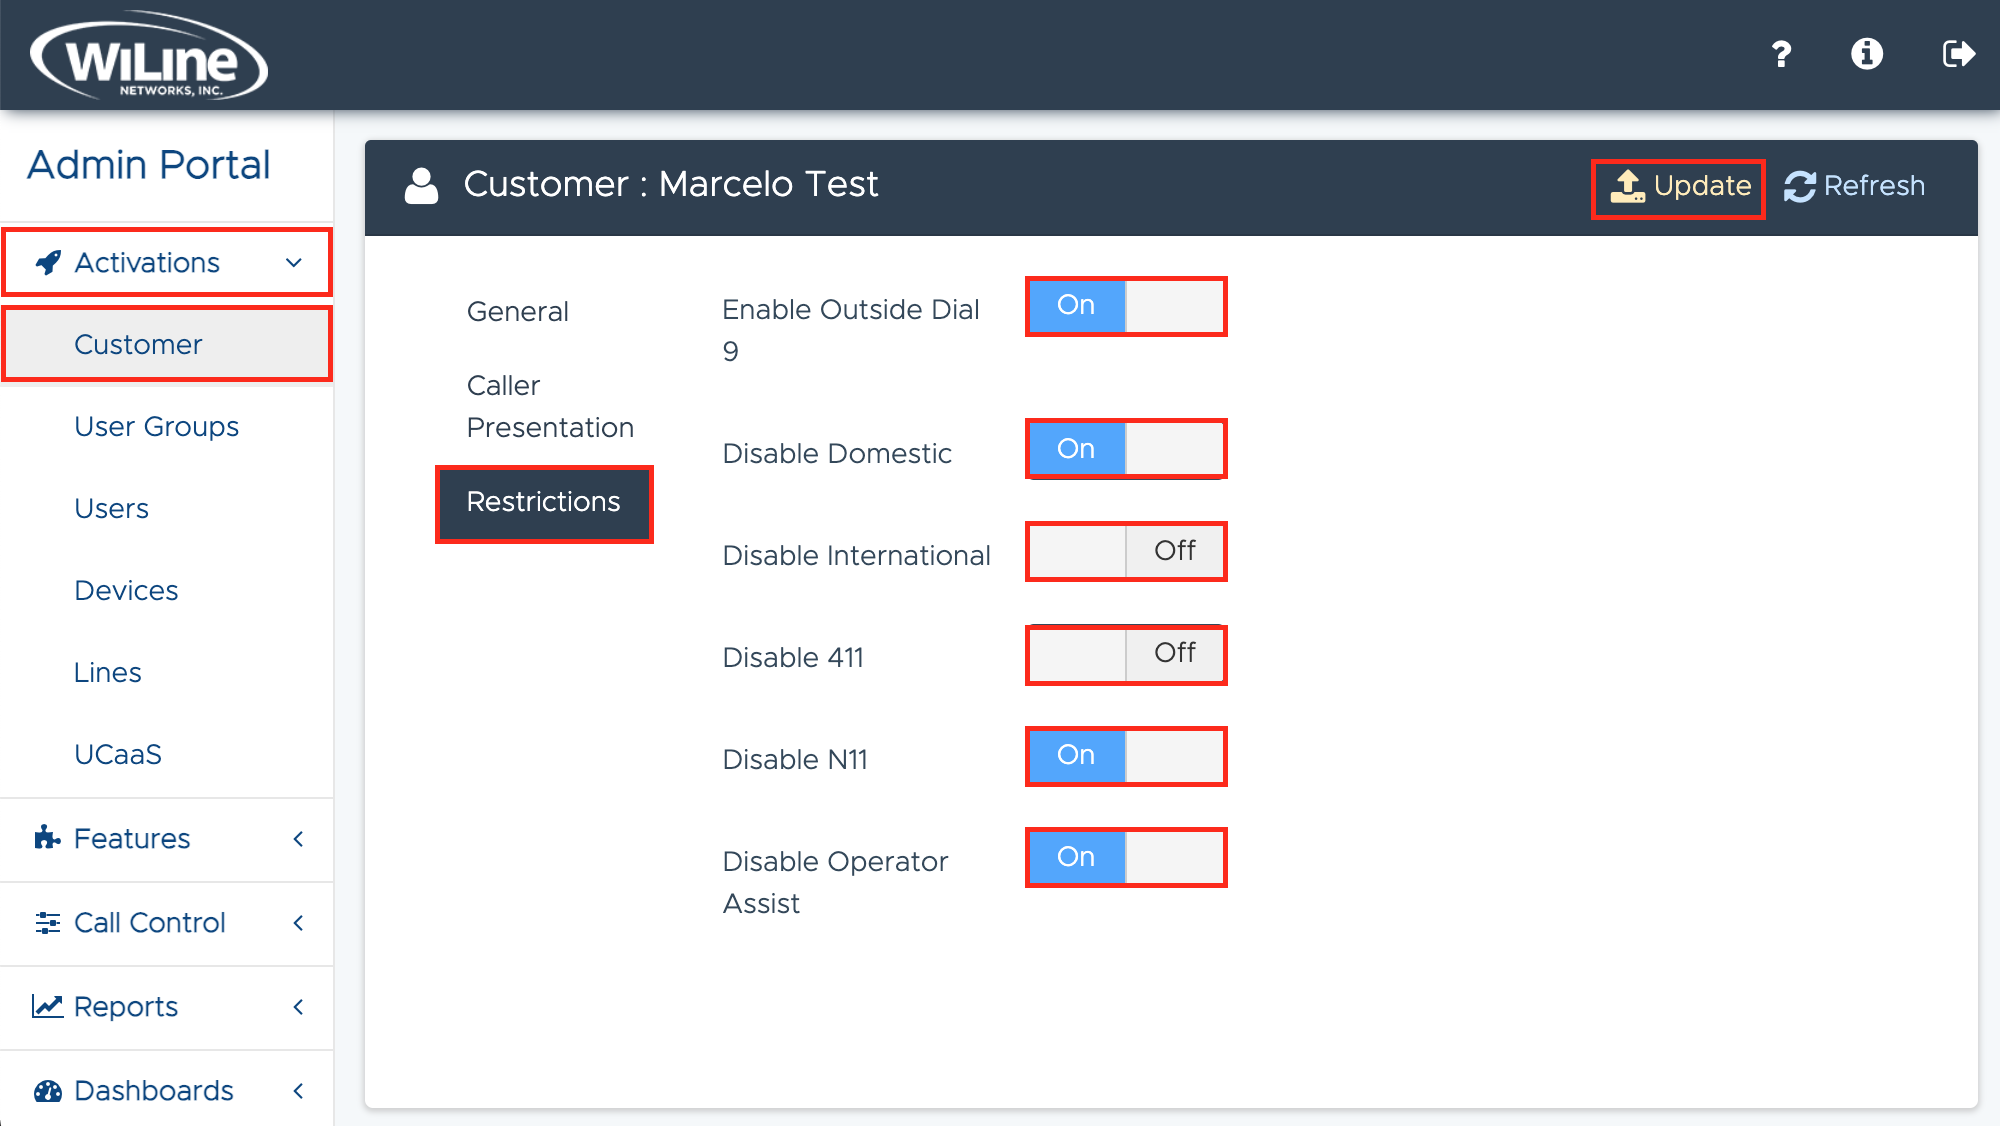
- Click on the Restrictions section.

- Toggle the following options as needed:
- Enable Outside Dial 9: Allow dialing 9 for outside lines.
- Disable Domestic: Restrict domestic calls.
- Disable International: Restrict international calls.
- Disable 411: Disable directory assistance access.
- Disable N11: Restrict all N11 services (e.g., 211, 311).
- Disable Operator Assist: Restrict access to operator assistance.
- Click Update to save changes or Refresh if updates are not immediately visible.
By following these steps, administrators can manage customer activations and customize settings within the Admin Portal, ensuring reliable call handling and service.