What is Zoiper?
Zoiper is a software-based phone (softphone) that allows you to make voice, video, and chat calls. To use Zoiper, you'll need:
- A computer or smartphone
- An internet connection
- A VoIP (Voice over IP) account, which you’ll get from the Admin Portal, along with the necessary credentials
Zoiper is a user-friendly platform, but setting up the credentials can be tricky. That's why we developed the WiLine UCaaS App to streamline the process. Choose the option that best suits your needs.
Installation
To download Zoiper 5, click here.
This guide provides step-by-step instructions for installing Zoiper on macOS. If you're using a different operating system, such as Windows or Linux, select the appropriate version for your platform and follow a similar process. For further details, you can refer to Zoiper's official documentation.
-
Run the Zoiper 5 Installer
Launch the installer and click Continue on the first screen.
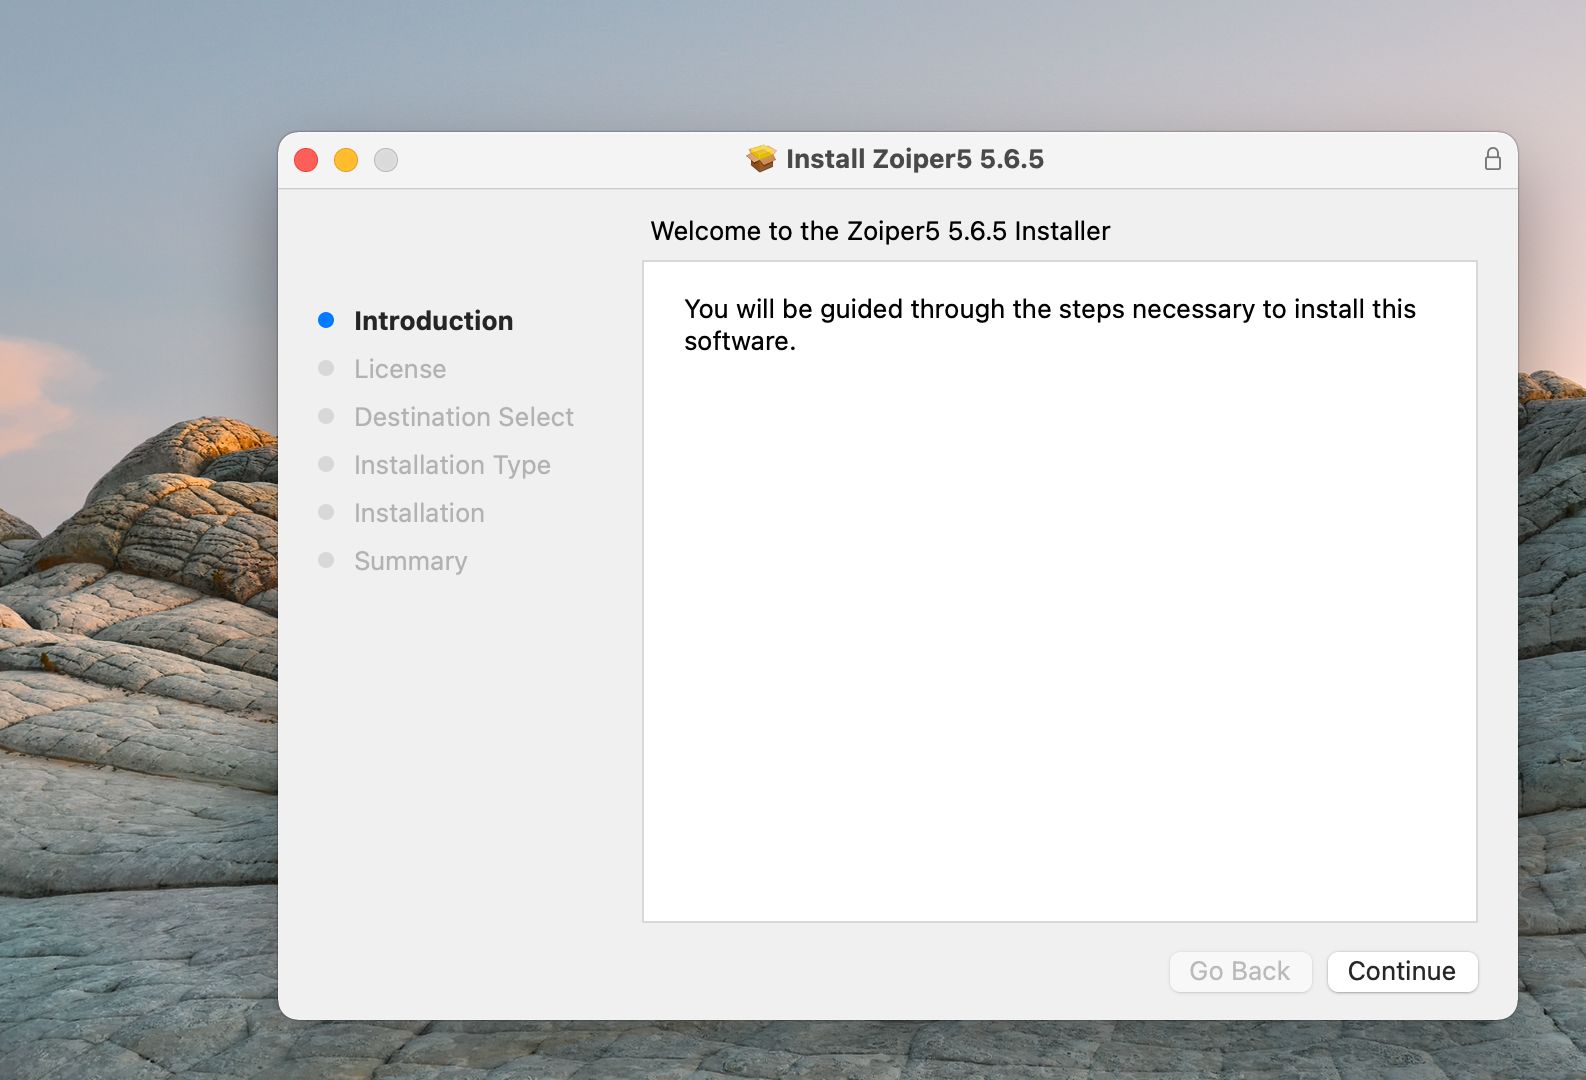
Figure 1: Zoiper Setup Screen. -
Accept the License Agreement
At the license agreement screen, click Continue, and then Agree after reviewing the terms.
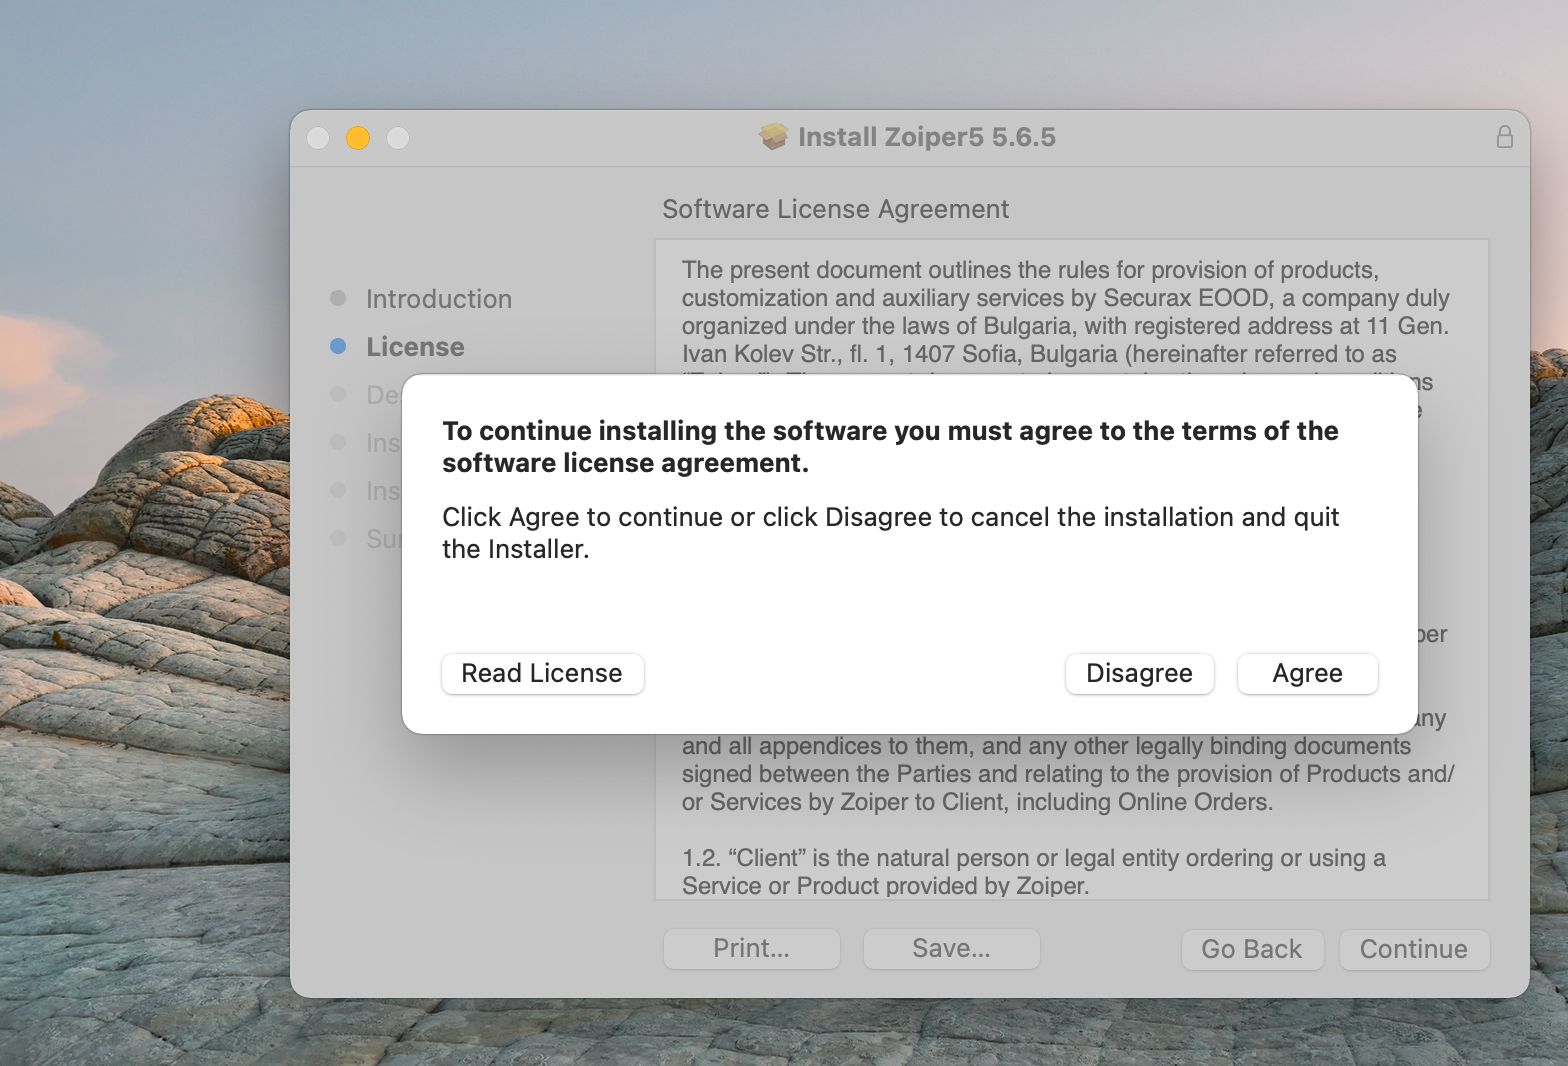
Figure 2: License Agreement. -
Choose Installation Folder and Type
Select an installation folder and installation type for Zoiper 5 (the default option is recommended). Click Install to begin the standard installation.
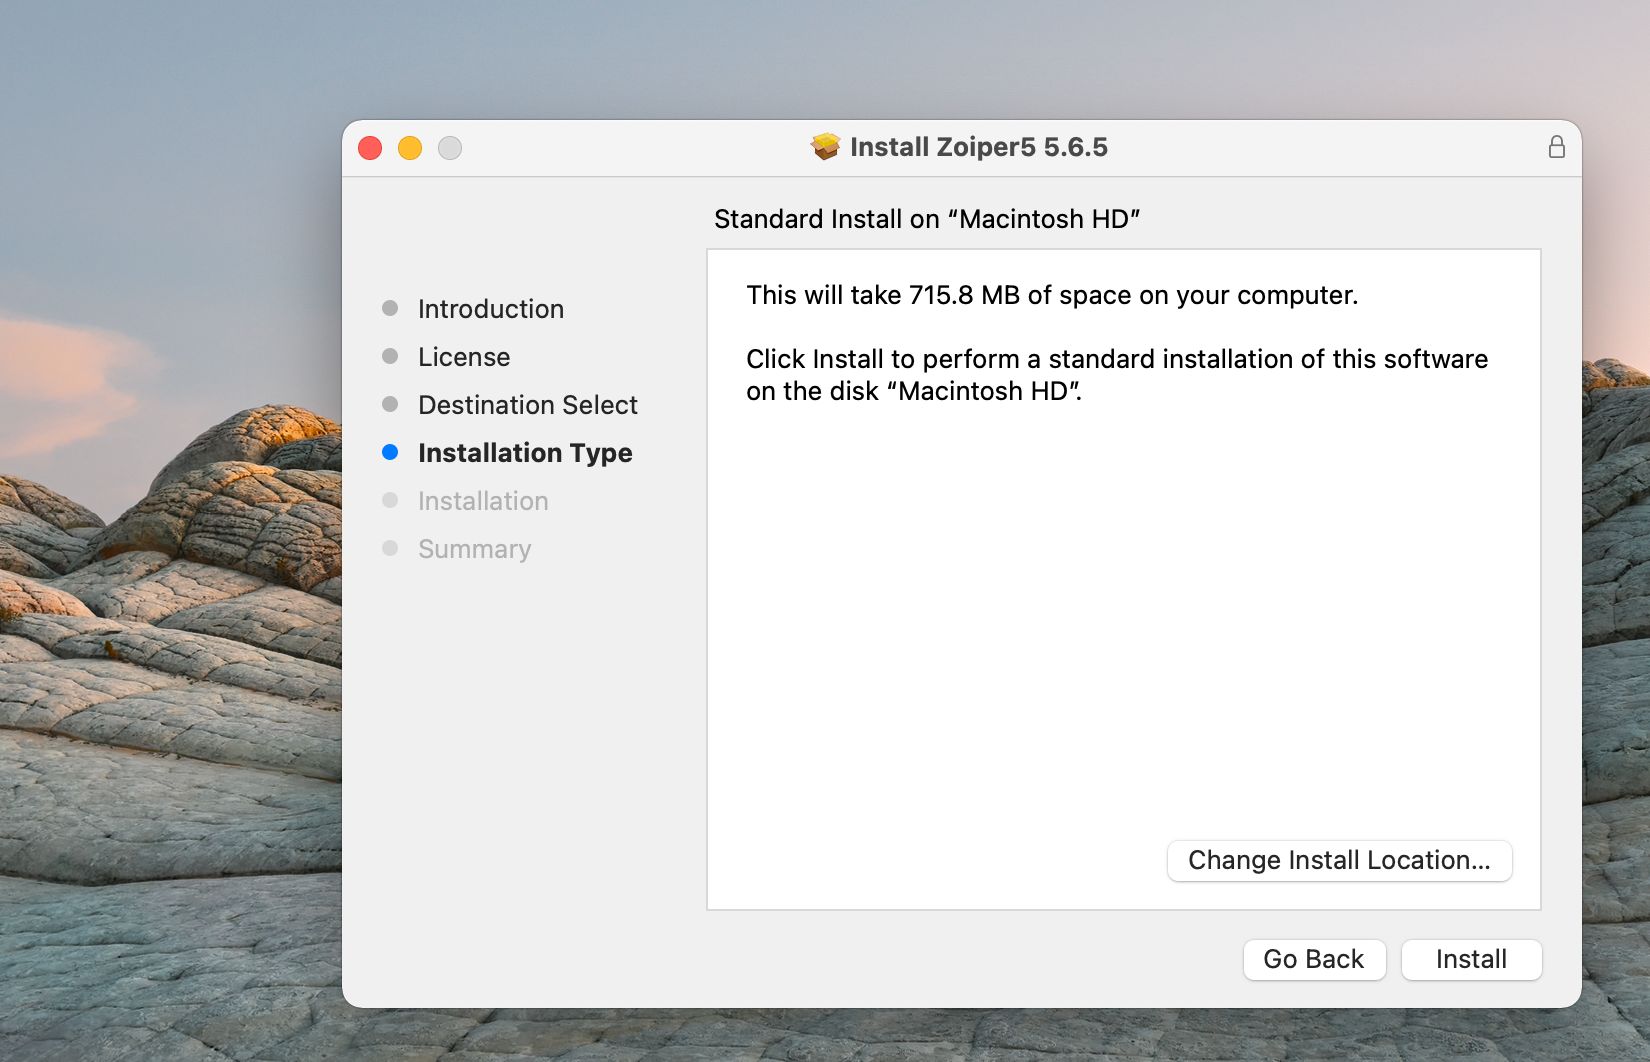
Figure 3: Installation Setup. -
Enter Admin Password (Mac users only)
If prompted, enter your Mac admin password, then click Install Software.
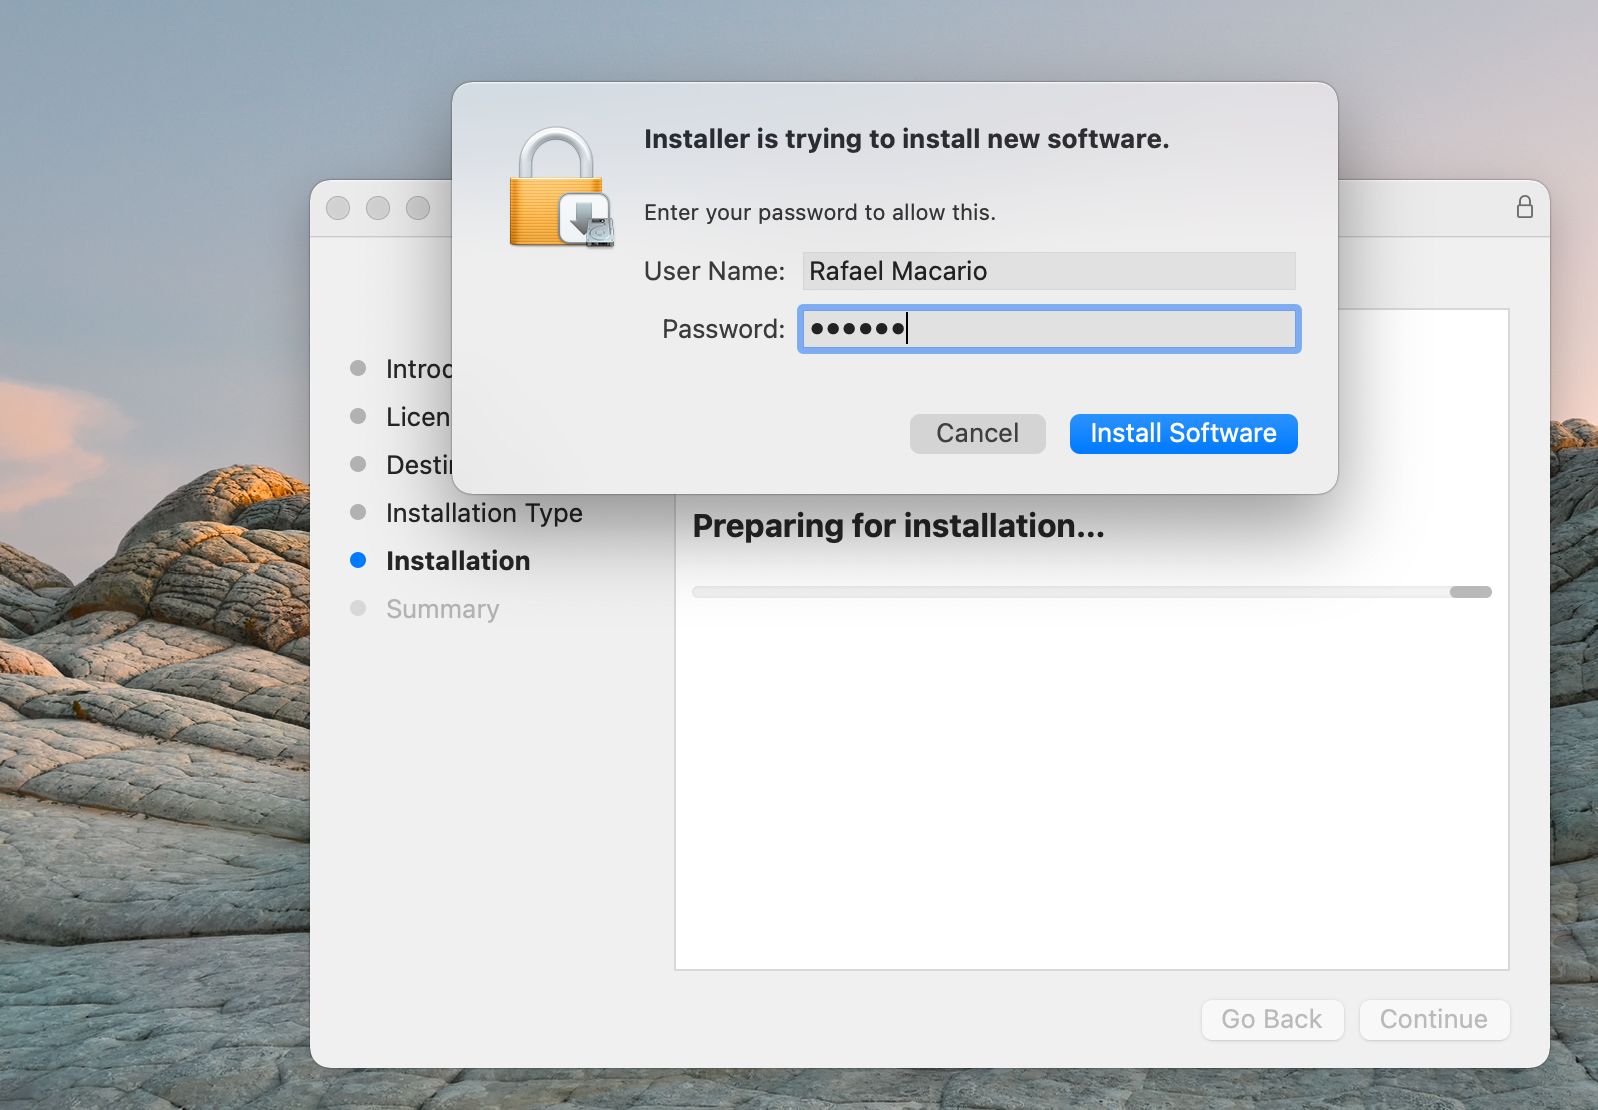
Figure 4: Admin Password Prompt. -
Complete the Installation
When the installation is complete, you’ll see a confirmation screen. Click Close to launch Zoiper 5 and exit the installer.
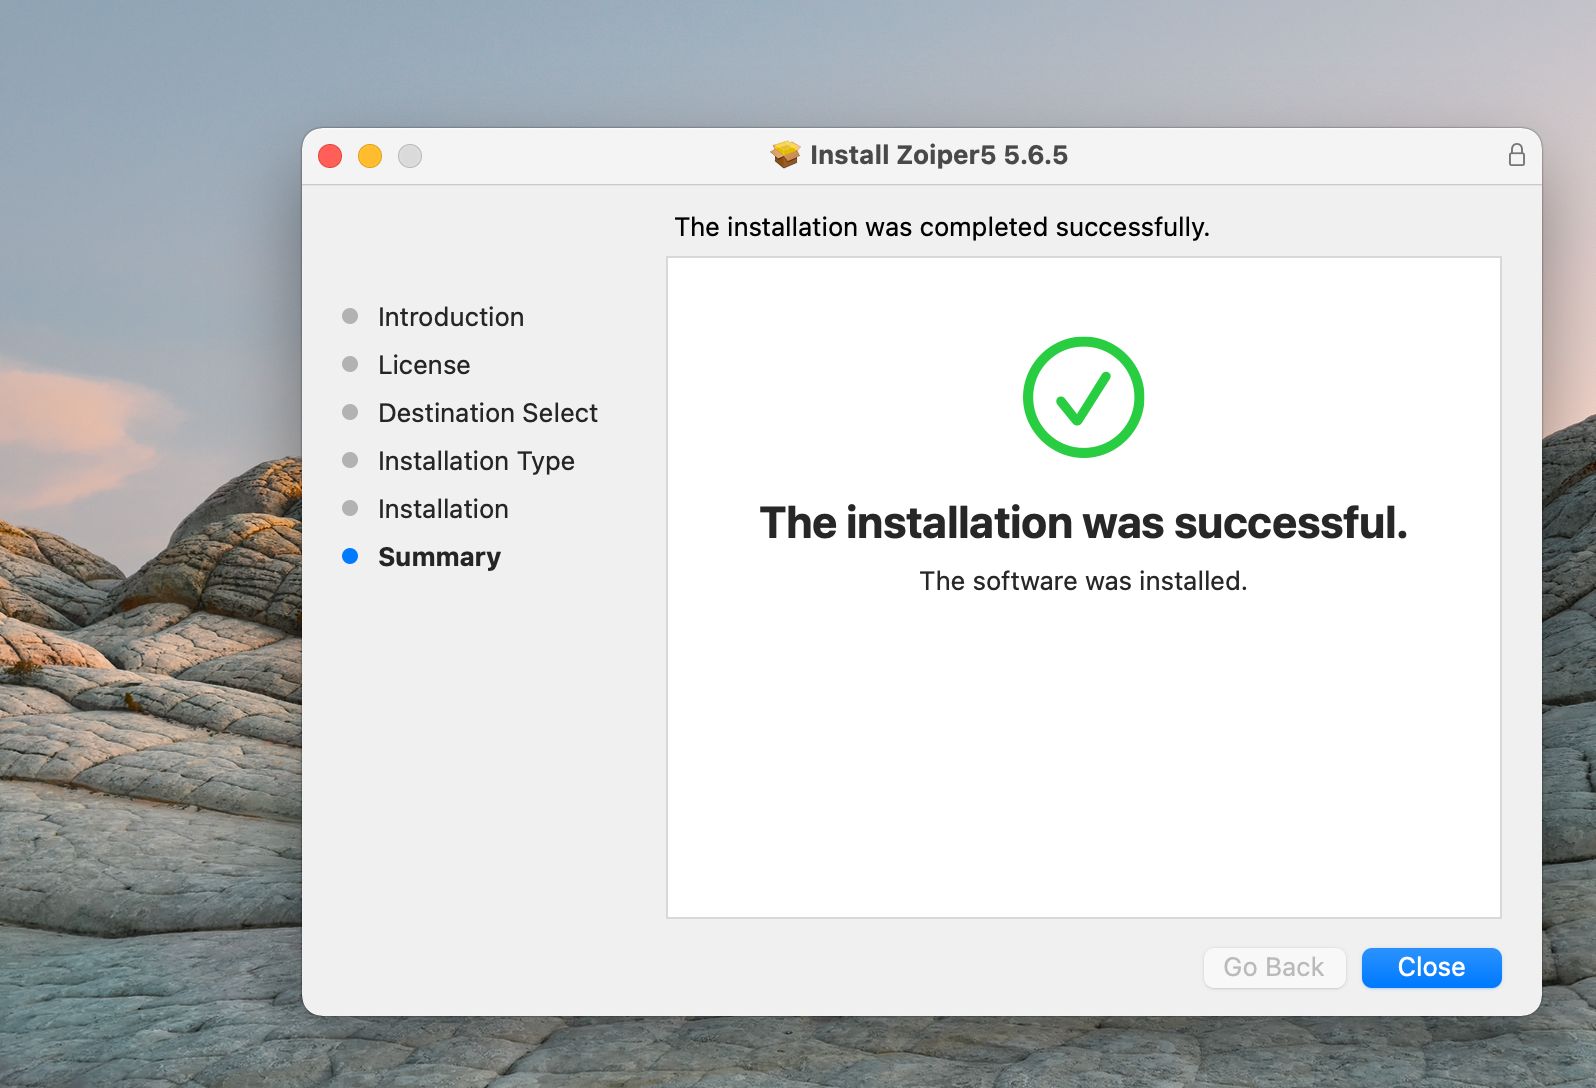
Figure 5: Installation Complete.
Install on iPhone
To set up Zoiper on your iPhone, follow these steps after downloading it from the App Store. Ensuring the app functions smoothly involves configuring necessary permissions:
- Open Settings on your iPhone and scroll down to find Zoiper.
- Tap Zoiper, then review and enable the following permissions:
- Contacts: Grants Zoiper access to your contacts for seamless dialing.
- Local Network: Allows Zoiper to connect to your local network for making VoIP calls.
- Microphone: Ensures Zoiper can capture audio for voice communication during calls.
- Notifications: Enables Zoiper to alert you about incoming calls and messages.
- Siri & Search (Optional): Allows you to use Siri for voice commands with Zoiper.
- Background App Refresh: Ensures Zoiper updates in the background, improving performance and call reliability.
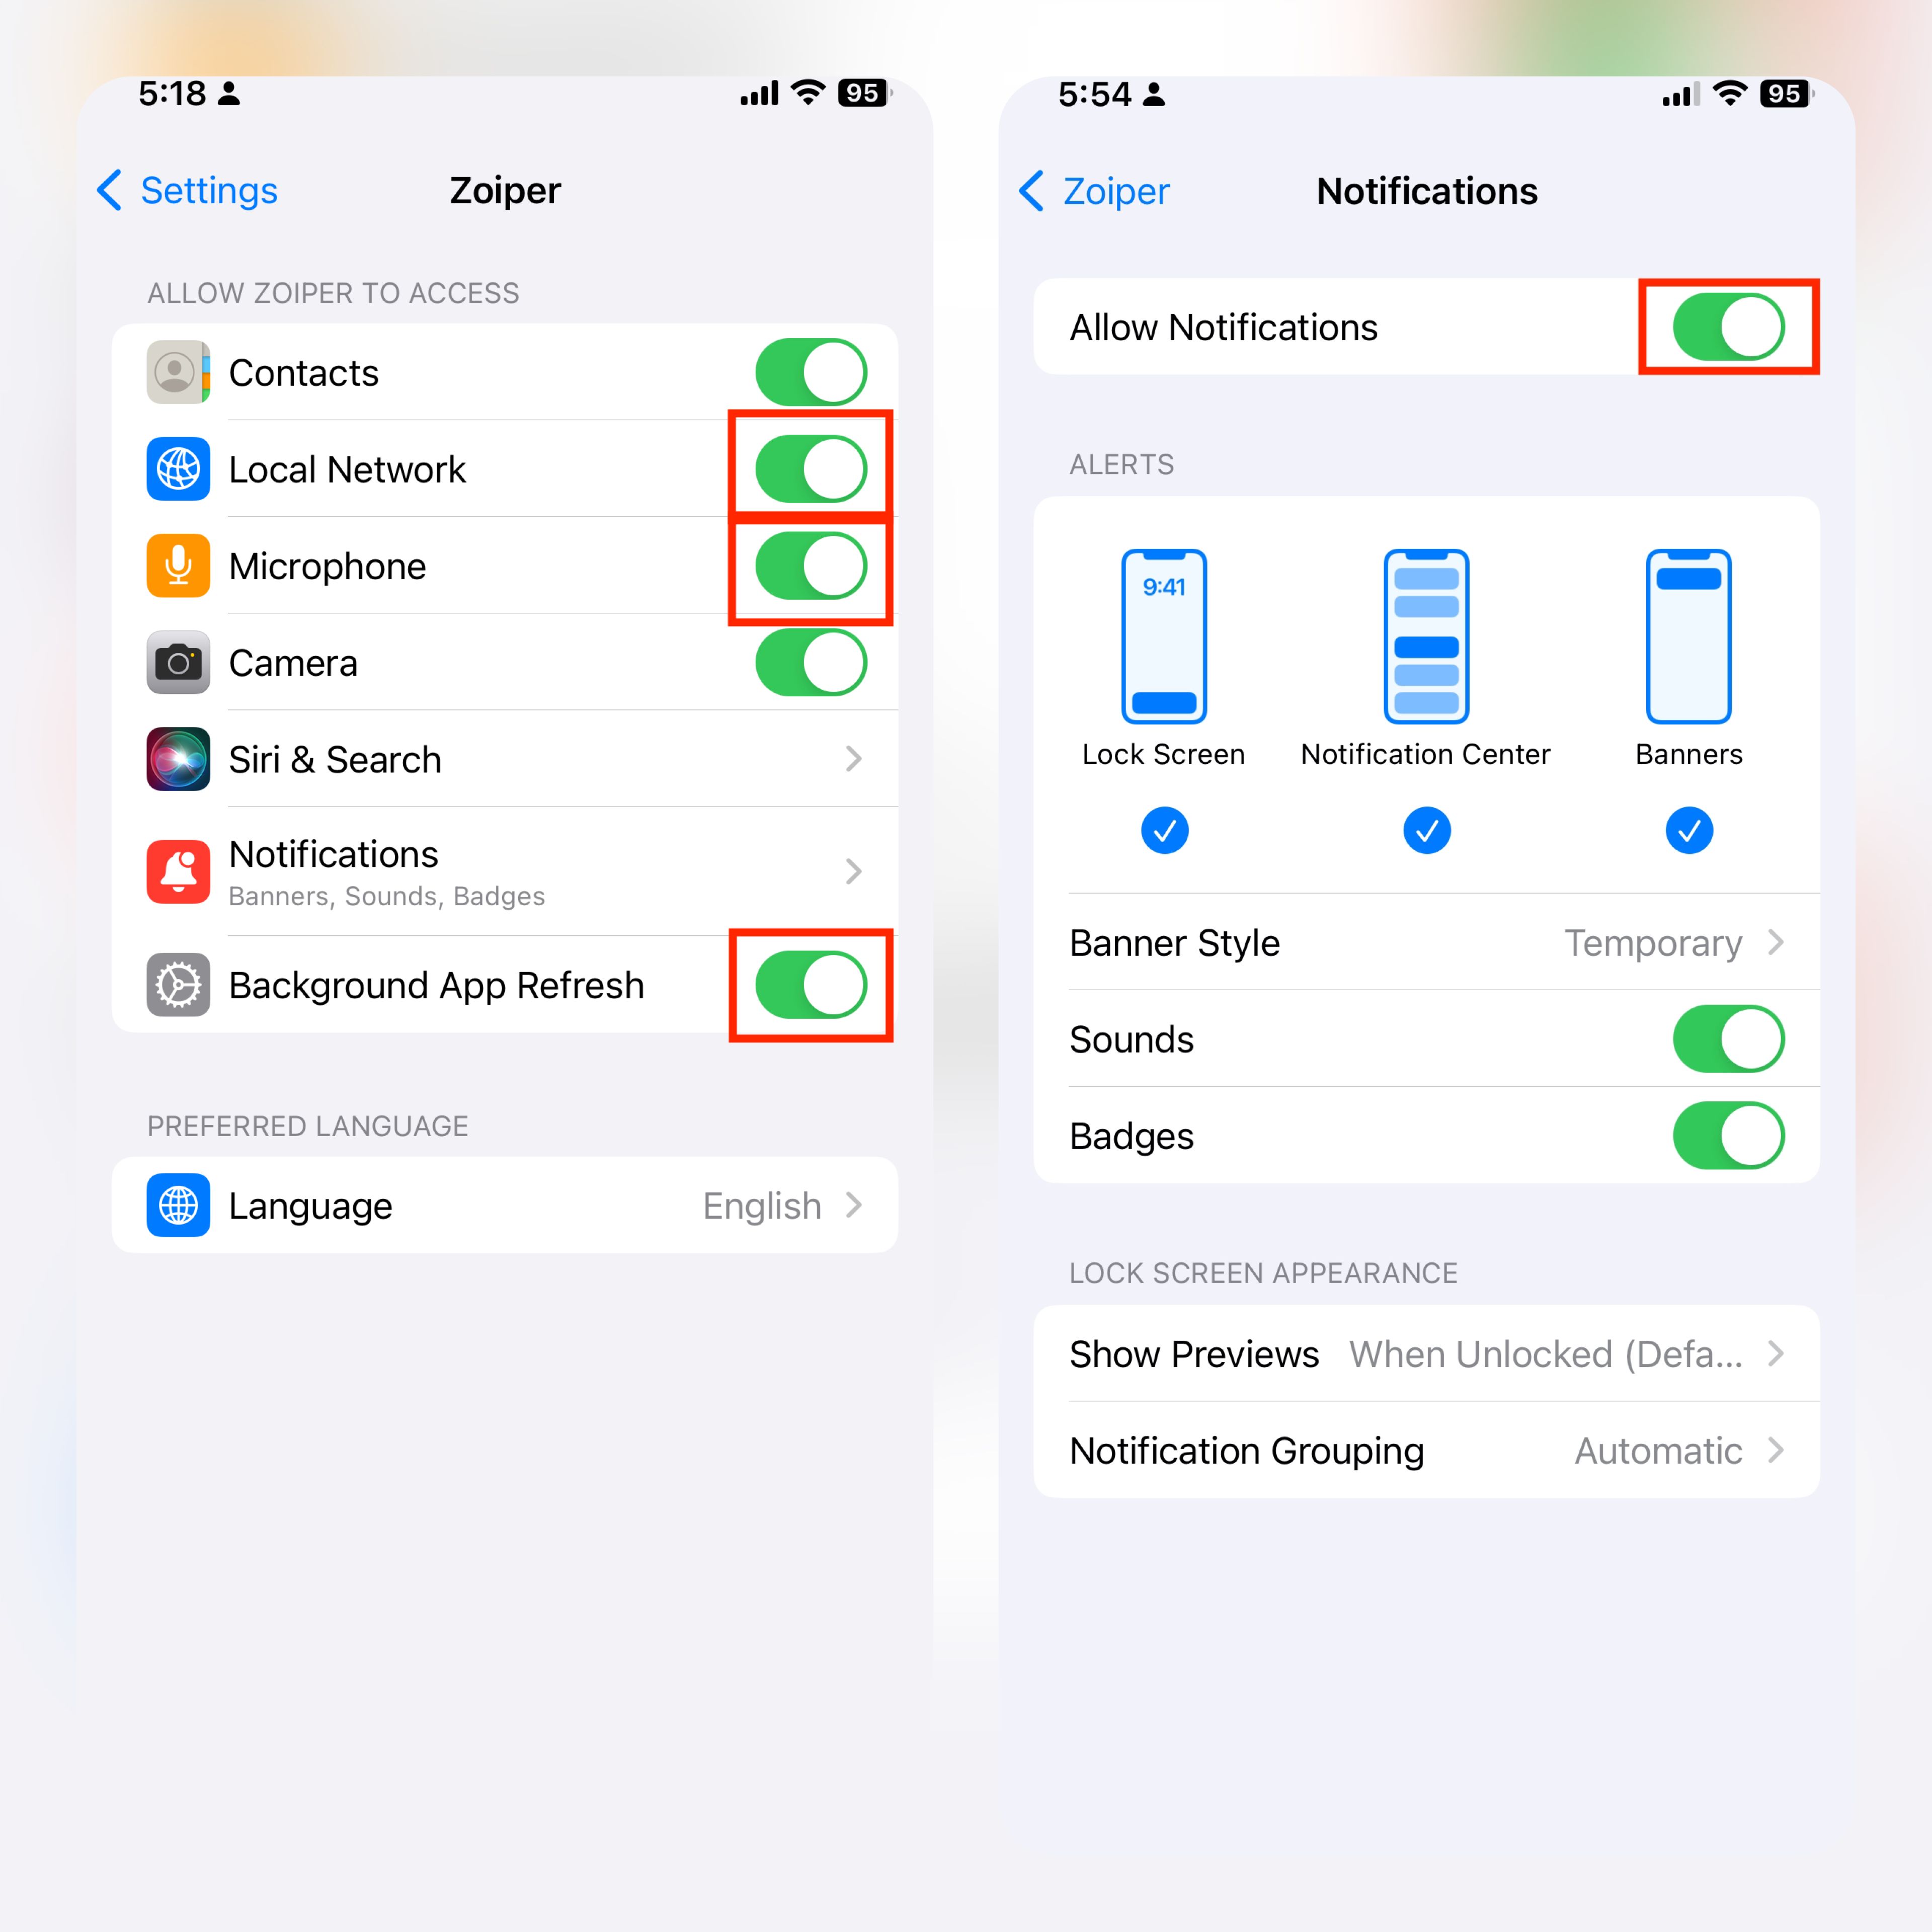
Figure 6: Zoiper iPhone Settings Configuration.
Once these permissions are granted, Zoiper will be fully optimized for use on your device.
Create Zoiper Credentials
To configure Zoiper, you first need to create the required credentials in the Admin Portal.
Select a User and Link Them to an Extension
-
Log in to the Connect Portal.
-
Navigate to Activate > Users.
-
Select an existing User from the list or create a new one (refer to the Manage Users section of the Admin Portal documentation for guidance).
-
From the dropdown list, link an Extension to the user.
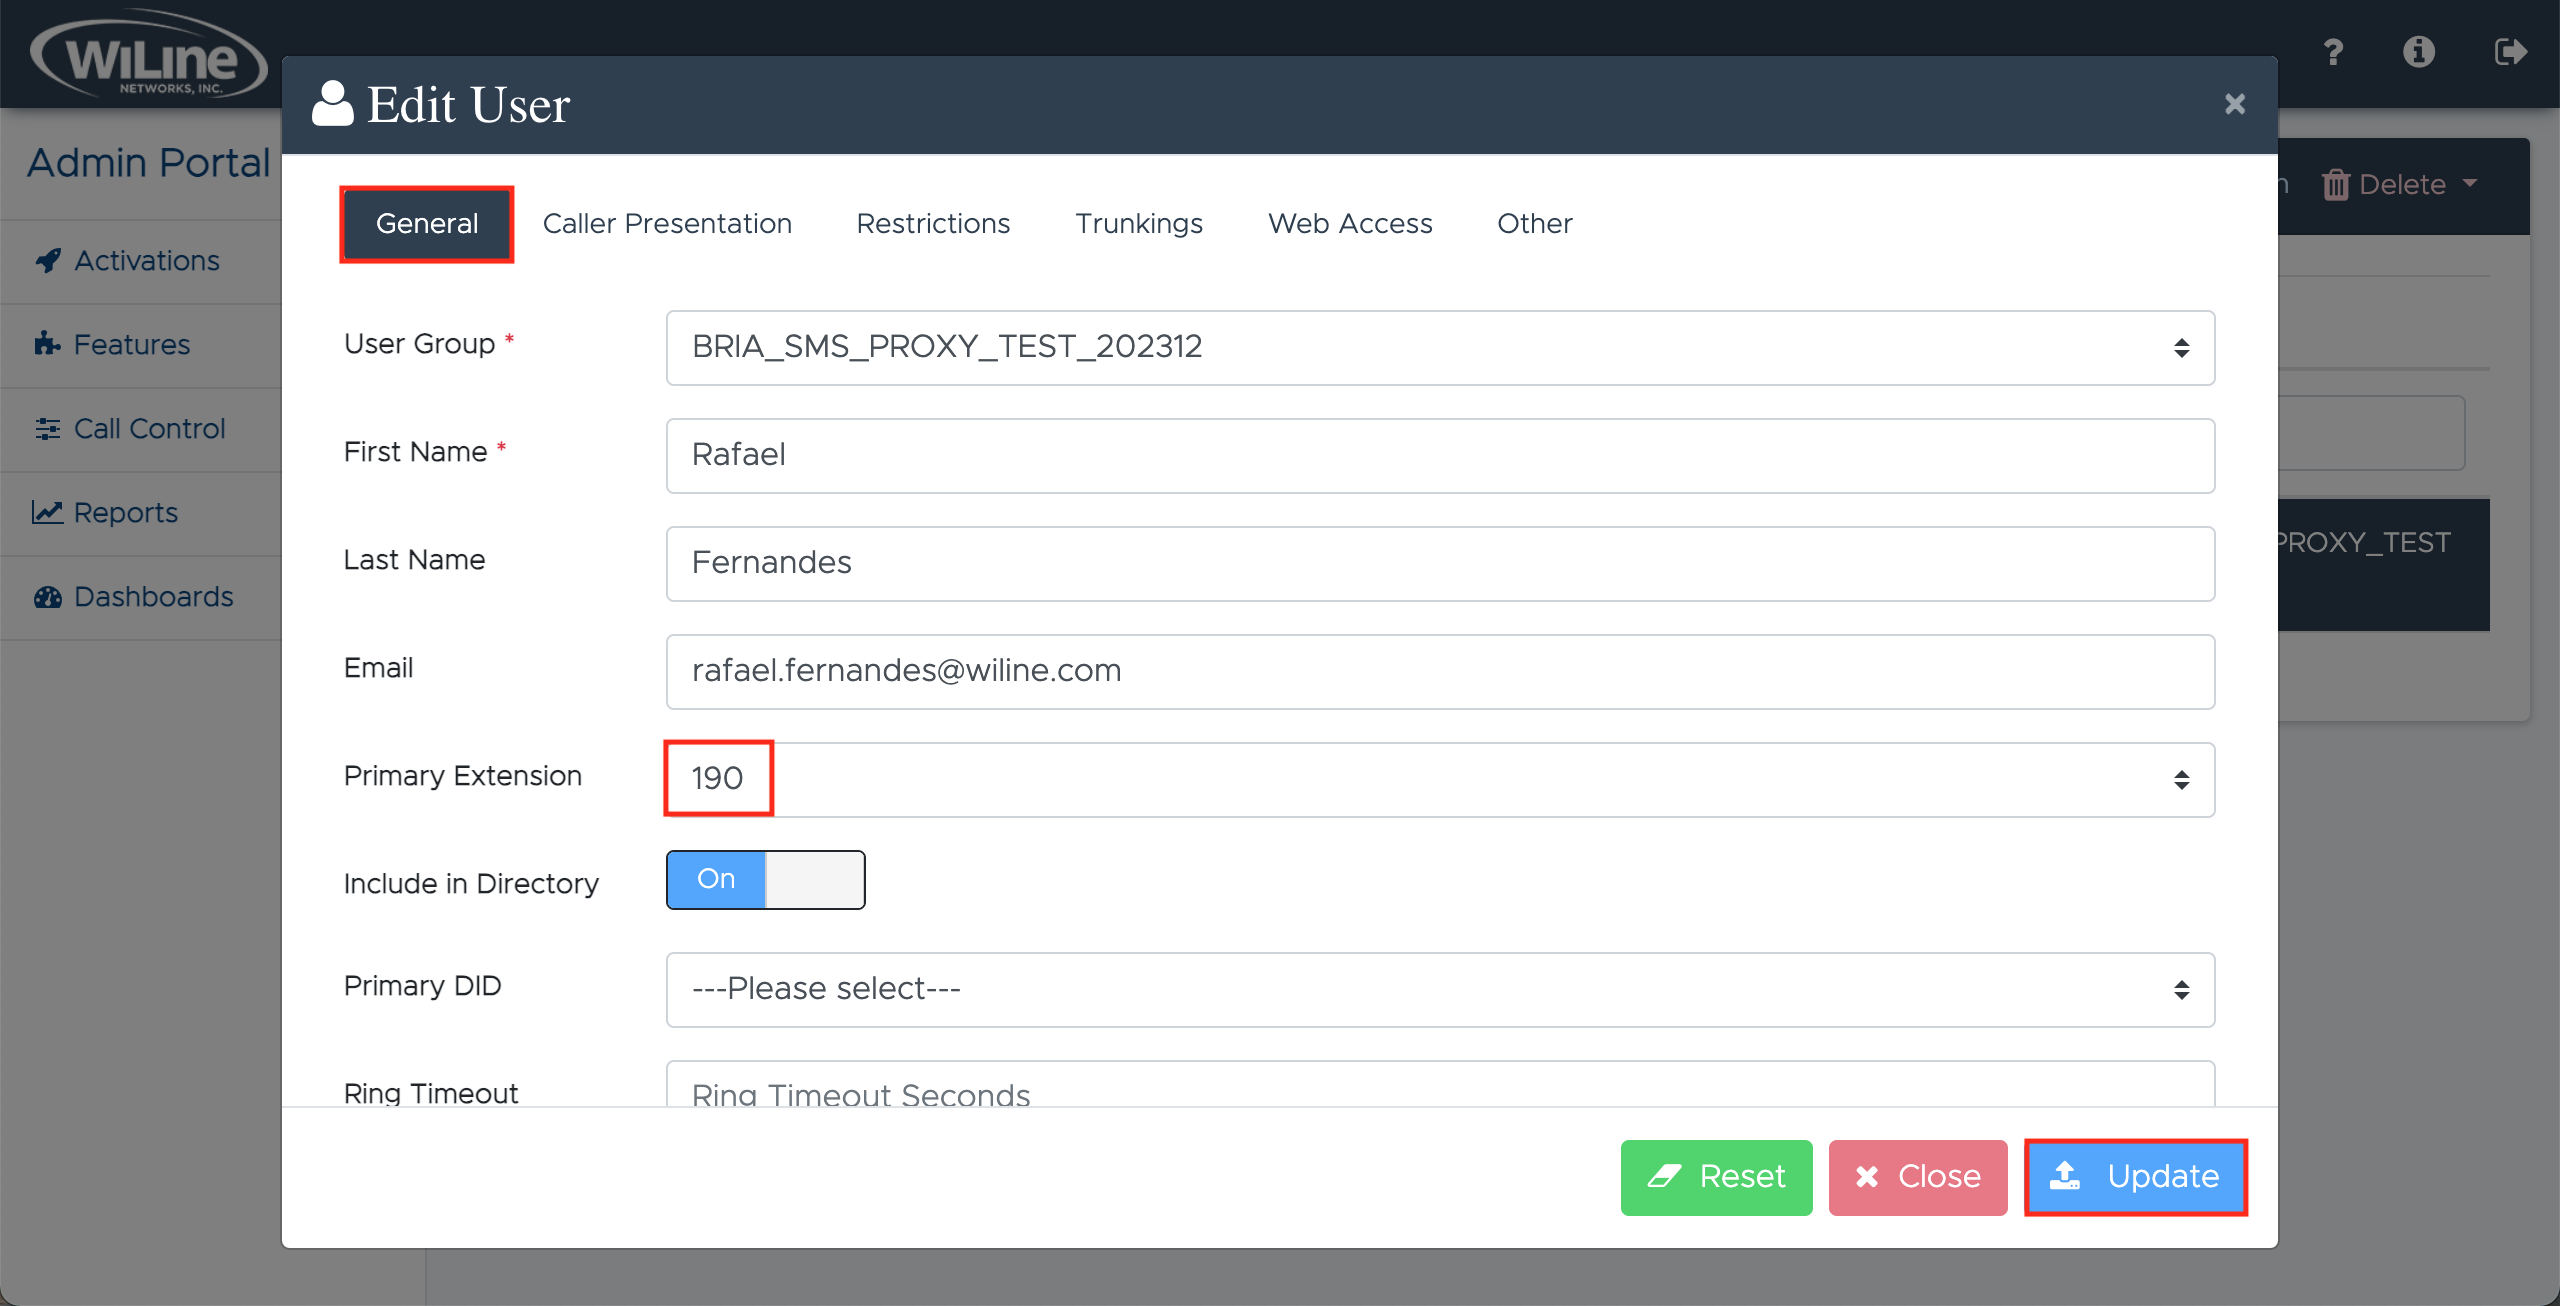
Figure 7: Linking a User to an Extension.
Link the User to a Device
-
Go to Activations > Devices.
-
Choose an existing Device or create a new one (see the Manage Devices section of the Admin Portal documentation for more information).
-
Configure Device Settings:
- In the General tab, complete the following fields:
- Name: Enter or edit the device’s name (e.g.,
Rafael-device). - Manufacturer: Specify the manufacturing company (e.g.,
Softphone). - Model: Select the device model (e.g.,
Other). - Line Amount: Specify the number of lines on the device (e.g.,
1).
- Name: Enter or edit the device’s name (e.g.,
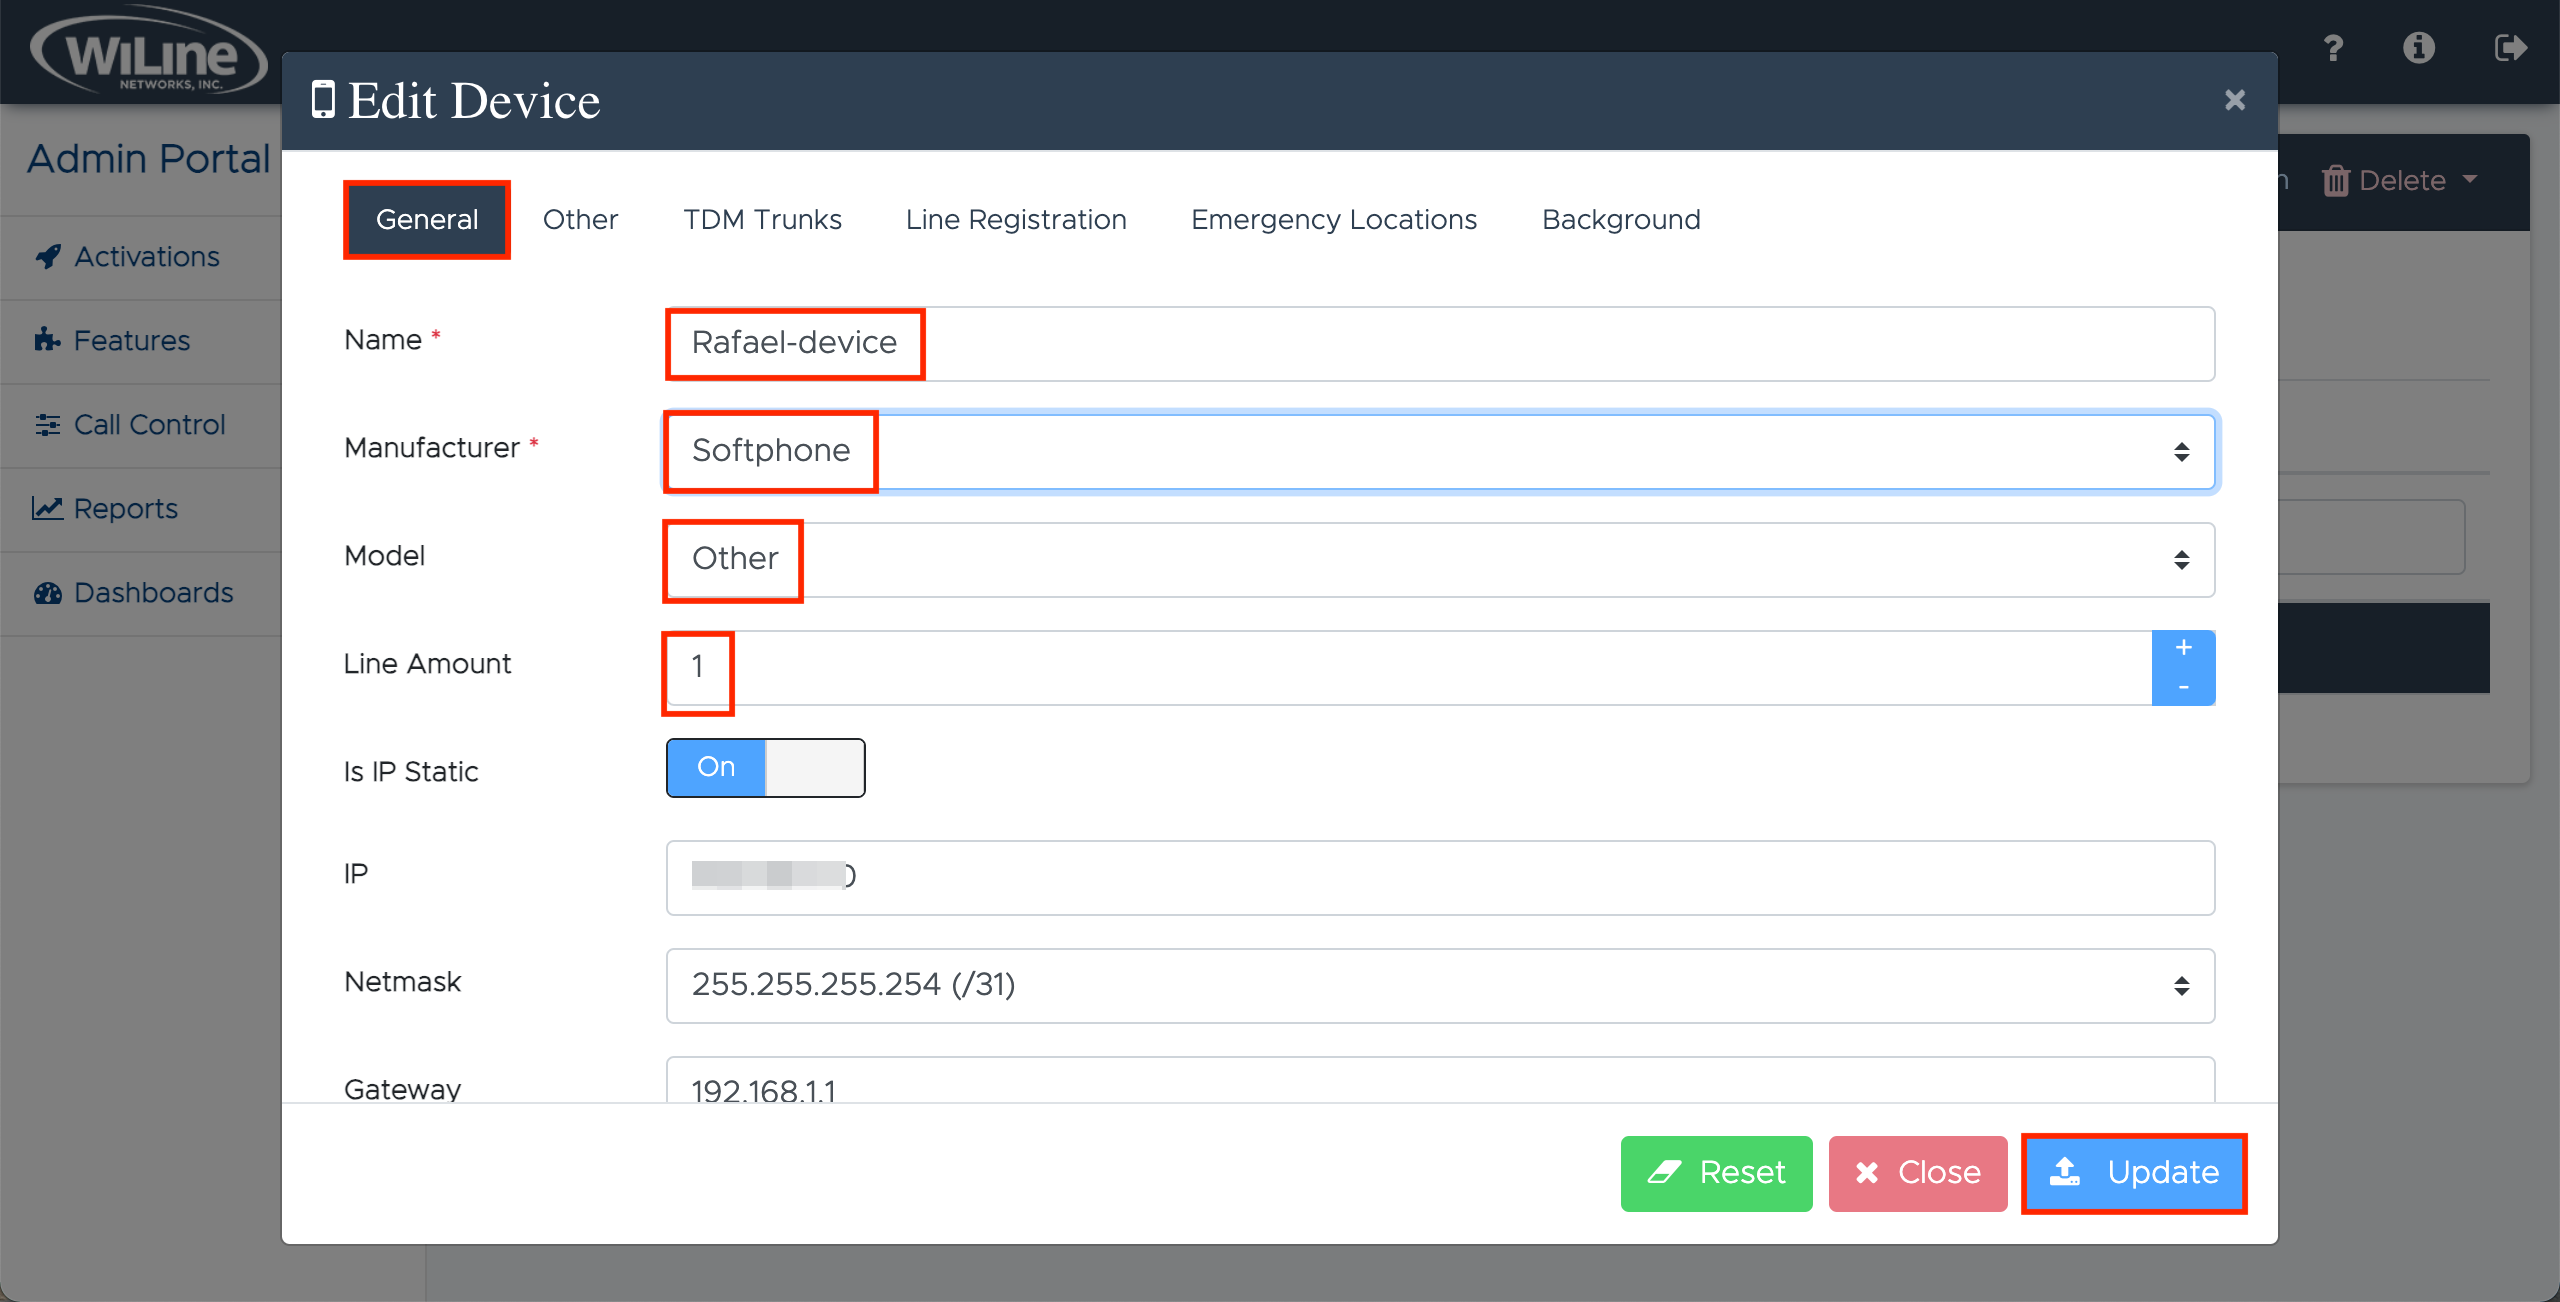
Figure 8: Configuring Device Settings.- Scroll down and toggle Enable NAT to On.
- Click Update to save these settings.
- In the General tab, complete the following fields:
-
Set Up Line Registration:
- In the same Edit Device window, go to the Line Registration tab.
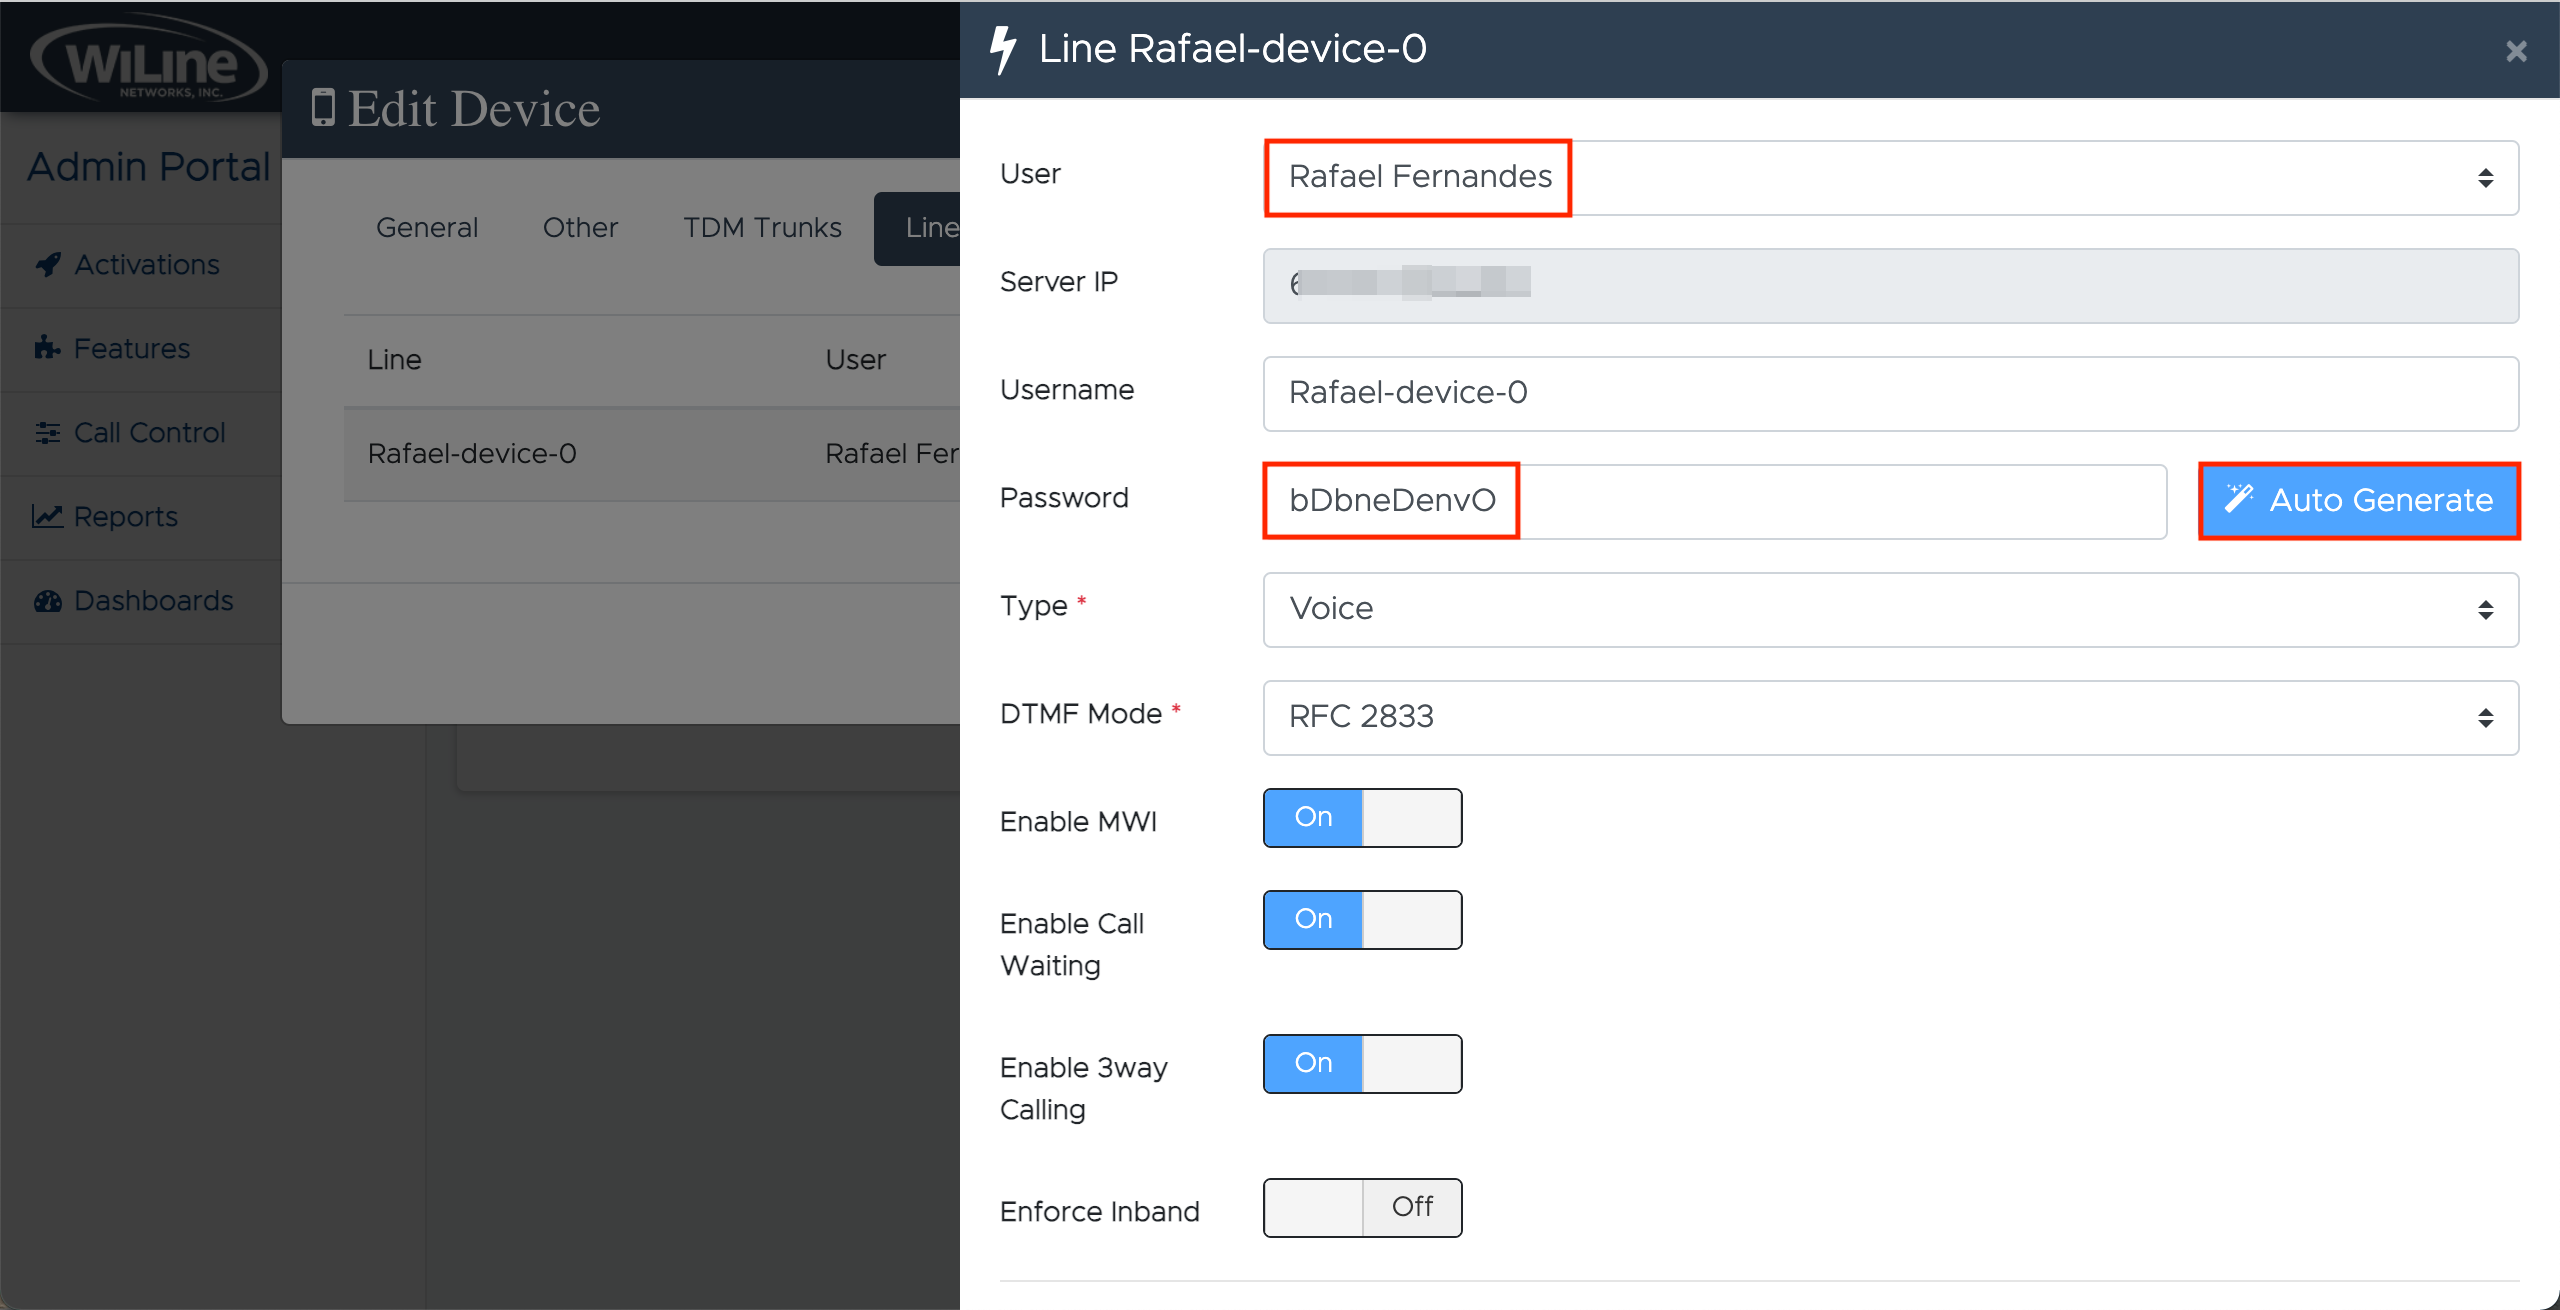
Figure 9: Configuring Line Registration.-
Select the desired line, then assign a User in the new window.
-
The Server IP field will be automatically populated.
-
The device's name will appear in the Username field, which you can edit if needed.
-
Lastly, either create a password or select Auto Generate.
-
Click Update to complete the setup.
noteTo configure Zoiper, you'll need these three pieces of information: Username, Server IP, and Password. Make sure to save them securely.
Activation
To activate Zoiper:
-
Open Zoiper 5
Start Zoiper 5 from your applications menu. -
Activate as Free User
On the activation screen, select Continue as a Free User to use Zoiper without a paid license.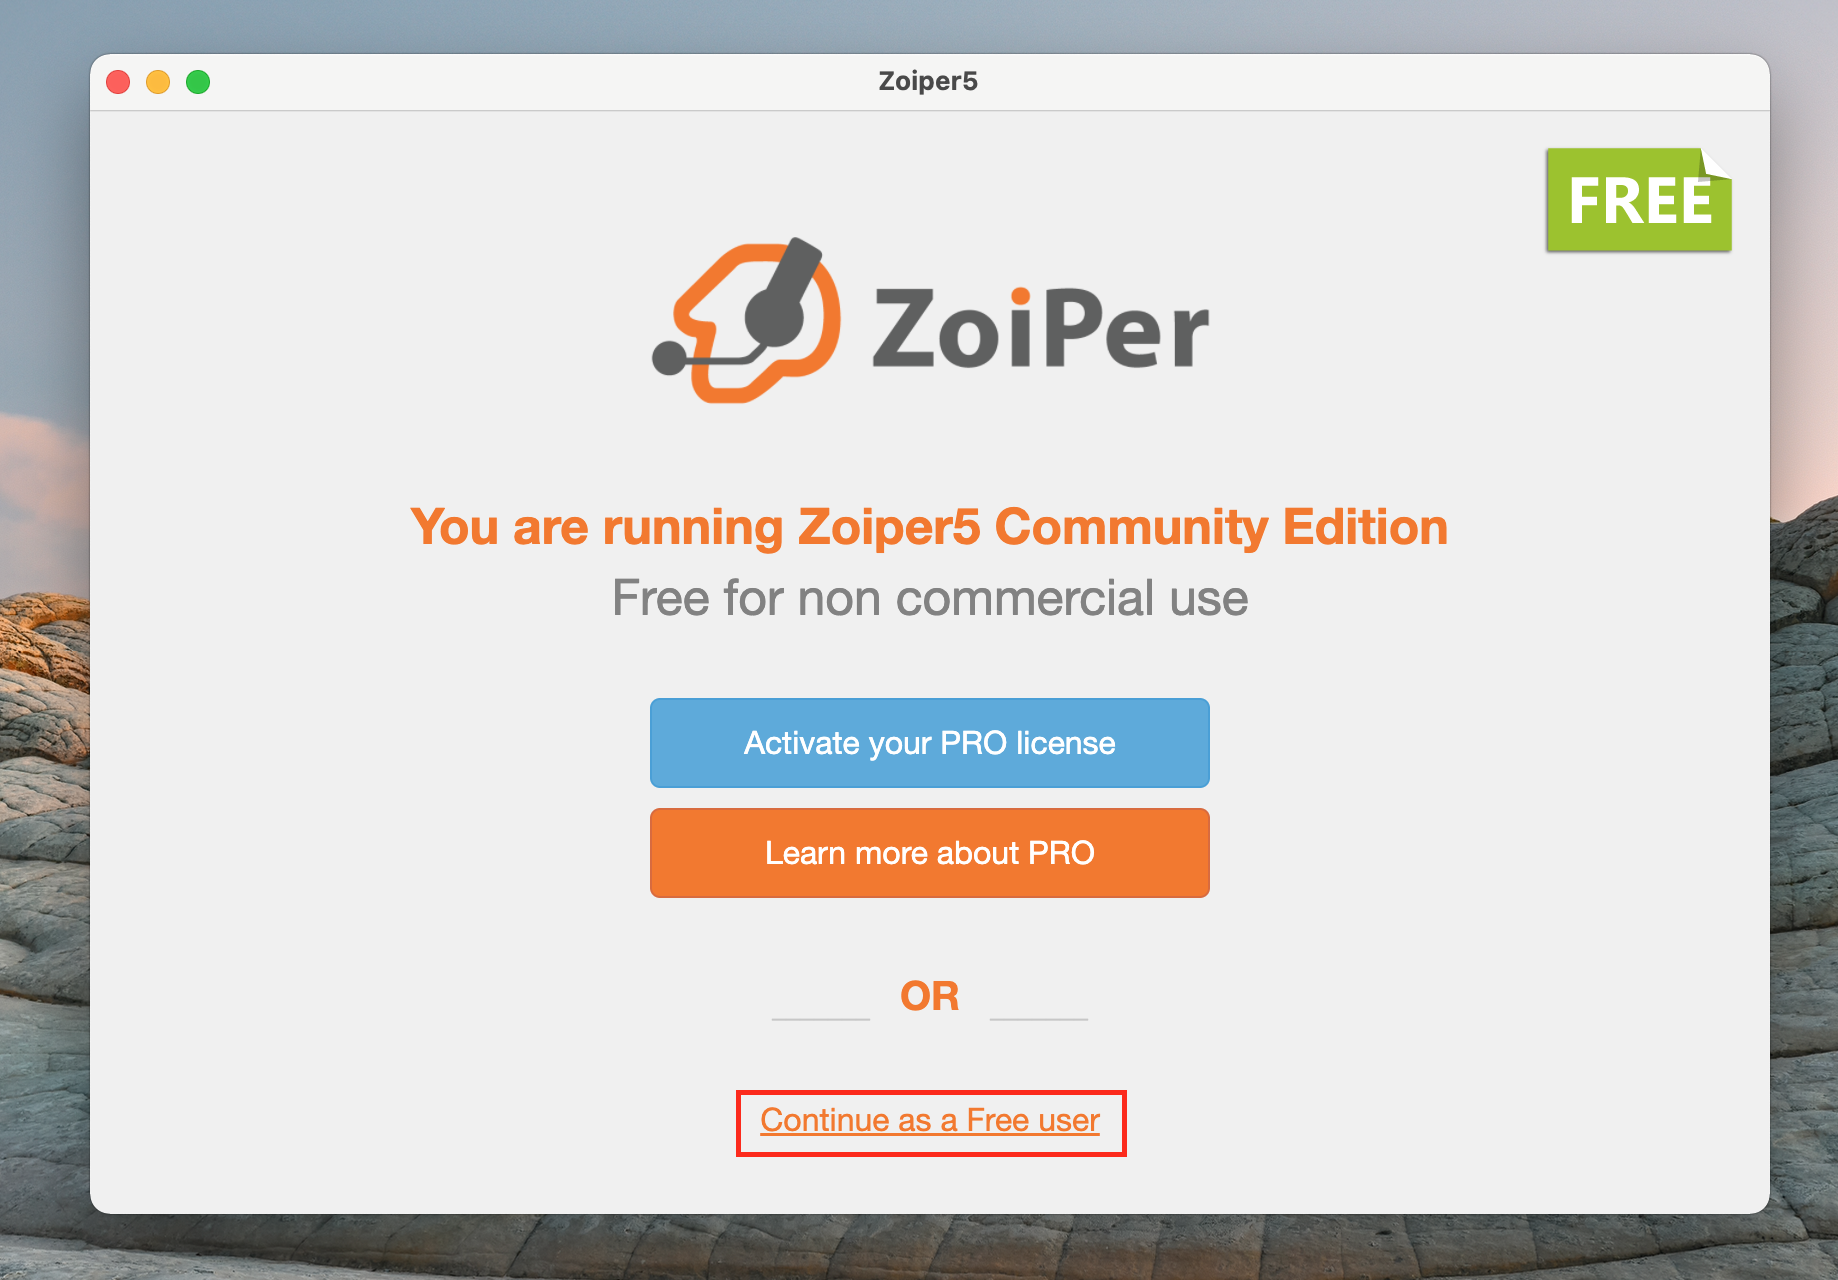
Figure 10: Activation as Free User. -
Configure Zoiper Credentials
Fill out the credentials with the following information to set up Zoiper:- Server IP: Enter your server domain or IP address.
- Username: Use the username/device name created in the Admin Portal.
- Password: Use the password generated or created in the Admin Portal.
In Zoiper, input the following for account setup:
- Username/Login:
username@serverIP - Password: Enter the password created in the Admin Portal.
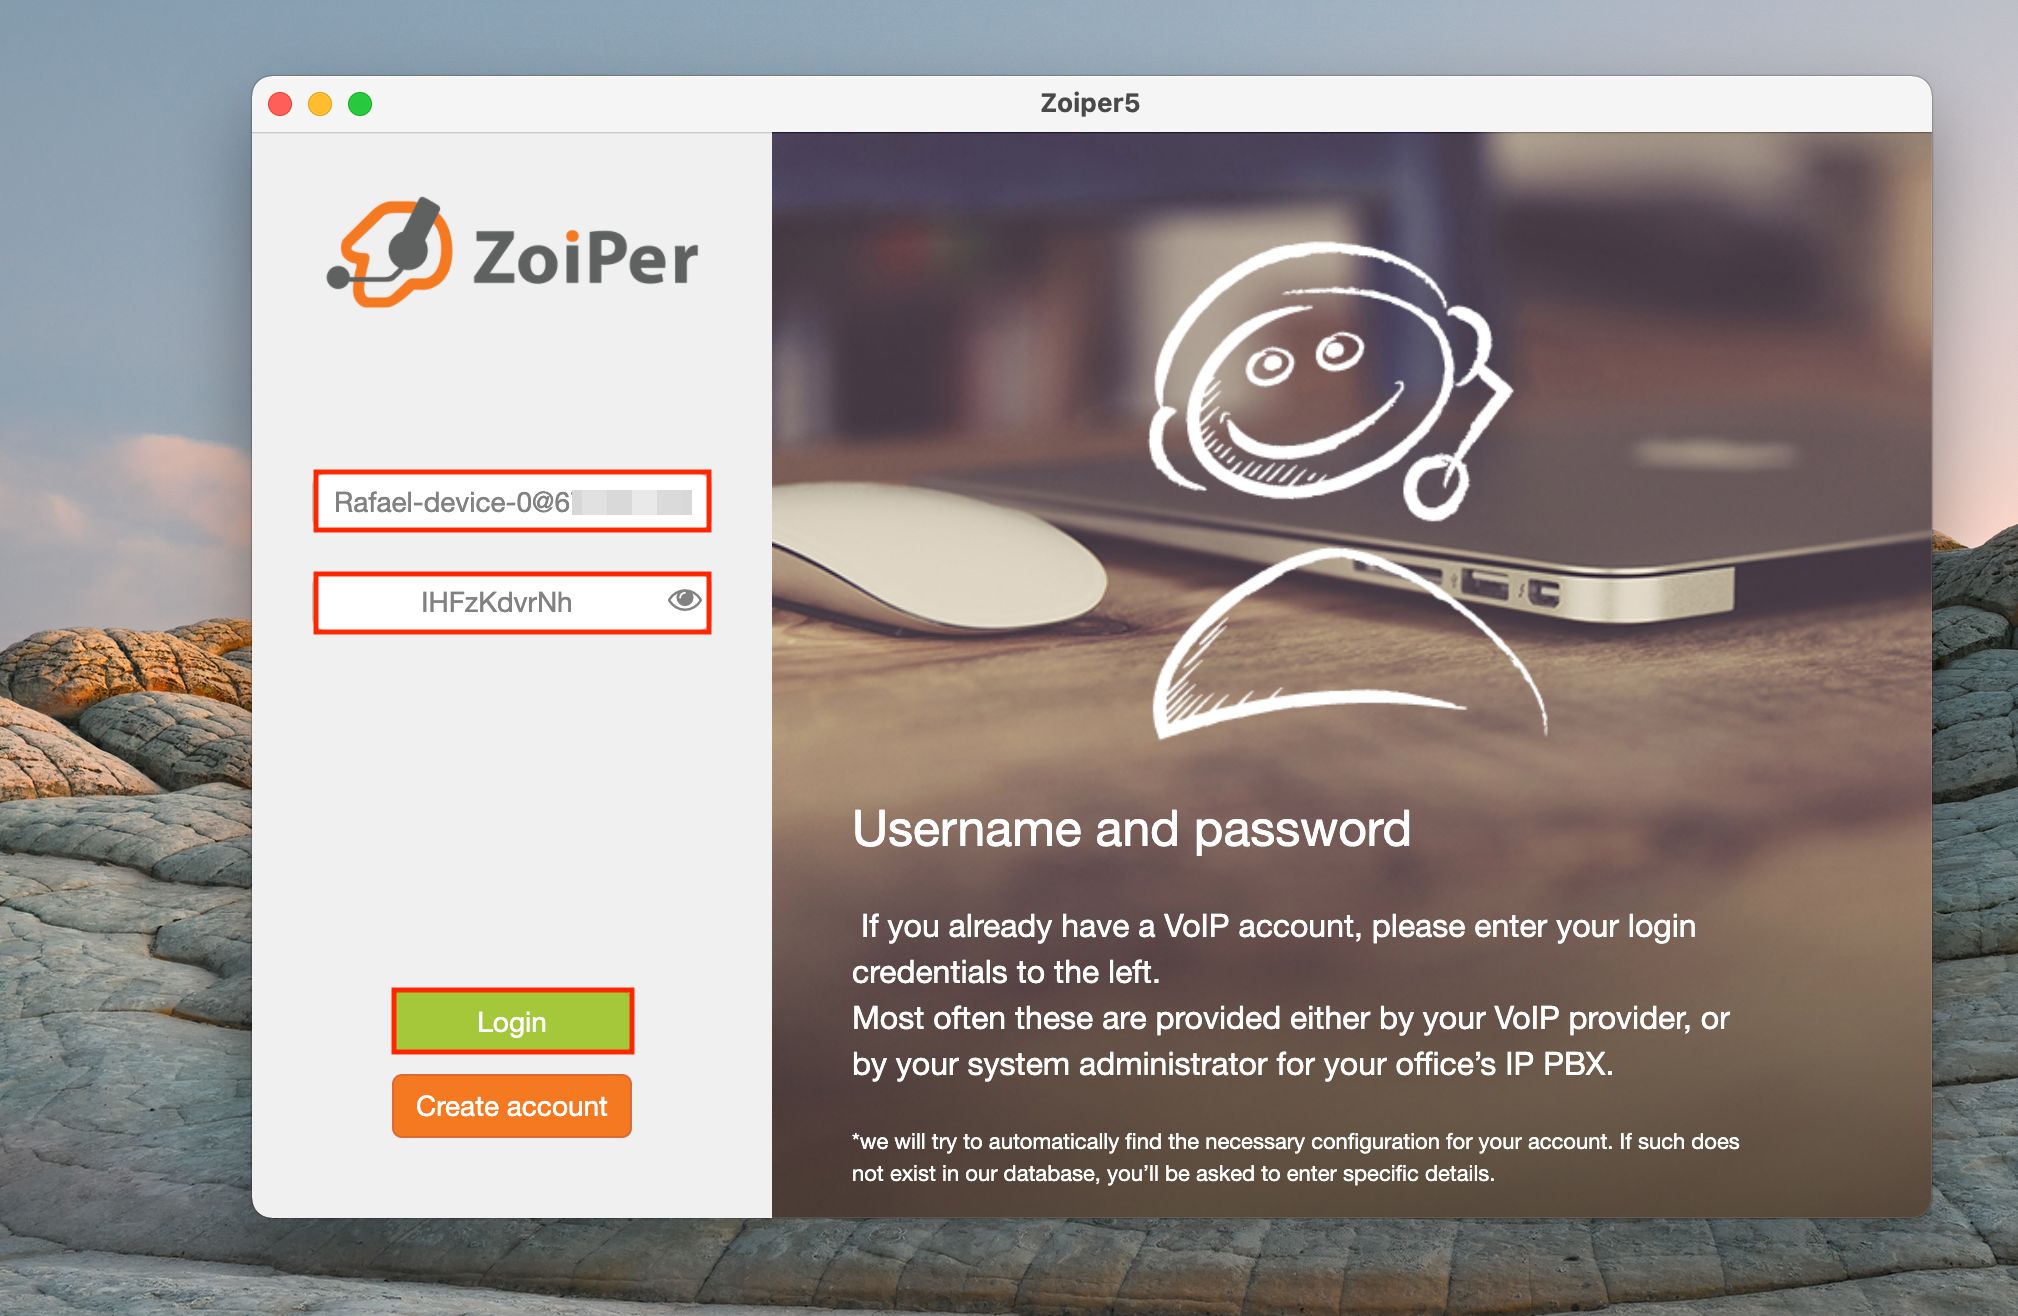
Figure 11: Setting Up Zoiper. -
Click Login.
-
Fill in your hostname by using the same Server IP.
-
Click Skip when you are asked with Authentication and Outbound Proxy.
-
Then wait for the configurations to be processed, then click Next.
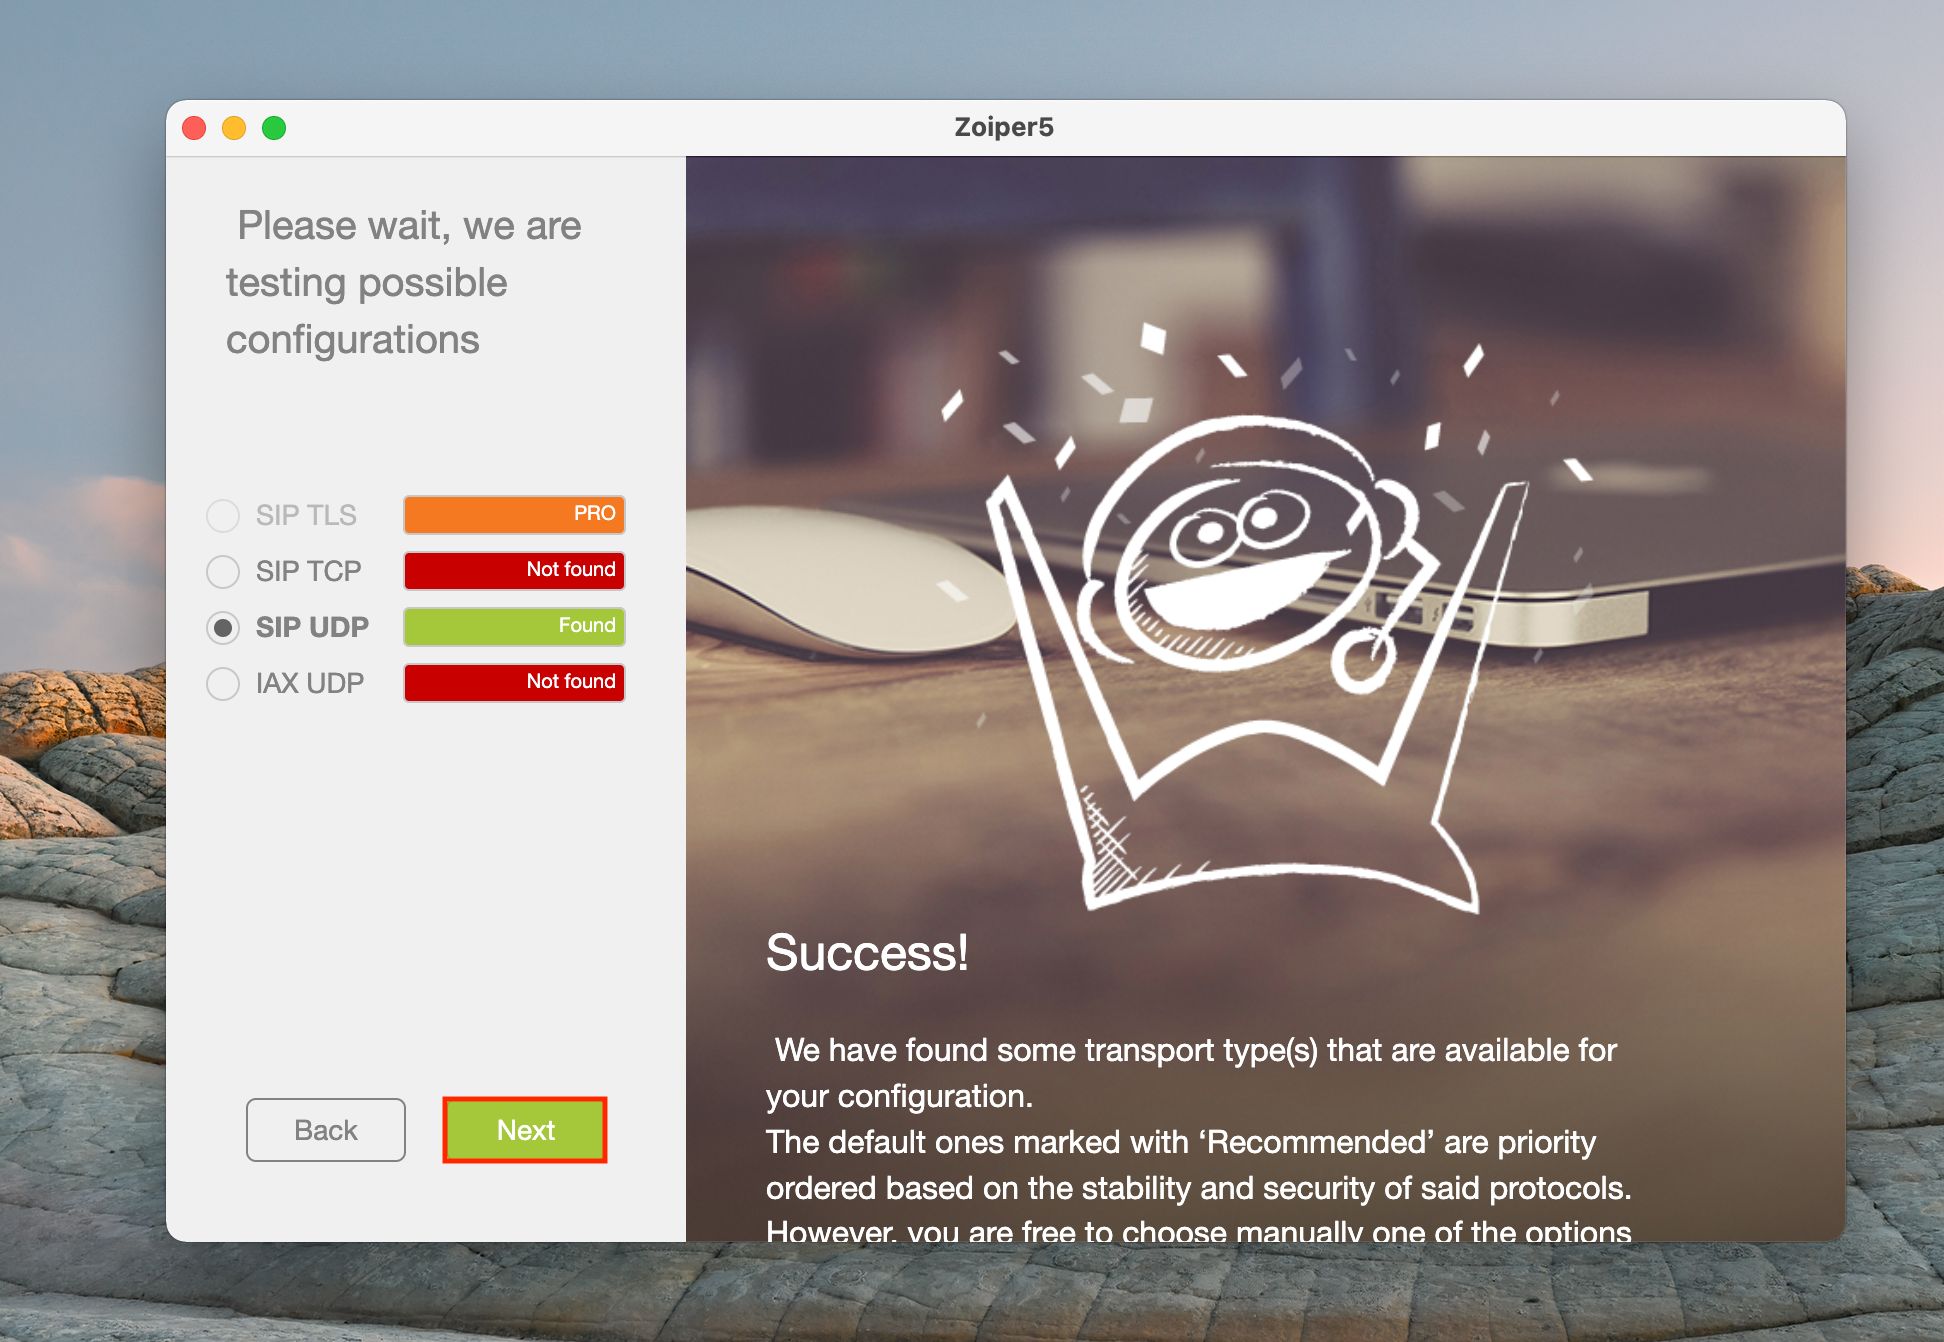
Figure 12: Testing Zoiper Configurations. -
If you waited for the configuration process, your phone will be automatically connected with a
indicator.
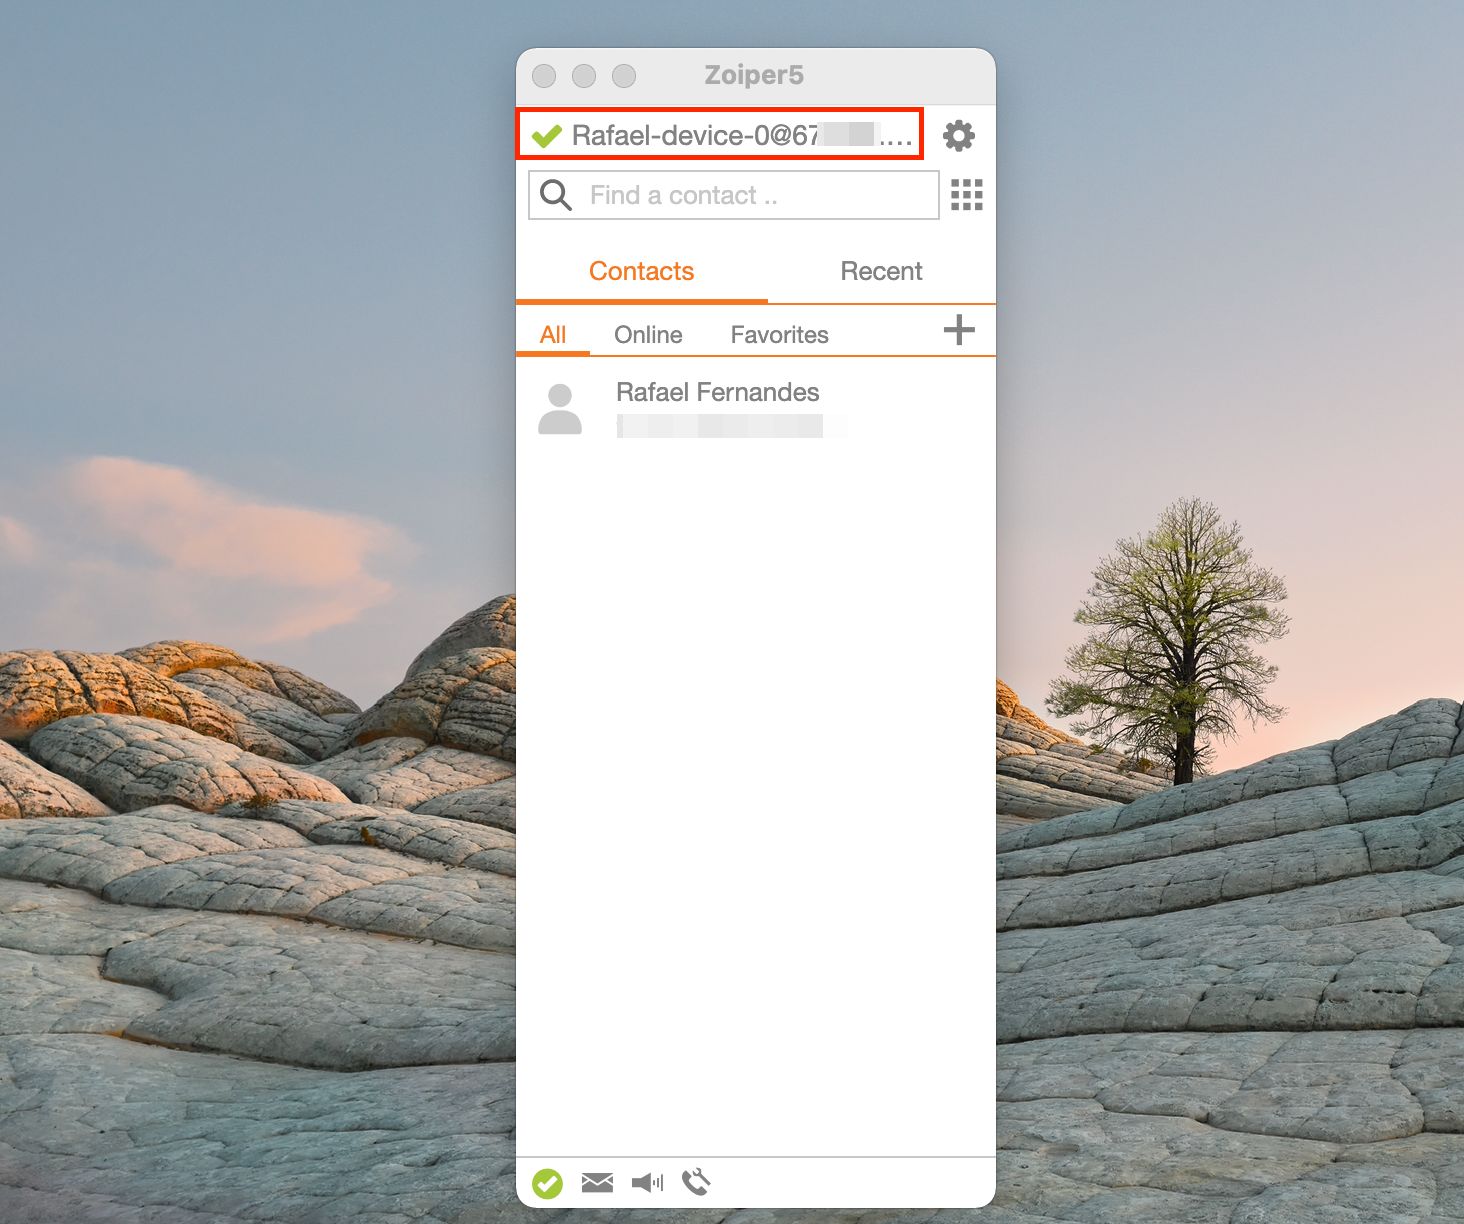
Figure 13: Setting Up Zoiper.
This completes the configuration process for Zoiper, allowing you to start using it for calls.
Activate on iPhone
To activate Zoiper on your iPhone, follow these steps:
-
Access Settings:
- Open the Zoiper app.
- Tap on Settings .
-
Add New Account:
- In the Settings menu, select Accounts.
- Tap the + icon to create a new account.
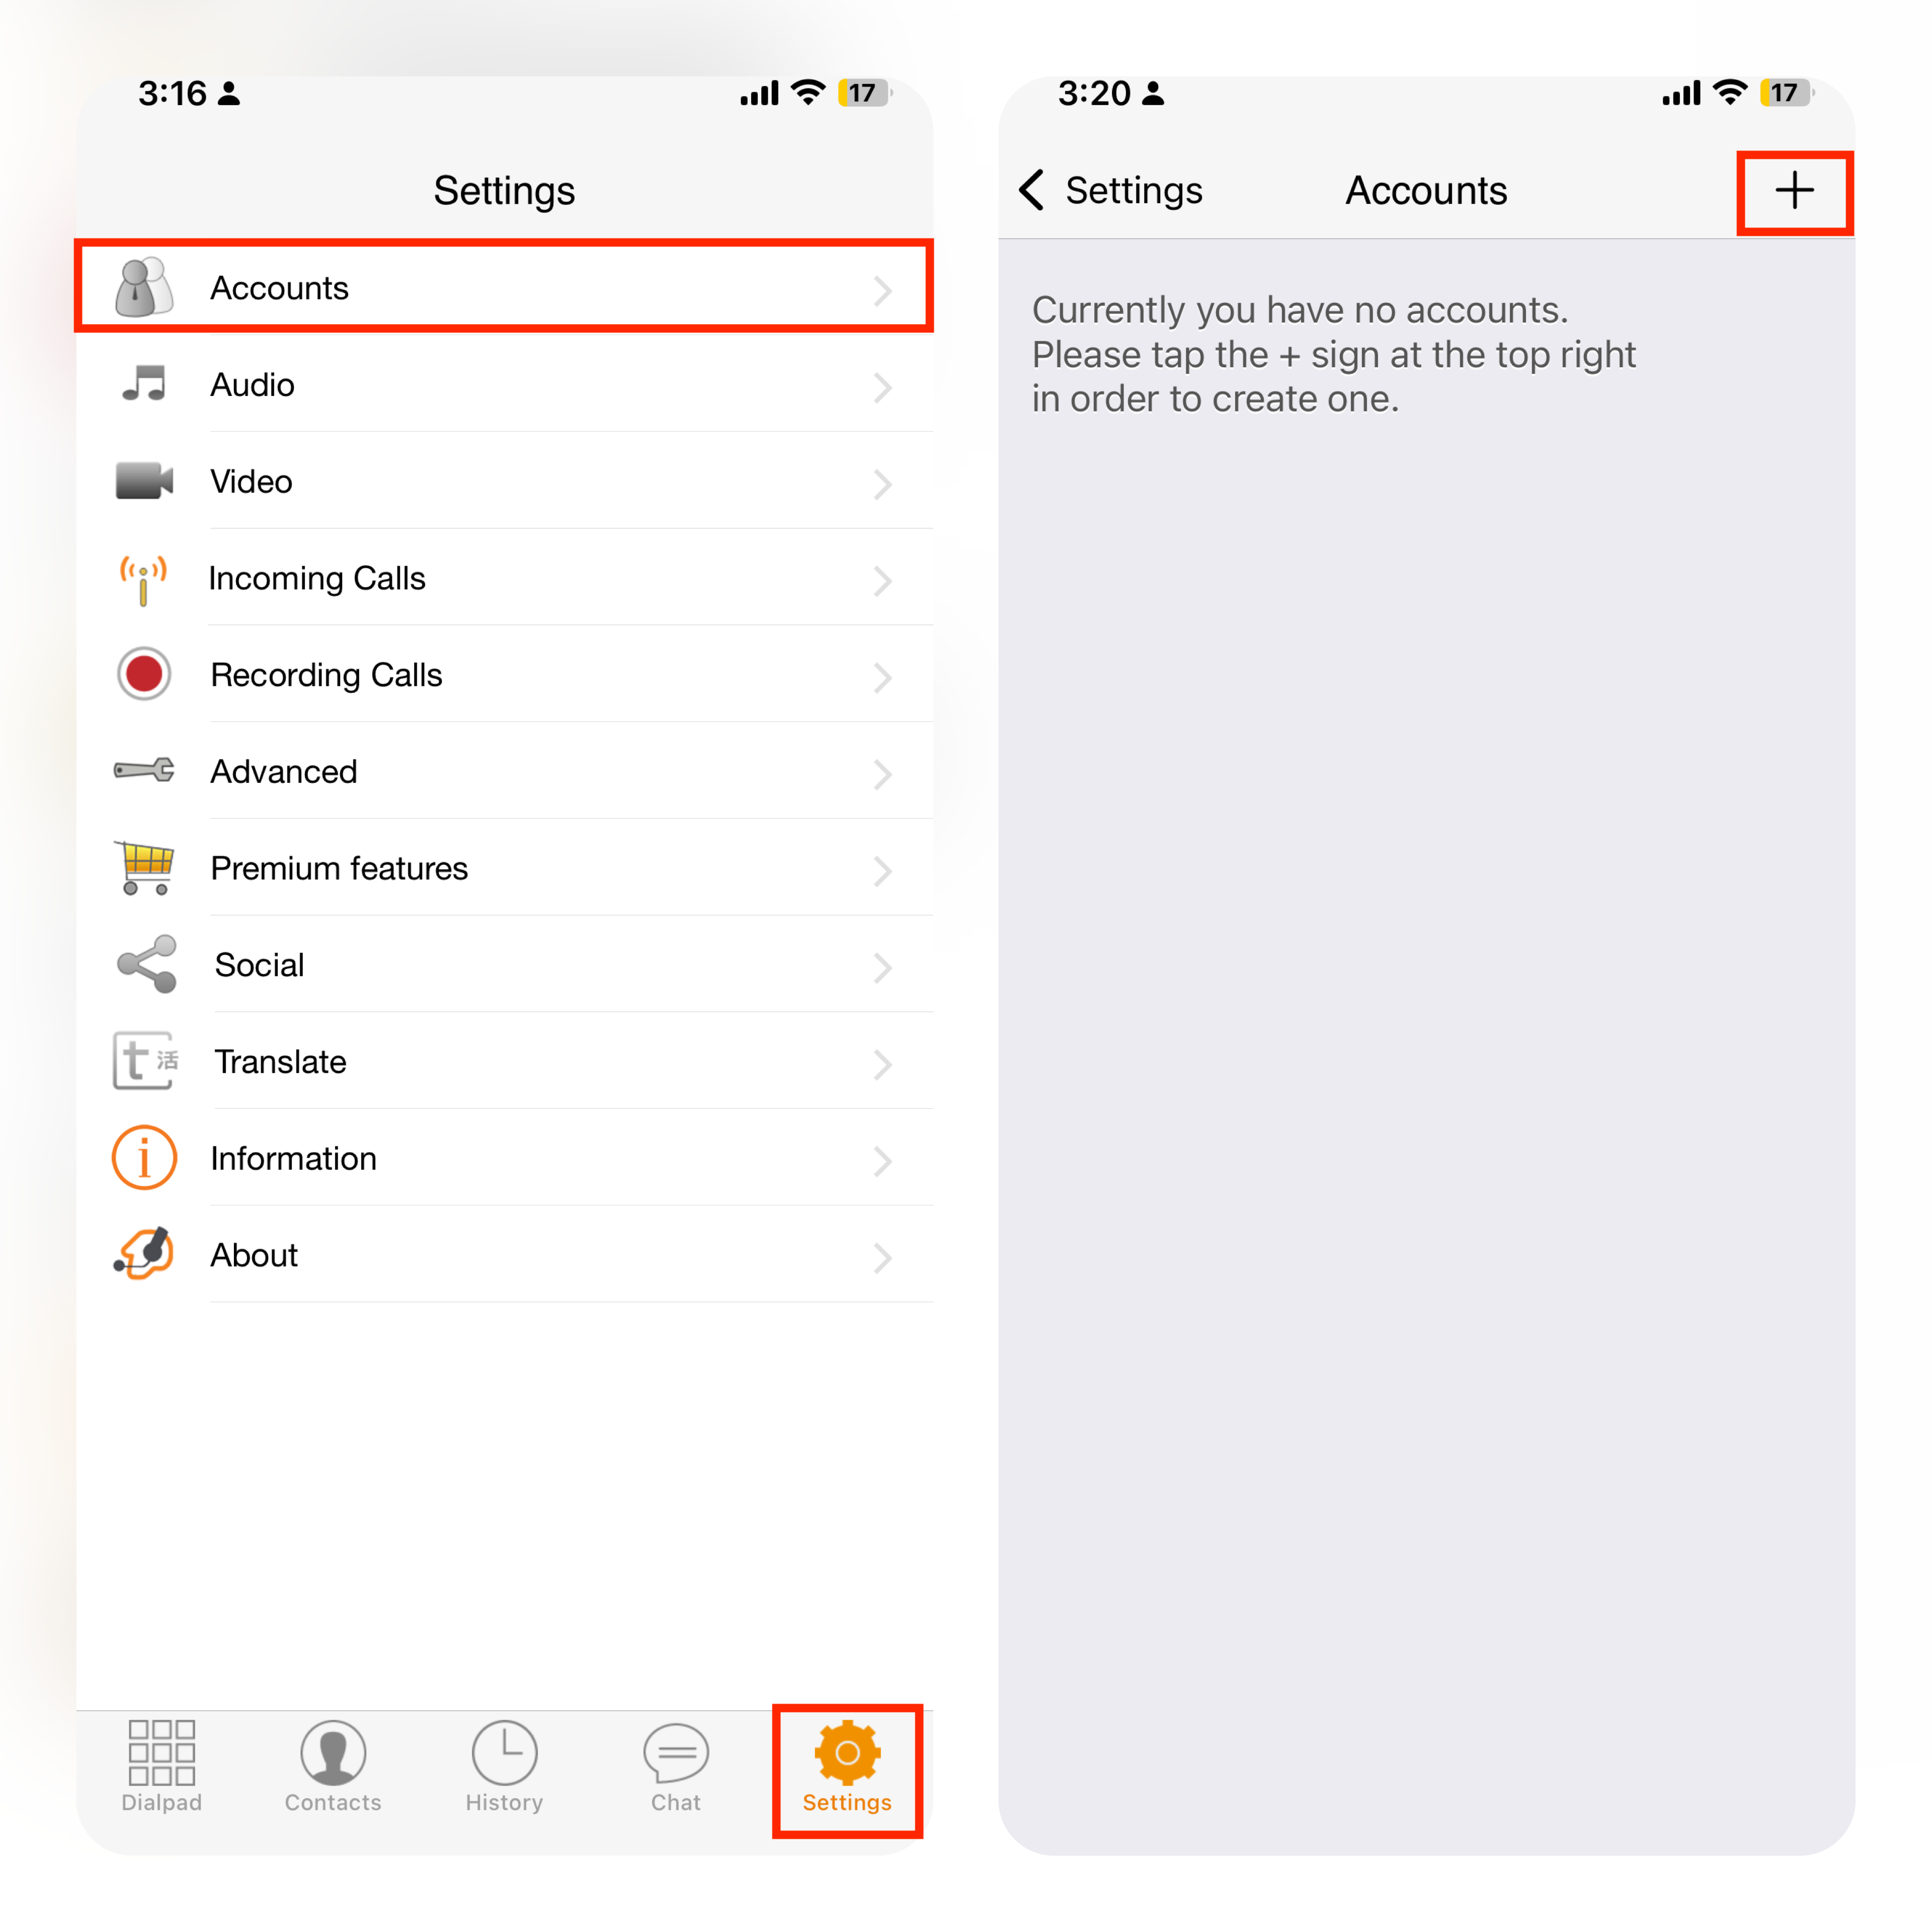
Figure 14: Creating a New Zoiper Account. -
Choose Configuration:
- When prompted with "Do you have an account?", select Yes.
- Choose Manual Configuration.
-
Enter SIP Account Details:
-
Select SIP Account in the next window and fill in the following details:
- Account Name (Optional): Enter a name for this account (e.g.,
"r-fern-softphone"). - Domain: Enter the IP server address generated in the Admin Portal.
- Username: Enter the username/device name created in the Admin Portal (e.g.,
"Rafael-device-0"). - Password: Enter the password generated or created in the Admin Portal.
- Caller ID (Optional): Set a display name for outgoing calls (e.g.,
"Rafael Fernandes - Wiline").
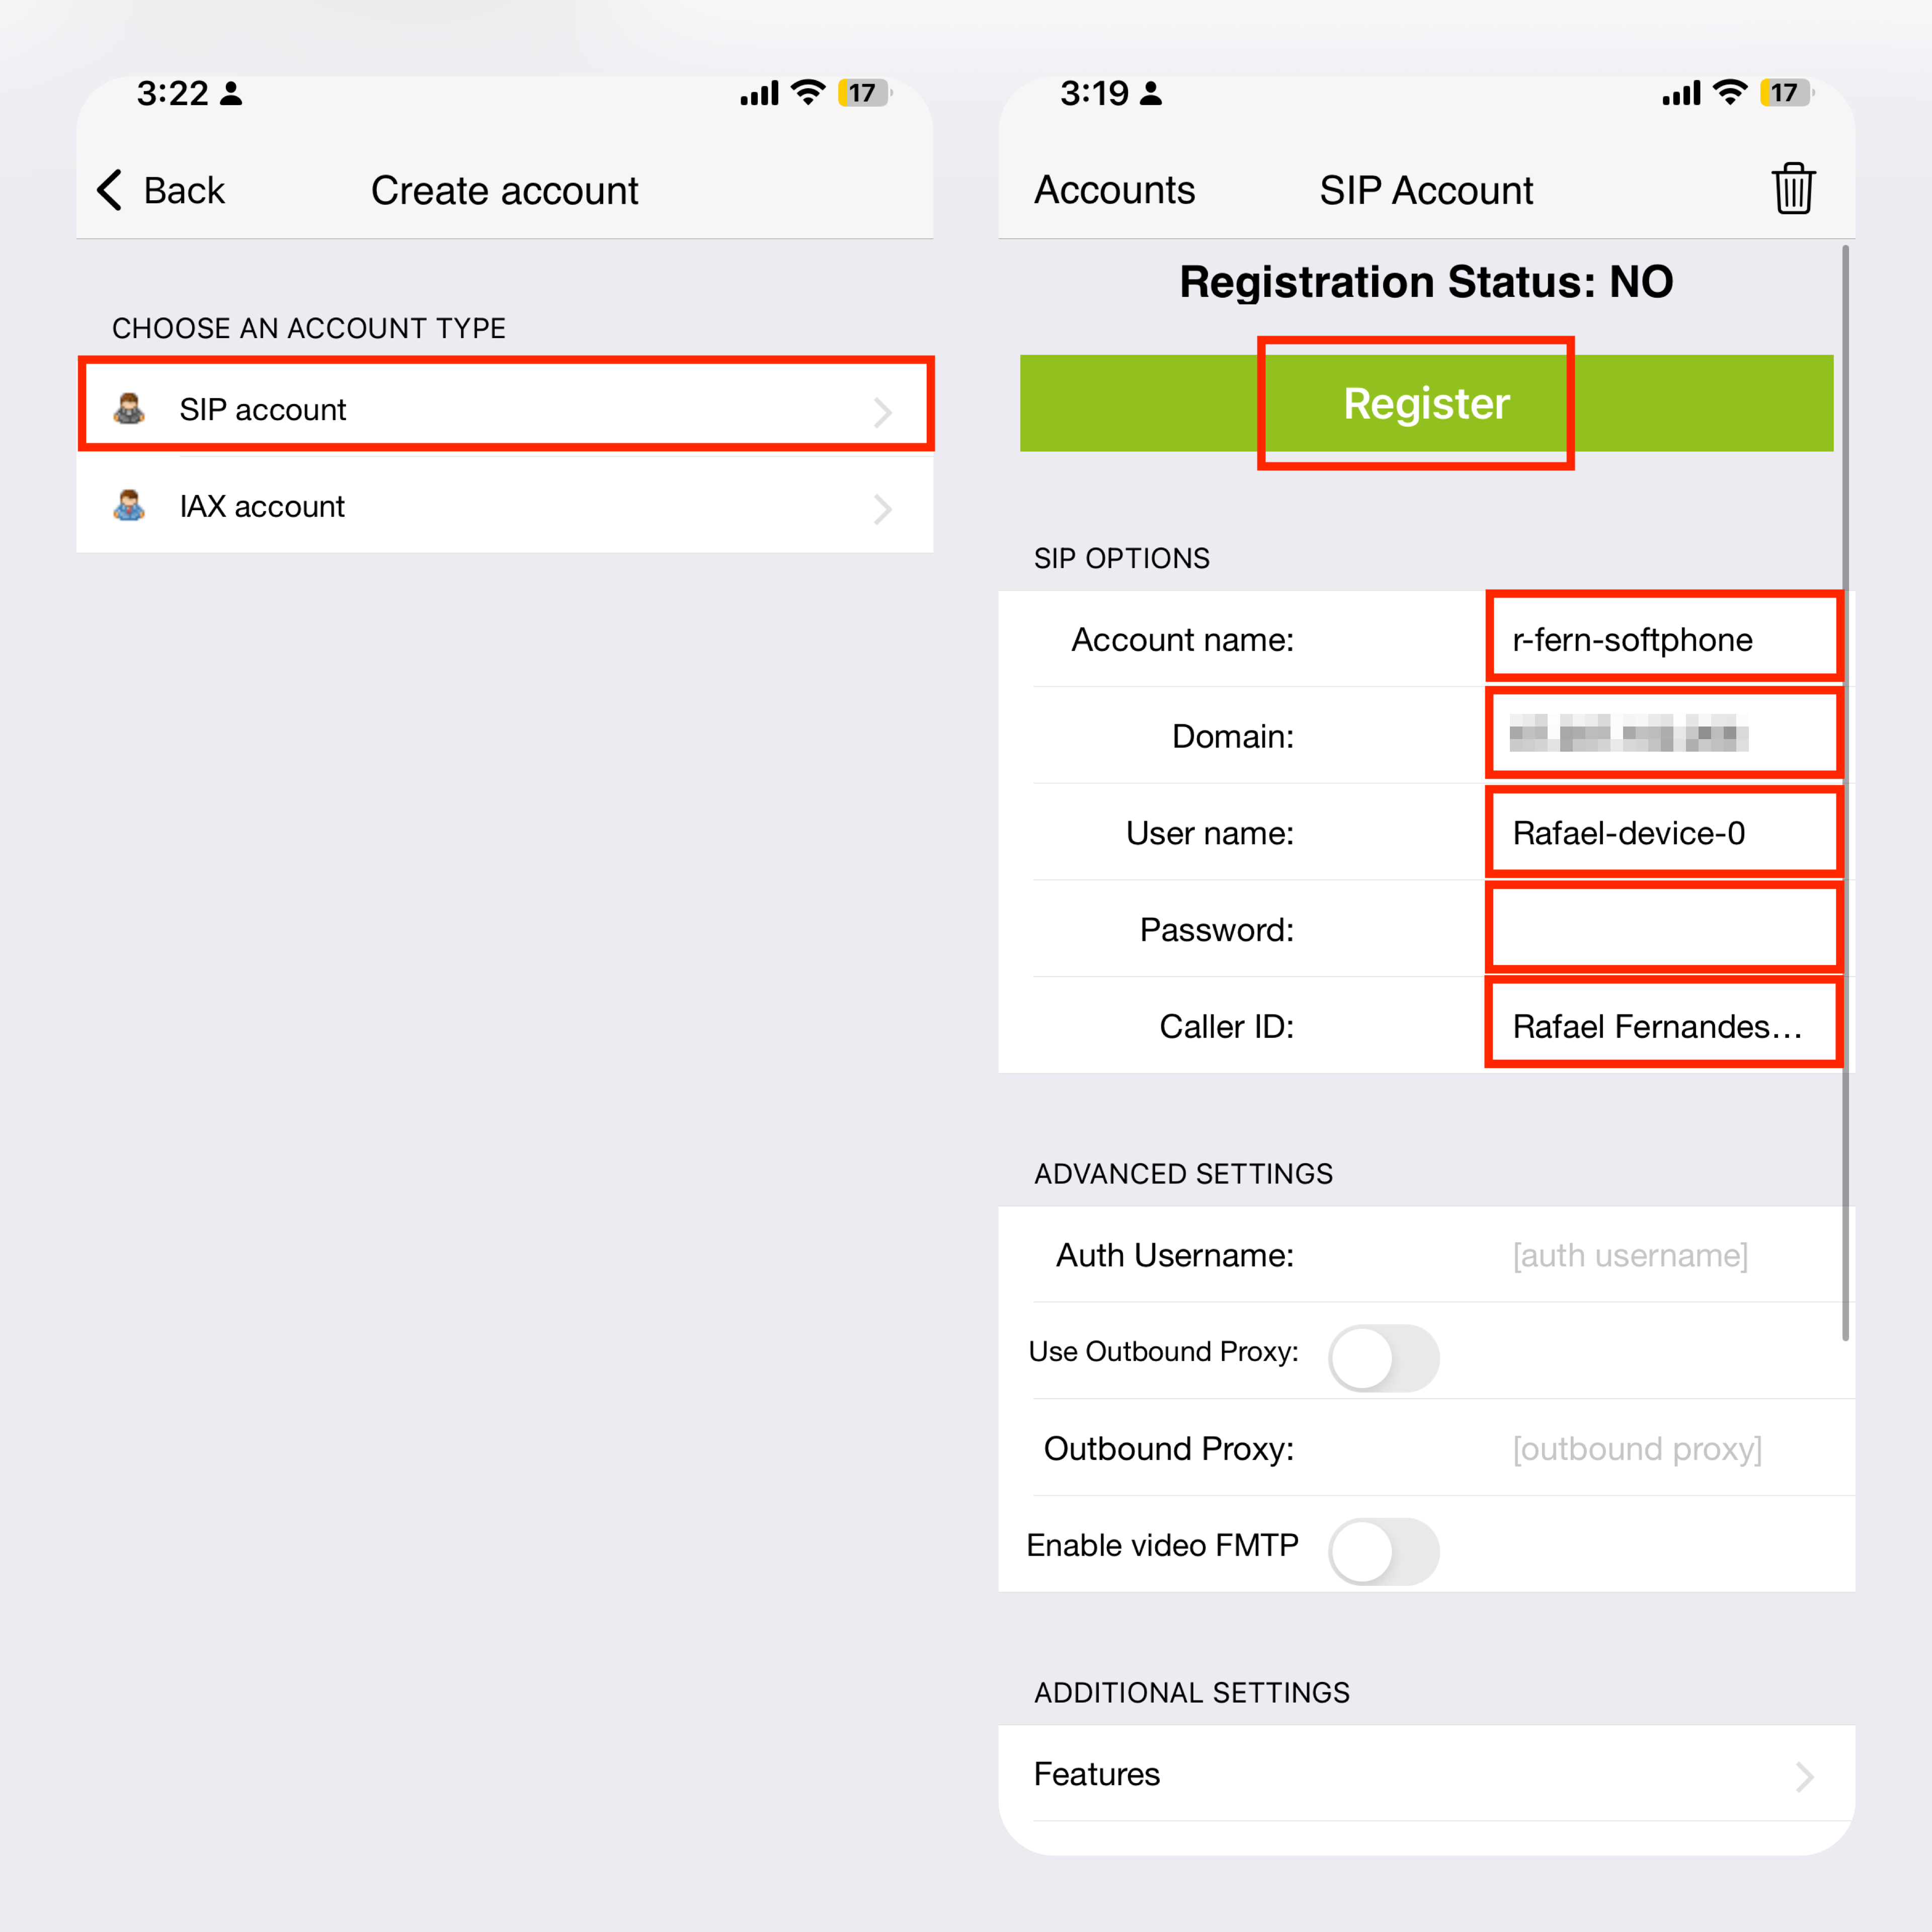
Figure 15: _Filling Out SIP Account Info and Registering. _ - Account Name (Optional): Enter a name for this account (e.g.,
-
-
Complete Activation:
- Once all fields are filled in, click REGISTER to save your changes.
After completing these steps, your Zoiper account will be activated and ready for use.
Zoiper's Main Features
Zoiper offers a variety of tools designed to enhance your calling experience. Below are some of the key features you’ll find in the app to help manage your calls efficiently.
1. Dialpad
The dialpad allows you to manually enter numbers and symbols for dialing.
Note: The main dialpad does not support DTMF (Dual-tone multi-frequency) tones.
- To enter DTMF tones: Use the Keypad available in the active call window, as shown in Figure 16.
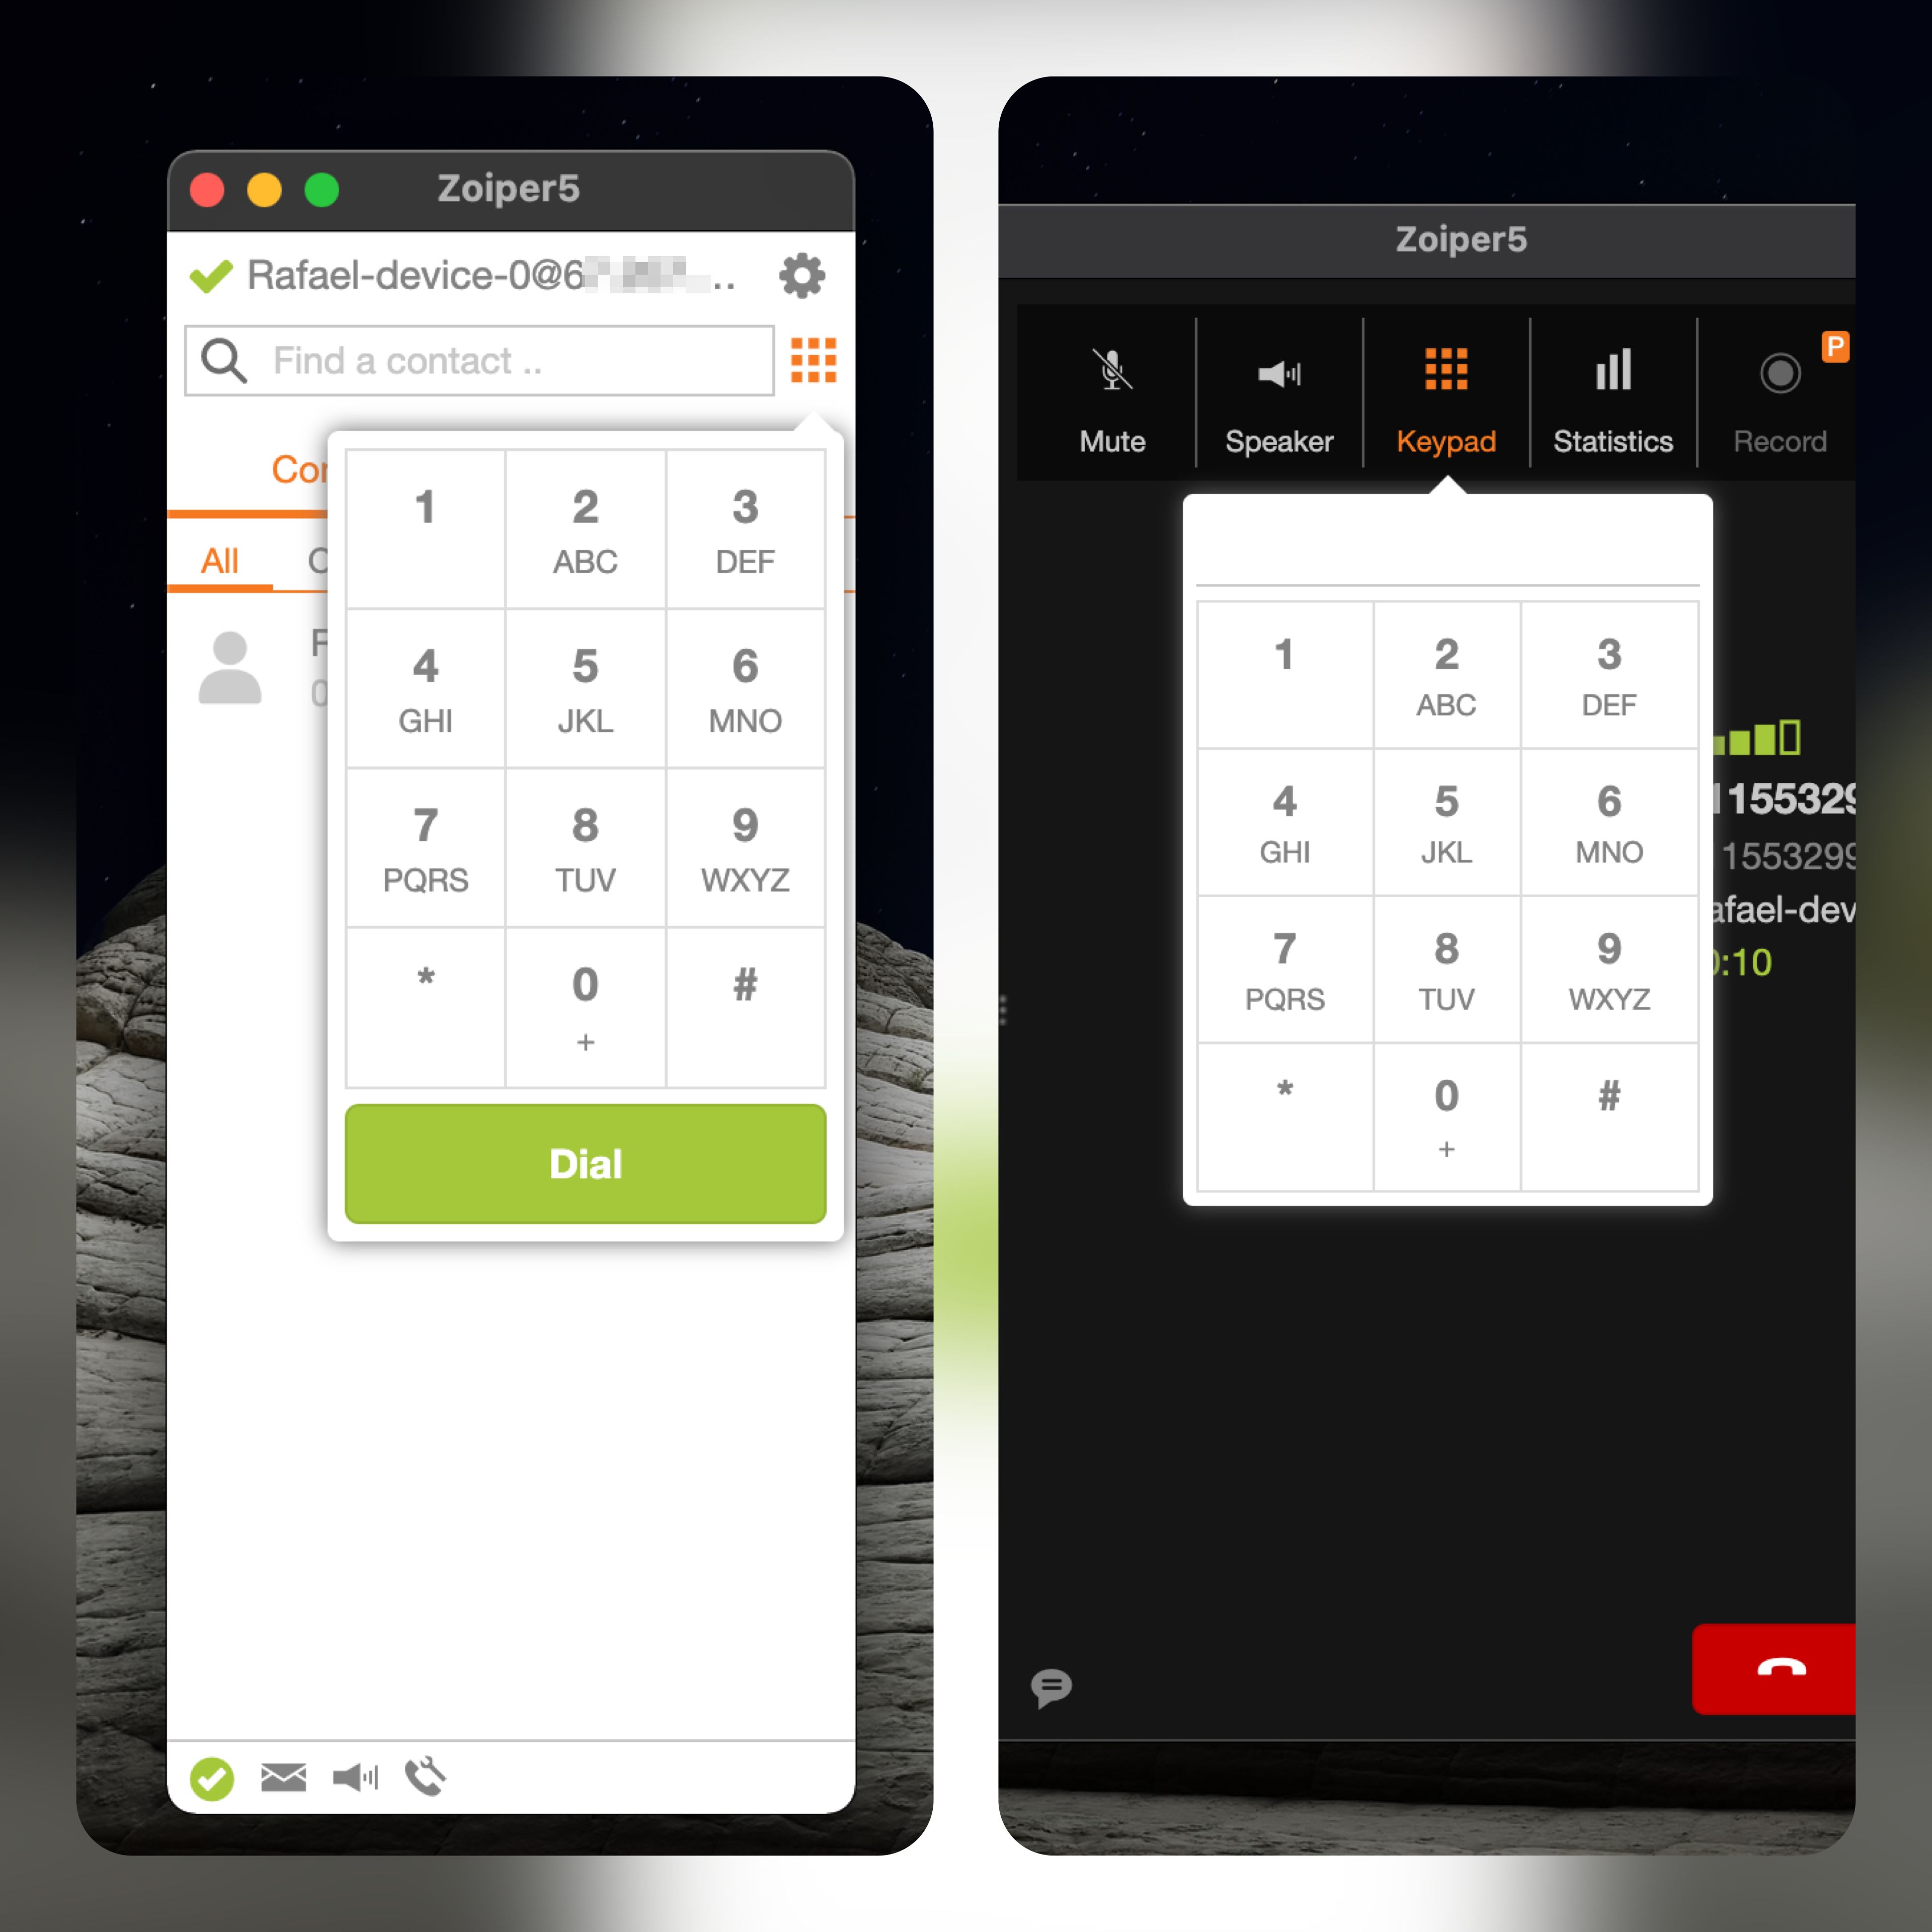
Figure 16: DTMF Keypad in Active Call Window.
2. Audio Control
The speaker icon (third from the left) offers quick audio control options.
- Functionality: Tapping this icon opens a pop-up with volume controls for the selected microphone and audio device.
- Usage Tip: Adjust audio settings here to optimize sound quality during calls.
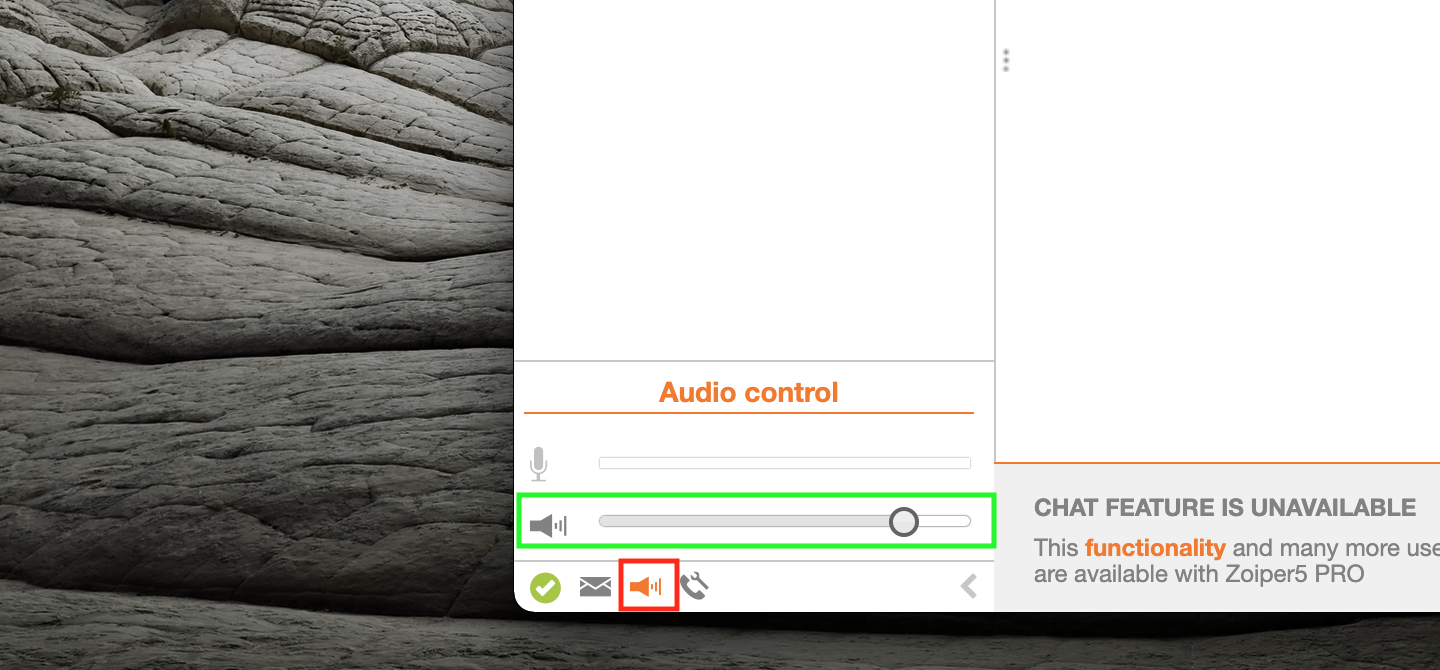
Figure 17: Audio Control Pop-up.
3. Hang Up Button
The Calls section shows a list of ongoing calls with options to manage each.
- Active Calls: For active calls, a Hang Up button appears next to each call, allowing you to end it.
- Incoming Calls: For incoming calls that are not yet answered, you can also click the Hang Up button to decline the call.
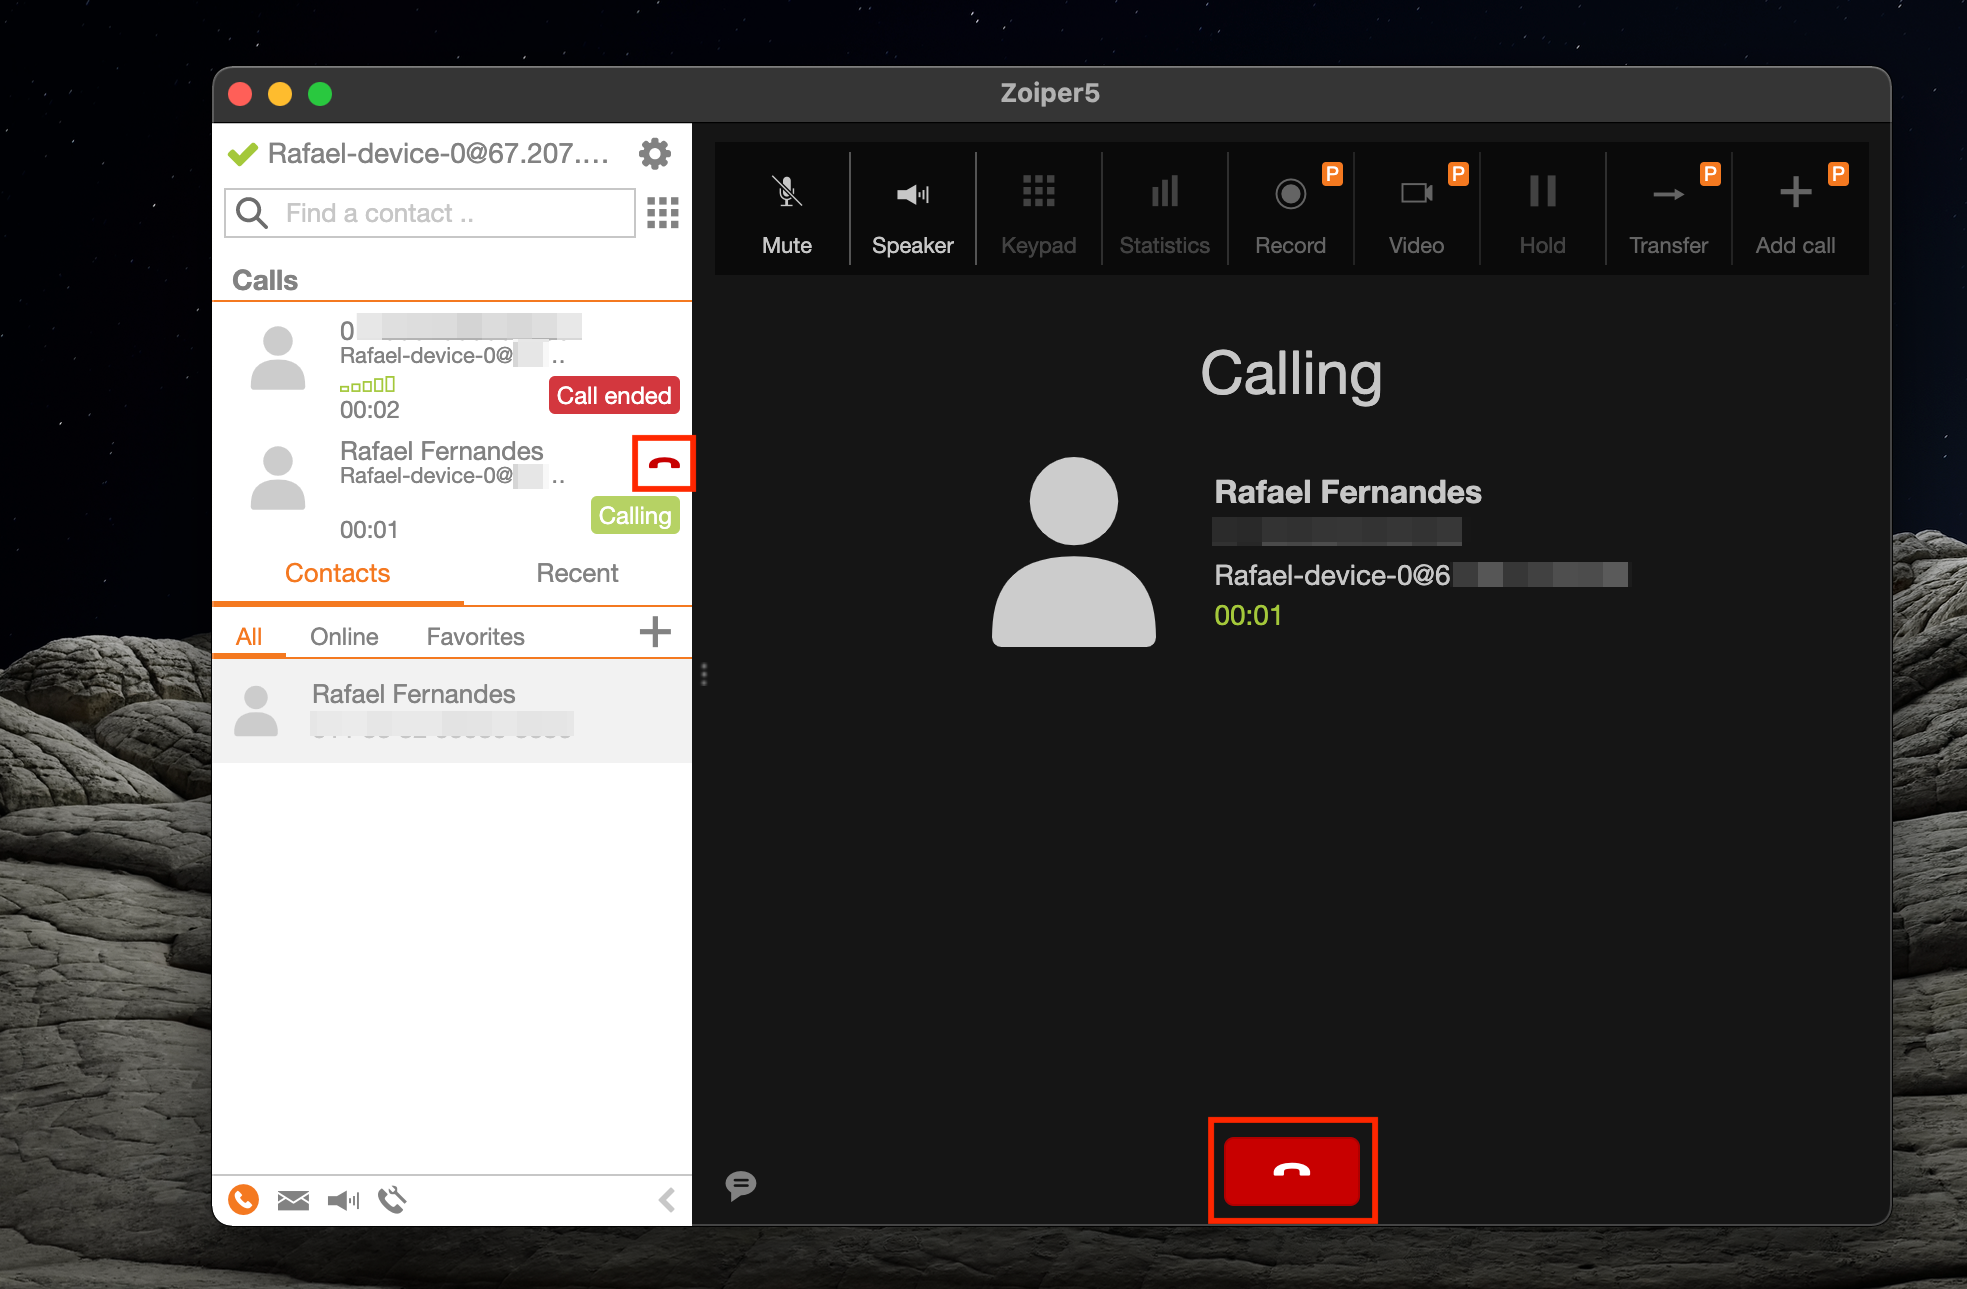
Figure 18: Hang Up Button in Active Calls Section.
By following these steps, Zoiper has been successfully configured, allowing you to make seamless voice calls through WiLine's SDN VoIP services.