Manage TNs
Manage telephone numbers (TNs) in the Admin Portal. View, assign, set as default, clear default designations, and delete TNs to maintain optimal system configuration and functionality.
View All TNs
Follow the steps below to view all TNs:
- Log in to the Admin Portal.
- Navigate to the option Call Control > TNs in the left-side menu.
- A list of all TNs will be displayed on the dashboard, including:
- Phone Number: The TN associated with the account.
- Type: Indicates the type of number (e.g., DID).
- Action: Displays the action assigned to the TN (e.g., Send fax to email, Dial line).
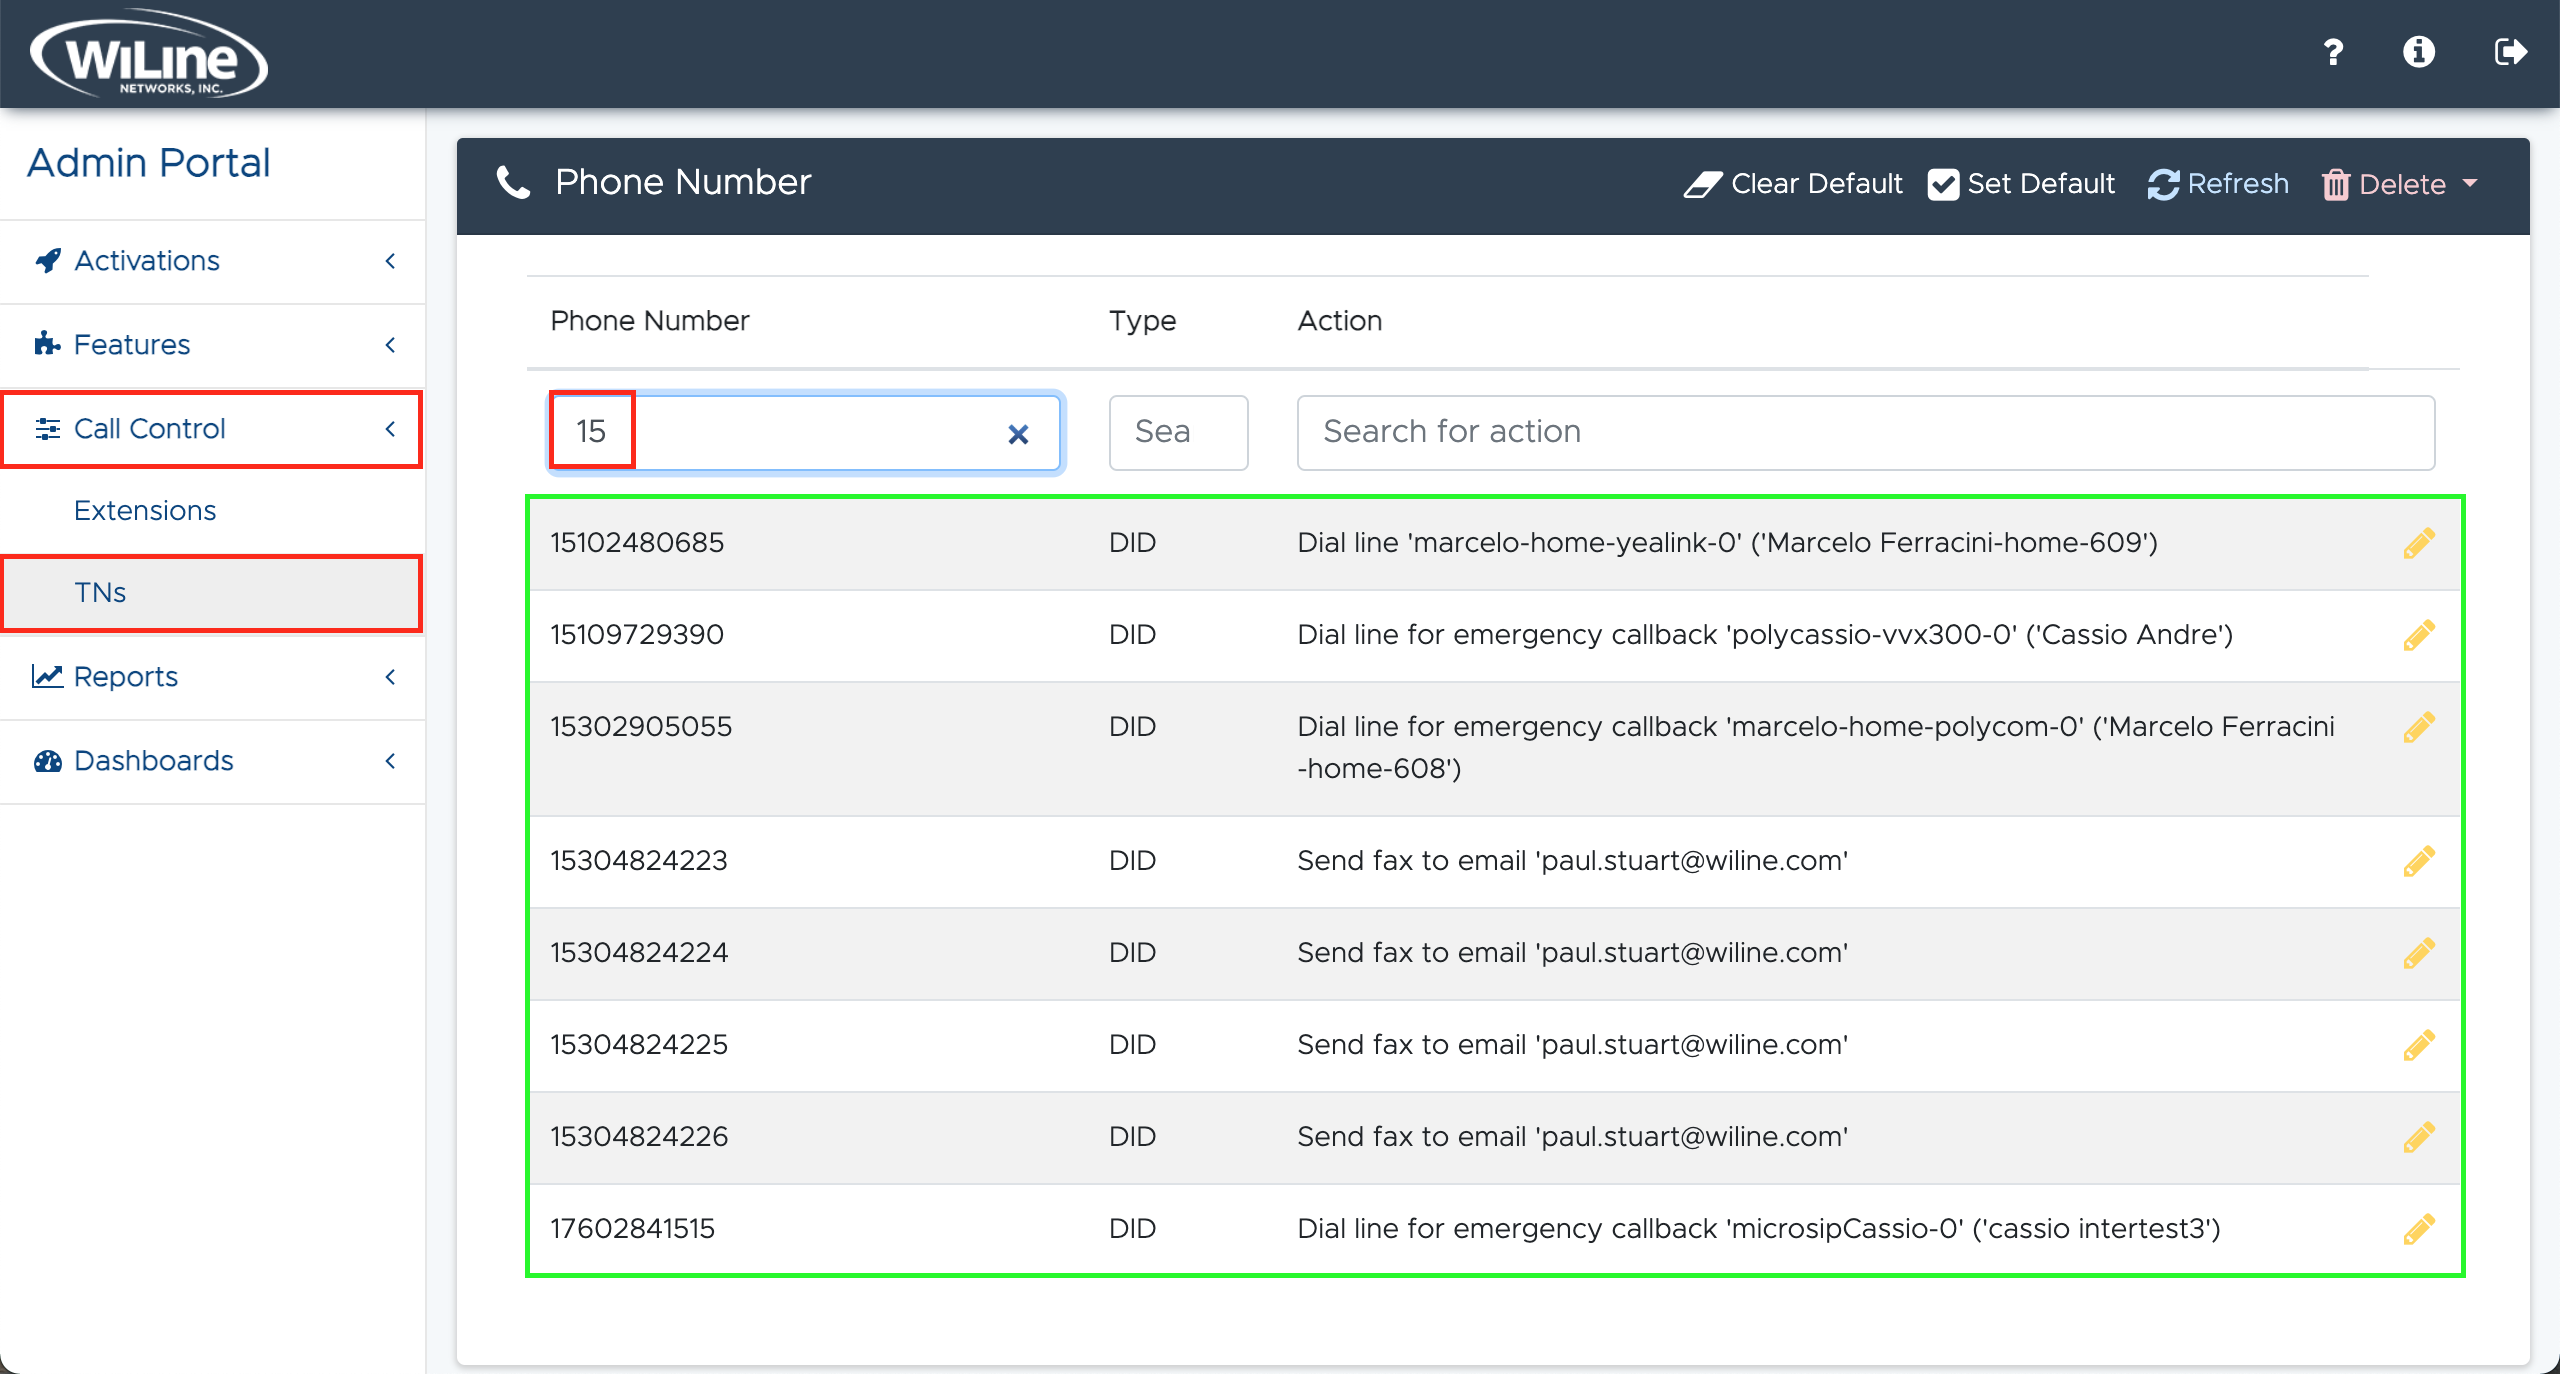
- To reorder or filter the results:
- Click the column headers (e.g., Phone Number, Type, Action) to sort in ascending or descending order.
- Use the search fields beneath the headers to filter for specific TNs, types, or actions.
Edit a TN
To edit a TN (telephone number):
-
Access the TN:
- Double-click a TN from the list, or
- Select a TN and click the yellow pencil icon on the right.
A Choose An Action pop-up will open, allowing you to modify the TN's action:
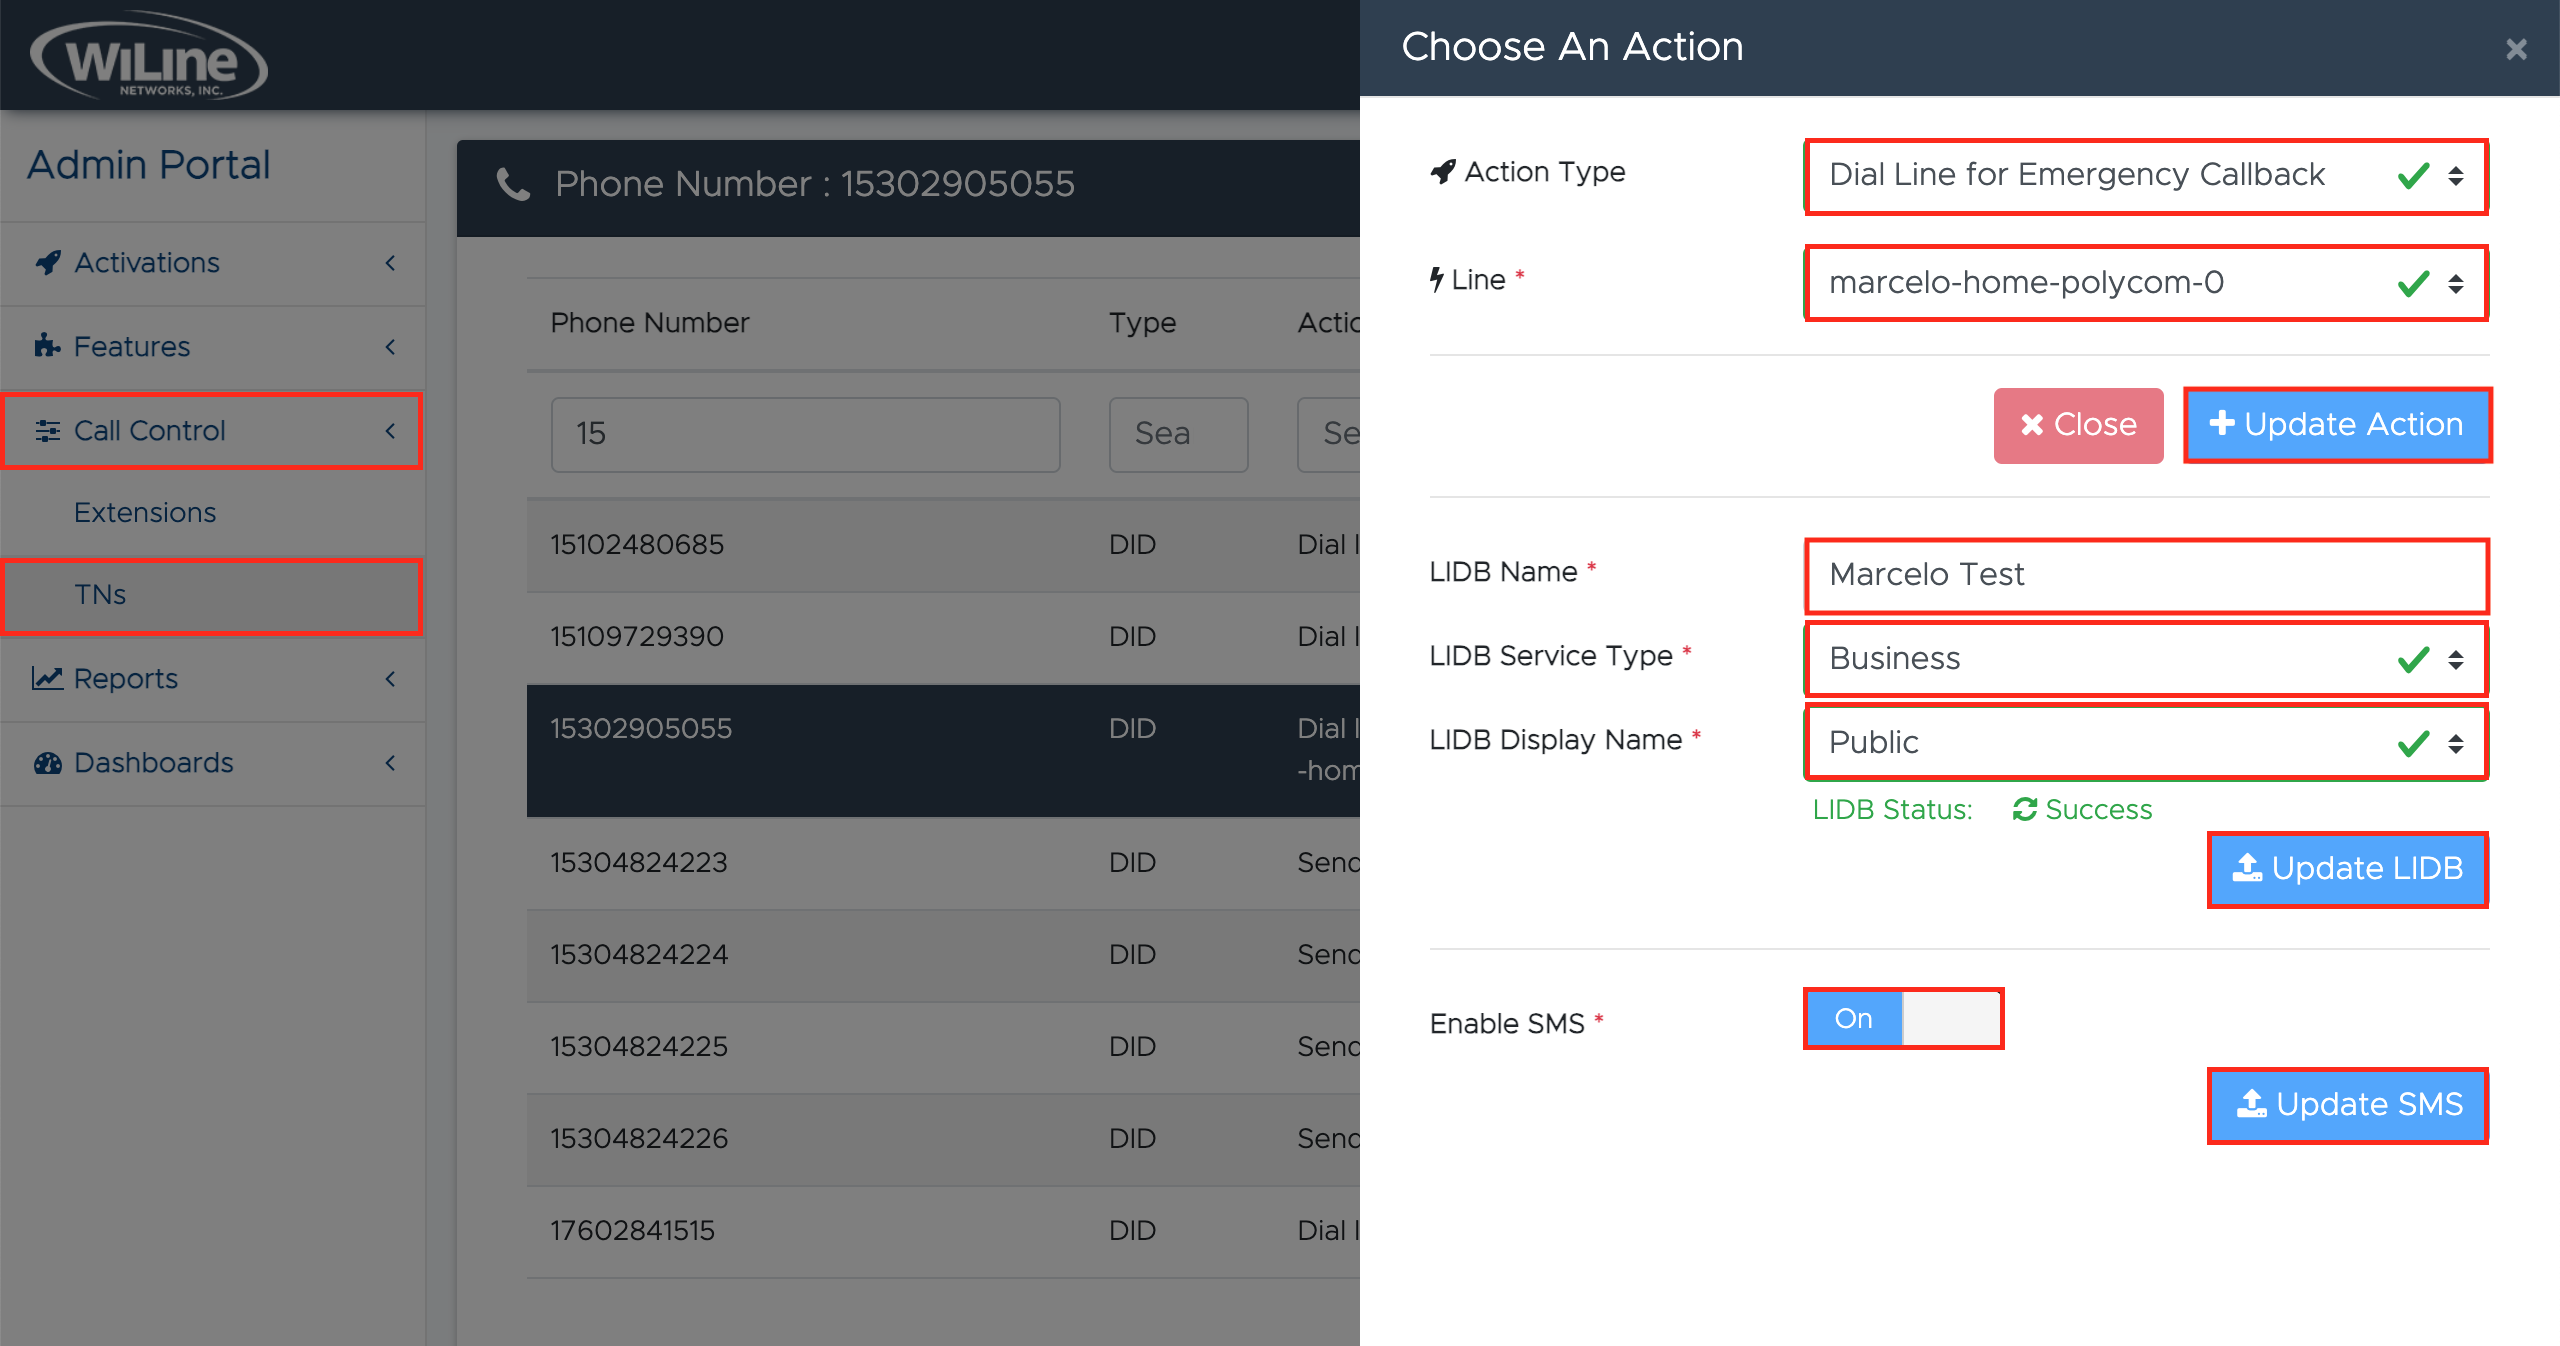
Figure 2.Choosing an action for a telephone number (TN). -
Edit Action Fields:
- Action Type: Redefine the action as needed, selecting from the dropdown menu (e.g.,
Dial Line for Emergency Callback; other actions are available in Table 1). - Line (required): Redefine the line if needed (e.g.,
marcelo-home-polycom-0).
Click the Update Action button to save any changes, or Close to exit.
- Action Type: Redefine the action as needed, selecting from the dropdown menu (e.g.,
-
Edit LIDB Fields:
- LIDB Name(required): Redefine the LIDB name (e.g.,
Marcelo Test). The LIDB name is the identifier for the TN, used to link it to various services and features in the system. - LIDB Service Type (required): Change the type from the dropdown:
- Business
- Residential
- LIDB Display Name (required): Change the display name from the dropdown:
- Public
- Private
noteThe Line Information Database (LIDB) stores essential information about the TN and its associated services. This data is critical for call routing, enabling features such as caller ID and call blocking, ensuring that the TN functions correctly within the system.
Click Update LIDB to save your changes. A confirmation message will appear under the LIDB Display Name field: LIDB Status: Success.
- LIDB Name(required): Redefine the LIDB name (e.g.,
-
Edit SMS Field (required): Toggle to Enable SMS and click Update SMS to save.
Set and Clear Default
Manage which TNs are designated as the default and easily clear that designation when necessary, ensuring optimal configuration for your system.
Set a TN as Default
To set a TN as the default:
- Select the desired TN from the list.
- Click the Set Default button in the options bar.
A confirmation pop-up will appear to verify your action:
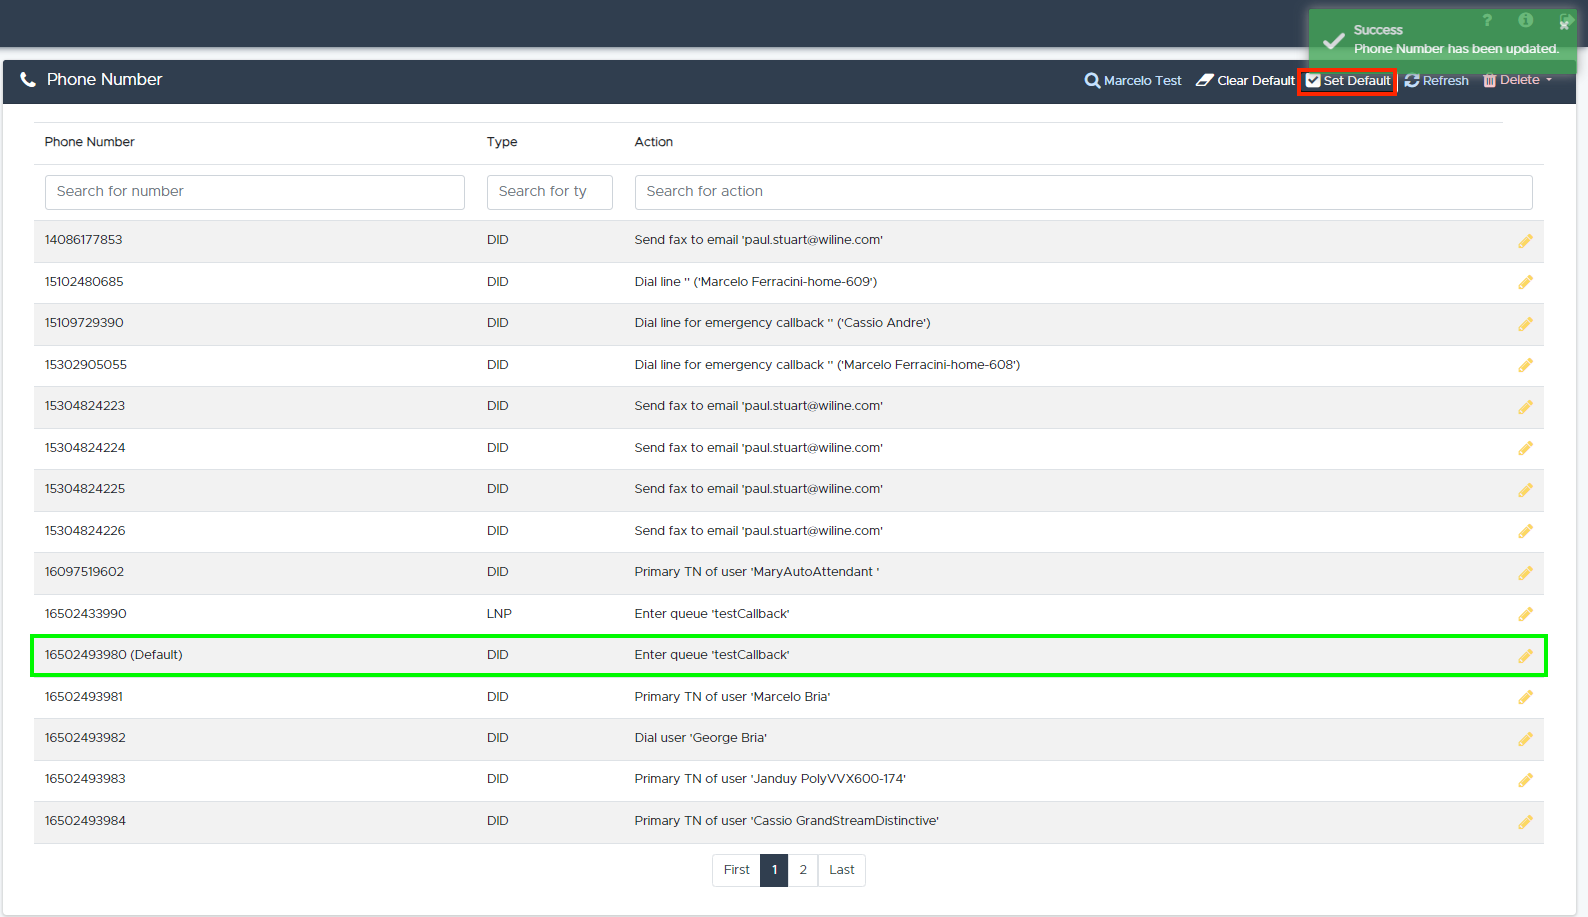
Once confirmed, the TN will display a (default) label next to its number.
Clear a TN as Default
To remove the default designation from a TN:
- Select the TN currently marked as default from the list.
- Click the Clear Default button in the options bar.
A confirmation pop-up will appear to confirm your action:
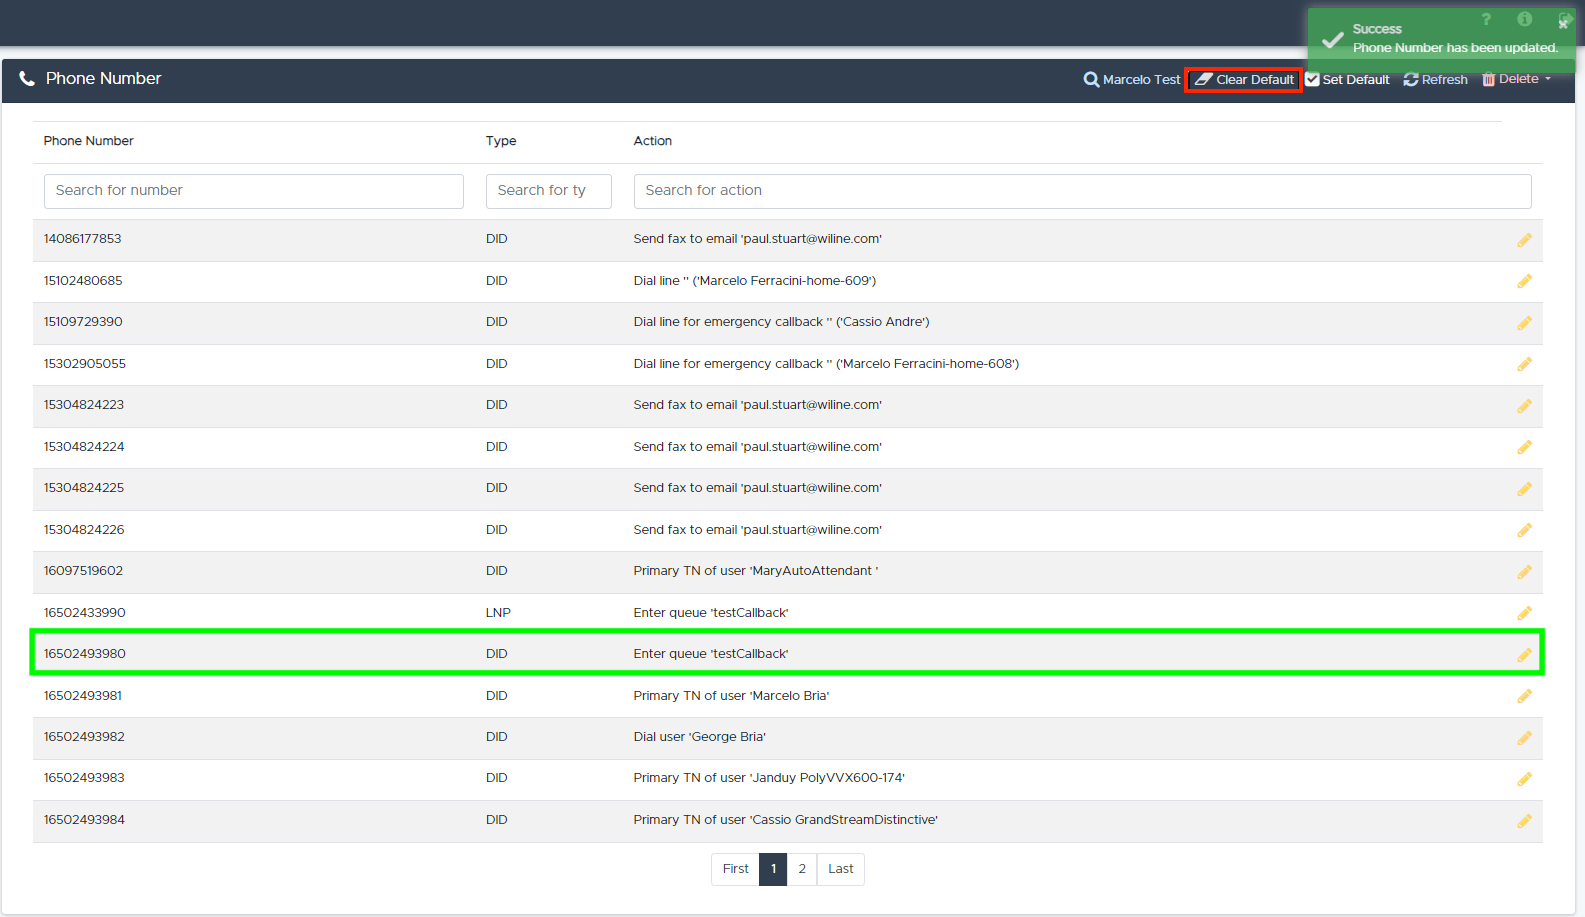
Once cleared, the (default) label will be removed from the extension number.
Delete a TN
To delete a TN, follow these steps:
- Select the TN from the list.
- Click the red Delete button in the options bar.
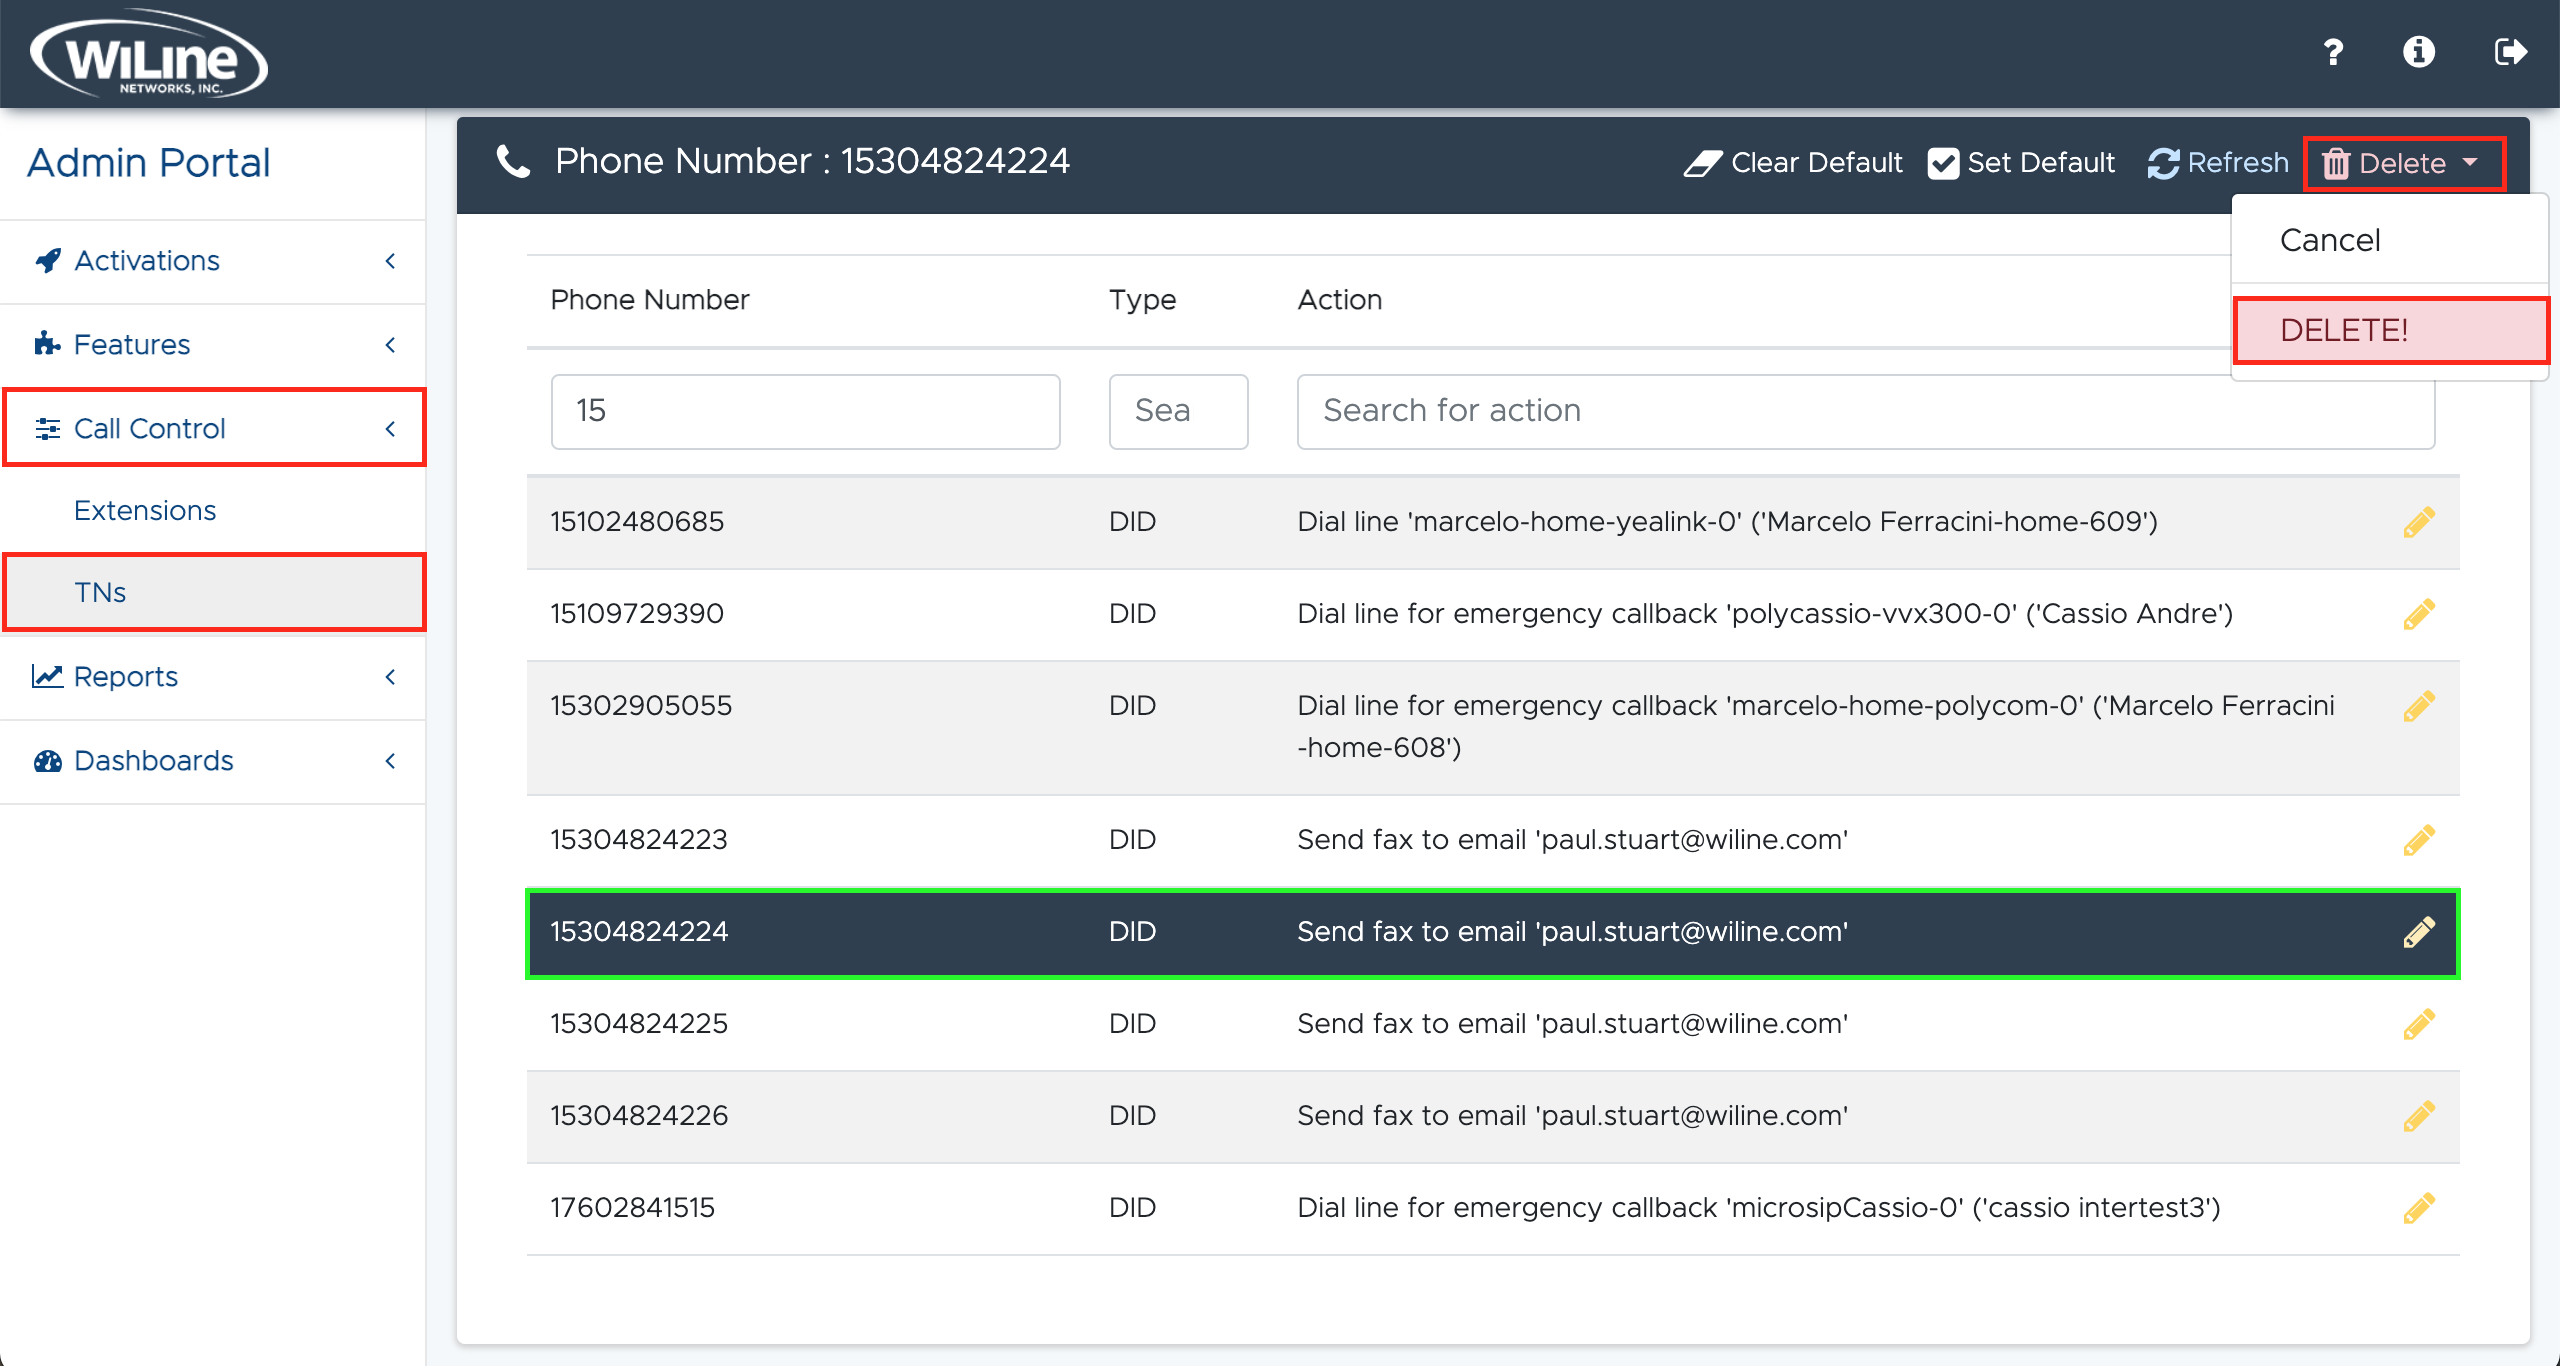
A confirmation pop-up will appear. Click Delete to confirm or Cancel to return to the list.
By following these steps, administrators can efficiently manage TNs through the Admin Portal, ensuring proper configuration and effective handling of phone numbers within the system.