Manage Extensions
In the Admin Portal, administrators can efficiently manage user extensions, including creating new ones, setting defaults, editing, and deleting extensions. This guide provides step-by-step instructions to help you configure extensions according to your system’s needs.
Create a New Extension
To create a new extension, follow these steps:
-
Log in to the Admin Portal.
-
Navigate to Features > Extensions in the left-side menu.
-
Click New in the options bar to create a new extension.
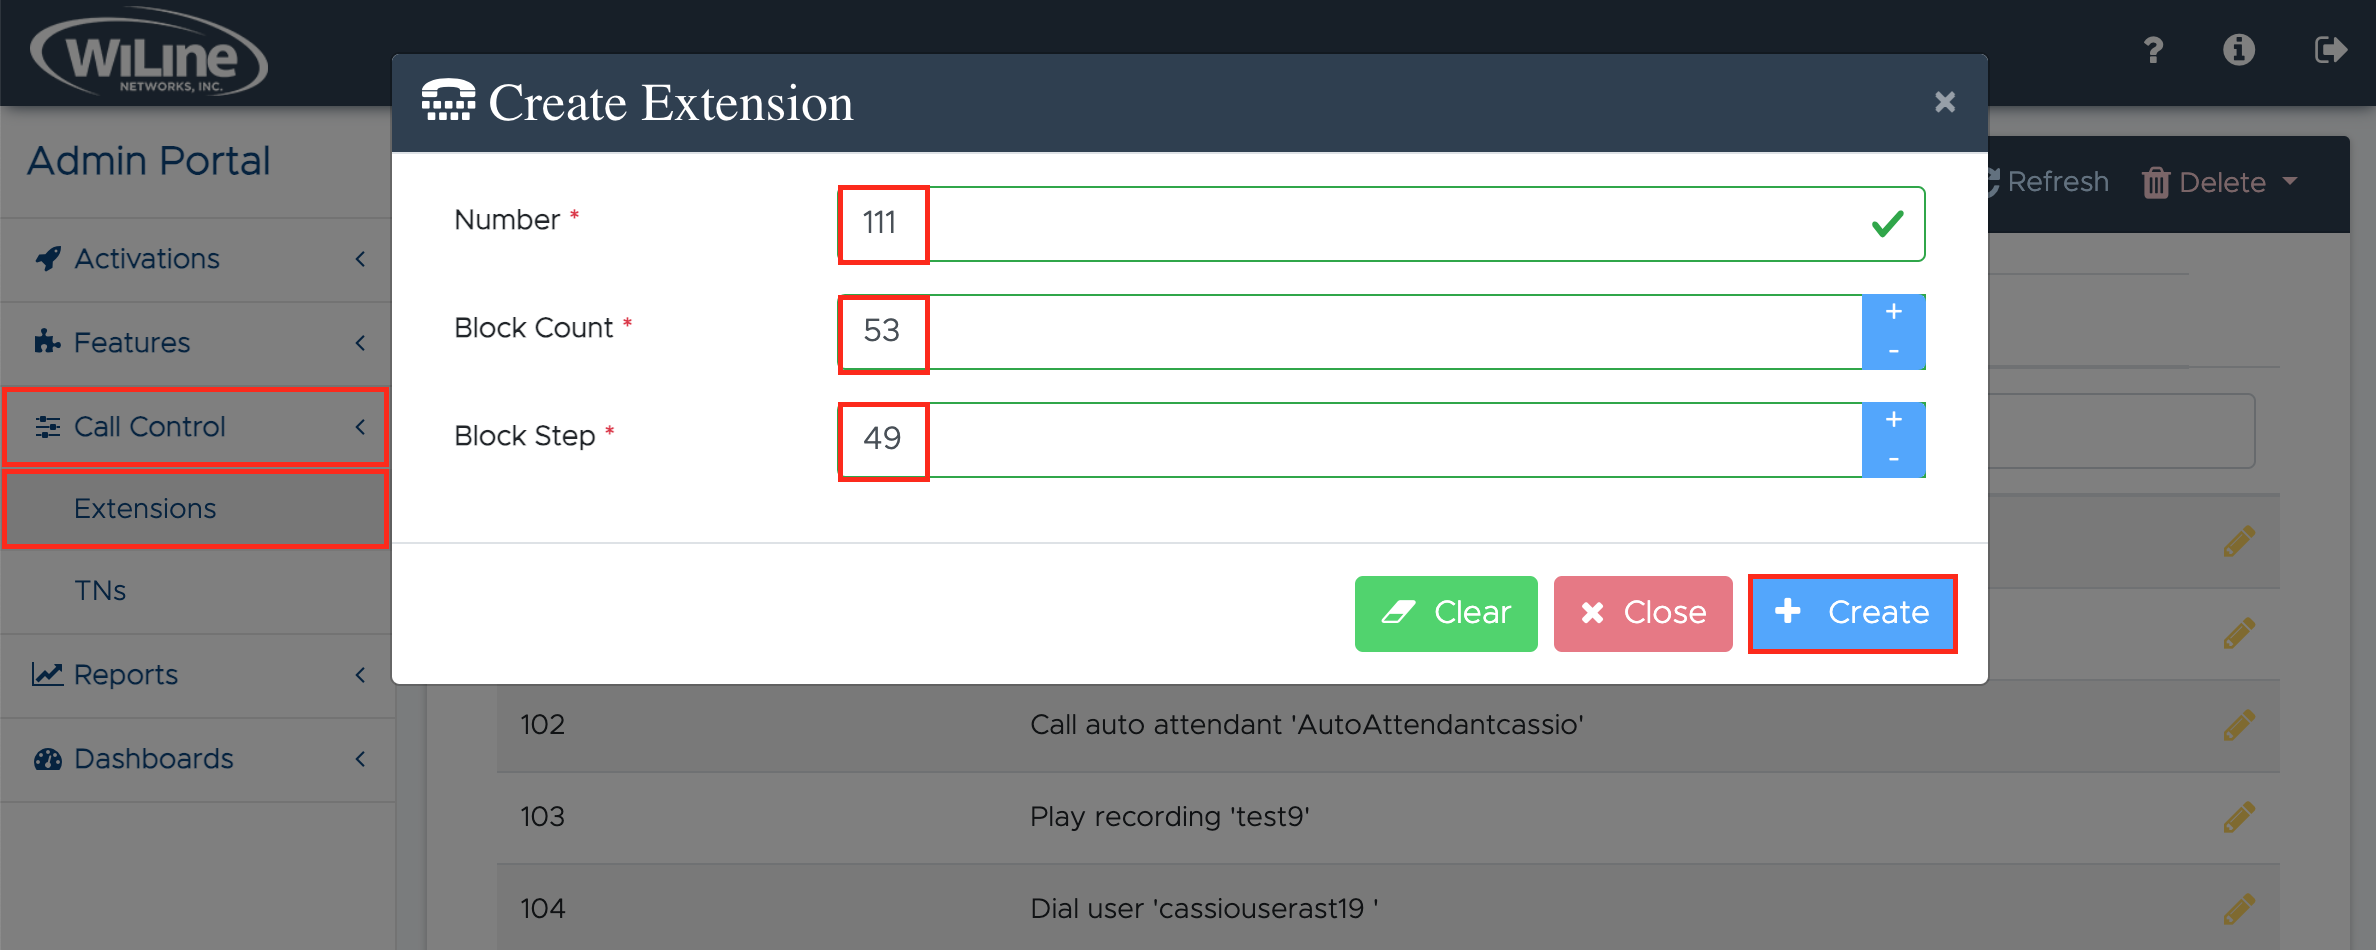
Figure 1. Creating a new extension. -
Fill in the required fields for your new extension.
- Name: Unique identifier for the extension (e.g.,
111). - Block Count: Total number of extensions in the block (e.g.,
53). - Block Step: Interval for assigning extensions (e.g.,
49—extensions are assigned every 49th number to avoid conflicts).
- Name: Unique identifier for the extension (e.g.,
Choose an Action
To choose an action for your extension:
-
Find the new extension in the list by typing in the fields under the headers (e.g.,
111under Extension) and click the yellow pencil icon on the right. -
Choose an Action for the extension.
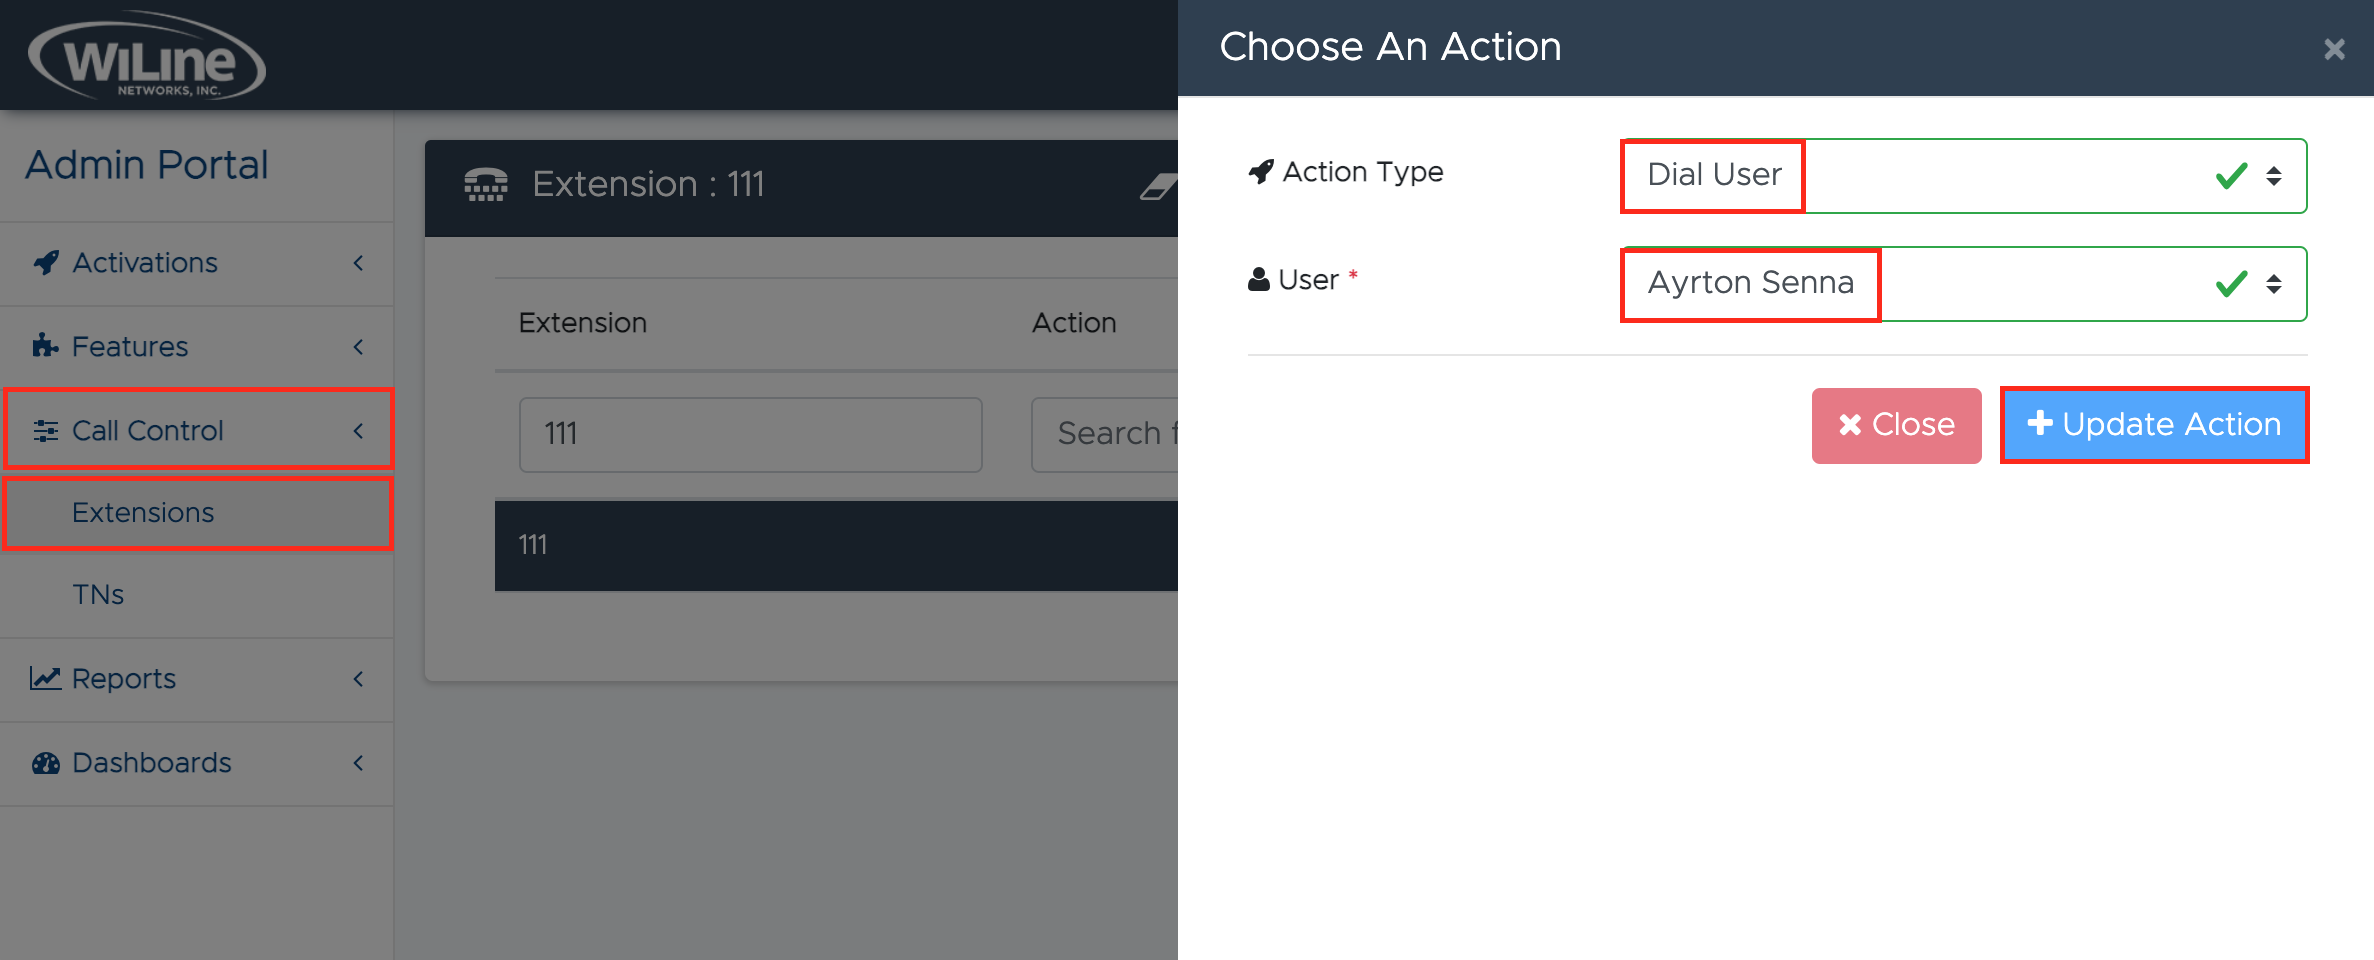
Figure 2. Choosing an action for the new extension.
Choose from the following options:
| Action | Description |
|---|---|
| No Action | No action taken. |
| Dial Line for Emergency Callback | Connect to emergency line. |
| Dial User | Route call to a specific user. |
| Dial Line | Direct call to a specific line. |
| Distinctive Ringtone | Play a unique ringtone for incoming calls. |
| Join Conference | Allow caller to join a conference. |
| Enter Queue | Place caller in a queue. |
| Queue Login/Logout | Manage agent availability. |
| Queue Member Pause | Pause agent's queue participation. |
| Queue Member Unpause | Resume agent's queue participation. |
| Page Group | Page a defined group of users. |
| Hunt Group | Route call to a hunt group. |
| Auto Attendant | Direct caller to another auto attendant. |
| Forward | Forward call to another number. |
| Check Voicemail | Allow caller to check voicemail. |
| Leave Voicemail | Enable caller to leave voicemail. |
| Directory | Provide caller directory. |
| New Recording | Start a new audio recording for greetings. |
| Update Recording | Modify existing recording. |
| Play Recording | Play specific audio recording to caller. |
| Fax to Email | Send fax to an email address. |
| PIN Set | Require a PIN for certain features. |
| Custom Action | Execute a predefined custom action. |
| Custom Target | Route call to a specific custom target. |
-
After selecting the first option, an additional field will appear based on your choice. For example, if you select Dial User, you will be prompted to choose a User. If you select Enter Queue, a dropdown will appear for you to select a Queue, etc.
-
To save your configuration, click Update Action. Select Close to cancel.
View All Extensions
To view a list of all configured extensions, follow these steps:
- Log in to the Admin Portal.
- Navigate to Call Control > Extensions in the left-side menu.
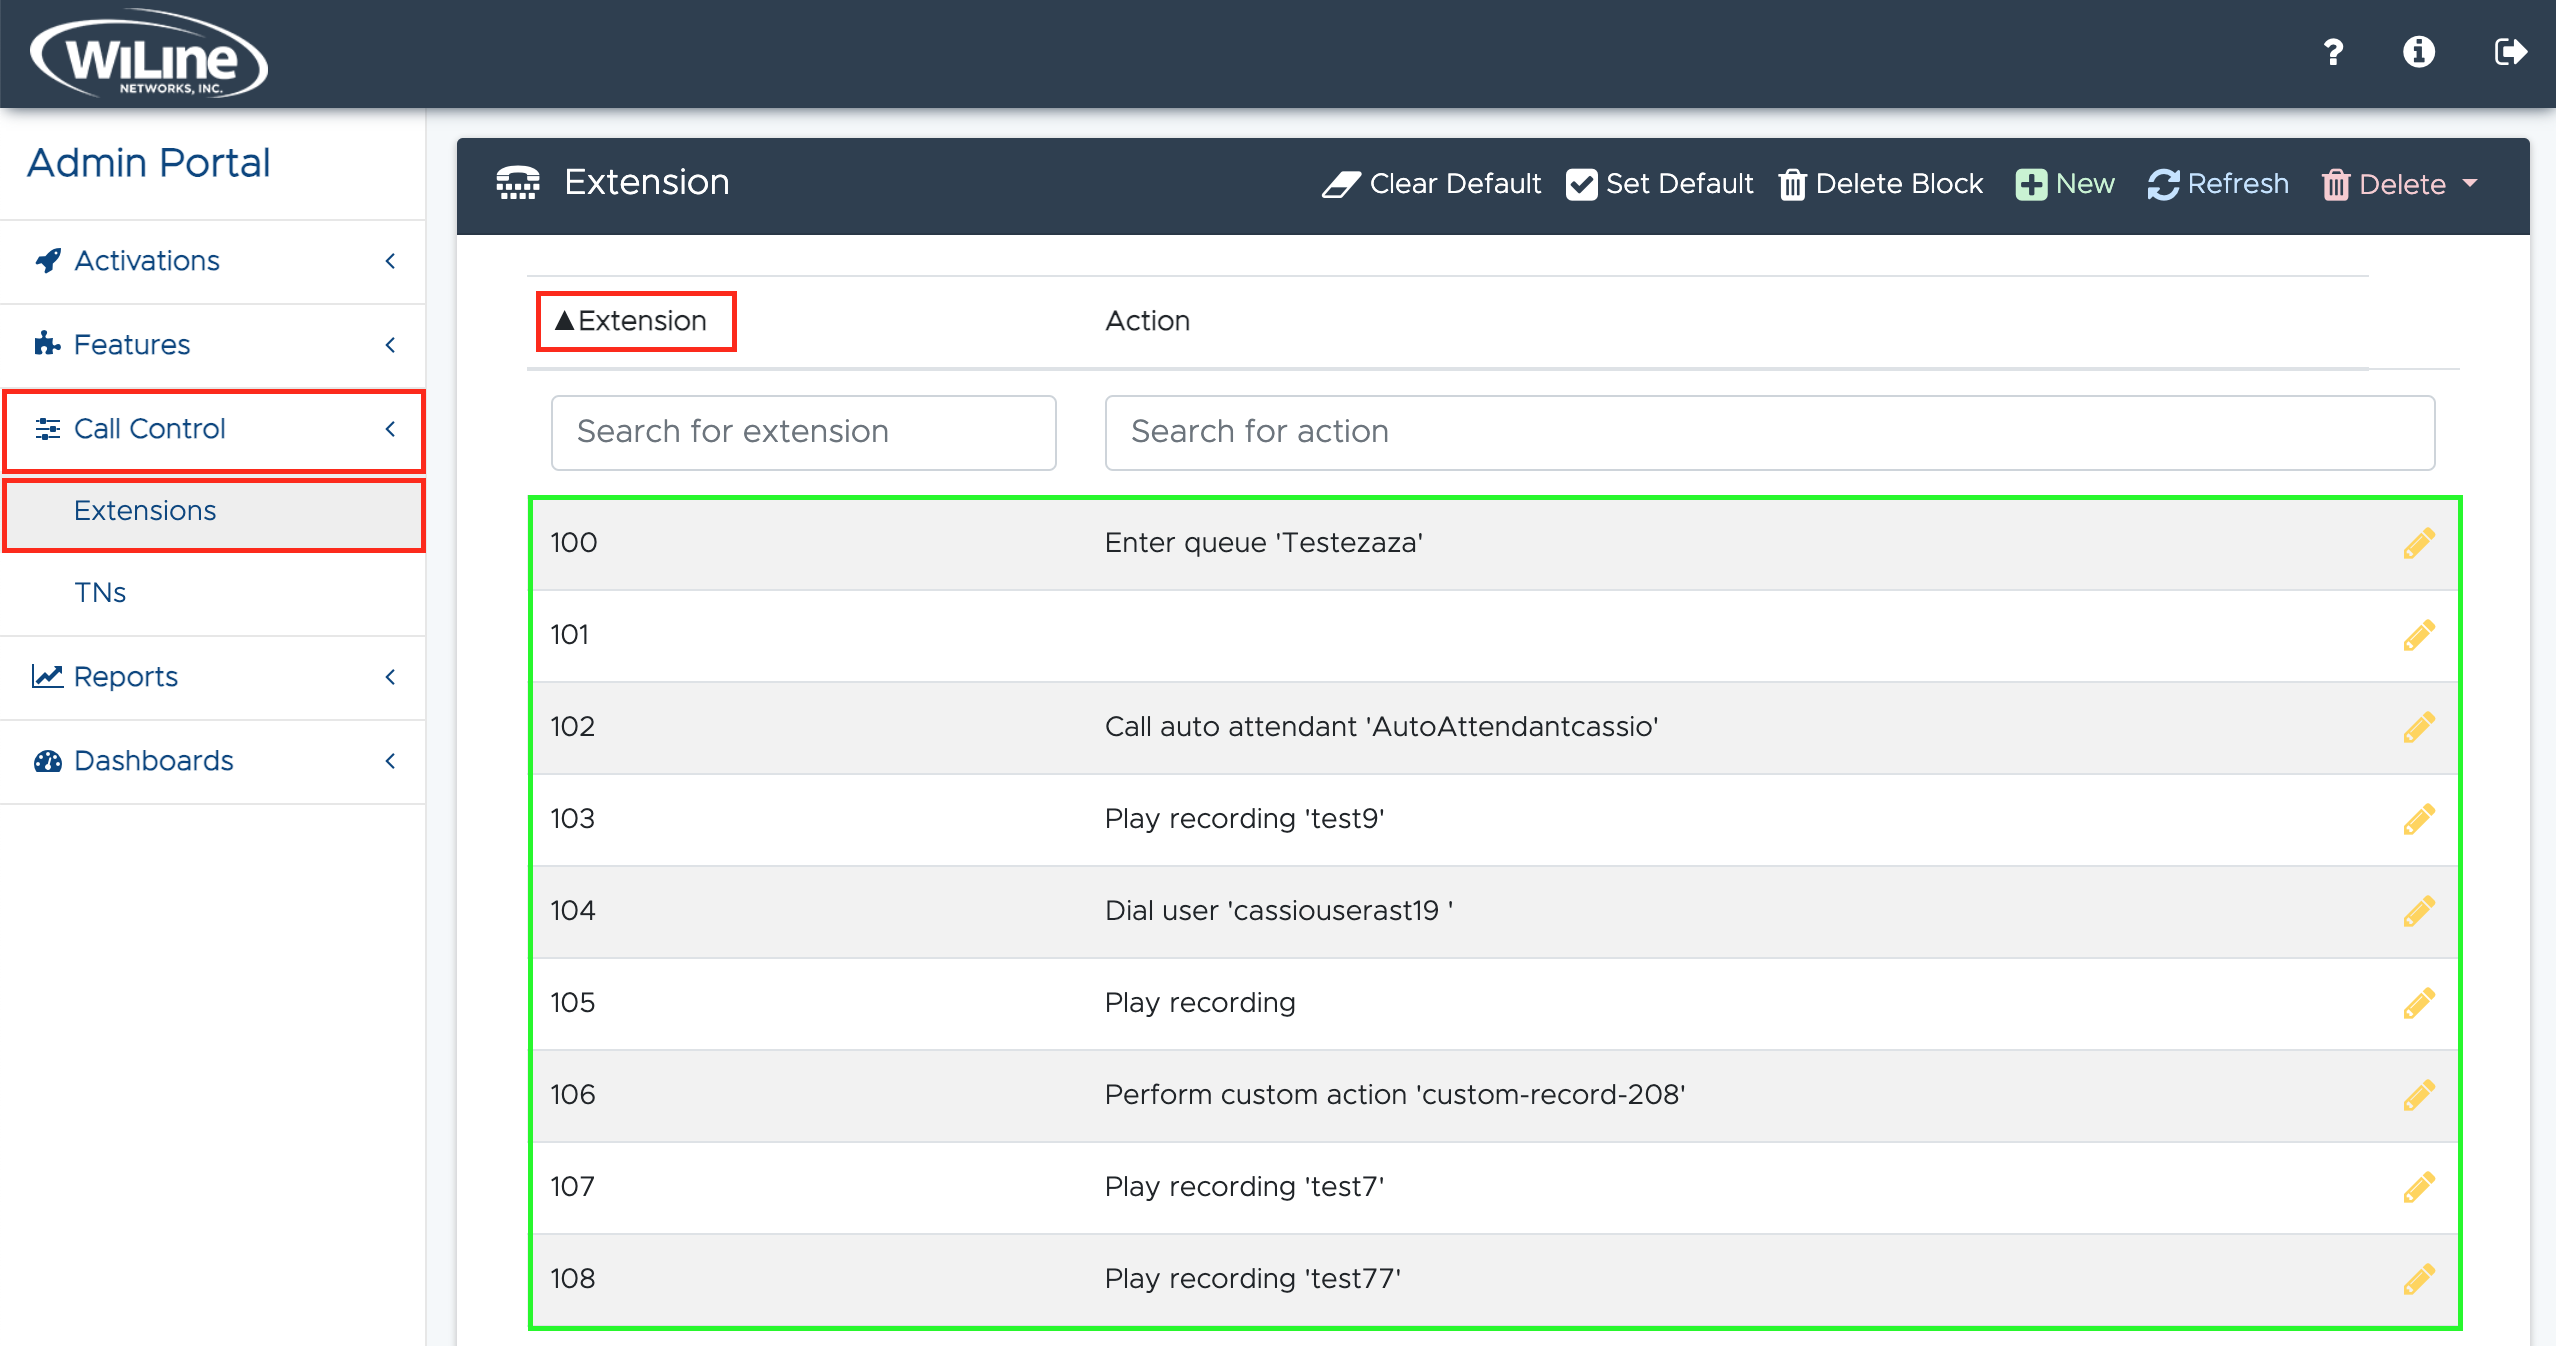
A list of all your active extensions will appear on your dashboard:
- To reorder or filter the results:
- Click the column headers (e.g., Extension and Action) to organize the results in ascending or descending order.
- To filter or search for specific extensions, type in the fields under the headers.
Edit an Extension
To edit an extension:
- Double-click an extension from the list, or
- Select an extension and click the yellow pencil icon on the right.
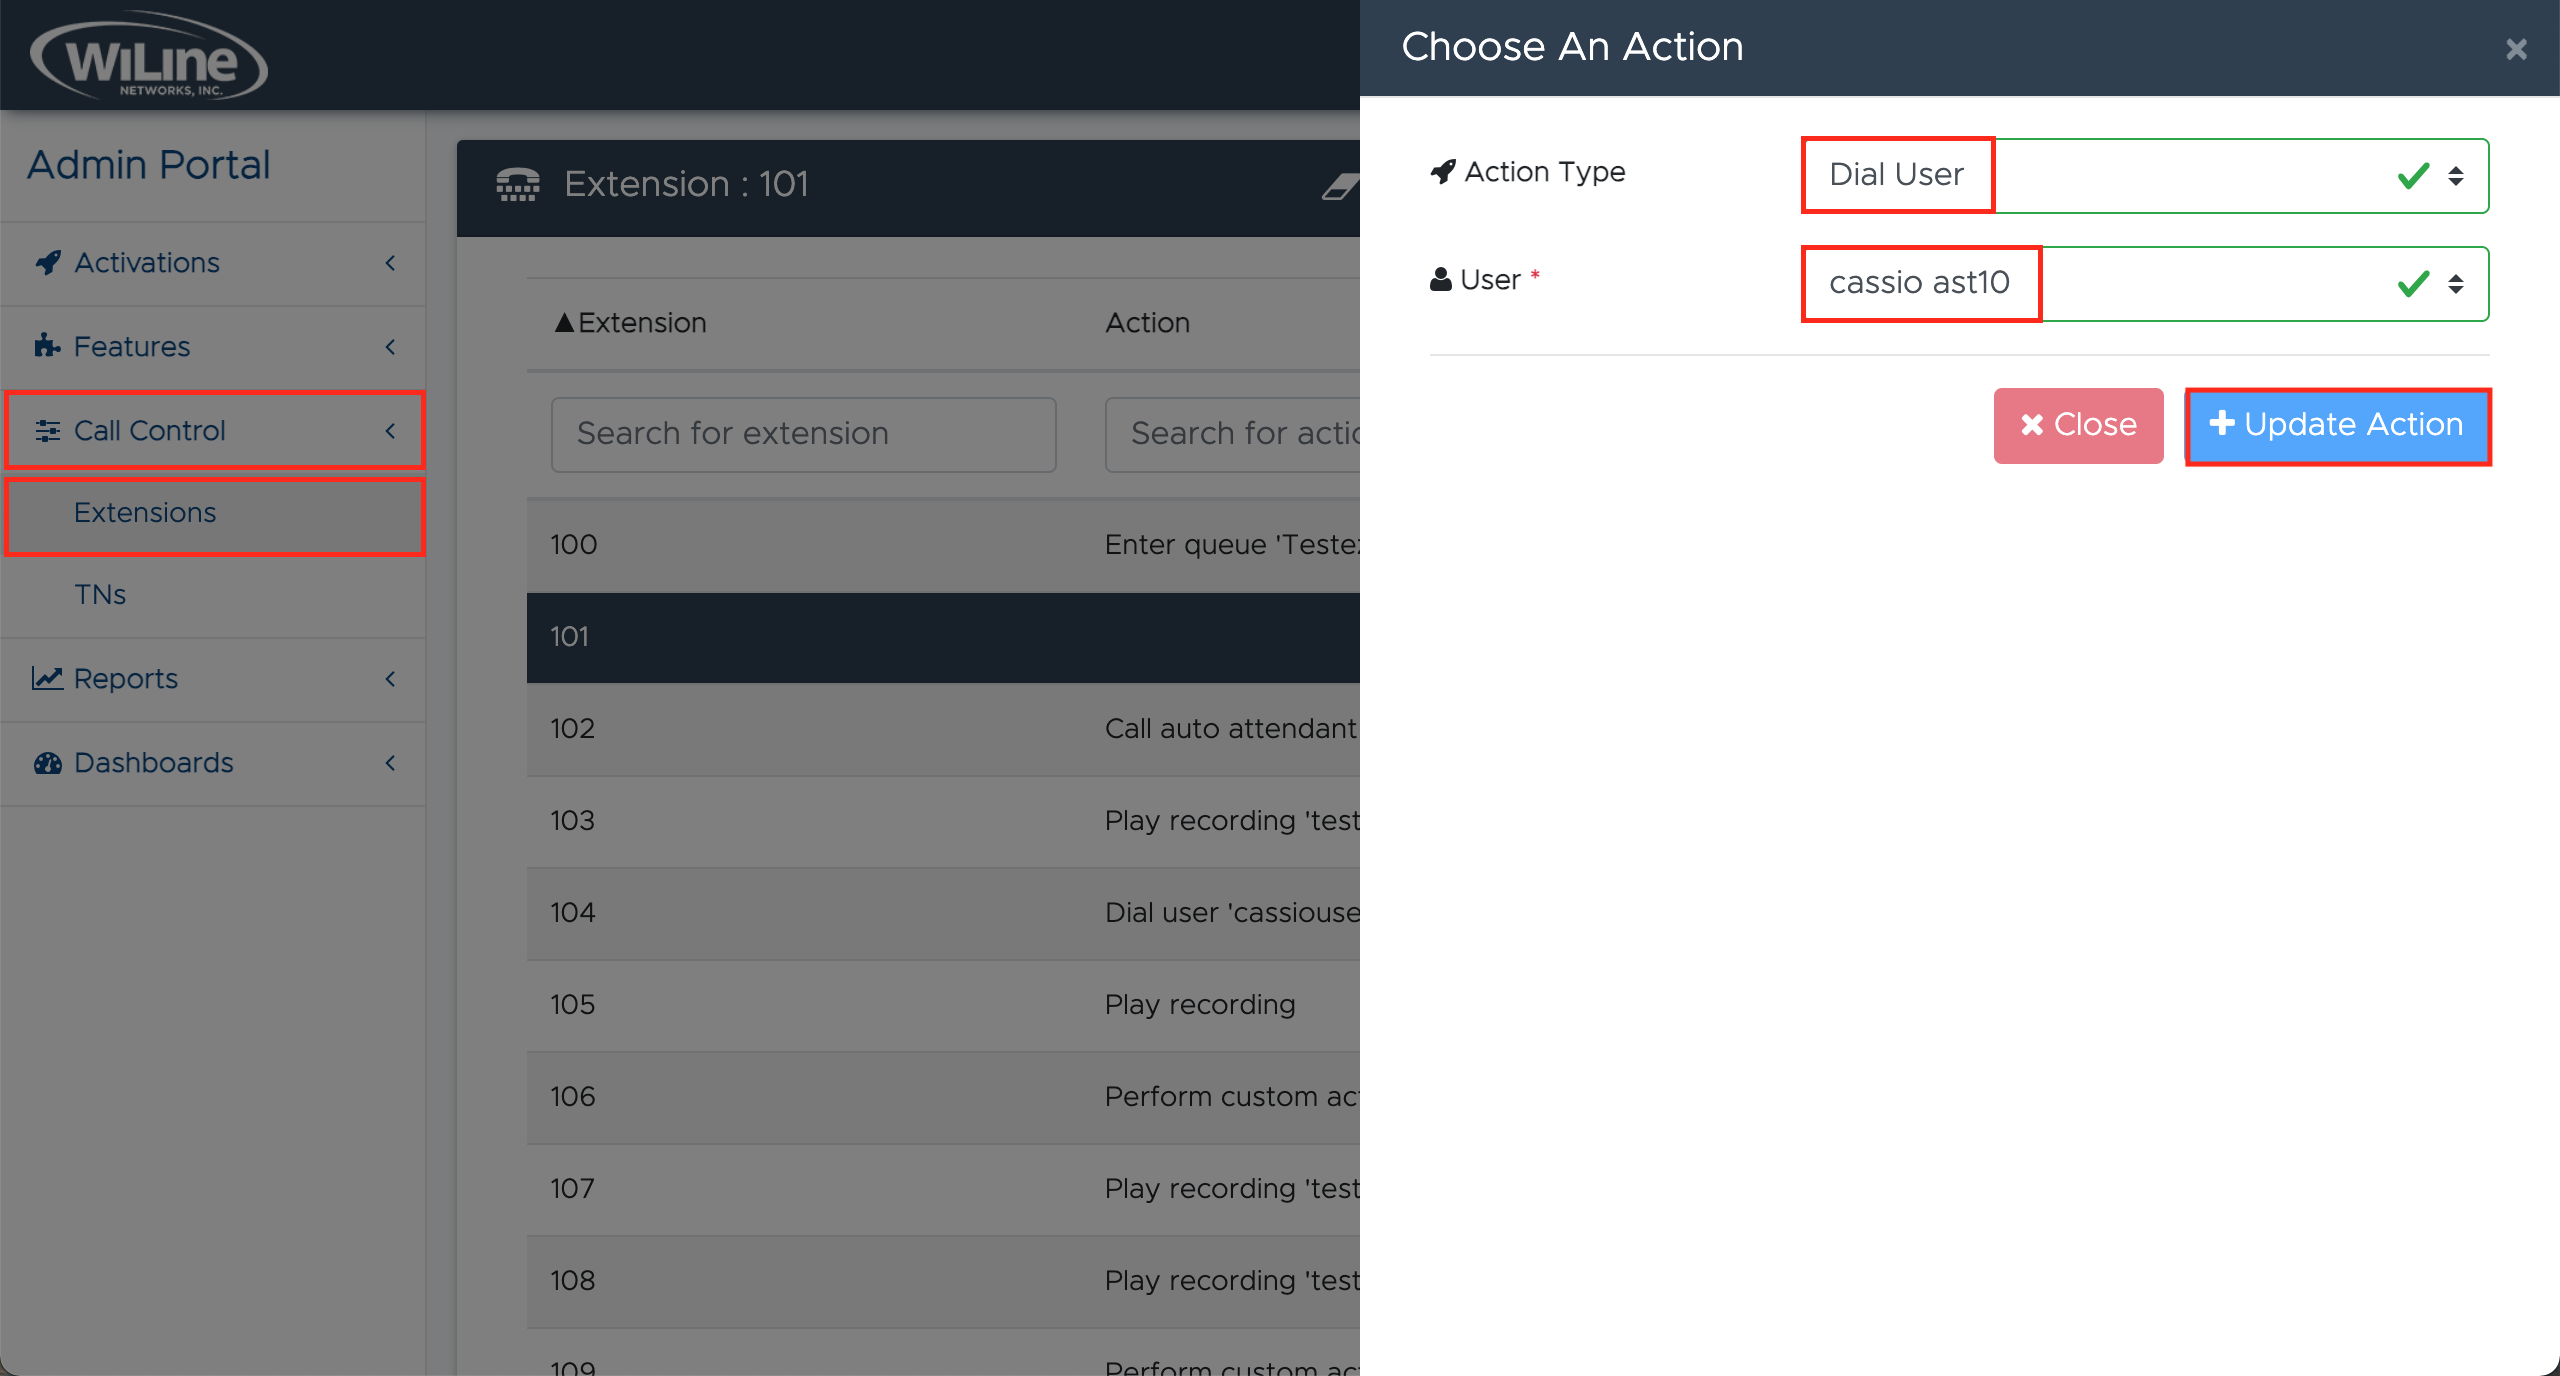
A Choose An Action pop-up will open, allowing you to modify the extension's action type:
-
Similar to the instructions in the Create a New Extension section, Choose an Action for the extension from the dropdown menu. For example, you can choose Dial User, Dial Line, Enter Queue, etc. See the full list of actions and descriptions in [Table 1].
-
After selecting the first option, an additional field will appear based on your choice. For example, if you select Dial Line for Emergency Callback, you will be prompted to choose a Line. If you select Enter Queue, a dropdown will be displayed for you to select a Queue, etc.
-
Click Update Action to save your configuration, or Close to cancel.
Set and Clear Default
Manage which extension is designated as the default and easily clear that designation when necessary, ensuring optimal configuration for your system.
Set an Extension as Default
To set an extension as the default:
- Select the desired extension from the list.
- Click the Set Default button in the options bar.
A confirmation pop-up will appear to verify your action:
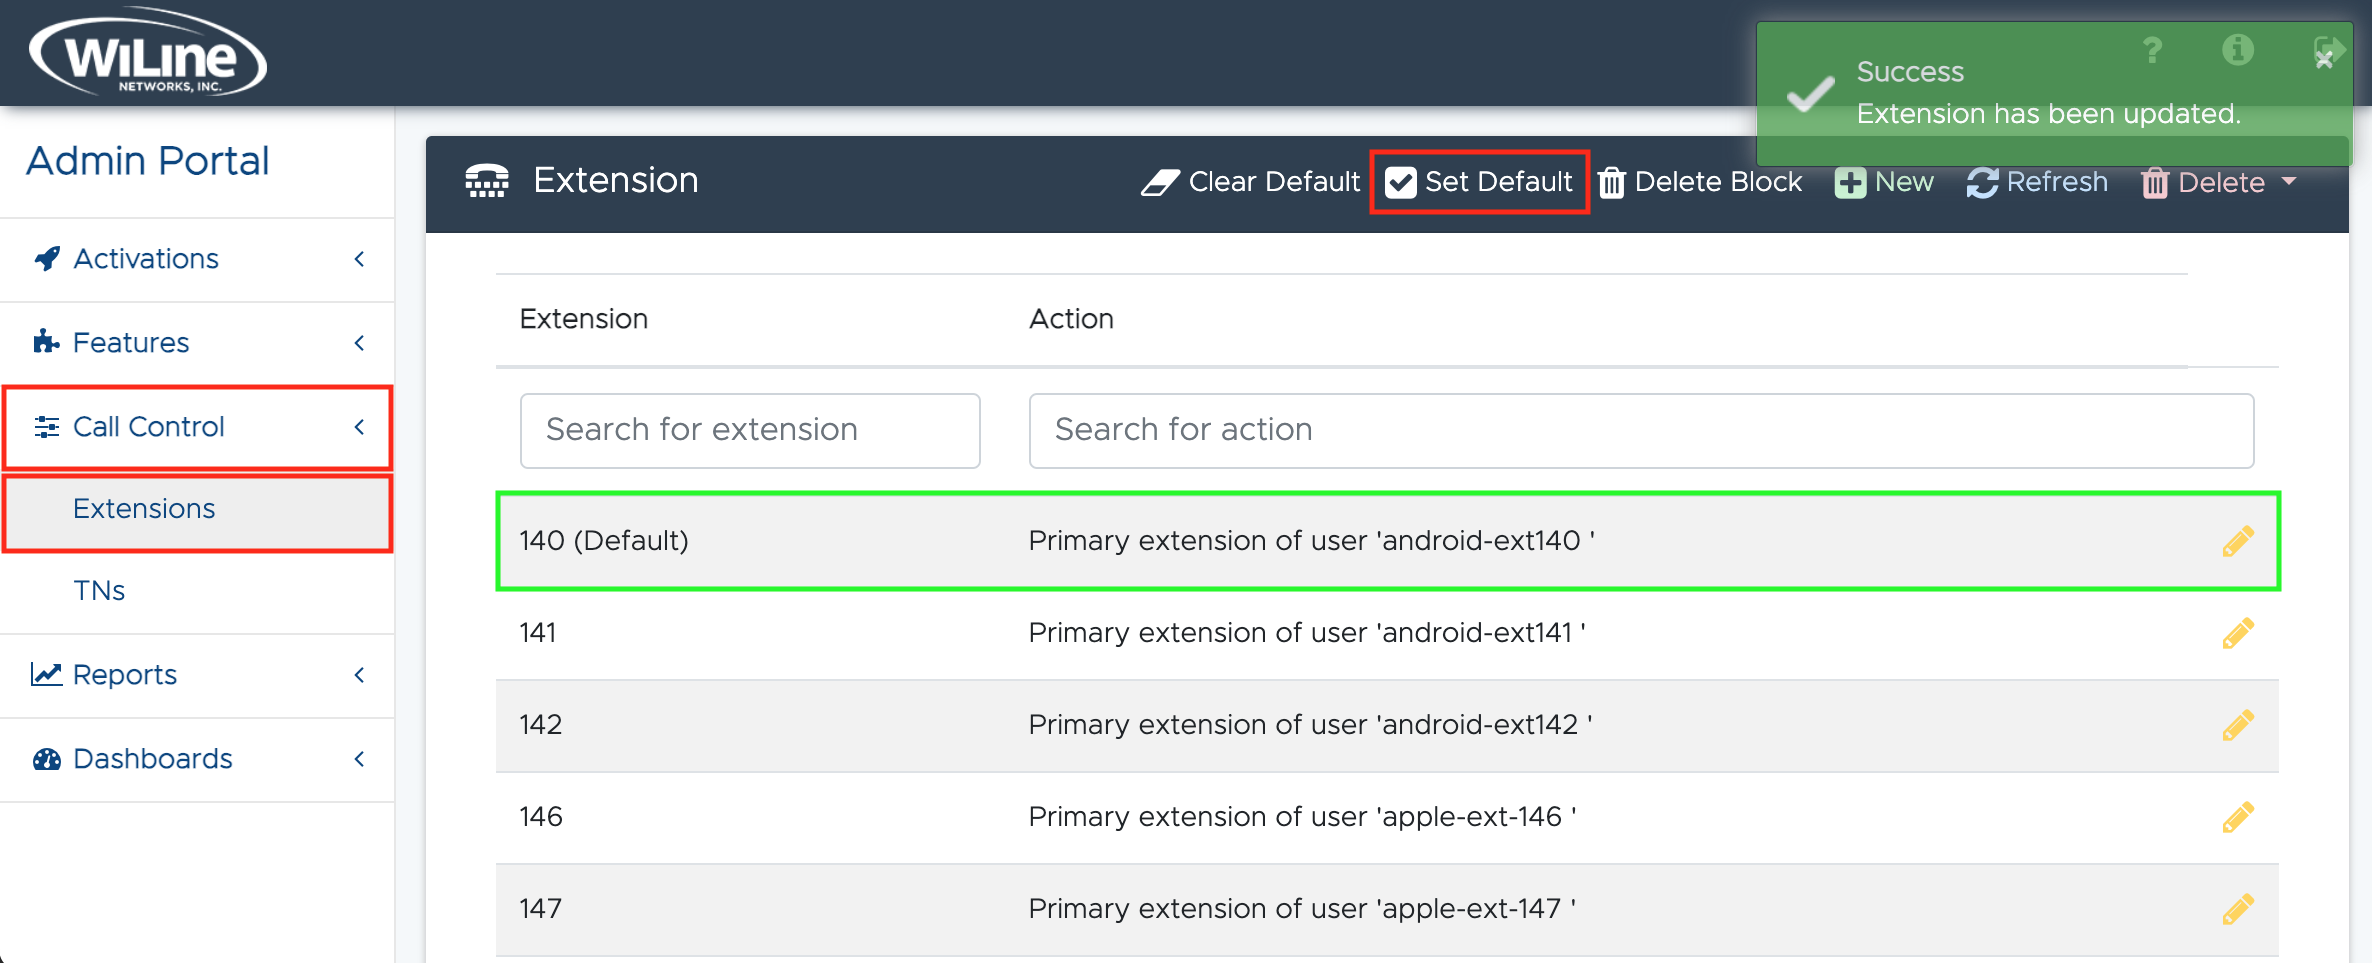
Once confirmed, the extension will display a (default) label next to its number.
Clear an Extension as Default
To remove the default designation from an extension:
- Select the extension currently marked as default from the list.
- Click the Clear Default button in the options bar.
A confirmation pop-up will appear to confirm your action:
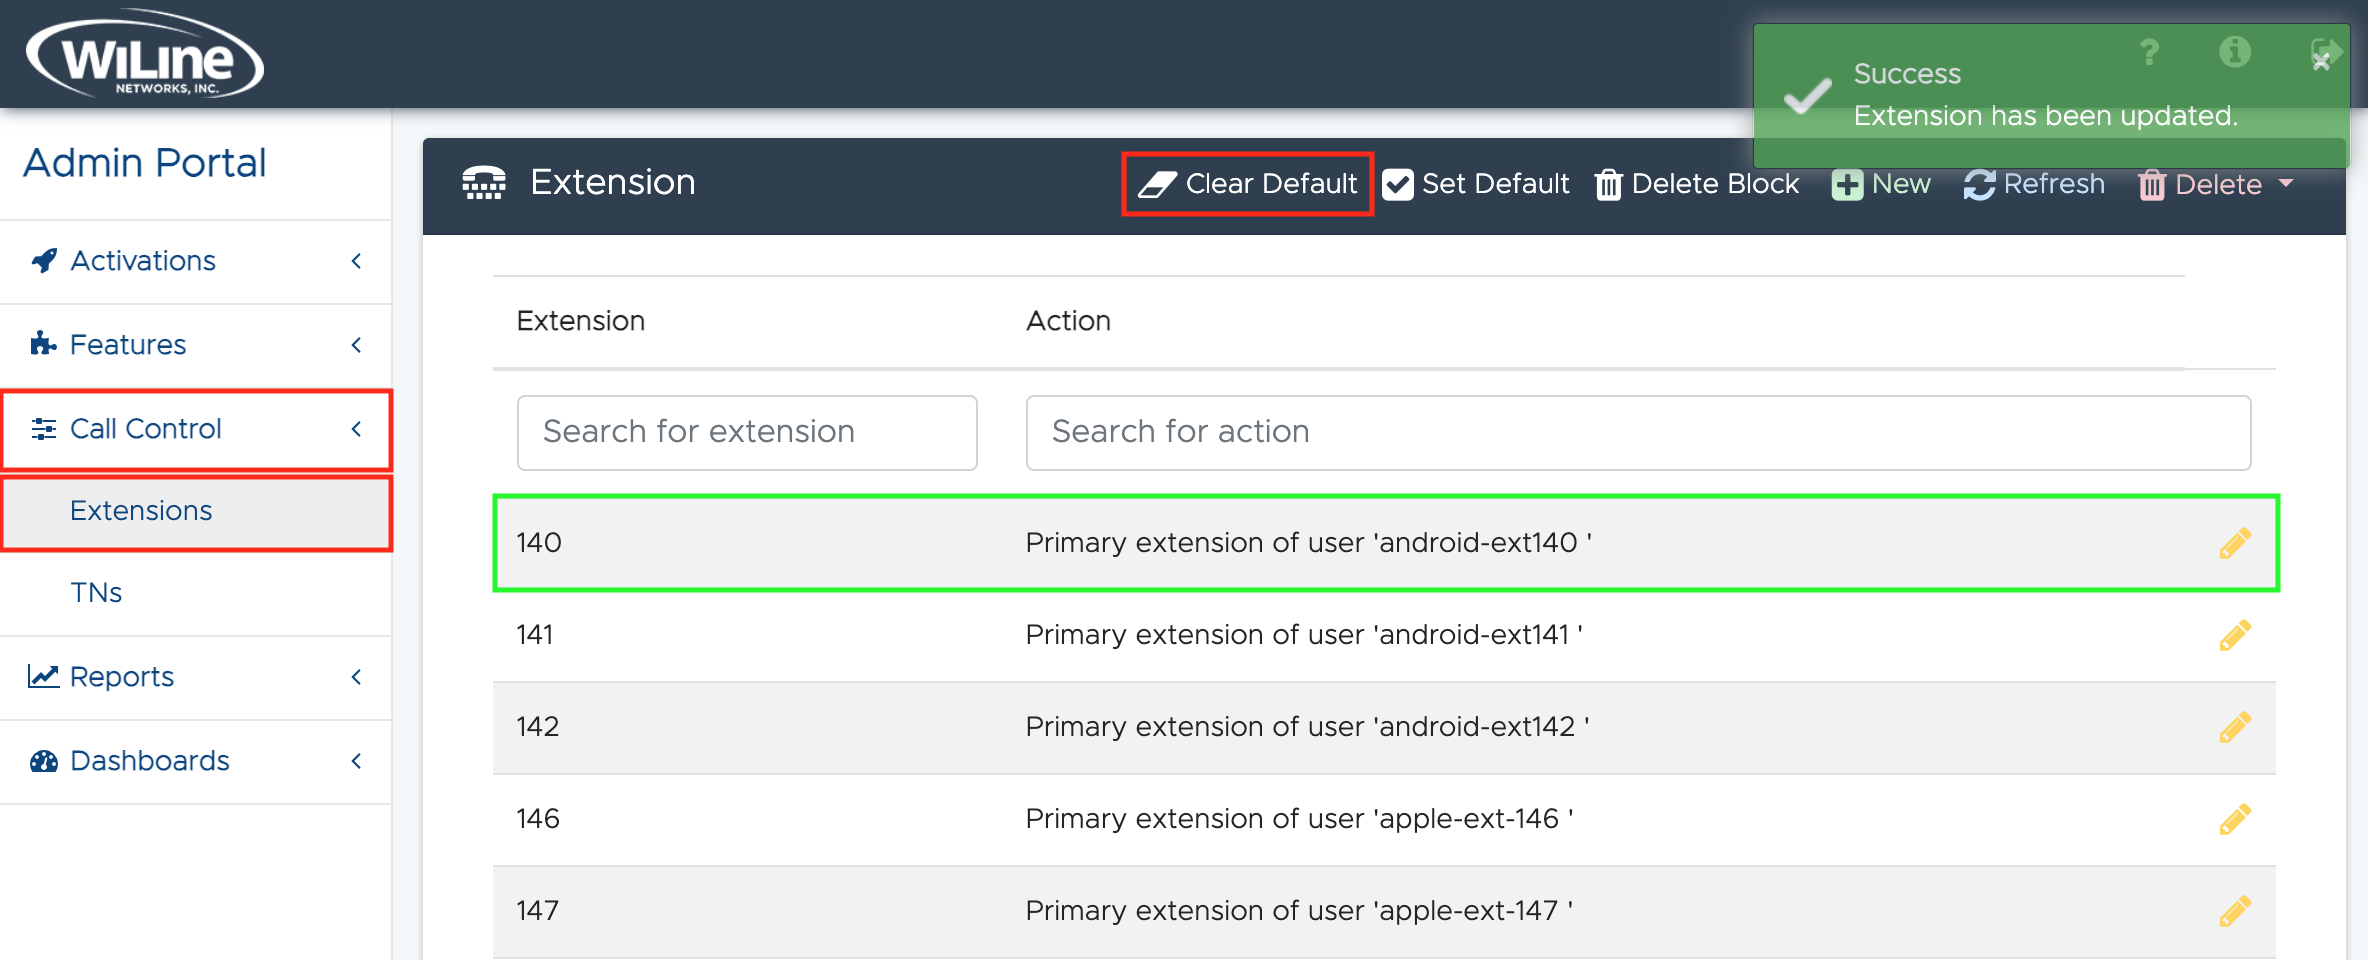
Once cleared, the (default) label will be removed from the extension number.
Delete an Extension
To delete an extension, follow these steps:
- Select the extension from the list.
- Click the red Delete button in the options bar.

A confirmation pop-up will appear. Click Delete to confirm or Cancel to return to the list.
Delete a Block
To delete a whole block of extensions, follow these steps:
- Select an extension from the list.
- Click the Delete Block button in the options bar.
A Delete an Extension pop-up will appear prompting you information about the block:
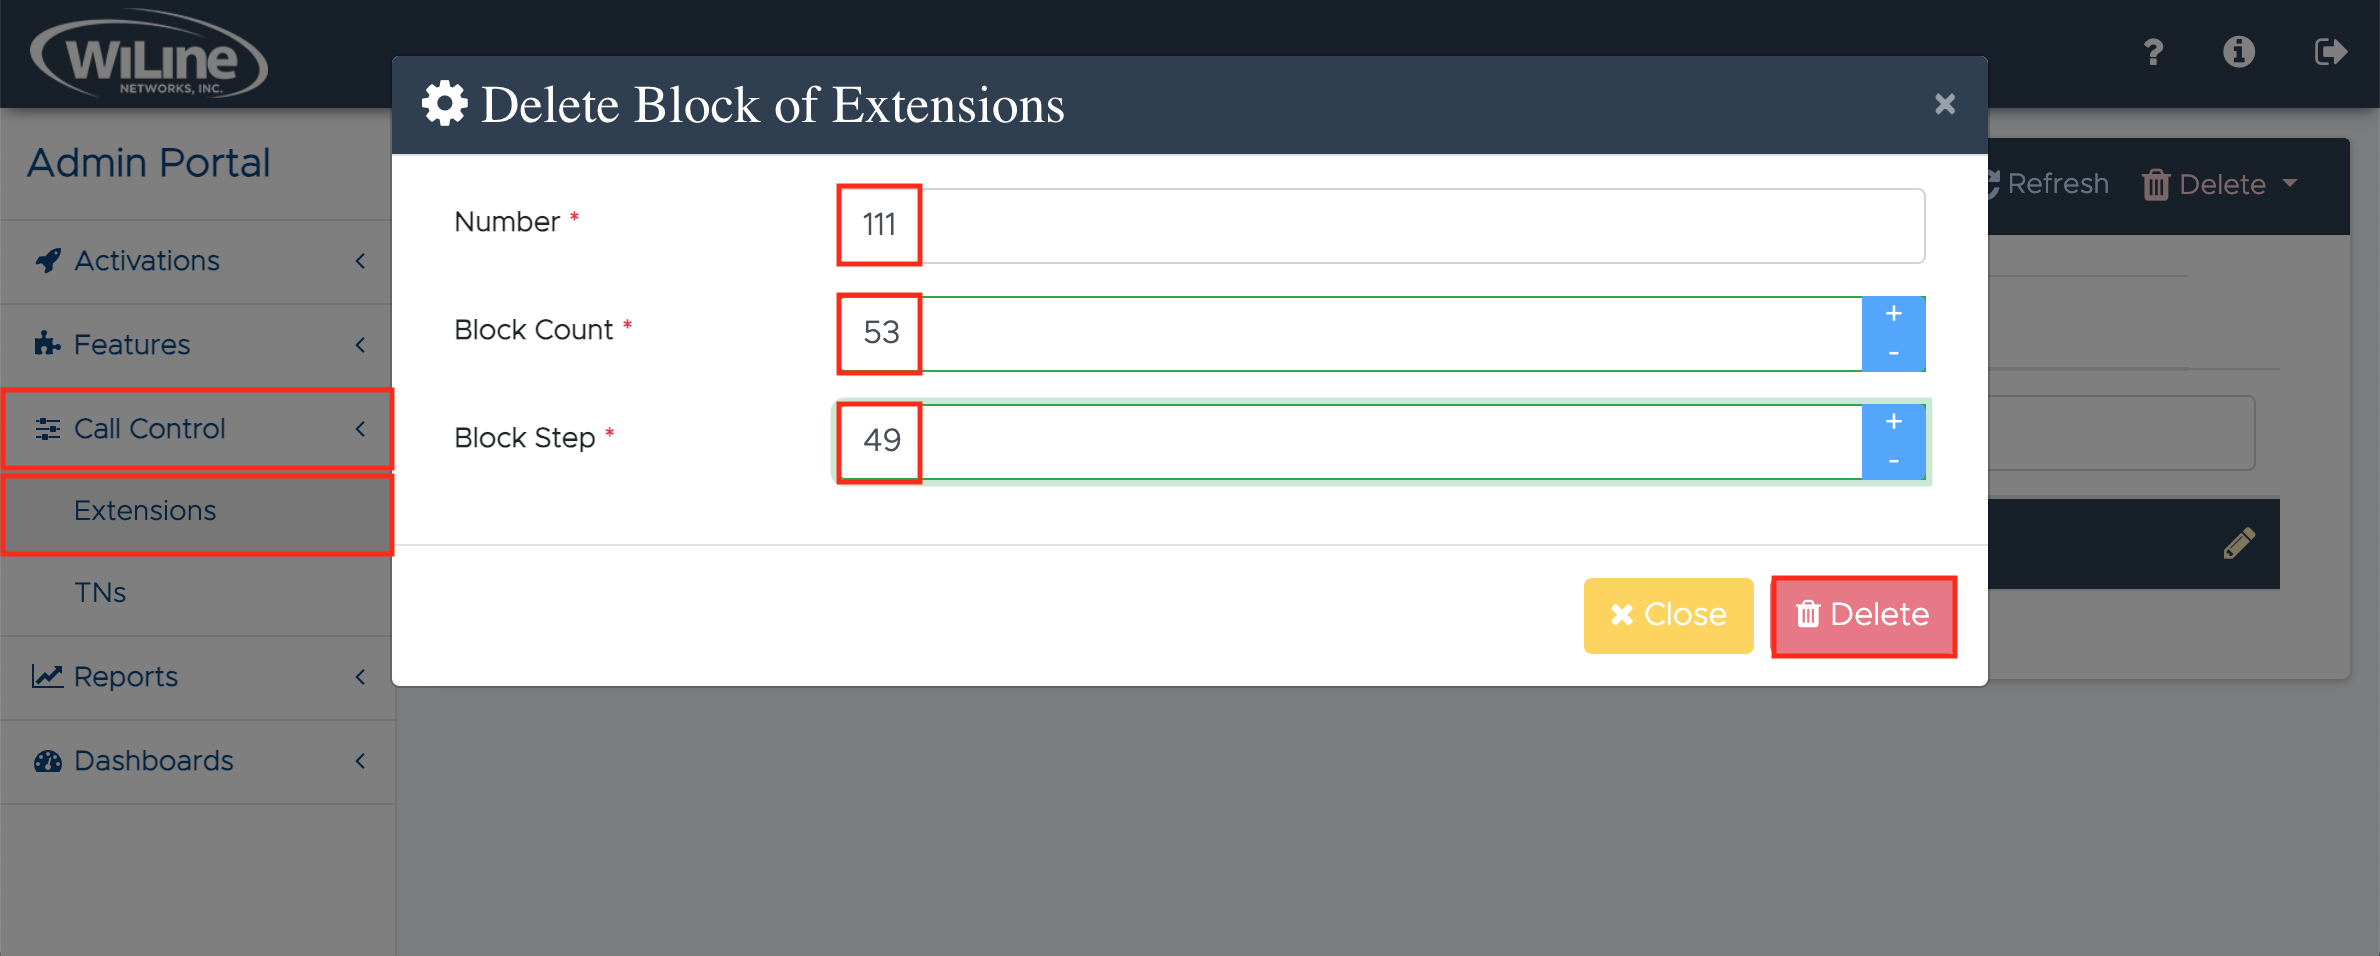
- Ensure that the correct fields for Name (e.g.,
111), Block Count (e.g.,53), and Block Step (e.g.,49) of the block you wish to delete are checked. - Next, click Delete to proceed or Close if you changed your mind.
A confirmation pop-up will appear prompting you to delete the corresponding extensions:
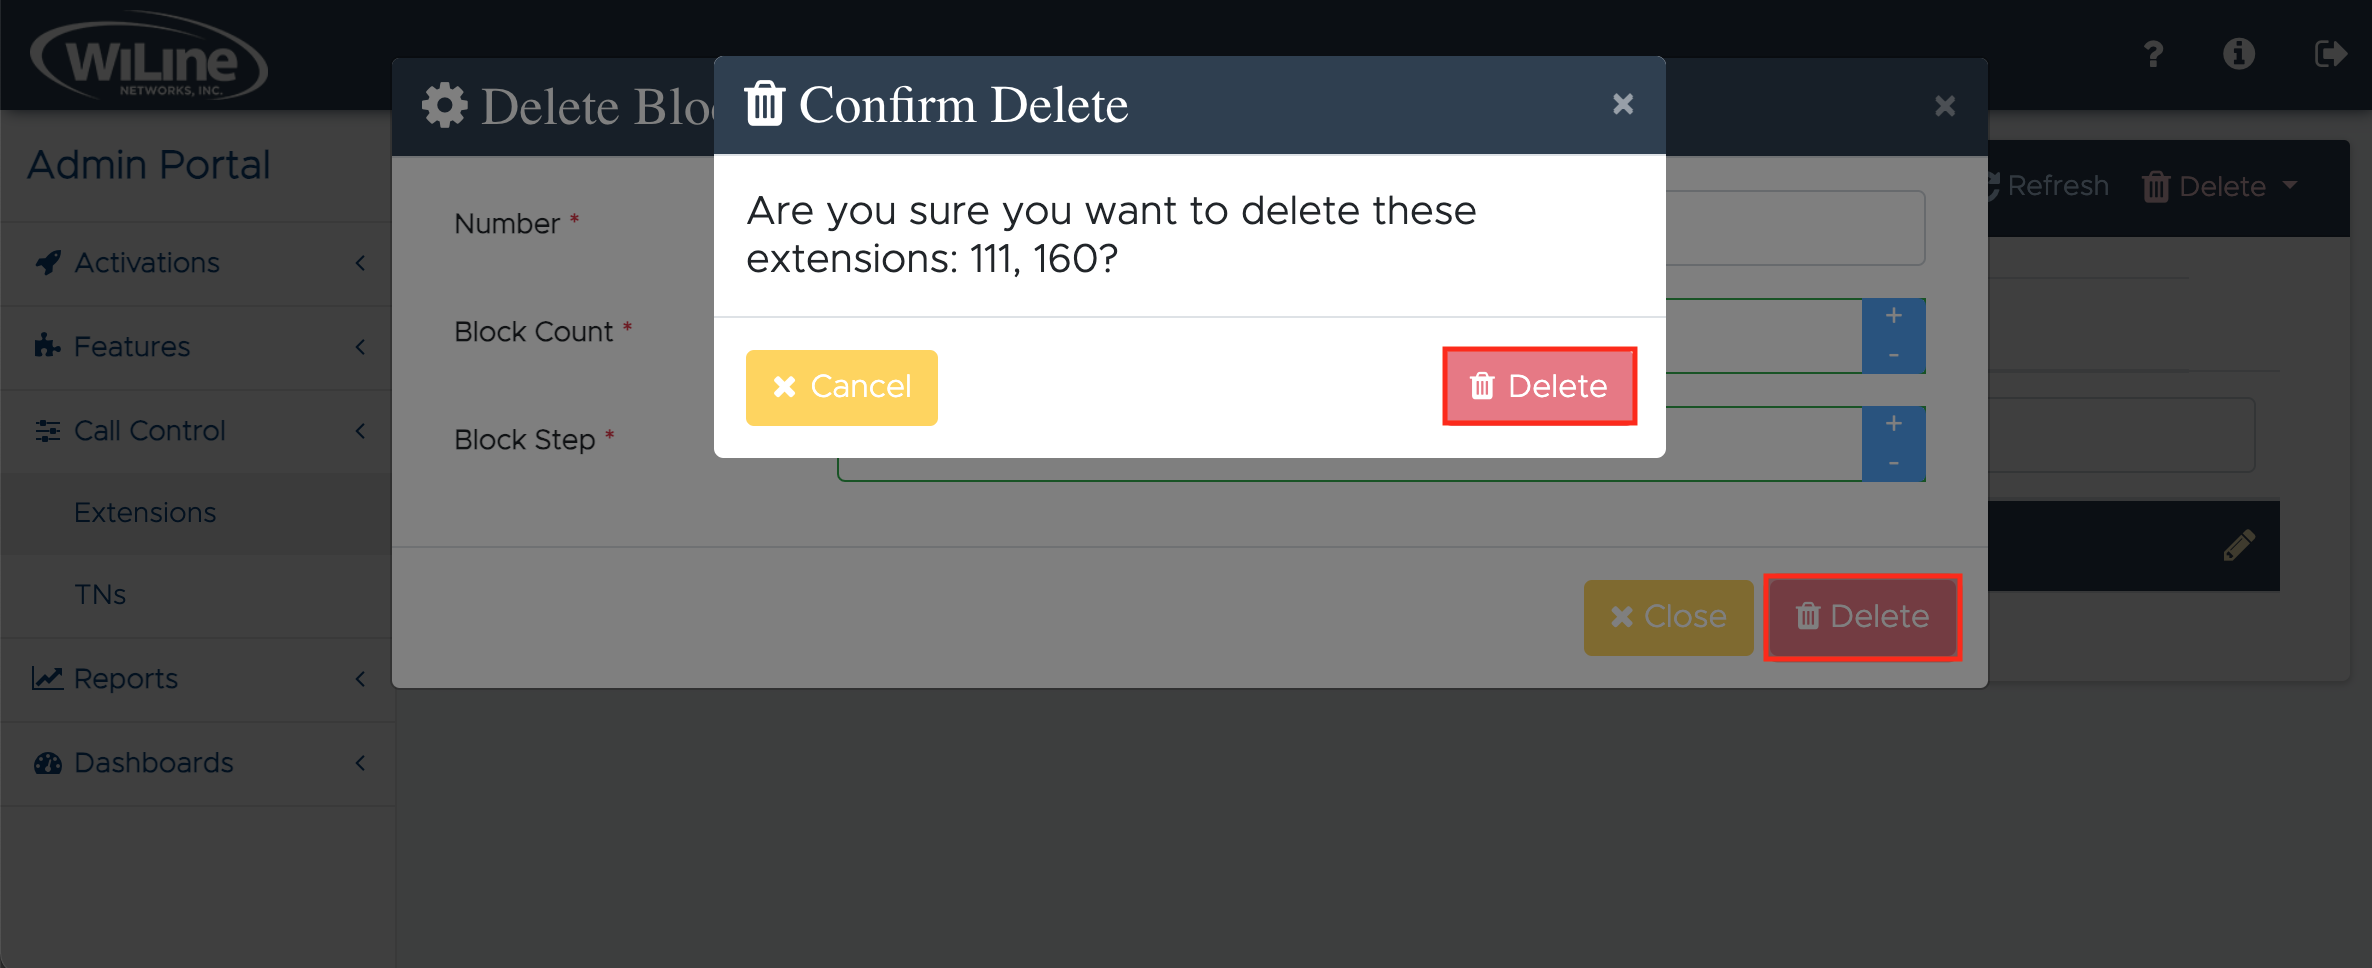
- Click Delete to proceed or Cancel if you changed your mind.
By following these instructions, administrators can ensure that extensions are properly configured though the Admin Portal, facilitating smooth call routing and efficient system management. This approach ensures accessibility and customization for all users.